Page 141 of 510
INSTRUMENT PANEL STORAGE
TRAYS
WARNING
Do not place sharp objects in the trays to
help prevent injury in an accident or sud-
den stop.
CONSOLE BOX
Console box storage traysConsole box storage
Pull up on the lever�1to open the console box lid
�2.
Center stack storage
LIC1183LIC1369LIC1370
2-46Instruments and controls
Page 148 of 510
CAUTION
Placing additional items in the area speci-
fied for the jack may dent body panel or
damage power back door assembly (if so
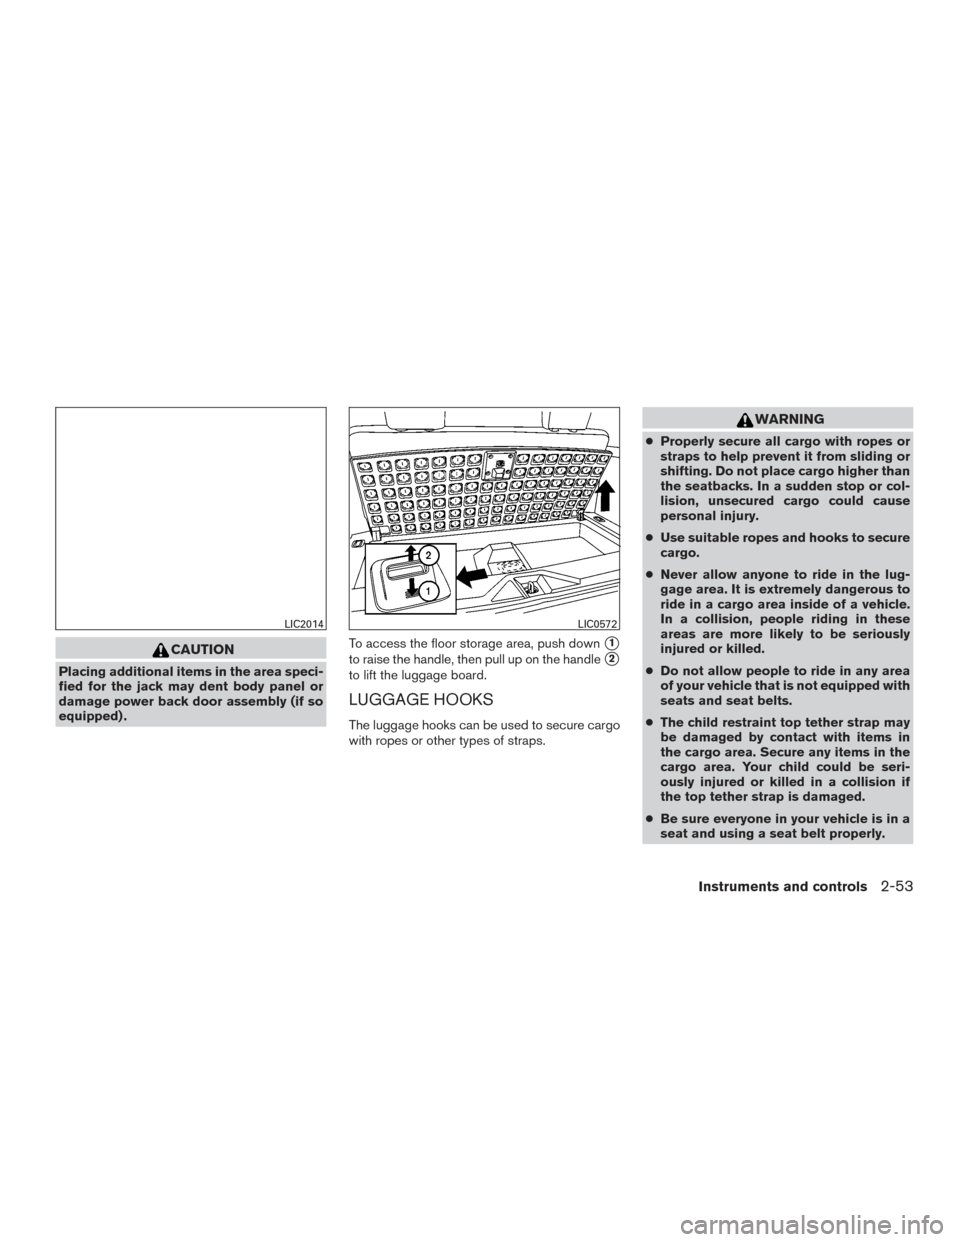
equipped) .To access the floor storage area, push down
�1
to raise the handle, then pull up on the handle�2
to lift the luggage board.
LUGGAGE HOOKS
The luggage hooks can be used to secure cargo
with ropes or other types of straps.
WARNING
●
Properly secure all cargo with ropes or
straps to help prevent it from sliding or
shifting. Do not place cargo higher than
the seatbacks. In a sudden stop or col-
lision, unsecured cargo could cause
personal injury.
● Use suitable ropes and hooks to secure
cargo.
● Never allow anyone to ride in the lug-
gage area. It is extremely dangerous to
ride in a cargo area inside of a vehicle.
In a collision, people riding in these
areas are more likely to be seriously
injured or killed.
● Do not allow people to ride in any area
of your vehicle that is not equipped with
seats and seat belts.
● The child restraint top tether strap may
be damaged by contact with items in
the cargo area. Secure any items in the
cargo area. Your child could be seri-
ously injured or killed in a collision if
the top tether strap is damaged.
● Be sure everyone in your vehicle is in a
seat and using a seat belt properly.
LIC2014LIC0572
Instruments and controls2-53
Page 152 of 510
1. Window lock button
2. Power door lock switch
3. Front passenger side automatic switch
4. Right rear passenger window switch
5. Left rear passenger window switch
6. Driver side automatic switch
Driver’s side power window switch
The driver’s side control panel is equipped with
switches to open or close the front and rear
passenger windows.To open a window, push the switch and hold it
down. To close a window, pull the switch and
hold it up. To stop the opening or closing function
at any time, simply release the switch.
Front passenger’s power window
switch
The passenger’s window switch operates only
the corresponding passenger’s window. To open
the window, push the switch and hold it down
�1.
To close the window, pull the switch up
�2.
LIC1181WIC1237
Instruments and controls2-57
Page 154 of 510
When power window switch does not
operate
If the power window automatic function (closing
only) does not operate properly, perform the fol-
lowing procedure to initialize the power window
system:1. Place the ignition switch in the ON position.
2. Open the window more than halfway by operating the power window switch.
3. Pull the power window switch and hold it to close the window, and then hold the switch
more than 3 seconds after the window is
closed.
4. Release the power window switch. Operate the window by the automatic function to
confirm the initialization is complete. The
power window automatically opens or
closes depending on if the automatic down
or up function is selected.
5. Perform steps 2 through 4 above for other windows.
If the power window function does not operate
properly after performing the above procedure,
see a NISSAN dealer for assistance.
POWER VENT WINDOWS (if so
equipped)
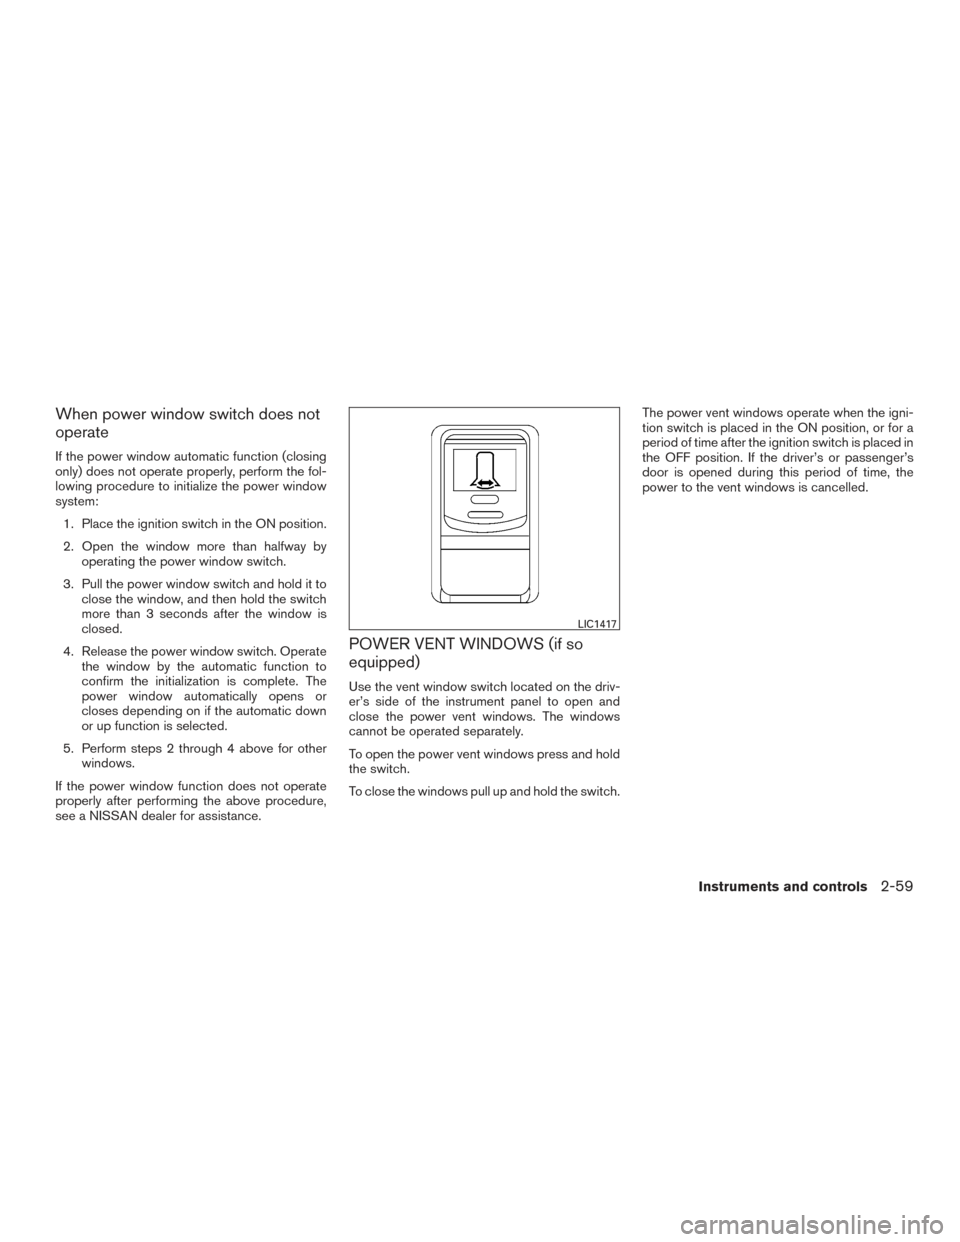
Use the vent window switch located on the driv-
er’s side of the instrument panel to open and
close the power vent windows. The windows
cannot be operated separately.
To open the power vent windows press and hold
the switch.
To close the windows pull up and hold the switch. The power vent windows operate when the igni-
tion switch is placed in the ON position, or for a
period of time after the ignition switch is placed in
the OFF position. If the driver’s or passenger’s
door is opened during this period of time, the
power to the vent windows is cancelled.
LIC1417
Instruments and controls2-59
Page 179 of 510
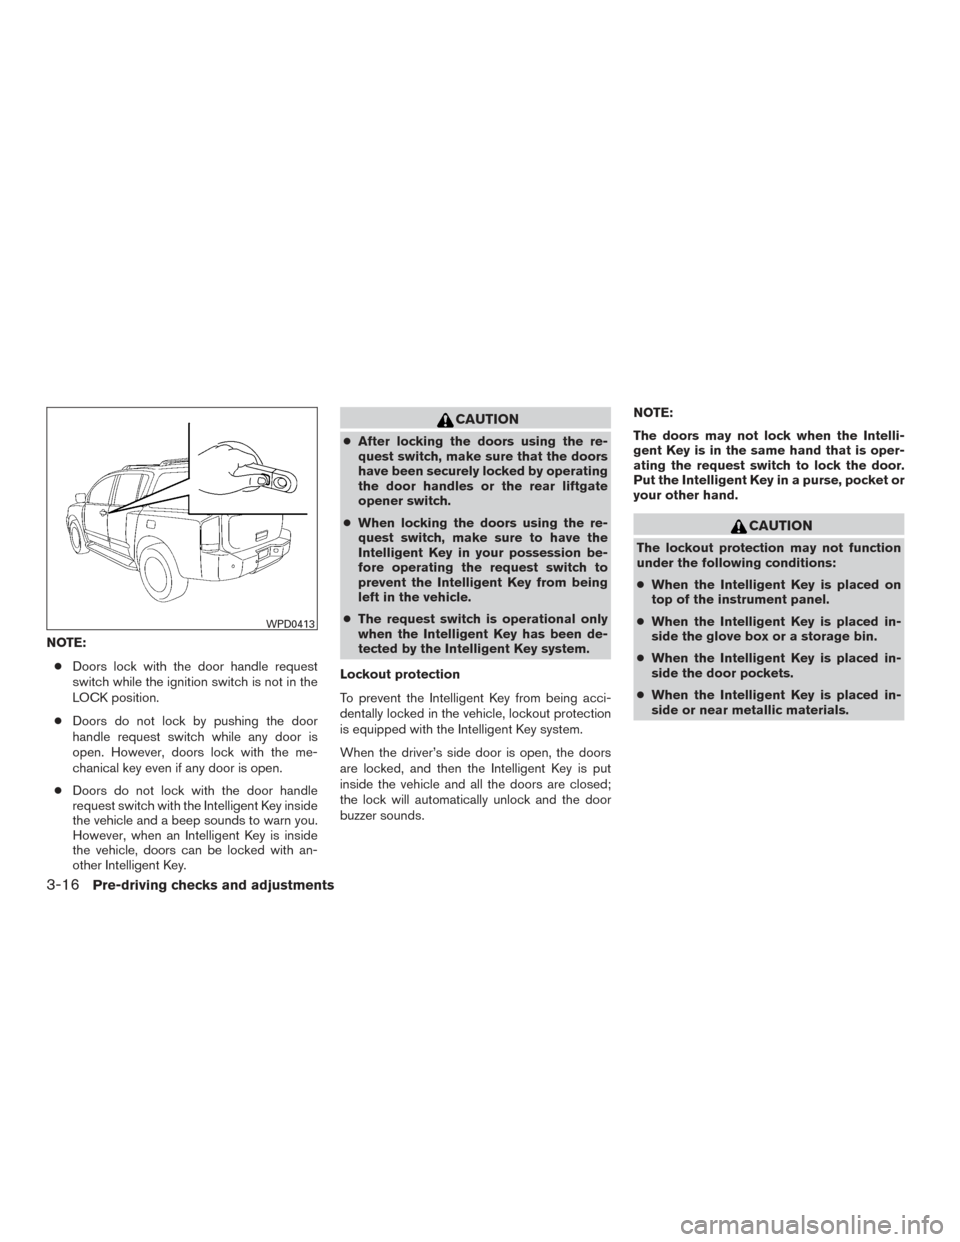
NOTE:● Doors lock with the door handle request
switch while the ignition switch is not in the
LOCK position.
● Doors do not lock by pushing the door
handle request switch while any door is
open. However, doors lock with the me-
chanical key even if any door is open.
● Doors do not lock with the door handle
request switch with the Intelligent Key inside
the vehicle and a beep sounds to warn you.
However, when an Intelligent Key is inside
the vehicle, doors can be locked with an-
other Intelligent Key.
CAUTION
● After locking the doors using the re-
quest switch, make sure that the doors
have been securely locked by operating
the door handles or the rear liftgate
opener switch.
● When locking the doors using the re-
quest switch, make sure to have the
Intelligent Key in your possession be-
fore operating the request switch to
prevent the Intelligent Key from being
left in the vehicle.
● The request switch is operational only
when the Intelligent Key has been de-
tected by the Intelligent Key system.
Lockout protection
To prevent the Intelligent Key from being acci-
dentally locked in the vehicle, lockout protection
is equipped with the Intelligent Key system.
When the driver’s side door is open, the doors
are locked, and then the Intelligent Key is put
inside the vehicle and all the doors are closed;
the lock will automatically unlock and the door
buzzer sounds. NOTE:
The doors may not lock when the Intelli-
gent Key is in the same hand that is oper-
ating the request switch to lock the door.
Put the Intelligent Key in a purse, pocket or
your other hand.
CAUTION
The lockout protection may not function
under the following conditions:
●
When the Intelligent Key is placed on
top of the instrument panel.
● When the Intelligent Key is placed in-
side the glove box or a storage bin.
● When the Intelligent Key is placed in-
side the door pockets.
● When the Intelligent Key is placed in-
side or near metallic materials.
WPD0413
3-16Pre-driving checks and adjustments
Page 184 of 510
NOTE:
If you change the horn beep and light flash
feature with the Intelligent Key, the display
screen (if so equipped) will not show the
current mode and cannot be used to
change the mode. Use the Intelligent Key to
return to the previous mode and re-enable
the display screen control.
To deactivate:Press and hold the
andbuttonsfor at least two seconds.
The hazard warning lights will flash three times to
confirm that the horn beep feature deactivated.
To activate: Press and hold the
andbuttonsfor at least two seconds
once more. The hazard warning lights will flash once and the
horn will sound once to confirm that the horn
beep feature is reactivated.
Deactivating the horn beep feature does not si-
lence the horn if the alarm is triggered.
WARNING SIGNALS
To help prevent the vehicle from moving unex-
pectedly by erroneous operation of the Intelligent
Key or to help prevent the vehicle from being
stolen, a chime or buzzer sounds from inside and
outside the vehicle and a warning is displayed in
the instrument panel.
When a chime or beep sounds or a warning is
displayed, be sure to check the vehicle and the
Intelligent Key.
For additional information, refer to the “Trouble-
shooting guide” in this section and “Vehicle infor-
mation display” in the “Instruments and controls”
section of this manual.
Pre-driving checks and adjustments3-21
Page 186 of 510
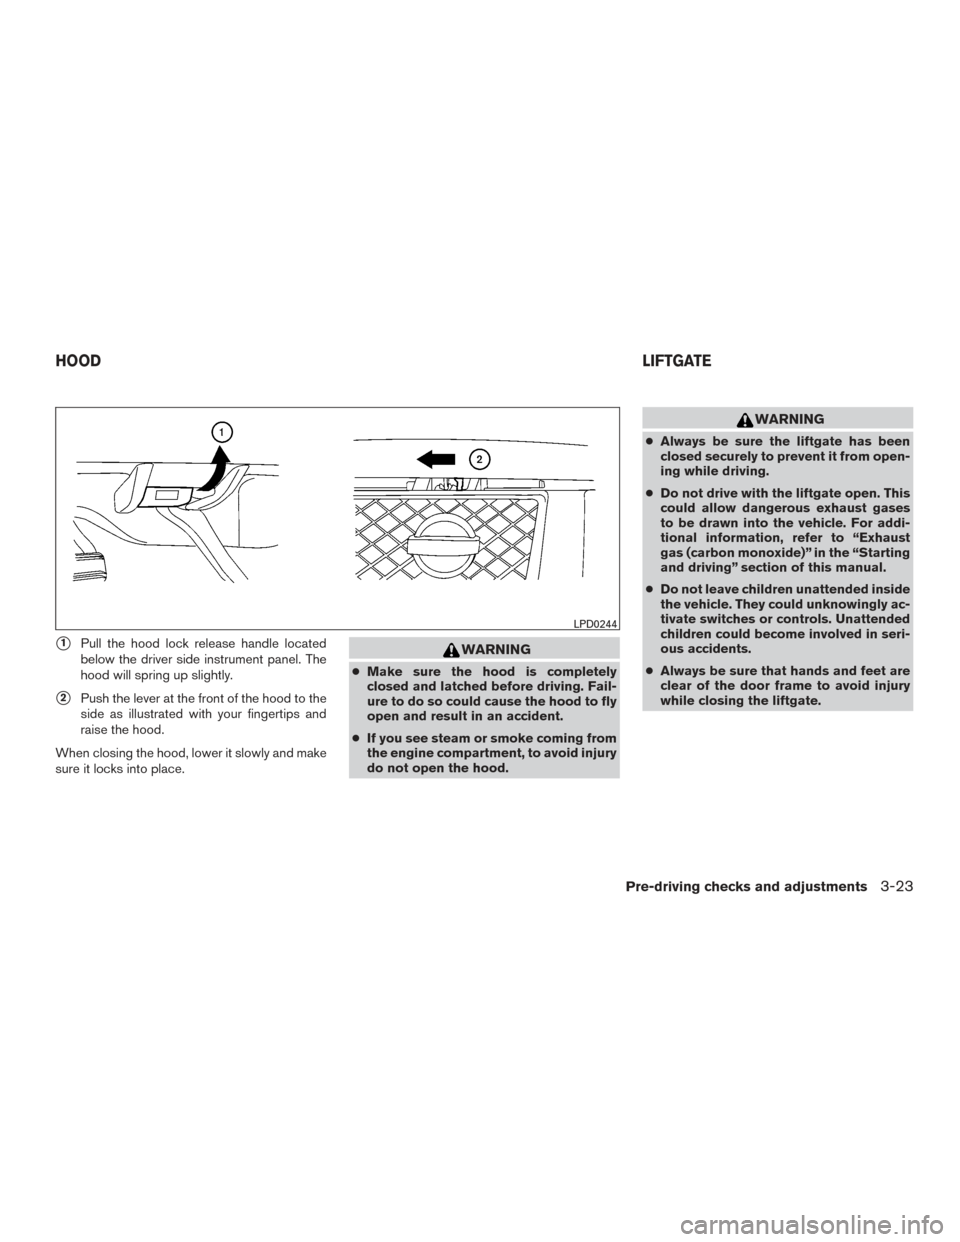
�1Pull the hood lock release handle located
below the driver side instrument panel. The
hood will spring up slightly.
�2Push the lever at the front of the hood to the
side as illustrated with your fingertips and
raise the hood.
When closing the hood, lower it slowly and make
sure it locks into place.
WARNING
● Make sure the hood is completely
closed and latched before driving. Fail-
ure to do so could cause the hood to fly
open and result in an accident.
● If you see steam or smoke coming from
the engine compartment, to avoid injury
do not open the hood.
WARNING
● Always be sure the liftgate has been
closed securely to prevent it from open-
ing while driving.
● Do not drive with the liftgate open. This
could allow dangerous exhaust gases
to be drawn into the vehicle. For addi-
tional information, refer to “Exhaust
gas (carbon monoxide)” in the “Starting
and driving” section of this manual.
● Do not leave children unattended inside
the vehicle. They could unknowingly ac-
tivate switches or controls. Unattended
children could become involved in seri-
ous accidents.
● Always be sure that hands and feet are
clear of the door frame to avoid injury
while closing the liftgate.
LPD0244
HOOD LIFTGATE
Pre-driving checks and adjustments3-23
Page 187 of 510
OPERATING THE MANUAL
LIFTGATE (if so equipped)
The power door lock system allows you to lock or
unlock all doors including the liftgate simultane-
ously.
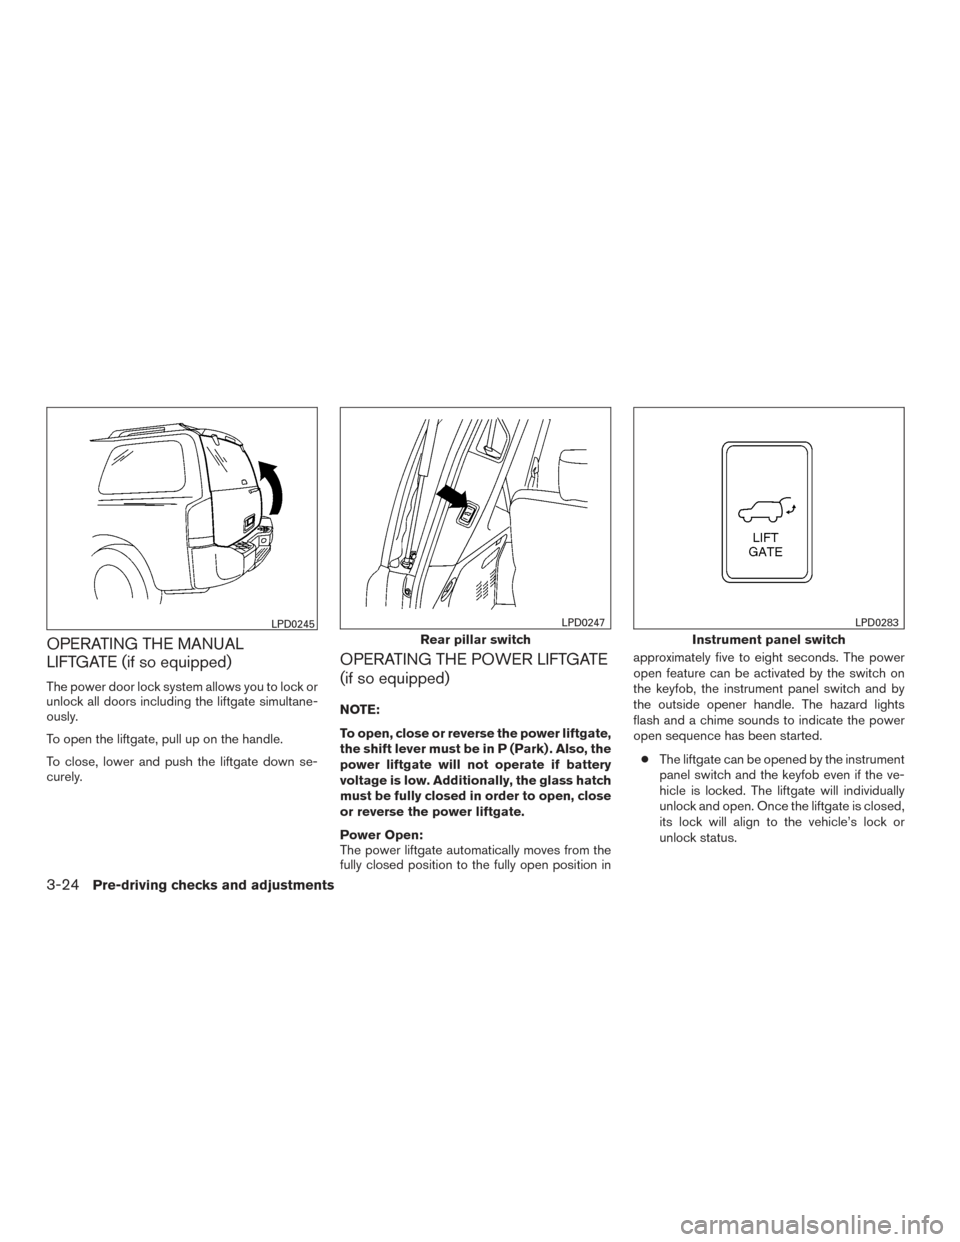
To open the liftgate, pull up on the handle.
To close, lower and push the liftgate down se-
curely.
OPERATING THE POWER LIFTGATE
(if so equipped)
NOTE:
To open, close or reverse the power liftgate,
the shift lever must be in P (Park) . Also, the
power liftgate will not operate if battery
voltage is low. Additionally, the glass hatch
must be fully closed in order to open, close
or reverse the power liftgate.
Power Open:
The power liftgate automatically moves from the
fully closed position to the fully open position inapproximately five to eight seconds. The power
open feature can be activated by the switch on
the keyfob, the instrument panel switch and by
the outside opener handle. The hazard lights
flash and a chime sounds to indicate the power
open sequence has been started.
● The liftgate can be opened by the instrument
panel switch and the keyfob even if the ve-
hicle is locked. The liftgate will individually
unlock and open. Once the liftgate is closed,
its lock will align to the vehicle’s lock or
unlock status.
LPD0245
Rear pillar switch
LPD0247
Instrument panel switch
LPD0283
3-24Pre-driving checks and adjustments