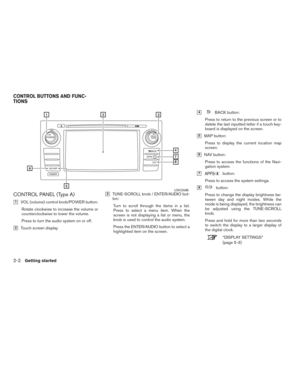
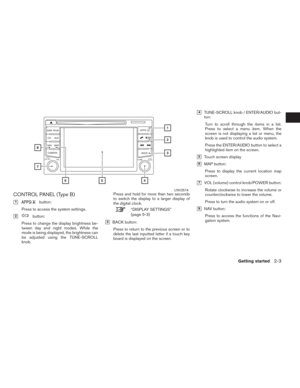
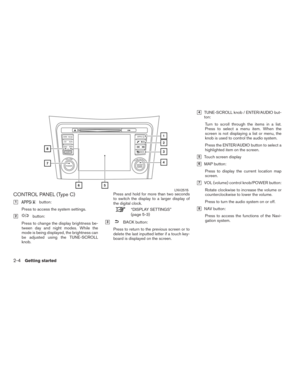
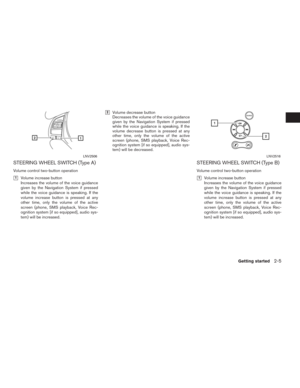
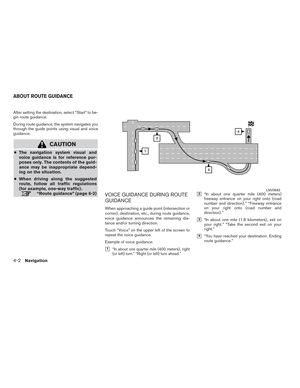
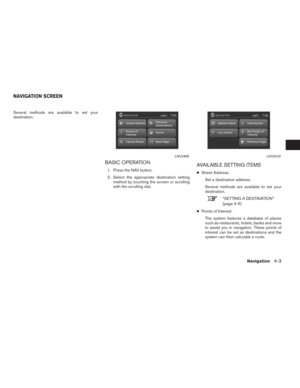
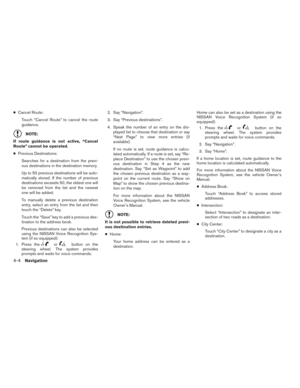
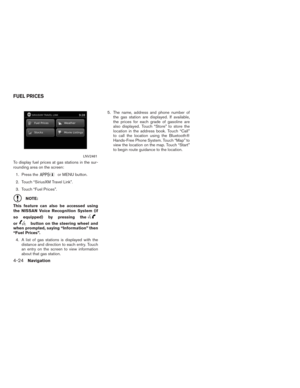
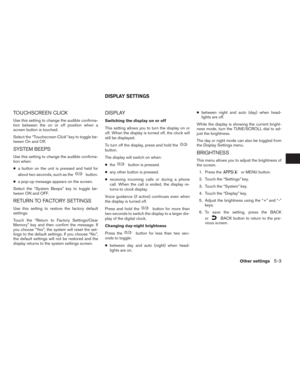
Page 17 of 81
Scrolling through a message or list:
Turn the TUNE-SCROLL dial to scroll through a
message or a list. When scrolling a lengthy list,
you can also touch the screen and slide your fin-
ger along the scroll bar where shown to scroll
more quickly. Touching the up or down arrow will
move between pages of the list.MENU SCREEN OPERATION Menu screens and their purpose
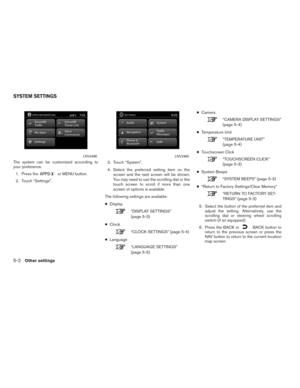
Press one of the application buttons to activate
the corresponding menu screen:
●NAV (Navigation)
●
or MENU
LNV0921(Type A)LNV2448(Type B)LNV2478
Getting started2-9
Page 18 of 81

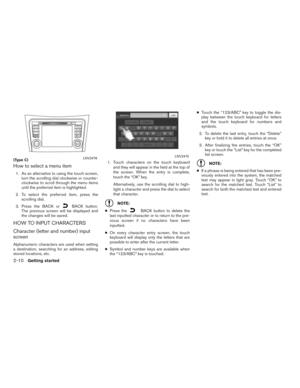
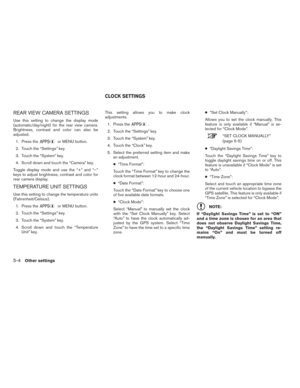
How to select a menu item
1. As an alternative to using the touch screen,
turn the scrolling dial clockwise or counter-
clockwise to scroll through the menu items
until the preferred item is highlighted.
2. To select the preferred item, press the
scrolling dial.
3. Press the BACK or
BACK button.
The previous screen will be displayed and
the changes will be saved.
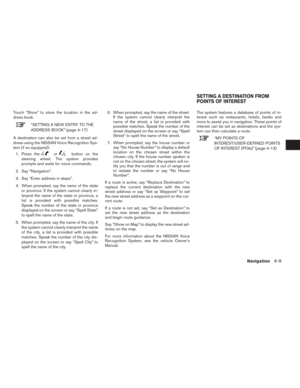
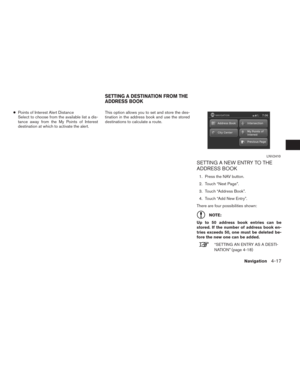
HOW TO INPUT CHARACTERS
Character (letter and number) input
screen
Alphanumeric characters are used when setting
a destination, searching for an address, editing
stored locations, etc.1. Touch characters on the touch keyboard
and they will appear in the field at the top of
the screen. When the entry is complete,
touch the “OK” key.
Alternatively, use the scrolling dial to high-
light a character and press the dial to select
that character.
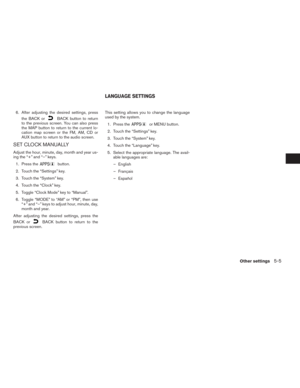
NOTE:
●Press the
BACK button to delete the
last inputted character or to return to the pre-
vious screen if no characters have been
inputted.
●On every character entry screen, the touch
keyboard will display only the letters that are
possible to enter after the current letter.
●Symbol and number keys are available when
the “123/ABC” key is touched.●Touch the “123/ABC” key to toggle the dis-
play between the touch keyboard for letters
and the touch keyboard for numbers and
symbols.
2. To delete the last entry, touch the “Delete”
key or hold it to delete all entries at once.
3. After finalizing the entries, touch the “OK”
key or touch the “List” key for the completed
list screen.
NOTE:
●If a phrase is being entered that has been pre-
viously entered into the system, the matched
text may appear in light gray. Touch “OK” to
search for the matched text. Touch “List” to
search for both the matched text and entered
text.(Type C)LNV2476LNV2415
2-10Getting started
Page 19 of 81
 view........................3-2
2-Dimensional North Up (2DN) view..............3-2
3-Dimensional (3D) view.......")
3 Map settings
Map types........................................3-2
2-Dimensional (2D) view........................3-2
2-Dimensional North Up (2DN) view..............3-2
3-Dimensional (3D) view........................3-2
Screen information (2D, 2DN or 3D)..............3-3
Moving a map.....................................3-4
Returning to the current vehicle location...........3-5
Map options menu screen . . ........................3-5
Changing the map scale............................3-6
Map scale.....................................3-7Looking at information on the map...................3-7
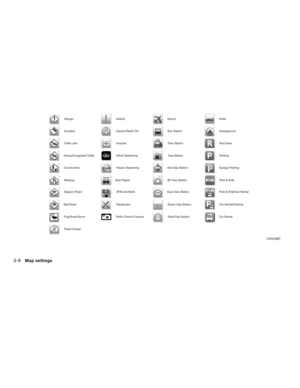
Map symbols...................................3-7
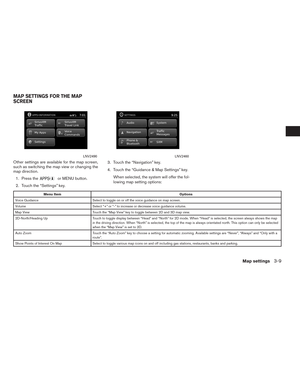
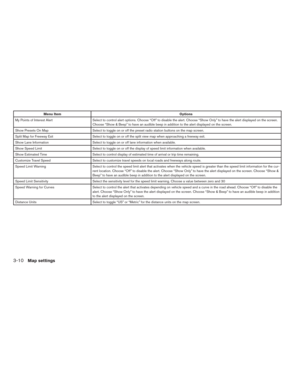
Map settings for the map screen....................3-9
Lane information..................................3-11
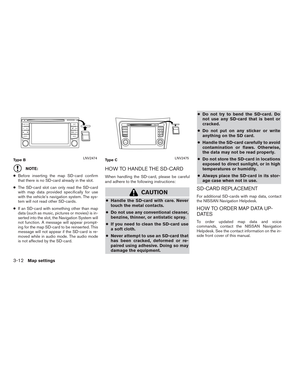
Map SD-card....................................3-11
How to handle the SD-card.....................3-12
SD-card replacement..........................3-12
How to order map data updates.................3-12
About the map data............................3-13
End-user terms................................3-14
Page 20 of 81
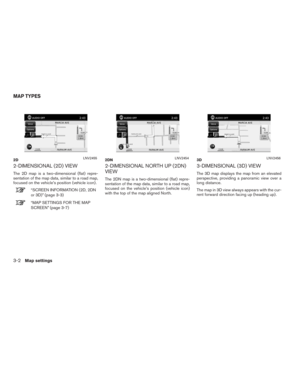
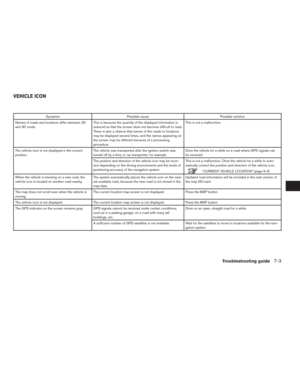
2-DIMENSIONAL (2D) VIEW
The 2D map is a two-dimensional (flat) repre-
sentation of the map data, similar to a road map,
focused on the vehicle’s position (vehicle icon) .
“SCREEN INFORMATION (2D, 2DN
or 3D)” (page 3-3)
“MAP SETTINGS FOR THE MAP
SCREEN” (page 3-7)
2-DIMENSIONAL NORTH UP (2DN)
VIEW
The 2DN map is a two-dimensional (flat) repre-
sentation of the map data, similar to a road map,
focused on the vehicle’s position (vehicle icon)
with the top of the map aligned North.
3-DIMENSIONAL (3D) VIEW
The 3D map displays the map from an elevated
perspective, providing a panoramic view over a
long distance.
The map in 3D view always appears with the cur-
rent forward direction facing up (heading up) .
2DLNV24552DNLNV24543DLNV2456
MAP TYPES
3-2Map settings
Page 21 of 81

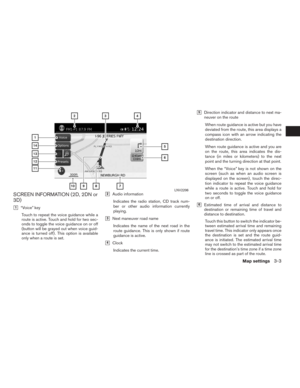
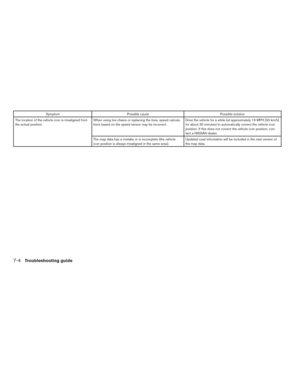
�1“Voice” key
Touch to repeat the voice guidance while a
route is active. Touch and hold for two sec-
onds to toggle the voice guidance on or off
(button will be")
SCREEN INFORMATION (2D, 2DN or
3D)
�1“Voice” key
Touch to repeat the voice guidance while a
route is active. Touch and hold for two sec-
onds to toggle the voice guidance on or off
(button will be grayed out when voice guid-
ance is turned off) . This option is available
only when a route is set.
�2Audio information
Indicates the radio station, CD track num-
ber or other audio information currently
playing.
�3Next maneuver road name
Indicates the name of the next road in the
route guidance. This is only shown if route
guidance is active.
�4Clock
Indicates the current time.
�5Direction indicator and distance to next ma-
neuver on the route
When route guidance is active but you have
deviated from the route, this area displays a
compass icon with an arrow indicating the
destination direction.
When route guidance is active and you are
on the route, this area indicates the dis-
tance (in miles or kilometers) to the next
point and the turning direction at that point.
When the “Voice” key is not shown on the
screen (such as when an audio screen is
displayed on the screen) , touch the direc-
tion indicator to repeat the voice guidance
while a route is active. Touch and hold for
two seconds to toggle the voice guidance
on or off.
�6Estimated time of arrival and distance to
destination or remaining time of travel and
distance to destination.
Touch this button to switch the indicator be-
tween estimated arrival time and remaining
travel time. This indicator only appears once
the destination is set and the route guid-
ance is initiated. The estimated arrival time
may not switch to the estimated arrival time
for the destination’s time zone if a time zone
line is crossed as part of the route.
LNV2206
Map settings3-3
Page 22 of 81

�7Current road indicator
The location of where the car is positioned.
�8Vehicle icon
Indicates the current location and direction
of the vehicle.
�9Suggested route
Appears as a bold blue line during route
guidance.
�10Scale indicator
Indicates the scale of the map.
�11Compass icon
Indicates the direction of the map. Touch
this icon to switch the map view between
the North Up, Heading Up (or actual direc-
tion) and 3D modes.
�12“Presets” key
This option toggles on and off with the
“Menu” key and displays a touch menu of
the radio presets on the screen. For more
information about the audio system, see the
vehicle Owner’s Manual.
�13Zoom in and zoom out keys
Touch to zoom the map in or out.
�14“Options” key
Touch this key to access the map options
menu screen.
“MAP OPTIONS MENU
SCREEN” (page 3-5)
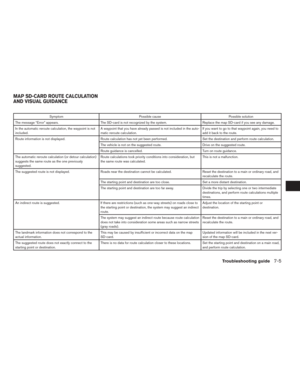
To scroll the map in either direction:
1. Touch and release the screen anywhere on
the map.
2. Touch the screen again and move your fin-
ger along the screen in the direction you
wish to scroll.
After releasing and touching the map again, a
marker will be displayed at the point touched
and, if possible, the position determined.
NOTE:
When the current location of the vehicle is
recognized, the street name will be dis-
played at the bottom of the screen. When
scrolling a map and an area that is not a
road, city or POI is touched, coordinates
corresponding to the marker’s position are
displayed at the bottom of the screen.
LNV2463
MOVING A MAP
3-4Map settings
Page 23 of 81

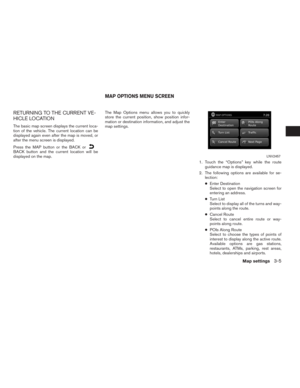
RETURNING TO THE CURRENT VE-
HICLE LOCATION
The basic map screen displays the current loca-
tion of the vehicle. The current location can be
displayed again even after the map is moved, or
after the menu screen is displayed.
Press the MAP button or the BACK or
BACK button and the current location will be
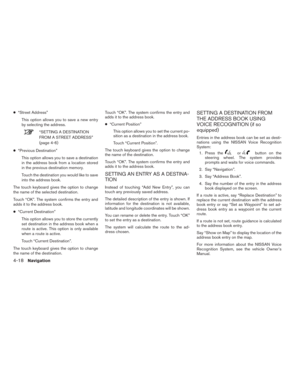
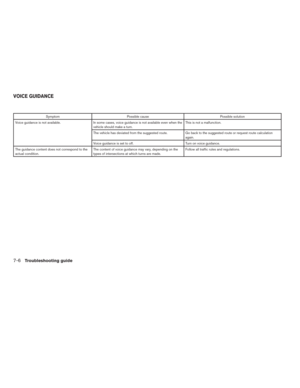
displayed on the map.The Map Options menu allows you to quickly
store the current position, show position infor-
mation or destination information, and adjust the
map settings.
1. Touch the “Options” key while the route
guidance map is displayed.
2. The following options are available for se-
lection:
●Enter Destination
Select to open the navigation screen for
entering an address.
●Turn List
Select to display all of the turns and way-
points along the route.
●Cancel Route
Select to cancel entire route or way-
points along route.
●POIs Along Route
Select to choose the types of points of
interest to display along the active route.
Available options are gas stations,
restaurants, ATMs, parking, rest areas,
hotels, dealerships and airports.LNV2457
MAP OPTIONS MENU SCREEN
Map settings3-5
Page 24 of 81
 as being closer than
the place in your traveling")
NOTE:
Some places of interest on divided high-
ways may show the equivalent place of in-
terest on the opposite side of the road
(such as a rest area) as being closer than
the place in your traveling direction. Con-
firm location of the place before following
the route.
●Traffic
Select to display all traffic events on
route and options to avoid roads along
route.
●Show Route On Map
Select to display the entire route on the
screen. The view will zoom to the neces-
sary level in order to show both the start-
ing point and destination on the screen.
●Routing Options
Select to view options available to cus-
tomize route. Avoiding specific roads, dy-
namic guidance, route type and minimiz-
ing freeways, types of roads and ferries
can all be adjusted.
●Show Position Information
Select to display the latitude, longitude
and altitude for the current position of the
vehicle. Location can also be stored to
the Address Book.●Show Waypoints
Select to add or show list of waypoints
along route.
●Guidance & Map Settings
Select to toggle guidance information
and map settings options.
“MAP SETTINGS FOR THE
MAP SCREEN” (page 3-7)
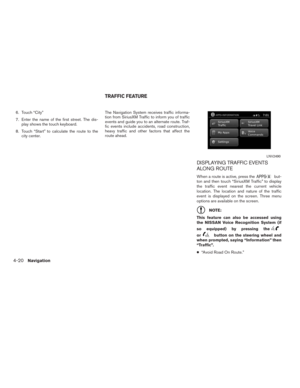
When using the “+” or “-” for zooming in or out,
the scale on the bottom left side of the screen
changes to indicate the new scale level.
LNV2462
CHANGING THE MAP SCALE
3-6Map settings


 VIEW
The 2D map is a two-dimensional (flat) repre-
sentation of the map data, similar to a road map,
focused on the vehicle’s position (vehicle icon) .
“SCREEN INFORMATION (2D,")