2015 MITSUBISHI OUTLANDER battery location
[x] Cancel search: battery locationPage 90 of 446

Free-hand Advanced Securi
ty Transmitter (F.A.S.T.-key) (if so equipped)
Features and controls 5-13
5
The operations possible with the F.A.S.T.- key can be modified as stated below.(Keyless entry operations are possible.) For details, contact an
authorized Mitsubi-
shi Motors dealer.• Enabling only the locking and unlocking of the doors and the liftgate • Enabling only the starting of the engine• Deactivating the F.A.S.T.-key
N00503201177
When a person enters the operating range ofthe F.A.S.T.-key while carrying the F.A.S.T.- key and presses the driver’s or front passen- ger’s door lock/unlock switch, the liftgateLOCK switch or the li
ftgate OPEN switch,
verification of the ID
code is performed.
The doors and the liftgate can be locked andunlocked and the engine can be started only when the ID codes of the vehicle and F.A.S.T.-key match.
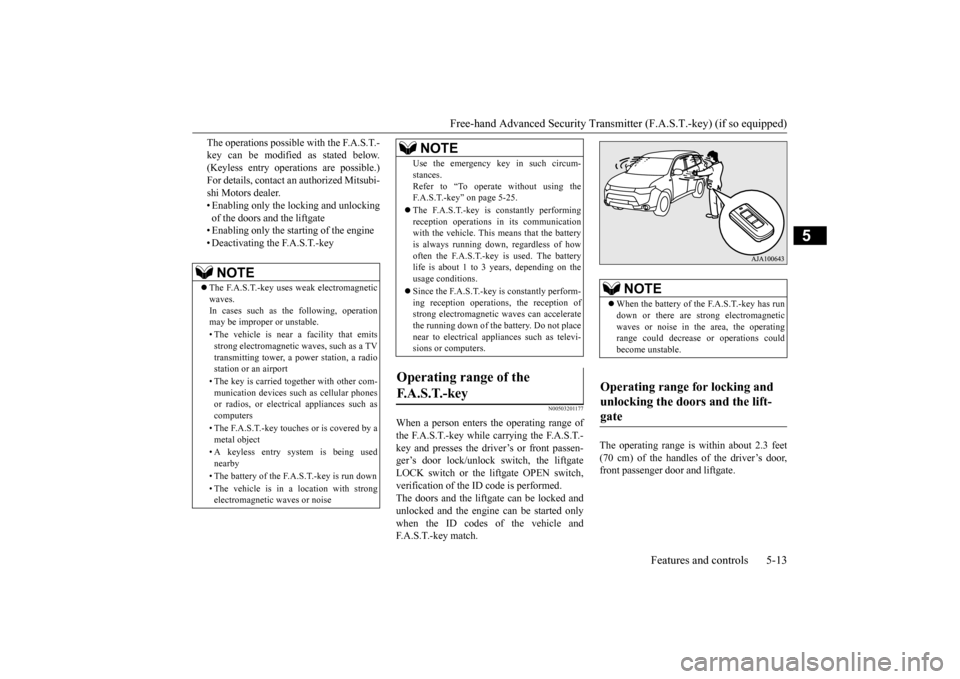
The operating range is
within about 2.3 feet
(70 cm) of the handles of the driver’s door, front passenger door and liftgate.
NOTE
The F.A.S.T.-key uses weak electromagnetic waves.In cases such as the following, operation may be imprope
r or unstable.
• The vehicle is near a facility that emits strong electroma
gnetic waves, such as a TV
transmitting tower, a po
wer station, a radio
station or an airport • The key is carried together with other com- munication devices such
as cellular phones
or radios, or electric
al appliances such as
computers • The F.A.S.T.-key touches or is covered by a metal object • A keyless entry system is being used nearby • The battery of the F.A.S.T.-key is run down • The vehicle is in a location with strong electromagnetic
waves or noise
Use the emergency key in such circum- stances.Refer to “To operate
without using the
F.A.S.T.-key” on page 5-25. The F.A.S.T.-key is constantly performing reception operations
in its communication
with the vehicle. This means that the battery is always running down, regardless of howoften the F.A.S.T.-key is used. The battery life is about 1 to 3 years, depending on the usage conditions. Since the F.A.S.T.-key is constantly perform- ing reception operati
ons, the reception of
strong electrom
agnetic waves
can accelerate
the running down of the
battery. Do not place
near to electrical appliances such as televi-sions or computers.
Operating range of the F. A . S . T. - k e y
NOTE
NOTE
When the battery of the F.A.S.T.-key has run down or there are st
rong electromagnetic
waves or noise in the area, the operating range could decrease
or operations could
become unstable.
Operating range for locking and unlocking the doors and the lift- gate
BK0211800US.book 13 ページ 2014年3月12日 水曜日 午後2時42分
Page 113 of 446

Power liftgate (if so equipped) 5-36 Features and controls
5
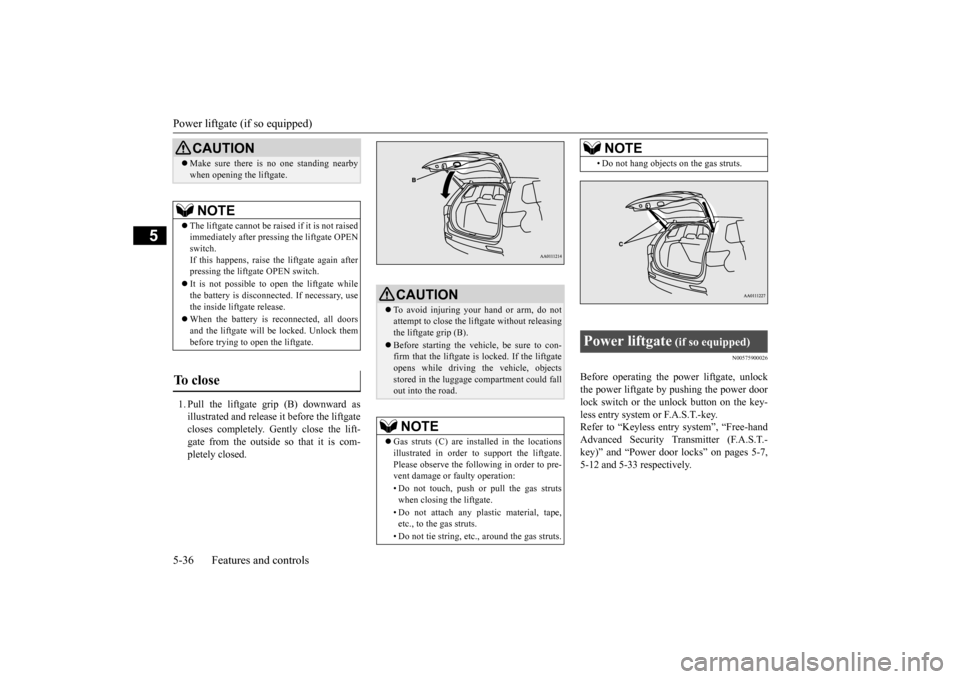
1. Pull the liftgate grip (B) downward as illustrated and release it before the liftgatecloses completely. Gently close the lift- gate from the outside so that it is com- pletely closed.
N00575900026
Before operating the po
wer liftga
te, unlock
the power liftgate by pushing the power door lock switch or the unlock button on the key- less entry system or F.A.S.T.-key.Refer to “Keyless entry system”, “Free-hand Advanced Security Transmitter (F.A.S.T.- key)” and “Power door locks” on pages 5-7,5-12 and 5-33 respectively.
CAUTION Make sure there is no one standing nearby when opening the liftgate.NOTE
The liftgate cannot be rais
ed if it is not raised
immediately after pre
ssing the liftgate OPEN
switch. If this happens, raise th
e liftgate again after
pressing the liftga
te OPEN switch.
It is not possible to open the liftgate while the battery is disconnect
ed. If necessary, use
the inside liftgate release. When the battery is
reconnected, all doors
and the liftgate will be locked. Unlock them before trying to open the liftgate.
To close
CAUTION To avoid injuring your hand or arm, do not attempt to close the lift
gate without releasing
the liftgate grip (B). Before starting the vehi
cle, be sure to con-
firm that the liftgate is locked. If the liftgateopens while driving
the vehicle, objects
stored in the luggage compartment could fall out into the road.NOTE
Gas struts (C) are installed in the locations illustrated in order to
support the liftgate.
Please observe the following in order to pre- vent damage or faulty operation: • Do not touch, push or pull the gas struts when closing the liftgate. • Do not attach any pl
astic material, tape,
etc., to the gas struts. • Do not tie string, etc., around the gas struts.
• Do not hang objects on the gas struts.
Power liftgate
(if so equipped)
NOTE
BK0211800US.book 36 ページ 2014年3月12日 水曜日 午後2時42分
Page 120 of 446

Inside liftgate release
Features and controls 5-43
5
N00523101084
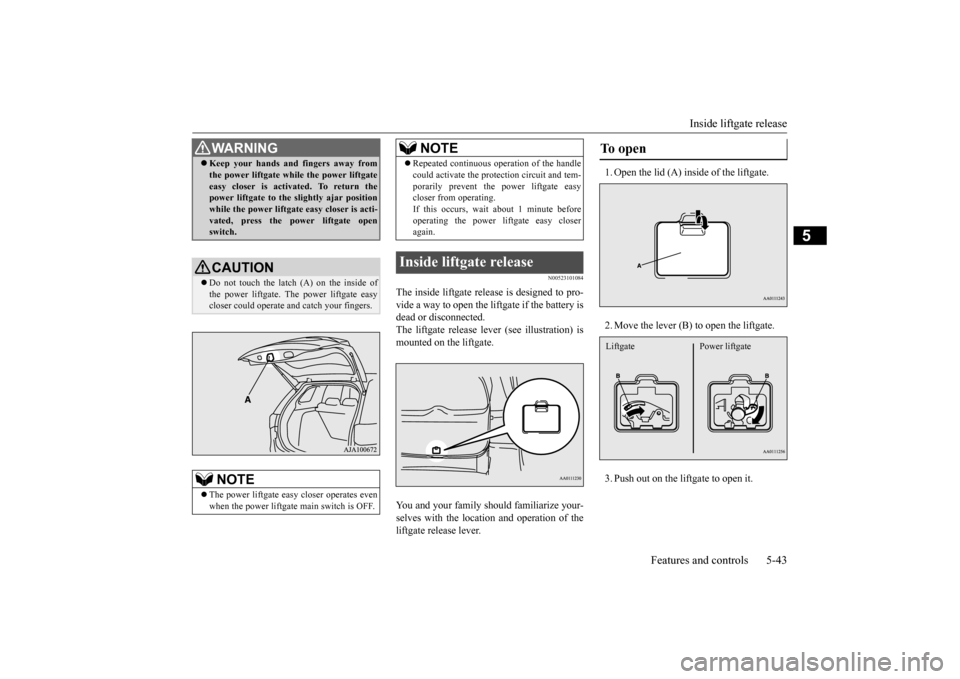
The inside liftgate release is designed to pro- vide a way to open the liftgate if the battery isdead or disconnected. The liftgate release lever (see illustration) is mounted on the liftgate. You and your family should familiarize your- selves with the location and operation of the liftgate release lever.
1. Open the lid (A) inside of the liftgate. 2. Move the lever (B) to open the liftgate.3. Push out on the liftgate to open it.
WA R N I N G Keep your hands and fingers away from the power liftgate while the power liftgateeasy closer is activated. To return thepower liftgate to the sl
ightly ajar position
while the power liftgate easy closer is acti- vated, press the power liftgate openswitch.CAUTION Do not touch the latch (A) on the inside of the power liftgate. Th
e power liftgate easy
closer could operate
and catch your fingers.
NOTE
The power liftgate easy
closer operates even
when the power liftgate main switch is OFF.
Repeated continuous ope
ration of the handle
could activate the prot
ection circui
t and tem-
porarily prevent the
power liftgate easy
closer from operating. If this occurs, wait
about 1 minute before
operating the power liftgate easy closeragain.
Inside liftgate release
NOTE
To open Liftgate Power liftgate
BK0211800US.book 43 ページ 2014年3月12日 水曜日 午後2時42分
Page 368 of 446

Jump-starting the engine For emergencies 8-3
8
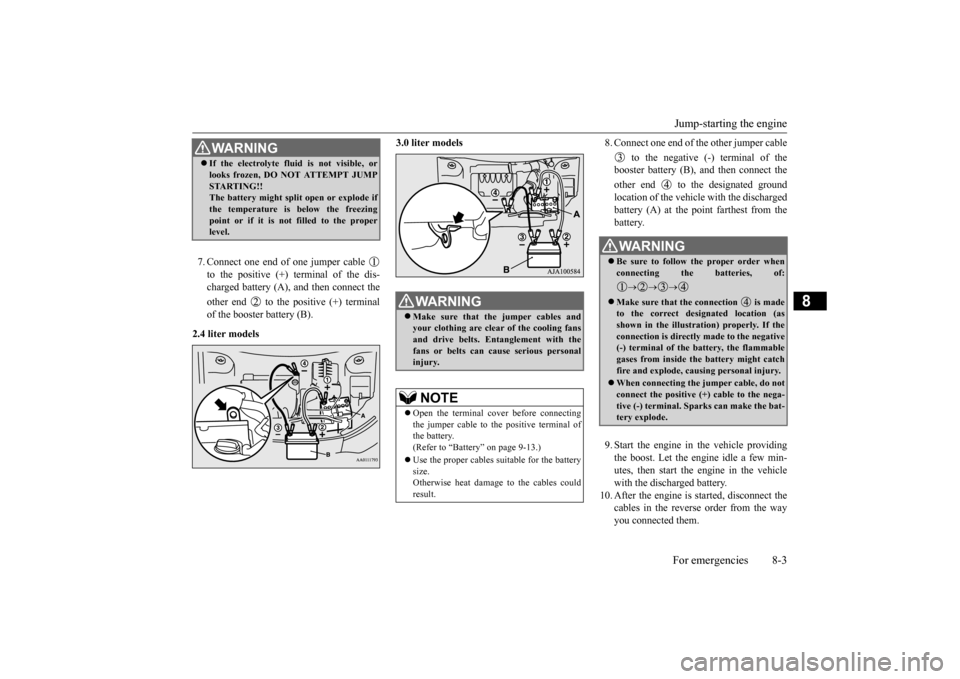
7. Connect one end of one jumper cable to the positive (+) terminal of the dis- charged battery (A),
and then connect the
other end to the positive (+) terminal of the booster battery (B).
2.4 liter models
3.0 liter models
8. Connect one end of the other jumper cable
to the negative (-) terminal of the booster battery (B), a
nd then connect the
other end to the designated ground location of the vehicl
e with the discharged
battery (A) at the point farthest from the battery. 9. Start the engine in the vehicle providing the boost. Let the engine idle a few min- utes, then start the engine in the vehiclewith the discharged battery.
10. After the engine is
started, disconnect the
cables in the reverse order from the wayyou connected them.
WA R N I N G If the electrolyte flui
d is not visible, or
looks frozen, DO NOT ATTEMPT JUMPSTARTING!!The battery might split open or explode if the temperature is below the freezing point or if it is not filled to the properlevel.
WA R N I N G Make sure that the jumper cables and your clothing are clear of the cooling fans and drive belts. Entanglement with thefans or belts can ca
use serious personal
injury.NOTE
Open the terminal cover before connecting the jumper cable to the positive terminal of the battery.(Refer to “Battery” on page 9-13.) Use the proper cables suitable for the battery size. Otherwise heat damage
to the cables could
result.
WA R N I N G Be sure to follow the proper order when connecting the batteries, of:
Make sure that the connection is made to the correct designated location (as shown in the illustration) properly. If theconnection is directly made to the negative (-) terminal of the battery, the flammable gases from inside the battery might catchfire and explode, caus
ing personal injury.
When connecting the jumper cable, do not connect the positive (+) cable to the nega- tive (-) terminal. Sparks can make the bat- tery explode.
BK0211800US.book 3 ページ 2014年3月12日 水曜日 午後2時42分