2015 MITSUBISHI OUTLANDER change time
[x] Cancel search: change timePage 269 of 446

Bluetooth® 2.0 interface (if so equipped) 5-192 Features and controls
5
If multiple paired Bluetooth
® devices are
available in the vehicle,
the cellular phone or
music player most recently connected is auto- matically connected to the Bluetooth
® 2.0
interface. You can also change a Bluetooth
® device to
be connected. To pair a Bluetooth
® device with the Blue-
tooth
® 2.0 interface, foll
ow the steps below.
1. Stop your vehicle in a safe area, put the selector lever in the “P” (PARK) positionand pull the parking brake lever.
2. Press the SPEECH button (except for vehicles with Mitsubishi Multi-Commu-nication System) or PICK-UP button (for vehicles with Mitsubishi Multi-Commu- nication System).3. Say “Setup.” 4. Say “Pairing Options.” 5. The voice guide will
say “Select one of
the following: pair, ed
it, delete, or list.”
Say “Pair.” 6. The voice guide will
say “Please say a 4-
digit pairing code.” Say a 4-digit number. When the confirmation function is on, the system will confirm
whether the number
said is acceptable. Answer “Yes.” Answer “No” to return to pairing code selection.
7. The voice guide will say “Start pairing procedure on the device. See the device manual for instructions.” Enter in the Bluetooth
® device the 4-digit number you
have registered in Step 6.
To p a i r
NOTE
You cannot pair any Bluetooth
® device with
the Bluetooth
® 2.0 interface unless the vehi-
cle is parked. Before pairing a Bluetooth
®
device with the Bluetooth
® 2.0 interface,
confirm that the vehicle is parked in a safe location.
NOTE
If 7 devices have alre
ady been paired, the
voice guide will sa
y “Maximum devices
paired” and then the system will end the pairing process. To re
gister a ne
w device,
delete one device and th
en repeat the pairing
process. (Refer to “Selecting a device: Deleting a device” on page 5-194.)
NOTE
Some Bluetooth
® devices requi
re a specific
pairing code. Please re
fer to the device man-
ual for pairing code requirements. The pairing code ente
red here is only used
for the Bluetooth
® connection ce
rtification.
It is any 4-digit numbe
r the user would like
to select. Remember the pairing c
ode as it needs to be
keyed into the Bluetooth
® device later in the
pairing process. Depending on the connecti
on settings of the
Bluetooth
® device, this code may have to be
entered each time you connect the Blue- tooth
® device to the Bluetooth
® 2.0 inter-
face. For the default
connection settings,
refer to the instructions for the device.NOTE
Depending on the Bluetooth
® device, it may
take a few minutes to pair it with the Blue- tooth
® 2.0 interface.
BK0211800US.book 192 ページ 2014年3月12日 水曜日 午後2時42分
Page 270 of 446

Bluetooth® 2.0 interface (if so equipped)
Features and controls 5-193
5
8. The voice guide will
say “Please say the
name of the device after the beep.” You can assign a desired name for the Blue- tooth
® device and register it as a device
tag. Say the name you want to register after the beep. 9. The voice guide will say “Pairing com- plete,” after which a beep will be played and the pairing process will end.
N00565101080
If multiple paired Bluetooth
® devices are
available in the vehicle,
the cellular phone or
music player most recently connected is auto- matically connected
to the Bluetooth
® 2.0
interface. You can connect to the
other paired cellular
phone or music player by following setting change procedures.
N00582200034
1. Press the SPEECH button (except forvehicles with Mitsubishi Multi-Commu- nication System) or
PICK-UP button (for
vehicles with Mitsubishi Multi-Commu- nication System). 2. Say “Setup.”3. Say “Select phone.” 4. After the voice guide says “Please say,” the numbers of the cellular phones anddevice tags of corresponding cellular phones will be read out in order, starting with the cellular phone that has been mostrecently connected. Say the number of the cellular phone that you want to connect to.
When the confirmation function is on, the system will ask you again whether thephone that you want to connect to is cor- rect. Answer “Yes” to continue and con- nect to the cellular phone.Answer “No,” and the voice guide will say “Please say.” Say the number of the phone that you want to connect to. 5. The selected phone will be connected to the Bluetooth
® 2.0 interface. The voice
guide will say “
and then the system will return to the main menu.
N00582300035
1. Press the SPEECH button (except for vehicles with Mitsubishi Multi-Commu- nication System) or PICK-UP button (for vehicles with Mitsubishi Multi-Commu-nication System). 2. Say “Setup.” 3. Say “Select music player.”
If the Bluetooth
® 2.0 interface cannot recog-
nize the Bluetooth
® device, the voice guide
will say “Pairing has tim
ed out” and the pair-
ing process will be cancelled. Confirm that the devi
ce you are pairing sup-
ports Bluetooth
®, and try pairing it again.
If you enter the wrong number, the voice guide will say “Pairing
failed” and the pair-
ing process will be cancelled. Confirm the number is right, and try pairingit again.NOTE
When the confirmation function is on, after repeating the device
tag you have said, the
voice guide will ask “Is this correct?” Answer “Yes.”To change the device
tag, answer “No” and
then say the device tag again.NOTE
Selecting a device
To select a cellular phone
NOTE
You can connect to a
phone at any time by
pressing the SPEECH button and saying the number, even before all of the paired num-bers and device tags
of corresponding cellu-
lar phones are read out by the system.
To select a music player
BK0211800US.book 193 ページ 2014年3月12日 水曜日 午後2時42分
Page 281 of 446

Bluetooth® 2.0 interface (if so equipped) 5-204 Features and controls
5
The Bluetooth
® 2.0 interface automatically
converts from text to
voice the na
mes regis-
tered in the transferred phonebook entries, and creates names. Follow the steps below to transfer to the mobile phonebook the phonebook stored in the cellular phone.
1. Press the SPEECH button (except for vehicles with Mitsubishi Multi-Commu- nication System) or PICK-UP button (forvehicles with Mitsubishi Multi-Commu- nication System). 2. Say “Phonebook.”3. The voice guide will
say “Select one of
the following: new entry, edit number, edit name, list names, delete, erase all, orimport contact.
” Say “Import contact.”
4. The voice guide will say “Would you like to import a single entr
y or all contacts?”
Say “All contacts.”
5. The voice guide will
say “Importing the
contact list from
the mobile phonebook.
This may take several minutes to com- plete. Would you li
ke to continue?”
Answer “Yes,” transferring to the mobilephonebook the phonebook stored in the cellular phone will start. Answer “No,” the system will return tothe main menu.
NOTE
Only the mobile phonebook transferred from the connected cellul
ar phone can be used
with that cellular phone. You cannot change the names and telephone numbers in the phonebook entries registeredin the mobile phonebook. You cannot select and delete specific
phonebook entries, either.
To change or delete any of the above, changethe applicable information in the source phonebook of the cellular phone and then transfer the phonebook again.
To import a devices phonebook
NOTE
Transfer should be completed while the vehi- cle is parked. Before transferring, make sure that the vehicle is parked in a safe location. The already stored phonebook in the mobile phonebook is overwritten by the stored phonebook in the cellular phone.
All or part of data
may not be transferred,
even when the cellular phone supports Blue- tooth
®, depending on the compatibility of
the device. Only a home, a work, and a mobile number can be imported. The maximum supported telephone number length is 19 digits. Any telephone number of20 digits or more will be
truncated to the first
19 digits. If telephone numbers
contain characters
other than 0 to 9,
*, # or +, these characters
are deleted before the transfer. For the connection set
tings on the cellular
phone side, refer to the
instructions for the
cellular phone.NOTE
NOTE
The transfer may take some time to complete depending on the number of contacts. If the Bluetooth
® 2.0 interface could not be
connected to the Bluetooth
® compatible cel-
lular phone, the voice gui
de will sa
y “Unable
to transfer contact list from phone” and thenthe system will return to the main menu. If you press the HANG-UP button or press and hold the SPEECH button during the data transfer, the transfer will be cancelled and the system will return to the main menu. If an error occurs during the data transfer, all transfer will be canc
elled and the voice guide
will say “Unable to complete the phonebook import” and then the system will return to the main menu. If there are no contacts in the phonebook, the voice guide will say
“There are no contacts
on the connected phone.”
BK0211800US.book 204 ページ 2014年3月12日 水曜日 午後2時42分
Page 322 of 446
Automatic climate cont
rol air conditioner
Comfort controls 7-7
7
N00736901189
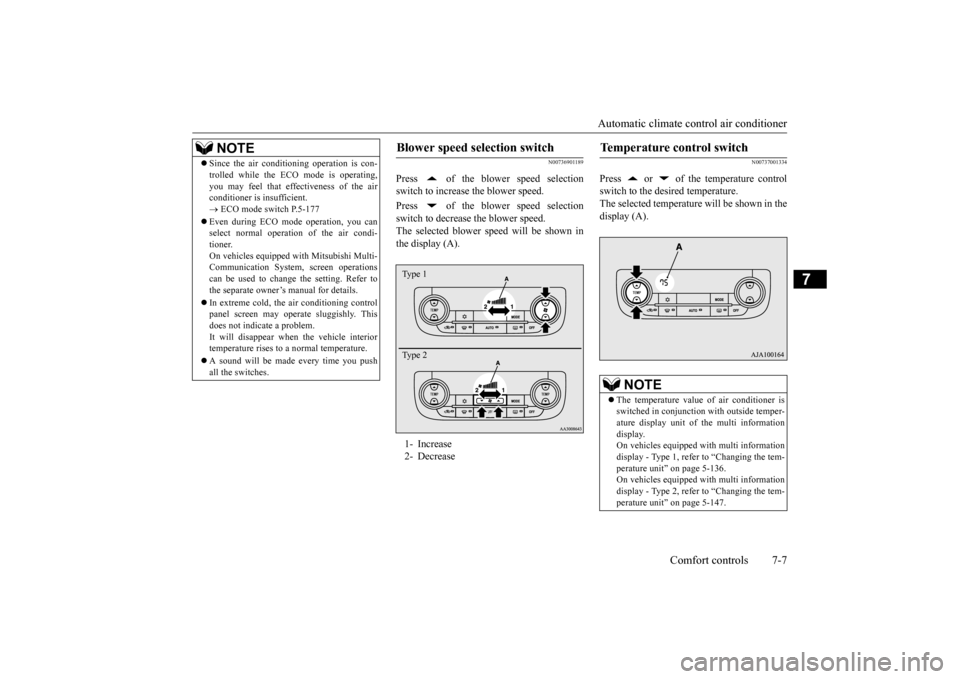
Press of the blower speed selection switch to increase the blower speed. Press of the blower speed selection switch to decrease the blower speed. The selected blower sp
eed will be shown in
the display (A).
N00737001334
Press or of the temperature controlswitch to the desired temperature. The selected temperature will be shown in the display (A).
NOTE
Since the air conditi
oning operation is con-
trolled while the ECO mode is operating,you may feel that effectiveness of the airconditioner is insufficient. ECO mode switch P.5-177
Even during ECO mode operation, you can select normal operati
on of the air condi-
tioner.On vehicles equipped
with Mitsubishi Multi-
Communication System,
screen operations
can be used to change the setting. Refer tothe separate owner’
s manual for details.
In extreme cold, the air conditioning control panel screen may operate sluggishly. This does not indicate a problem. It will disappear when
the vehicle interior
temperature rises to a normal temperature. A sound will be made every time you push all the switches.
Blower speed selection switch 1- Increase 2- DecreaseType 1 Type 2
Temperature control switch
NOTE
The temperature value of air conditioner is switched in conjunction
with outside temper-
ature display unit of the multi informationdisplay. On vehicles equipped with multi information display - Type 1, refer to “Changing the tem-perature unit” on page 5-136. On vehicles equipped with multi information display - Type 2, refer to “Changing the tem-perature unit” on page 5-147.
BK0211800US.book 7 ページ 2014年3月12日 水曜日 午後2時42分
Page 323 of 446
Automatic climate cont
rol air conditioner
7-8 Comfort controls
7
The above indicates the
factory settings. You
can personalize the air
selection switch and
air conditioning switch to match your per- sonal preferences.Contact your Mitsubishi
Motors dealer or a
repair facility of your
choice for assistance.
Refer to “Personalizi
ng the air conditioning
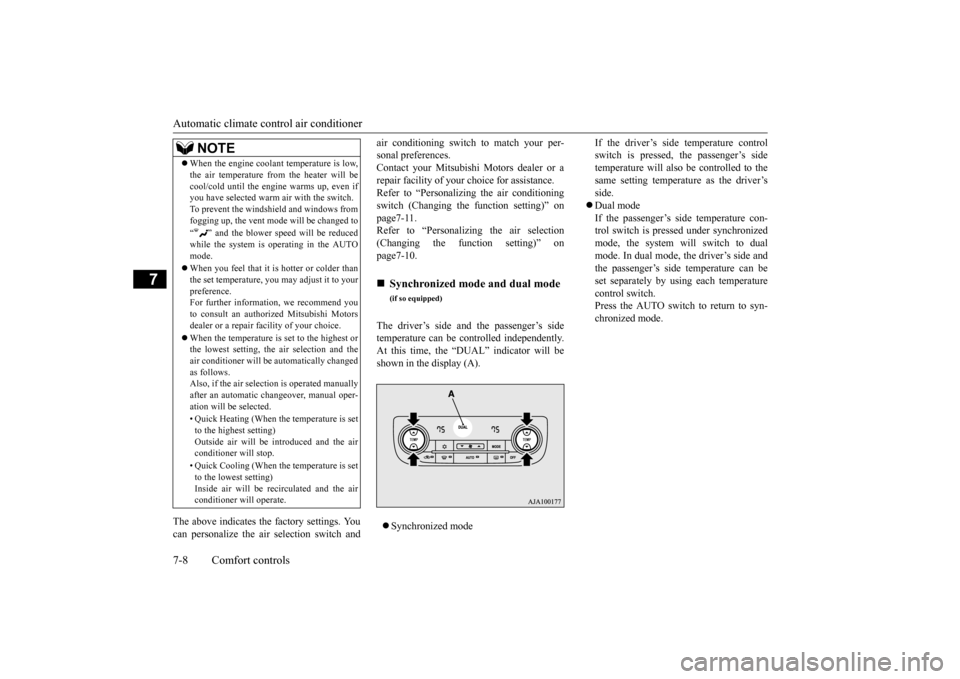
switch (Changing the function setting)” on page7-11. Refer to “Personalizing the air selection(Changing the function setting)” on page7-10. The driver’s side and the passenger’s side temperature can be controlled independently.At this time, the “
DUAL” indicator will be
shown in the display (A). Synchronized mode
If the driver’s side temperature control switch is pressed, the passenger’s sidetemperature will also be controlled to the same setting temperat
ure as the driver’s
side. Dual mode If the passenger’s side temperature con- trol switch is pressed under synchronizedmode, the system will switch to dual mode. In dual mode, the driver’s side and the passenger’s side
temperature can be
set separately by usi
ng each temperature
control switch.Press the AUTO switch to return to syn- chronized mode.
When the engine coolan
t temperature is low,
the air temperature from the heater will becool/cold until the engi
ne warms up, even if
you have selected warm
air with the switch.
To prevent the windshield and windows from fogging up, the vent mode
will be changed to
“ ” and the blower speed will be reduced while the system is operating in the AUTO mode. When you feel that it is hotter or colder than the set temperature, you may adjust it to yourpreference. For further information, we recommend you to consult an authorized Mitsubishi Motorsdealer or a repair fa
cility of your choice.
When the temperature is set to the highest or the lowest setting, the air selection and the air conditioner will be
automatically changed
as follows.Also, if the air selection is operated manually after an automatic ch
angeover, manual oper-
ation will be selected. • Quick Heating (When th
e temperature is set
to the highest setting)Outside air will be introduced and the air conditioner will stop. • Quick Cooling (When th
e temperature is set
to the lowest setting) Inside air will be recirculated and the airconditioner wi
ll operate.
NOTE
Synchronized mode and dual mode
(if so equipped)
BK0211800US.book 8 ページ 2014年3月12日 水曜日 午後2時42分
Page 324 of 446
Automatic climate cont
rol air conditioner
Comfort controls 7-9
7
N00737101218
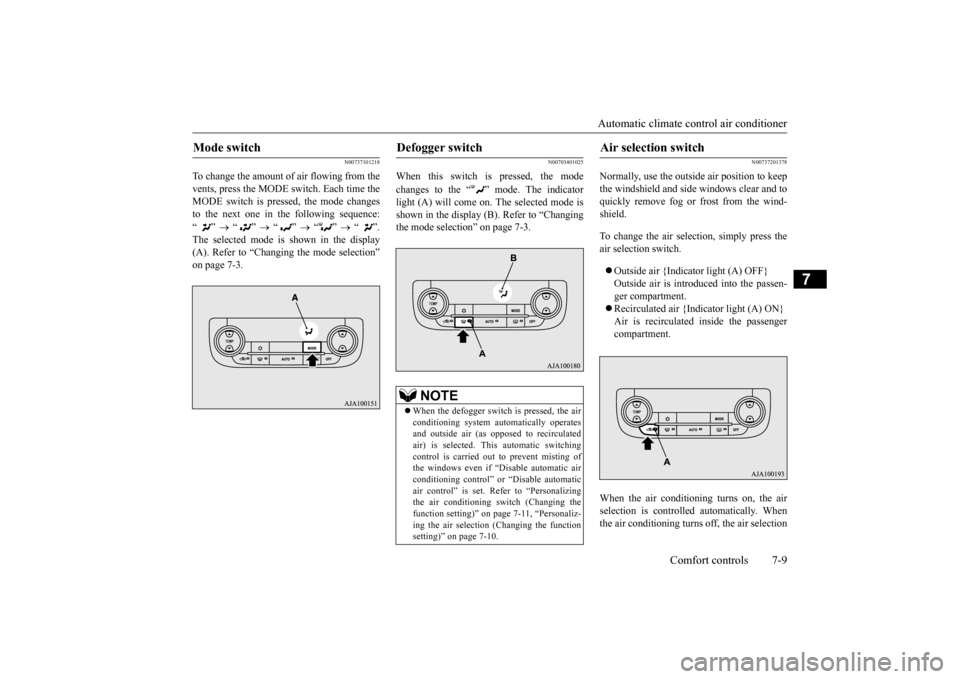
To change the amount of air flowing from the vents, press the MODE switch. Each time the MODE switch is pressed, the mode changesto the next one in the following sequence: “”
“”
“”
“”
“”.
The selected mode is shown in the display (A). Refer to “Changing the mode selection”on page 7-3.
N00703401025
When this switch is pressed, the mode changes to the “ ” mode. The indicator light (A) will come on. The selected mode is shown in the display (B). Refer to “Changingthe mode selection” on page 7-3.
N00737201378
Normally, use the outside
air position to keep
the windshield and side
windows clear and to
quickly remove fog or frost from the wind-shield. To change the air selection, simply press the air selection switch. Outside air {Indicator light (A) OFF} Outside air is introduced into the passen- ger compartment. Recirculated air {Indicator light (A) ON} Air is recirculated
inside the passenger
compartment.
When the air conditioning turns on, the air selection is controlled automatically. When the air conditioning turns
off, the air selection
Mode switch
Defogger switch
NOTE
When the defogger switch is pressed, the air conditioning system au
tomatically operates
and outside air (as oppos
ed to recirculated
air) is selected. This automatic switchingcontrol is carried out to prevent misting of the windows even if “Disable automatic air conditioning control” or
“Disable automatic
air control” is set. Refer to “Personalizing the air conditioning sw
itch (Changing the
function setting)” on pa
ge 7-11, “Personaliz-
ing the air selection
(Changing the function
setting)” on page 7-10.
Air selection switch
BK0211800US.book 9 ページ 2014年3月12日 水曜日 午後2時42分
Page 325 of 446
Automatic climate cont
rol air conditioner
7-10 Comfort controls
7
automatically goes back
to the outside posi-
tion.If high cooling performanc
e is desired, or if
the outside air is dusty
or contaminated in
some way, use the
recirculat
ion position.
Switch to the outside position every now and then to keep the windows from fogging up.
N00712300023
You can change the following functions to match your preference.
Enable automatic air control: When the AUTO switch is pressed, the airselection switch will also be automatically controlled. Disable automatic air control: Even when the AUTO switch is pressed,the air selection switch will not be auto- matically controlled. Changing the settings Press the air selection switch for approxi- mately 10 seconds or longer. When the setting has changed, the systemwill beep and the indi
cator light will flash.
• When the setting has changed from enabled to disabled,
the system will beep
three times and the indicator light will flash three times. • When the setting has changed from dis-abled to enabled, the system will beep two times and the indicator light will flash three times.On vehicles equippe
d with Mitsubishi
Multi-Communication System, screen operations can also be
used to change the
setting. Refer to the separate owner’s manual for details.
N00737301353
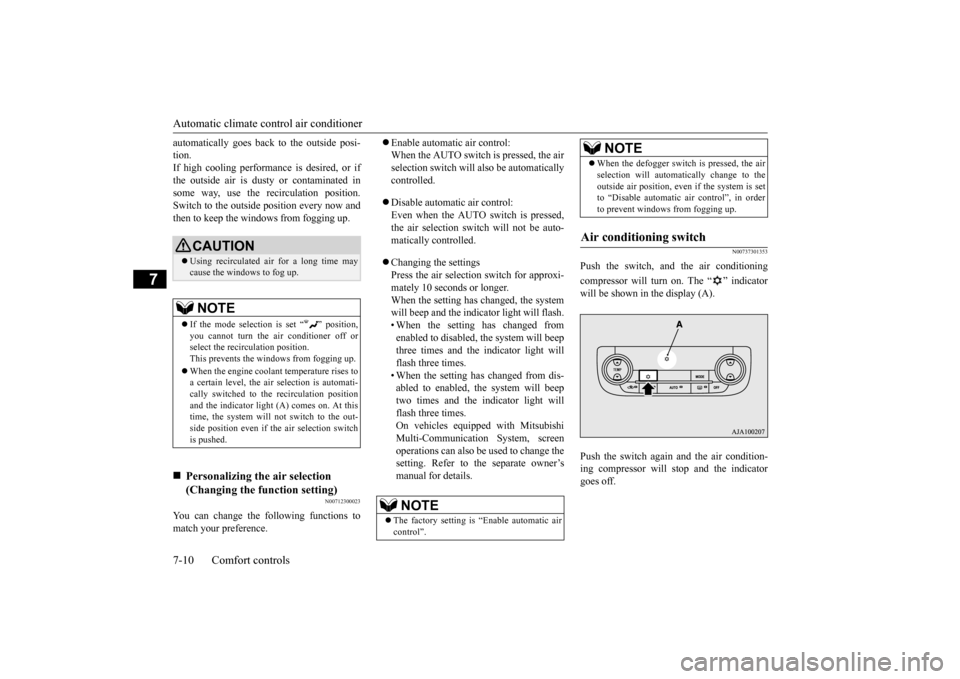
Push the switch, and the air conditioning compressor will turn on. The “ ” indicator will be shown in the display (A). Push the switch again and the air condition- ing compressor will stop and the indicatorgoes off.
CAUTION Using recirculated air for a long time may cause the windows to fog up.NOTE
If the mode selection
is set “ ” position,
you cannot turn the ai
r conditioner off or
select the recirc
ulation position.
This prevents the windows from fogging up. When the engine coolan
t temperature rises to
a certain level, the air selection is automati- cally switched to the
recirculation position
and the indicator light
(A) comes on. At this
time, the system will not switch to the out- side position even if
the air selection switch
is pushed.
Personalizing the air selection (Changing the function setting)
NOTE
The factory setting is
“Enable automatic air
control”.
When the defogger switch is pressed, the air selection will automati
cally change to the
outside air position, even if the system is setto “Disable automatic air control”, in order to prevent windows from fogging up.
Air conditioning switch
NOTE
BK0211800US.book 10 ページ 2014年3月12日 水曜日 午後2時42分
Page 326 of 446
Automatic climate cont
rol air conditioner
Comfort controls 7-11
7
N00712200022
You can change the following functions to match your preference. Enable automatic ai
r conditioning control:
When the AUTO switch is pressed, or when the temperature control switch hasbeen set to the minimum temperature, the air conditioning switch is automatically controlled. Disable automatic air conditioning con- trol: The air conditioning switch is not auto- matically controlled,
unless the air condi-
tioning switch is used. Changing the settings Press the air conditioning switch for about10 seconds or longer. When the setting has changed, the system will beep and the indi
cator light will flash.
• When the setting has changed from enabled to disabled, the system will beep three times and the indicator light willflash three times. • When the setting has changed from dis- abled to enabled, the system will beeptwo times and the i
ndicator light will
flash three times. On vehicles equippe
d with Mitsubishi
Multi-Communication System, screen operations can also be used to change the setting. Refer to th
e separate owner’s
manual for details.
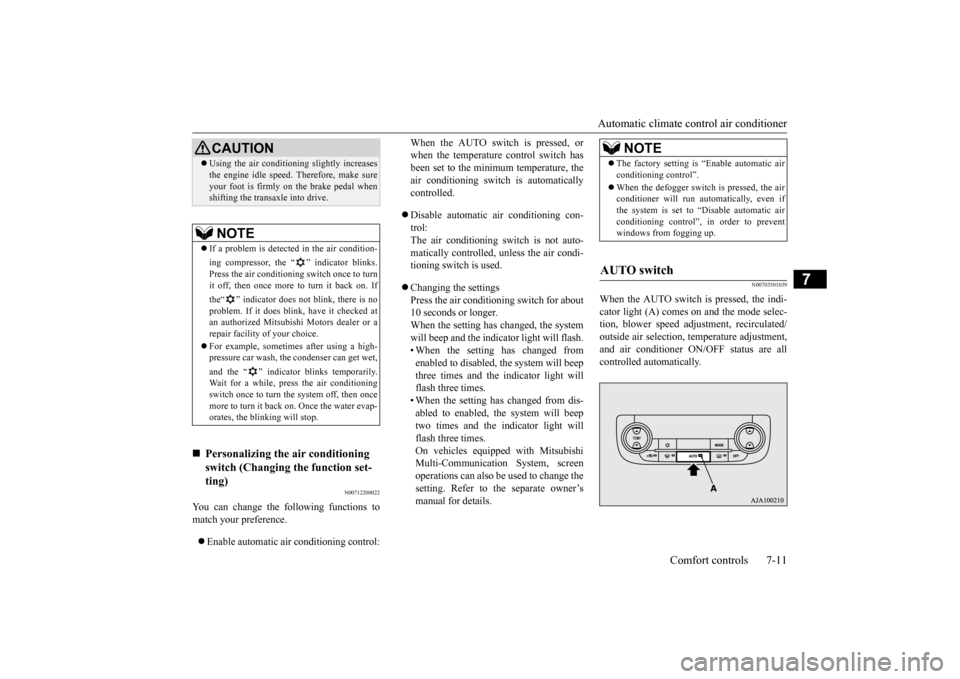
N00703501039
When the AUTO switch is pressed, the indi-cator light (A) comes on and the mode selec-tion, blower speed adju
stment, reci
rculated/
outside air selection, temperature adjustment, and air conditioner ON/
OFF status are all
controlled automatically.
CAUTION Using the air conditioni
ng slightly increases
the engine idle speed. Therefore, make sureyour foot is firmly on the brake pedal whenshifting the transaxle into drive.NOTE
If a problem is detect
ed in the air condition-
ing compressor, the “ ” indicator blinks. Press the air conditioning
switch once to turn
it off, then once more to turn it back on. If the“ ” indicator does not blink, there is no problem. If it does blink,
have it checked at
an authorized Mitsubish
i Motors dealer or a
repair facility of your choice. For example, sometimes after using a high- pressure car wash, the
condenser can get wet,
and the “ ” indicator blinks temporarily. Wait for a while, pres
s the air conditioning
switch once to turn the system off, then oncemore to turn it back on. Once the water evap-orates, the blinking will stop.
Personalizing the
air conditioning
switch (Changing the function set-ting)
NOTE
The factory setting is
“Enable automatic air
conditioning control”. When the defogger switch
is pressed, the air
conditioner will run au
tomatically, even if
the system is set to “Disable automatic airconditioning control”, in order to prevent windows from fogging up.
AUTO switch
BK0211800US.book 11 ページ 2014年3月12日 水曜日 午後2時42分