2015 MITSUBISHI OUTLANDER III tire pressure
[x] Cancel search: tire pressurePage 398 of 446

Tires
Vehicle care and maintenance 9-17
9
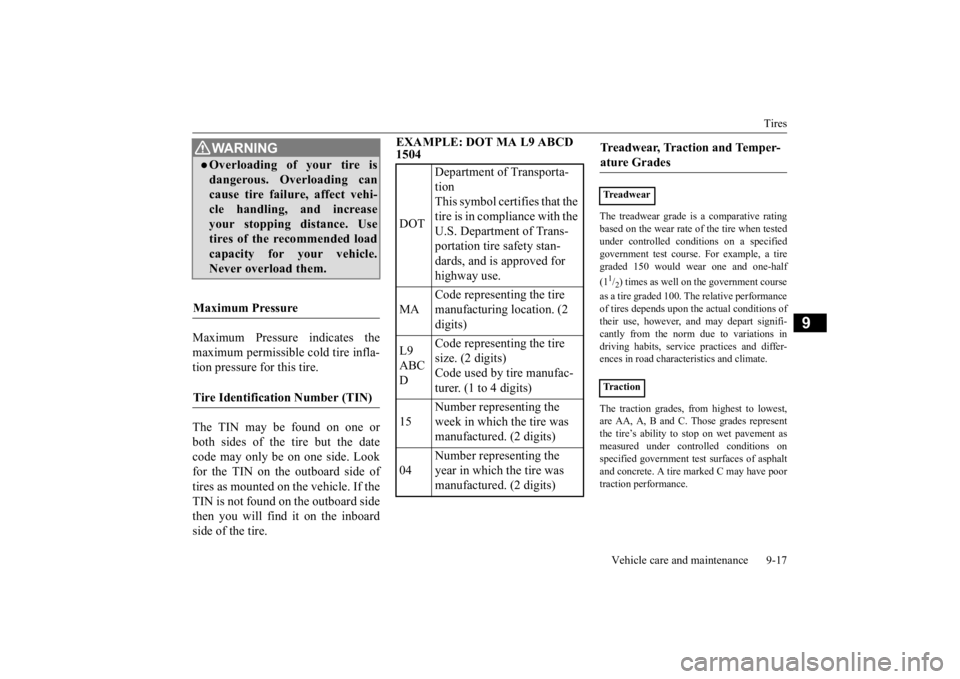
Maximum Pressure indicates the maximum permissible cold tire infla- tion pressure for this tire. The TIN may be found on one or both sides of the tire but the datecode may only be on one side. Look for the TIN on the outboard side of tires as mounted on the vehicle. If theTIN is not found on the outboard side then you will find it on the inboard side of the tire.
EXAMPLE: DOT MA L9 ABCD 1504
The treadwear grade is a comparative rating based on the wear rate of the tire when testedunder controlled conditions on a specified government test course. For example, a tire graded 150 would wear one and one-half (11/2) times as well on th
e government course
as a tire graded 100.
The relative performance
of tires depends upon th
e actual conditions of
their use, however, and may depart signifi-cantly from the norm due to variations in driving habits, service
practices and differ-
ences in road characteristics and climate. The traction grades, from highest to lowest, are AA, A, B and C. Those grades represent the tire’s ability to
stop on wet pavement as
measured under controlled conditions onspecified government te
st surfaces of asphalt
and concrete. A tire marked C may have poor traction performance.
WA R N I N GOverloading of your tire is dangerous. Overloading can cause tire failure, affect vehi- cle handling, and increaseyour stopping distance. Use tires of the recommended load capacity for your vehicle.Never overload them.
Maximum Pressure Tire Identification Number (TIN)
DOT
Department of Transporta- tion This symbol certifies that the tire is in compliance with the U.S. Department of Trans- portation tire safety stan- dards, and is approved for highway use.
MA
Code representing the tire manufacturing location. (2 digits)
L9 ABC D
Code representing the tire size. (2 digits) Code used by tire manufac-turer. (1 to 4 digits)
15
Number representing the week in which the tire was manufactured. (2 digits)
04
Number representing the year in which the tire was manufactured. (2 digits)
Treadwear, Traction and Temper-ature Grades Treadwear Traction
BK0211800US.book 17 ページ 2014年3月12日 水曜日 午後2時42分
Page 399 of 446

Tires 9-18 Vehicle care and maintenance
9
The temperature grades are A (the highest), B and C, representing the tire’s resistance to thegeneration of heat and
its ability to dissipate
heat when tested under controlled conditions on a specified indoor la
boratory test wheel.
Sustained high temper
ature can cause the
material of the tire to
degenerate and reduce
tire life, and excessive temperature can leadto sudden tire failure. The grade C corre- sponds to a level of performance which all passenger car tires must meet under the Fed- eral Motor Vehicle Safety Standard No. 109. Grades B and A represent higher levels ofperformance on the labora
tory test wheel than
the minimum required by law.
N00939300815
Proper tire inflation pres
sure is essential for
the safe and satisfactory operation of your vehicle. The wrong tire
pressure will cause
problems in three major areas: Safety Too little pressure increases flexing in the tire and can cause tire failure. Too muchpressure can cause a tire to lose its ability to cushion shock. Objects on the road and potholes could then cause tire damage thatmay result in tire failure.
Economy The wrong tire pressu
re can cause uneven
wear patterns in the tire tread. These abnormal wear patter
ns will reduce the
tread life, and the tire will have to bereplaced sooner. Too little pressure also
makes it harder for
the tire to roll, and this uses up more fuel. Ride comfort and vehicle stability The superior riding e
xperience built into
your vehicle partly depends on the correct tire pressure. Too much pressure gives an uncomfortable and ja
rring ride. Too little
pressure feels as if
your vehicle is slow to
respond. Unequal tire pressure
s can make steering
your vehicle uneven and unpredictable.
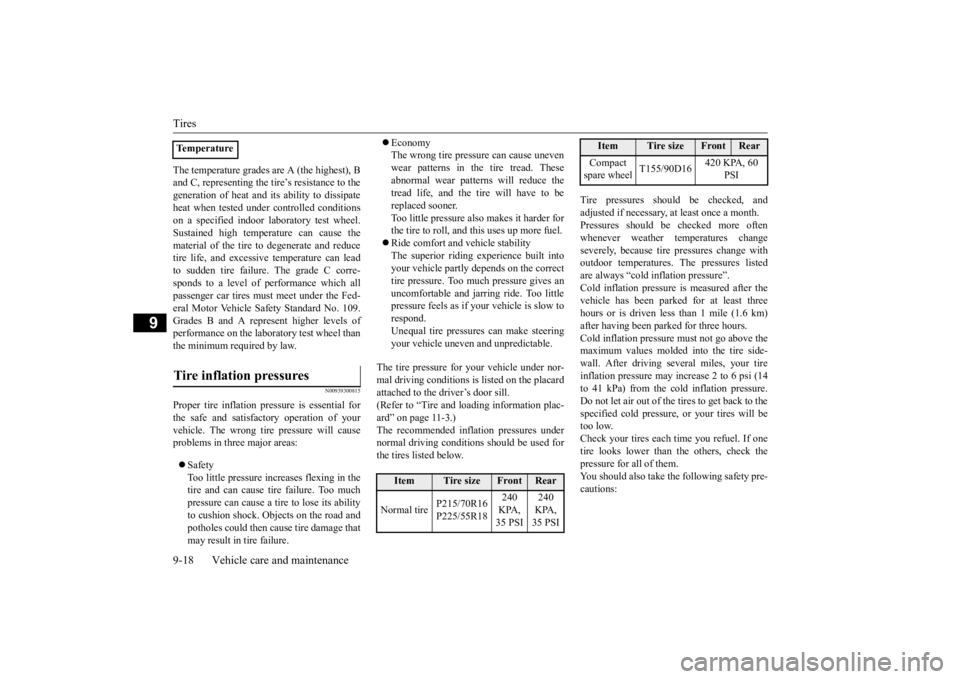
The tire pressure for your vehicle under nor- mal driving conditions is listed on the placard attached to the driver’s door sill.(Refer to “Tire and loading information plac- ard” on page 11-3.) The recommended infl
ation pressures under
normal driving conditions should be used for the tires listed below.
Tire pressures should be checked, and adjusted if necessary, at least once a month.Pressures should be checked more often whenever weather temperatures change severely, becaus
e tire pressures change with
outdoor temperatures. The pressures listed are always “cold in
flation pressure”.
Cold inflation pressure is measured after thevehicle has been parked
for at least three
hours or is driven less than 1 mile (1.6 km) after having been parked for three hours. Cold inflation pressure must not go above the maximum values molded into the tire side-wall. After driving seve
ral miles, your tire
inflation pressure may increase 2 to 6 psi (14 to 41 kPa) from the cold inflation pressure.Do not let air out of the tires to get back to the specified cold pressure, or your tires will be too low.Check your tires each time you refuel. If one tire looks lower than the others, check the pressure for all of them.You should also take the following safety pre- cautions:
TemperatureTire inflation pressures
Item
Tire size
Front
Rear
Normal tire
P215/70R16 P225/55R18
240 KPA, 35 PSI
240 KPA, 35 PSI
Compact spare wheel
T155/90D16
420 KPA, 60
PSI
Item
Tire size
Front
Rear
BK0211800US.book 18 ページ 2014年3月12日 水曜日 午後2時42分
Page 400 of 446

Tires
Vehicle care and maintenance 9-19
9
Keep your tires inflated to the recom- mended pressures. (See the tire and load-ing information placard attached to the driver’s door sill.) Stay within the recommended load limits. Make sure that the weight of any load in your vehicle is evenly distributed. Drive at safe speeds. After filling your tires to the correct pres- sure, check them for damage and air leaks. Be sure to reinstall the caps on the valve stems.
N00939600241
N00939700141
The following maintenance steps are recom- mended: Check tire pressures regularly. Have regular maintenance done on the wheel balance and front
and rear suspen-
sion alignment. Rotate your tires regularly as described in the “Tire rotation” se
ction on page 9-20.
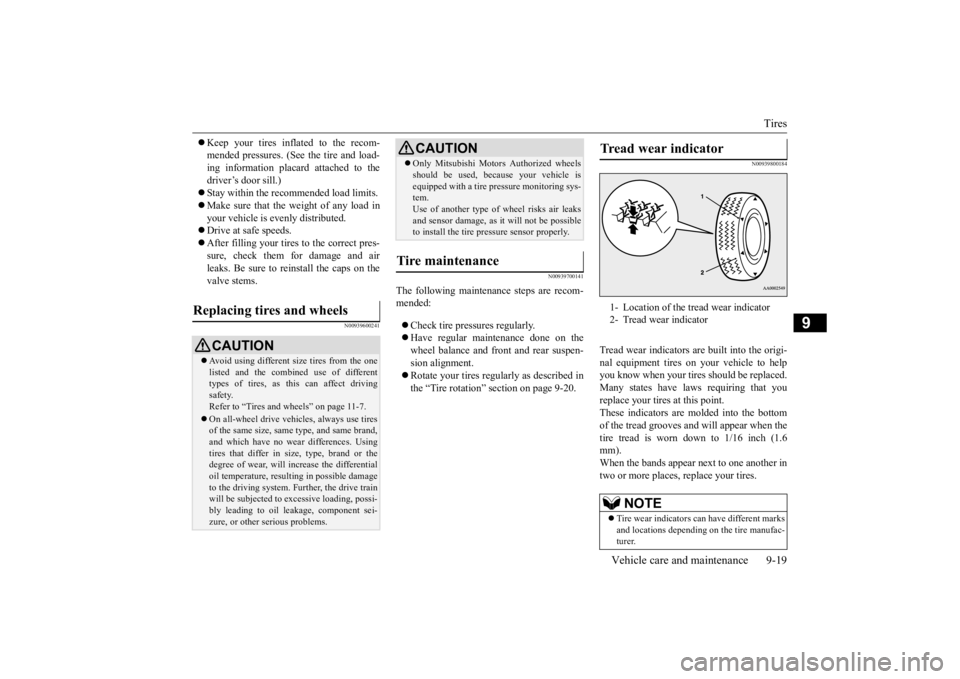
N00939800184
Tread wear indicators ar
e built into the origi-
nal equipment tires on
your vehicle to help
you know when your tires should be replaced. Many states have la
ws requiring that you
replace your tires at this point.These indicators are molded into the bottom of the tread grooves and will appear when the tire tread is worn down to 1/16 inch (1.6mm). When the bands appear next to one another in two or more places
, replace your tires.
Replacing tires and wheels
CAUTIONAvoid using different size tires from the one listed and the combined use of different types of tires, as this can affect driving safety.Refer to “Tires and wheels” on page 11-7. On all-wheel drive vehi
cles, always use tires
of the same size, same
type, and same brand,
and which have no wear differences. Using tires that differ in si
ze, type, brand or the
degree of wear, will increase the differential oil temperature, resulting in possible damage to the driving system. Further, the drive trainwill be subjected to ex
cessive loading, possi-
bly leading to oil leakage, component sei- zure, or other serious problems.
Only Mitsubishi Motors Authorized wheels should be used, beca
use your vehicle is
equipped with a tire pr
essure monitoring sys-
tem. Use of another type of
wheel risks air leaks
and sensor damage, as
it will not be possible
to install the tire pressure sensor properly.
Tire maintenance
CAUTION
Tread wear indicator 1- Location of the tread wear indicator 2- Tread wear indicator
NOTE
Tire wear indicators ca
n have different marks
and locations dependi
ng on the tire manufac-
turer.
BK0211800US.book 19 ページ 2014年3月12日 水曜日 午後2時42分
Page 402 of 446

Brake pedal free play
Vehicle care and maintenance 9-21
9
N00940101139 N00940300293
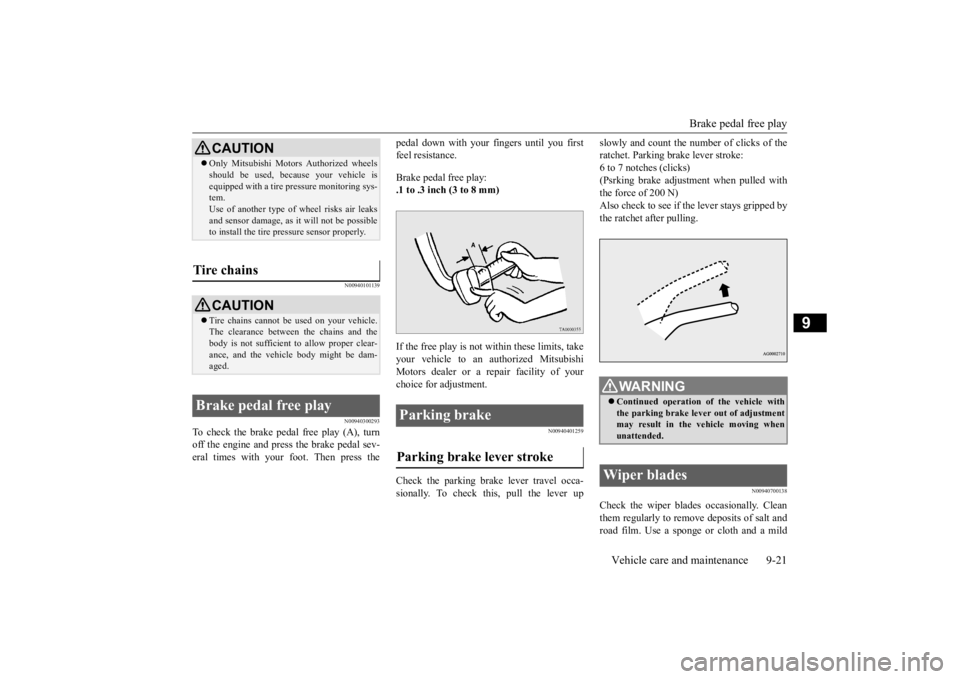
To check the brake pedal free play (A), turn off the engine and press the brake pedal sev- eral times with your
foot. Then press the
pedal down with your fingers until you first feel resistance. Brake pedal free play: .1 to .3 inch (3 to 8 mm) If the free play is not within these limits, take your vehicle to an authorized Mitsubishi Motors dealer or a repair facility of your choice for adjustment.
N00940401259
Check the parking brake lever travel occa- sionally. To check this, pull the lever up
slowly and count the number of clicks of the ratchet. Parking br
ake lever stroke:
6 to 7 notches (clicks) (Psrking brake adjustment when pulled with the force of 200 N)Also check to see if the lever stays gripped by the ratchet after pulling.
N00940700138
Check the wiper blades occasionally. Clean them regularly to rem
ove deposits of salt and
road film. Use a sponge or cloth and a mild
CAUTION Only Mitsubishi Motors Authorized wheels should be used, beca
use your vehicle is
equipped with a tire pr
essure monitoring sys-
tem. Use of another type of wheel risks air leaks and sensor damage, as it
will not be possible
to install the tire pressure sensor properly.
Tire chains
CAUTION Tire chains cannot be used on your vehicle. The clearance between the chains and the body is not sufficient
to allow proper clear-
ance, and the vehicle body might be dam- aged.
Brake pedal free play
Parking brake Parking brake lever stroke
WA R N I N G Continued operation
of the vehicle with
the parking brake leve
r out of adjustment
may result in the vehicle moving when unattended.
Wiper blades
BK0211800US.book 21 ページ 2014年3月12日 水曜日 午後2時42分
Page 444 of 446

Alphabetical index
12-5
12
5-53 Wheel lock
............................
5-22
, 5-57
Stop lights
Bulb capacity
.................................
9-30
Replacement
..................................
9-36
Storage spaces
..................................
5-213
Sun visors
........................................
5-209
Sunroof
..............................................
5-50
Super-all wheel control (S-AWC)
S-AWC control mode display
..........
5-79
S-AWC control mode switch
...........
5-78
S-AWC operation display
................
5-79
Supplemental Re
straint System
............
4-33
How the Supplemental Restraint System works
..........................................
4-35
Maintenance service
........................
4-47
T
Tail light
Bulb capacity
.................................
9-30
Replacement
..................................
9-36
Tank capacity
.....................................
11-7
Theft-alarm system
.............................
5-44
Time Setting
.......................................
7-44
Timing belt
........................................
9-24
Tire
...................................................
9-14
Inflation pressure
............................
9-18
Maintenance
...................................
9-19
Quality grading
...............................
10-2
Replacing tires and wheels
..............
9-19
Rotation
........................................
9-20
Size (tire and wheel)
.......................
11-7
Snow tires
.....................................
9-20
Tire and loading information placard 11-3Tire chains
.....................................
9-21
To change a tire
................................
8-6
Tread wear indicator
.......................
9-19
Tire pressure monitoring system
.........
5-114
Tools
...................................................
8-6
Storage
............................................
8-5
Towing
..............................................
8-14
Trailer towing
....................................
6-11
Transfer oil
................................
9-11
, 11-7
Turn signal light
Indicators
.....................................
5-166
Lever
...........................................
5-176
U
USB input terminal
............................
5-206
How to connect a USB memory device
....
5-206 How to connect an iPod
.................
5-207
V
Vanity mirror
....................................
5-209
Vanity mirror lights
Bulb capacity
.................................
9-32
Vehicle care precautions
.....................
9-39
Vehicle dimensions
.............................
11-4
Vehicle labeling
..................................
11-2
Vehicle preparation before driving
..........
6-4
Vehicle weights
..................................
11-5
Vents
...................................................
7-2
W
Warning lights
..................................
5-167
Washer
Fluid
.....................................
9-12
, 11-7
Rear window washer
.....................
5-182
Switch
.........................................
5-182
Washing
.............................................
9-40
Waxing
..............................................
9-41
Weights
.............................................
11-5
Wheel
Covers
...........................................
8-13
Specification
..................................
11-7
Wiper
Rear window wiper
.......................
5-182
Switch
.........................................
5-178
Wiper blades
..................................
9-21
BK0211800US.book 5 ページ 2014年3月12日 水曜日 午後2時42分