2015 MITSUBISHI OUTLANDER III turn signal
[x] Cancel search: turn signalPage 216 of 446

Multi Information display - Type 1
Features and controls 5-139
5
1. Press and hold the mu
lti information dis-
play switch (for about 2 seconds or more)to switch from the setting mode screen to the menu screen. Refer to “Changing th
e function settings”
on page 5-134. 2. Lightly press the multi information dis- play switch to select “ALARM” (rest timesetting). 3. Press and hold the mu
lti information dis-
play switch (for about 2 seconds or more) to display “ALARM” (rest time setting). 4. Lightly press the multi information dis-play switch to select the time until the dis- play appears. 5. Press and hold the mu
lti information dis-
play switch (for about 2 seconds or more) to change the setting to the selected time.
N00563501080
It is possible to cha
nge the turn signal sound.
1. Press and hold the multi information dis- play switch (for about 2 seconds or more)to switch from the setting mode screen to the menu screen. Refer to “Changing the function settings”on page 5-134. 2. Lightly press the multi information dis- play switch to sele
ct . (changing the
turn signal sound) 3. Press and hold the multi information dis- play switch (for about 2 seconds or more) to switch from 1 (turn-signal sound 1) to 2(turn-signal sound 2), or from 2 to 1. The setting changes to the selected turn signal sound.
N00563601049
It is possible to change the bar graph settingof the momentary fuel consumption display. 1. Press and hold the multi information dis- play switch (for about 2 seconds or more) to switch from the setting mode screen to the menu screen.Refer to “Changing the function settings” on page 5-134. 2. Lightly press the multi information dis- play switch to
select . (changing
the momentary fuel consumption display)
3. Press and hold the multi information dis- play switch (for about 2 seconds or more)to switch from ON (with the green bar graph) to OFF (without the green bar graph), or from OFF to ON.The setting changes to
the selected bar
graph setting.
N00557601204
All of the function settings can be returned to their factory settings. 1. Press and hold the multi information dis- play switch (for about 2 seconds or more) to switch from the setting mode screen to the menu screen.Refer to “Changing th
e function settings”
on page 5-134. 2. Lightly press the multi information dis-play switch to select “RESET” (return to the factory settings). 3. Press and hold the multi information dis-play switch (for about 5 seconds or more), the buzzer sounds and all of the function settings are returned to the factory set-tings.
NOTE
If the battery is disconnected, the memory of the unit setting is erased and is automatically set to the “OFF”. The drive time is reset when the ignition switch is in the “LOCK” or “OFF” position or the operation mode is in OFF.
Changing the turn signal sound
Changing the momentary fuel con- sumption display
Returning to the factory settings
NOTE
The factory settings
are as follows.
BK0211800US.book 139 ページ 2014年3月12日 水曜日 午後2時42分
Page 217 of 446
Multi Information display - Type 2 5-140 Features and controls
5
N00555001291
The multi information display displays the odometer, trip odometer, service reminder, fuel remaining, outside temperature, selectorlever position, averag
e fuel consumption,
driving range, etc. It is also possible to change elements such as the units used on the multi information dis-play.
• Average fuel consumption and average speed reset mode: A (Auto reset) • Fuel consumption display unit: mpg (US) or (L/100 km) • Temperature unit: °F (Fahrenheit) or {°C (Celsius)} • Display language: ENGLISH • Cooperative language
setting: A (language
cooperation: enabled) • Operation sounds: ON (Operation sound on) • “REST REMINDER” display: OFF• Turn signal sound: Turn signal sound 1 • Momentary fuel consumption with the green bar graph: ON
Multi Information display - Type 2
NOTE
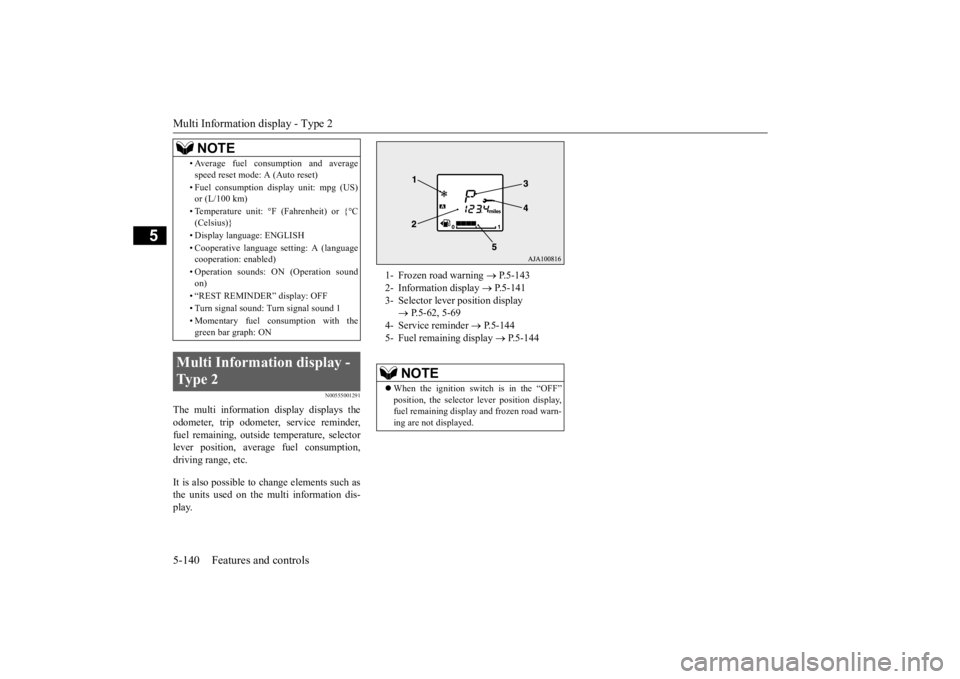
1- Frozen road warning
P.5-143
2- Information display
P.5-141
3- Selector lever
position display
P.5-62, 5-69
4- Service reminder
P.5-144
5- Fuel remaining display
P.5-144
NOTE
When the ignition switch is in the “OFF” position, the selector
lever position display,
fuel remaining display and frozen road warn-ing are not displayed.
BK0211800US.book 140 ページ 2014年3月12日 水曜日 午後2時42分
Page 225 of 446
Indicator light, warning light, and information screen display list (multi information display - Type 1) 5-148 Features and controls
5
N00557701058 N00557801307
Indicator light, warning light, an
d information screen display list (multi information display -
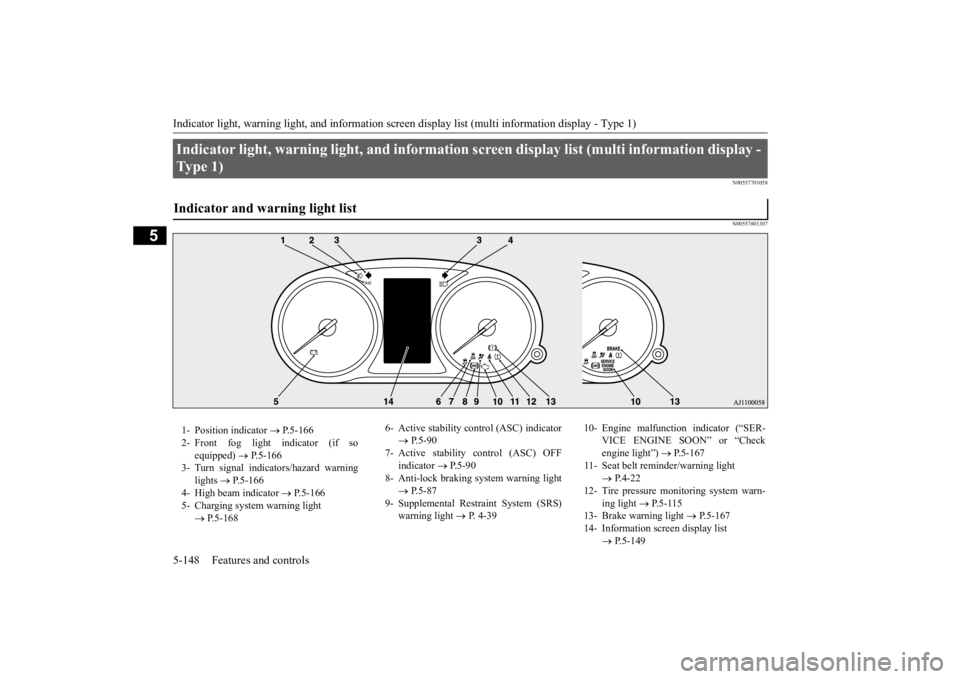
Ty p e 1 ) Indicator and warning light list 1- Position indicator
P.5-166
2- Front fog light indicator (if so
equipped)
P.5-166
3- Turn signal indicators/hazard warning
lights
P.5-166
4- High beam indicator
P.5-166
5- Charging system warning light
P.5-168
6- Active stability c
ontrol (ASC) indicator
P.5-90
7- Active stability control (ASC) OFF
indicator
P.5-90
8- Anti-lock braking
system warning light
P.5-87
9- Supplemental Restraint System (SRS)
warning light
P. 4-39
10- Engine malfunction indicator (“SER-
VICE ENGINE SOON” or “Check engine light”)
P.5-167
11- Seat belt reminder/warning light
P.4-22
12- Tire pressure monitoring system warn-
ing light
P.5-115
13- Brake warning light
P.5-167
14- Information screen display list
P.5-149
BK0211800US.book 148 ページ 2014年3月12日 水曜日 午後2時42分
Page 242 of 446

Indicator and warning light package (multi information display - Type 2)
Features and controls 5-165
5
N00519801875
Indicator and warning light package (mu
lti information display - Type 2)
1- Position indicator
P. 5-166
2- Front fog light indicator (if so
equipped)
P. 5-166
3- Turn signal indicators/hazard warning
lights
P. 5-166
4- Cruise control indicator
P. 5-92
5- Door-ajar warning light
P. 5-169
6- For details, refer to “Warning activa-
tion” on page 5-18. (if so equipped)
7- For details, refer to “Warning activa-
tion” on page 5-18. (if so equipped)
8- Electric power steering system warn-
ing light
P .5-88
9- High beam indicator
P. 5-166
10- ECO mode indicator
P .5-177
11- ECO Drive Assist
P. 5-166
12- Oil pressure warning light
P. 5-168
13- Charging system warning light
P. 5-168
14- High coolant temperature warning light
(red)
P. 5-169
15- Low coolant temperature indicator
(blue)
P. 5-166
16- Active stability control (ASC) indicator
P. 5 - 9 0
17- Active stability
control (ASC) OFF
indicator P. 5 - 9 0
18- Anti-lock braking system warning light
P. 5-87
19- Supplemental Restra
int System (SRS)
warning light
P. 4 - 3 9
20- Engine malfuncti
on indicator (“SER-
VICE ENGINE SOON” or “Check engine light”)
P. 5-167
21- Seat belt remi
nder/warning light
P. 4-22
22- Tire pressure monitoring system warn-
ing light
P. 5-115
23- Brake warning light
P. 5-167
24- Multi information display
P. 5-140
BK0211800US.book 165 ページ 2014年3月12日 水曜日 午後2時42分
Page 243 of 446
Indicators 5-166 Features and controls
5
N00519900127 N00520000216
The arrows will flash in time with the corre- sponding exterior turn signals when the turnsignal lever is used. Both arrows will flash
when the hazard warn-
ing flasher swit
ch is pressed.
N00520100086
A blue light comes on when the headlights are on high beam.
N00520200175
This indicator comes on while the front foglights are on.
N00551300026
This indicator light illuminates while the position lights are on.
N00575601020
This indicator comes on in blue while thecoolant temperature is low.
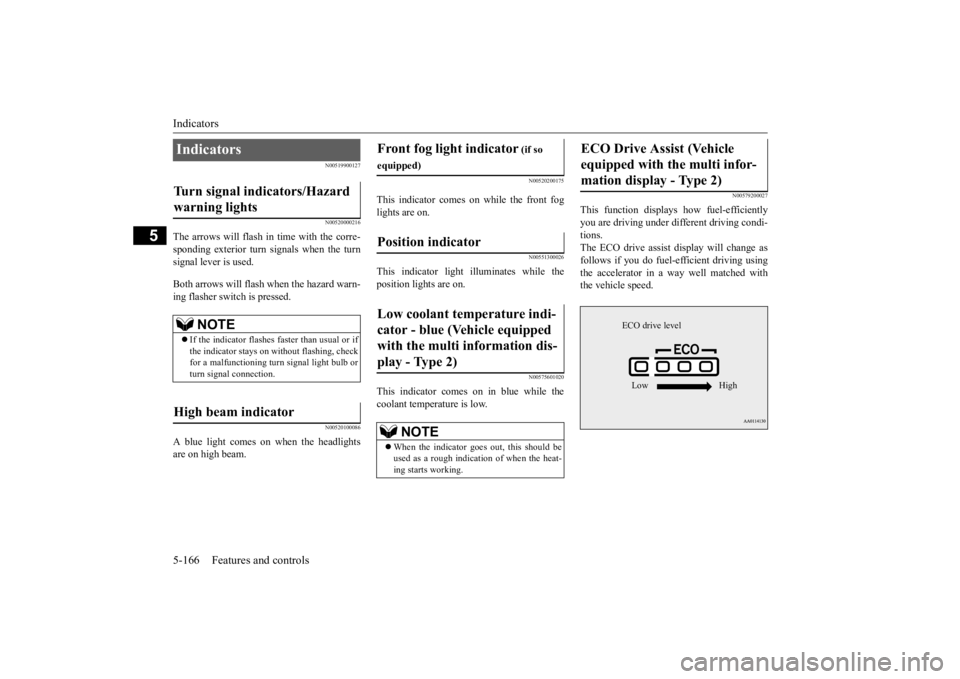
N00579200027
This function displays
how fuel-efficiently
you are driving under different driving condi- tions. The ECO drive assist di
splay will change as
follows if you do fuel-efficient driving using the accelerator in a way well matched with the vehicle speed.
Indicators Turn signal indicators/Hazard warning lights
NOTE
If the indicator flashes faster than usual or if the indicator stays on wi
thout flashing, check
for a malfunctioning turn signal light bulb orturn signal connection.
High beam indicator
Front fog light indicator
(if so
equipped)Position indicator Low coolant temperature indi- cator - blue (Vehicle equipped with the multi information dis- play - Type 2)
NOTE
When the indicator goes out, this should be used as a rough indication of when the heat-ing starts working.
ECO Drive Assist (Vehicle equipped with the multi infor-mation display - Type 2)
ECO drive level Low High
BK0211800US.book 166 ページ 2014年3月12日 水曜日 午後2時42分
Page 251 of 446
Combination headlights and dimmer switch 5-174 Features and controls
5
If the combination headlights and dimmer switch is turned to the “ ” or “ ” posi- tion again after the engine is turned off, the about 3-minute auto-cutout function described above will not
work. The lights (the
parking lights, tail li
ghts and license plate
lights) will stay on and will not turn off auto- matically.
N00549801236
[When using a key to start the engine]If the driver’s door is opened with the key inthe “OFF” or “LOCK” or “ACC” position or removed from the ignition switch while the
lights are on, the tone will sound to remind you to turn off the lights. [When using the F.A.S.T.-key to start the engine] If the driver’s door is opened with the opera- tion mode is put in OFF or ACC, or if theoperation mode is changed to OFF while the lights are on, the tone will sound to remind you to turn off the lights. In either case, the lights will turn off automat- ically and so will the tone. Or you can turn the light switch to the “OFF” position to stopthe tone.
N00549901178
To change the headlights from high beam to low beam and vice vers
a, pull the turn signal
lever to (1). Switch the headlights to lowbeam as a courtesy whenever there are oncoming vehicles, or when there is traffic moving ahead of you. An illuminated bluelight in the instrument
cluster indicates when
the headlights are on high beam.
N00550001209
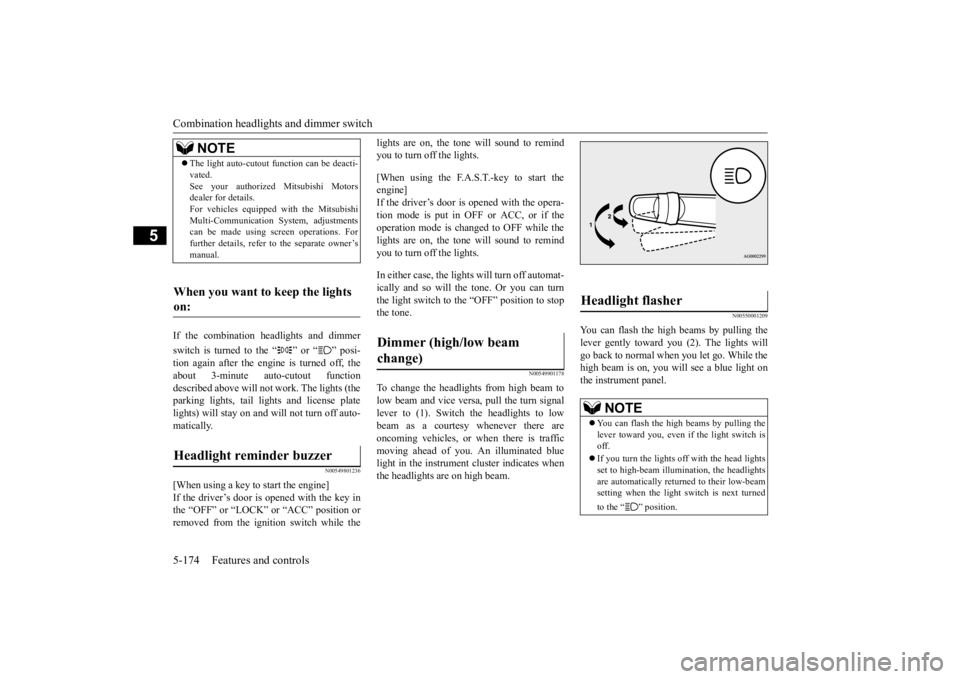
You can flash the high beams by pulling the lever gently toward you (2). The lights will go back to normal when you let go. While the high beam is on, you will
see a blue light on
the instrument panel.
NOTE
The light auto-cutout
function can be deacti-
vated.See your authorized Mitsubishi Motorsdealer for details. For vehicles equipped
with the Mitsubishi
Multi-Communication System, adjustmentscan be made using sc
reen operations. For
further details, refer to the separate owner’s manual.
When you want to keep the lights on: Headlight reminder buzzer
Dimmer (high/low beam change)
Headlight flasher
NOTE
You can flash the high beams by pulling the lever toward you, even if the light switch is off. If you turn the lights off with the head lights set to high-beam illumin
ation, the headlights
are automatically returned to their low-beamsetting when the light
switch is next turned
to the “ ” position.
BK0211800US.book 174 ページ 2014年3月12日 水曜日 午後2時42分
Page 252 of 446
Combination headlights and dimmer switch
Features and controls 5-175
5
N00563201117
This function turns on
the front side-marker
and parking lights for
about 30 seconds after
the UNLOCK button on the remote controltransmitter is pressed when the combination headlights and dimmer switch is in the “OFF” or “AUTO” position (f
or vehicles equipped
with the automatic light control). On vehicles equipped with the automatic light control (except for vehicles e
quipped with LDW), the
welcome light functi
on will operate only
when it is dark outside the vehicle.
N00547301110
This function turns on the headlights in thelow beam setting for a
bout 30 seconds after
the ignition switch is turned to the “OFF” or “LOCK” position or the operation mode is put in OFF. 1. Turn the combination headlights and dim- mer switch to the “OFF” or “AUTO” position (for vehicles
equipped with the
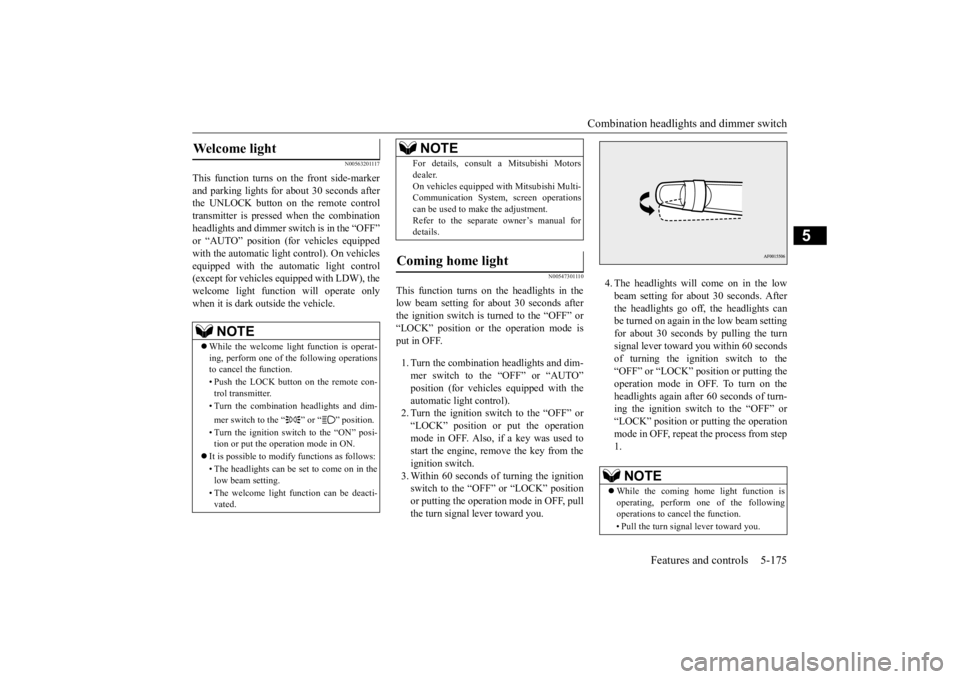
automatic light control).2. Turn the ignition switch to the “OFF” or “LOCK” position or put the operation mode in OFF. Also, if a key was used tostart the engine, remove the key from the ignition switch. 3. Within 60 seconds of turning the ignitionswitch to the “OFF” or “LOCK” position or putting the operation mode in OFF, pull the turn signal lever toward you.
4. The headlights will come on in the low beam setting for about 30 seconds. After the headlights go off, the headlights canbe turned on again in
the low beam setting
for about 30 seconds by pulling the turn signal lever toward you within 60 secondsof turning the ignition switch to the “OFF” or “LOCK” position or putting the operation mode in OFF. To turn on the headlights again after 60 seconds of turn- ing the ignition switch to the “OFF” or“LOCK” position or putting the operation mode in OFF, repeat
the process from step
1.
Welcome light
NOTE
While the welcome light
function is operat-
ing, perform one of the following operations to cancel the function. • Push the LOCK button on the remote con- trol transmitter. • Turn the combination headlights and dim- mer switch to the “ ” or “ ” position. • Turn the ignition switch to the “ON” posi- tion or put the opera
tion mode in ON.
It is possible to modify functions as follows: • The headlights can be set to come on in the low beam setting. • The welcome light fu
nction can be deacti-
vated.
For details, consult a Mitsubishi Motorsdealer.On vehicles equipped
with Mitsubishi Multi-
Communication System, screen operations can be used to ma
ke the adjustment.
Refer to the separate
owner’s manual for
details.
Coming home light
NOTE
NOTE
While the coming home light function is operating, perform one of the following operations to canc
el the function.
• Pull the turn signal lever toward you.
BK0211800US.book 175 ページ 2014年3月12日 水曜日 午後2時42分
Page 253 of 446
Headlight leveling swit
ch (if so equipped)
5-176 Features and controls
5
N00537101115
The direction of the headlight beam (the direction in which the light shines) altersaccording to the number of people and the load in the vehicle. Lo
wer the headlight angle
if it is too high due to the number of peopleand/or the load in the vehicle so that the head- lights’ glare does not distract the drivers of approaching vehicles. First set the light switch to the “ ” position, then turn the headlight leveling switch knob to lower the
beam. The greater the number on the head- light leveling switch knob, the lower thebeam will point. Set the switch to the appropriate position so that the headlight beam is level with the road.
N00522601529
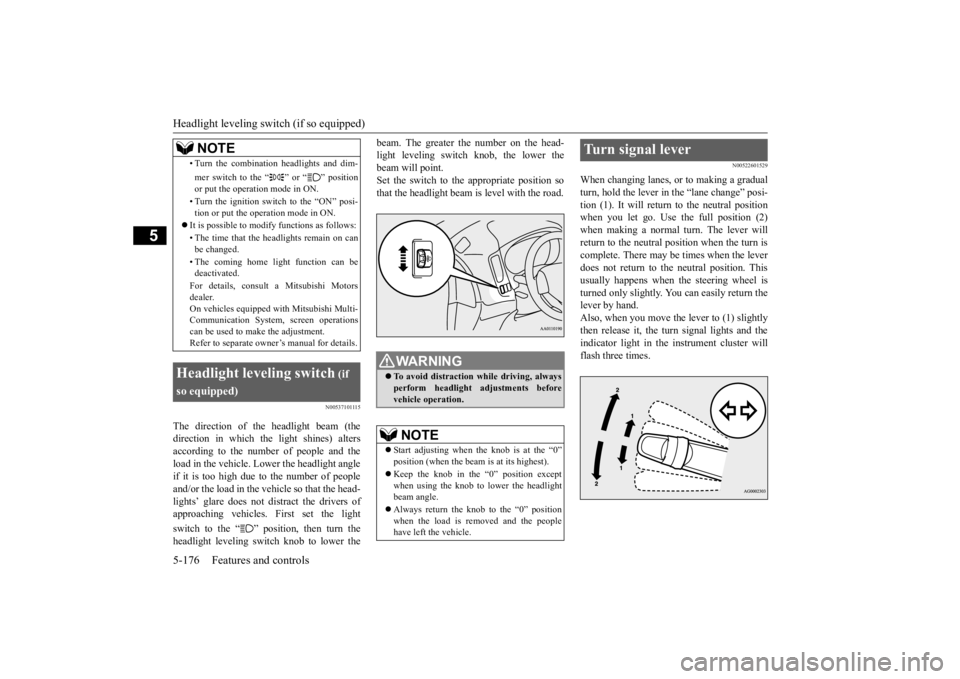
When changing lanes, or to making a gradual turn, hold the lever in the “lane change” posi- tion (1). It will return
to the neutral position
when you let go. Use the full position (2) when making a normal turn. The lever will return to the neutral position when the turn iscomplete. There may be times when the lever does not return to the neutral position. This usually happens when the steering wheel is turned only slightly. You can easily return the lever by hand.Also, when you move the lever to (1) slightly then release it, the turn signal lights and the indicator light in the instrument cluster willflash three times.
• Turn the combination headlights and dim- mer switch to the “ ” or “ ” position or put the operation mode in ON. • Turn the ignition switch to the “ON” posi- tion or put the operation mode in ON.
It is possible to modify functions as follows: • The time that the he
adlights remain on can
be changed. • The coming home light function can be deactivated. For details, consult a Mitsubishi Motors dealer. On vehicles e
quipped with Mitsubishi Multi-
Communication System, screen operations can be used to ma
ke the adjustment.
Refer to separate owne
r’s manual for details.
Headlight leveling switch
(if
so equipped)
NOTE
WA R N I N G To avoid distraction while driving, always perform headlight
adjustments before
vehicle operation.NOTE
Start adjusting when the knob is at the “0” position (when the beam
is at its highest).
Keep the knob in the “0” position except when using the knob to lower the headlightbeam angle. Always return the knob to the “0” position when the load is removed and the people have left
the vehicle.
Turn signal lever
BK0211800US.book 176 ページ 2014年3月12日 水曜日 午後2時42分