2015 MITSUBISHI LANCER door lock
[x] Cancel search: door lockPage 115 of 434

Sunroof (if so equipped) 5-46 Features and controls
5
N00549000127
When this switch is in the lock mode, the main switch for passenger door window and the sub switch cannot be used to open or close the door window, and the main switch
will open or close only the driver’s door win- dow. To unlock the switch, press it again.
N00551400014
Wind buffeting can be described as the per- ception of pressure on the ears or a booming or rumbling sound. Your vehicle may exhibitwind buffeting when driving with one or both
rear door windows down or partially opened. This is a normal occurrence that can be mini- mized. If the buffeting occurs with the rear door windows open, open the front door win-dows as well as the rear door windows to minimize the condition.
N00511000656
The sunroof can be opened and closed with the ignition switch in the “ON” position.
NOTE
The safety mechanism can be activated if the driving conditions or other circumstances cause the door window to be subjected to a physical shock similar to that caused by trapped hand or head. If the safety mechanism is activated 3 or more times consecutively, the safety mecha-nism is deactivated and normal closing of the door window will be aborted. Use the following method to return to normaloperation. 1. If the door window is open, repeatedly pull up the power window switch to fully close the door window. 2. With fully closing the window, release the switch and then pull up the switch again for about 1 second.
Lock switch
1- Lock 2- UnlockWA R N I N G Before driving with a child in the vehicle, be sure to lock the window switch to makeit inoperative. Children tampering with the switch could easily trap their hands or heads in the window.
What to do if you hear wind buffeting when driving
Sunroof
(if so equipped)
WA R N I N G Do not stick your head, hands or anything else in the sunroof opening. Before operating the sunroof, make sure that nothing can be trapped (head, hands, fingers, etc.). Never leave a child (or other person who is incapable of safely operating the sunroof switch) alone in the vehicle.
BK0210300US.bo
ok 46 ページ 2014年4月8日 火曜日 午前10時46分
Page 116 of 434

Sunroof (if so equipped)
Features and controls 5-47
5
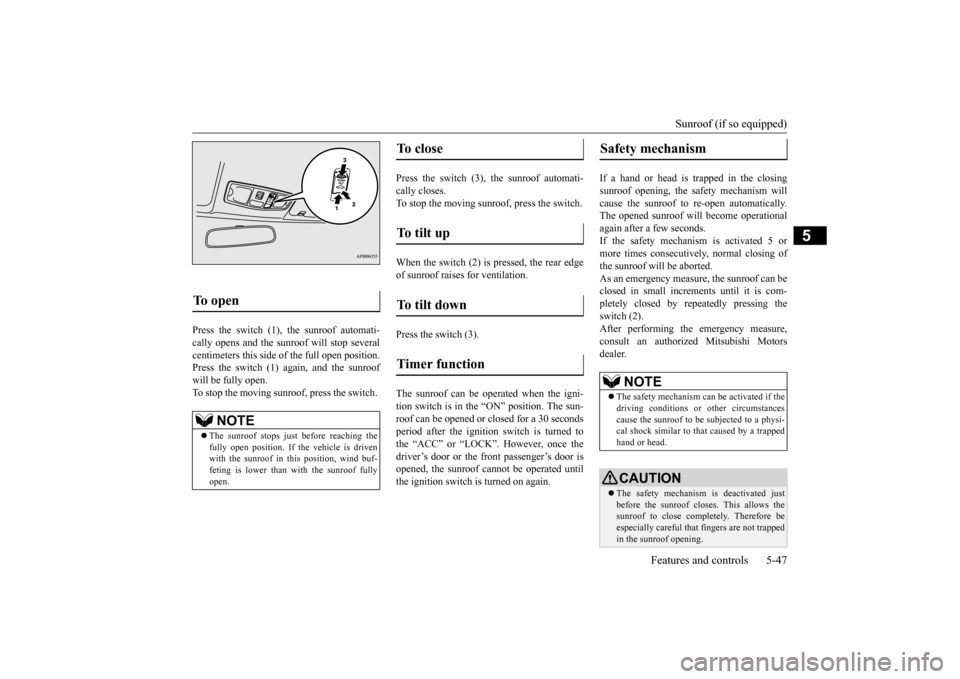
Press the switch (1), the sunroof automati- cally opens and the sunroof will stop several centimeters this side of the full open position. Press the switch (1) again, and the sunroofwill be fully open.To stop the moving sunroo
f, press the switch.
Press the switch (3), the sunroof automati- cally closes.To stop the moving sunroof, press the switch. When the switch (2) is pressed, the rear edge of sunroof raises for ventilation. Press the switch (3). The sunroof can be oper
ated when the igni-
tion switch is in the “ON” position. The sun- roof can be opened or closed for a 30 secondsperiod after the ignition
switch is turned to
the “ACC” or “LOCK”. However, once the driver’s door or the front passenger’s door isopened, the sunroof cannot be operated until the ignition switch is turned on again.
If a hand or head is trapped in the closing sunroof opening, the safety mechanism willcause the sunroof to re-open automatically. The opened sunroof will become operational again after a few seconds.If the safety mechanism is activated 5 or more times consecutively, normal closing of the sunroof will be aborted.As an emergency measure, the sunroof can beclosed in small increments until it is com- pletely closed by repeatedly pressing the switch (2).After performing the emergency measure, consult an authorized Mitsubishi Motors dealer.
To open
NOTE
The sunroof stops just before reaching the fully open position. If the vehicle is driven with the sunroof in this position, wind buf- feting is lower than with the sunroof fullyopen.
To close
To tilt up
To tilt down
Timer function
Safety mechanism
NOTE
The safety mechanism can be activated if the driving conditions or other circumstances cause the sunroof to be subjected to a physi-cal shock similar to that caused by a trapped hand or head.CAUTION The safety mechanism is deactivated just before the sunroof closes. This allows the sunroof to close completely. Therefore beespecially careful that fingers are not trapped in the sunroof opening.
BK0210300US.bo
ok 47 ページ 2014年4月8日 火曜日 午前10時46分
Page 202 of 434

Indicator light, warning light, an
d information screen display list Features and controls 5-133
5
You have forgotten to turn off the lights.
Refer to “Light auto-cutout function (headlights and other lights)” on page 5-149.
The theft-alarm system is operating.
Refer to “Theft-alarm system” on page 5-42.
After turning off the engine, an attempt was made to open the driver’s door with the ignition switch in any position other than “LOCK” (PUSH OFF).
Turn the ignition switch to the “LOCK” (PUSH OFF) position. Refer to “Ignition switch return reminder system” on page 5-37.
An attempt was made to lock all the doors and the trunk lid with the ignition switch in any position other than “LOCK” (PUSH OFF).
Turn the ignition switch to the “LOCK” (PUSH OFF) position.Refer to “Ignition switch turn-off reminder system” on page 5-20.
Screen type 1
Screen type 2
Cause
Do this (Reference)
BK0210300US.book
133 ページ 2014年4月8日 火曜日 午前10時46分
Page 206 of 434

Indicator light, warning light, an
d information screen display list Features and controls 5-137
5
The brake fluid level is low. There is a fault in the brake system.
Park the vehicle in a safe place and con- tact an authorized Mitsubishi Motors dealer or a repair facility of your choice for assistance. Refer to “Brake warning display” on page 5-145.
There is a fault in the Anti-lock braking system.
Avoid sudden braking and high-speed driving, park the vehicle in a safe place, and take corrective measures. Refer to “Anti-lock braking system warning light/display” on page 5-92.
The tire pressure in one of the tires (except spare tire) is low.
Refer to “Tire Pressure Monitoring Sys- tem” on page 5-102.
There is a fault in the Tire Pressure Monitoring System.
Refer to “Tire Pressure Monitoring Sys- tem” on page 5-102.
One of the doors or the trunk lid is not completely closed. The open door or open trunk lid is dis- played.
Close the door or trunk lid. Refer to “Door ajar warning display (With ignition switch in the “OFF” position)” on page 5-114.
Screen type1
Screen type 2
Cause
Do this (Reference)
BK0210300US.book
137 ページ 2014年4月8日 火曜日 午前10時46分
Page 218 of 434

Combination headlights and dimmer switch
Features and controls 5-149
5
N00532601607
If the ignition key is turned to “LOCK” or “ACC” position or removed from the ignition switch and the driver’s door is opened with the combination headlights and dimmer switch in the “ ” or “ ” [When using a key to start the engine] • If the driver’s door is opened after the key is removed from the ignition switch, a high-pitched constant tone will soundto remind you to turn off the lights. • If the driver’s door is opened with the key in the ignition switch, a low-pitchedtone will sound to remind you to remove the key. [When using the F.A.S.T.-key to start the engine]• If the ignition switch is turned to the “LOCK” position and the driver’s door is opened, a high-pitched constantbuzzer will sound to remind you to turn off the lights. • If the ignition switch is turned to anyposition other than “LOCK” and the driver’s door is opened, a low-pitched constant buzzer will sound to remindyou to return the ignition switch.
If the ignition switch is turned to “LOCK” or “ACC” position with the driver’s door closed and the combination headlights and dimmer switch in the “ ” or “ ”minutes and then turn off automatically.
If the combination headlights and dimmer switch is turned to the “ ” or “ ” posi- tion again after the engine is turned off, the about 3 minutes auto-cutout functiondescribed above will not work. The lights (the parking lights, tail lights and license plate lights) will stay on and will not turn off auto-matically.
Parking, tail, front and rear side- marker lights, license plate and instrument panel lights on Headlights and other lights on
NOTE
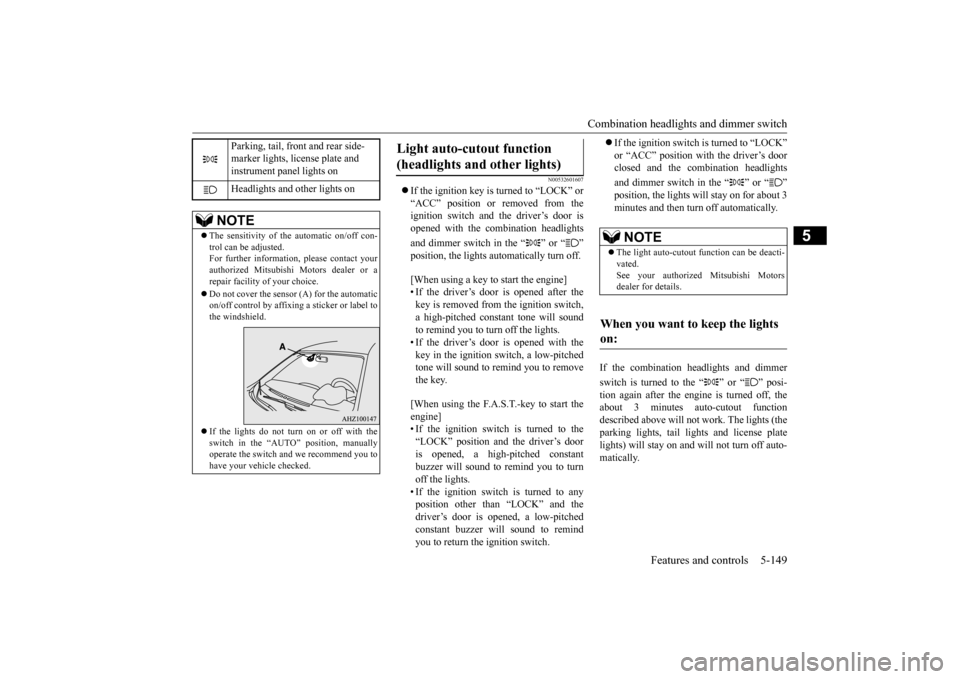
The sensitivity of the automatic on/off con- trol can be adjusted.For further information, please contact your authorized Mitsubishi Motors dealer or a repair facility of your choice. Do not cover the sensor (A) for the automatic on/off control by affixing a sticker or label tothe windshield. If the lights do not turn on or off with the switch in the “AUTO” position, manually operate the switch and we recommend you to have your vehicle checked.
Light auto-cutout function (headlights and other lights)
NOTE
The light auto-cutout function can be deacti- vated. See your authorized Mitsubishi Motorsdealer for details.
When you want to keep the lights on:
BK0210300US.book
149 ページ 2014年4月8日 火曜日 午前10時46分
Page 219 of 434

Combination headlights and dimmer switch 5-150 Features and controls
5
N00549800196
If the driver’s door is opened with the key in the “LOCK” or “ACC” position or removed
from the ignition switch while the lights are on, the buzzer will sound to remind you to turn off the lights. If the driver’s door is opened with the ignition switch in the “LOCK” or “ACC” position, or if the ignition switch is moved to the “LOCK” position while the lights are on, thebuzzer will sound to remind you to turn offthe lights. In either case, the lights and buzzer will turn off automatically. Or you can turn the combination headlightsand dimmer switch to the “OFF” position to stop the buzzer.
N00549900155
To change the headlights from high beam to low beam and vice versa, pull the turn signallever to fully toward you (1). Switch the headlights to low beam as a courtesy when- ever there are oncoming vehicles, or whenthere is traffic moving ahead of you. An illu- minated blue light in the instrument cluster
indicates when the headlights are on high beam.
N00550000198
You can flash the high beams by pulling thelever gently toward you (2). The lights will go back to normal when you let go. While the high beam is on, you will see a blue light onthe instrument panel.
NOTE
When the engine is started using the key, if the driver’s door is opened and the key is removed, the headlight reminder buzzer intermittently emits a high-pitched sound. If the key is still in the ignition the keyreminder buzzer intermittently emits a low- pitched sound. The buzzer stops when the driver’s door isclosed. (A warning is also displayed in the multi-information display.) operation function, if the driver’s door is opened and the ignition switch is in the“LOCK” position, the headlight reminder buzzer intermittently emits a high-pitched sound. If the ignition sw
itch is in any posi-
tion other than “LOCK”, the ignition switch on reminder buzzer intermittently emits a low-pitched sound.The buzzer stops when the driver’s door is closed. (A warning is also displayed in the multi-information display.)
When using a key to start the engine
When using the F.A.S.T.-key to start the engine Dimmer (high/low beam change)
Headlight flasher
NOTE
You can flash the high beams by pulling the lever toward you, even if the combination headlights and dimmer switch is off.
BK0210300US.book
150 ページ 2014年4月8日 火曜日 午前10時46分
Page 250 of 434

USB input terminal (if so equipped)
Features and controls 5-181
5
Connect the equipment into an outlet on a circuit different from that to which the receiver is connected. Consult the dealer or an experienced radio/TV technician for help.
ICES Notice: This Class B digital apparatus complies with Canadian ICES-003.
N00566401093 N00566701070
You can connect your USB memory device or iPod
* to play music files stored in the USB
memory device or iPod. The following explains how to connect andremove a USB memory device or iPod.
N00566800074
1. Park your vehicle in a safe place and turnthe ignition switch to the “LOCK” posi-tion.2. Open the USB input terminal cover (A) in the glove compartment. 3. Connect a commercially available USB connector cable (C)
to the USB memory
device (B).
4. Connect the USB connector cable (C) to the USB input terminal (D).
Enrollment commands
USB input terminal
(if so
equipped)
* :“iPod” is a registered trademark of Apple Inc. in the United States and other coun-tries.
How to connect a USB memory device
WA R N I N G An open glove compartment door can cause a serious injury or death to the front passenger in an accident, even if the pas- senger is wearing his/her seat belt. Alwayskeep the glove compartment door closed when driving.
BK0210300US.book
181 ページ 2014年4月8日 火曜日 午前10時46分
Page 251 of 434

USB input terminal (if so equipped) 5-182 Features and controls
5
5. To remove the USB connector cable, turn the ignition switch to the “LOCK” posi- tion first and perform the installation stepsin reverse.
N00566900020
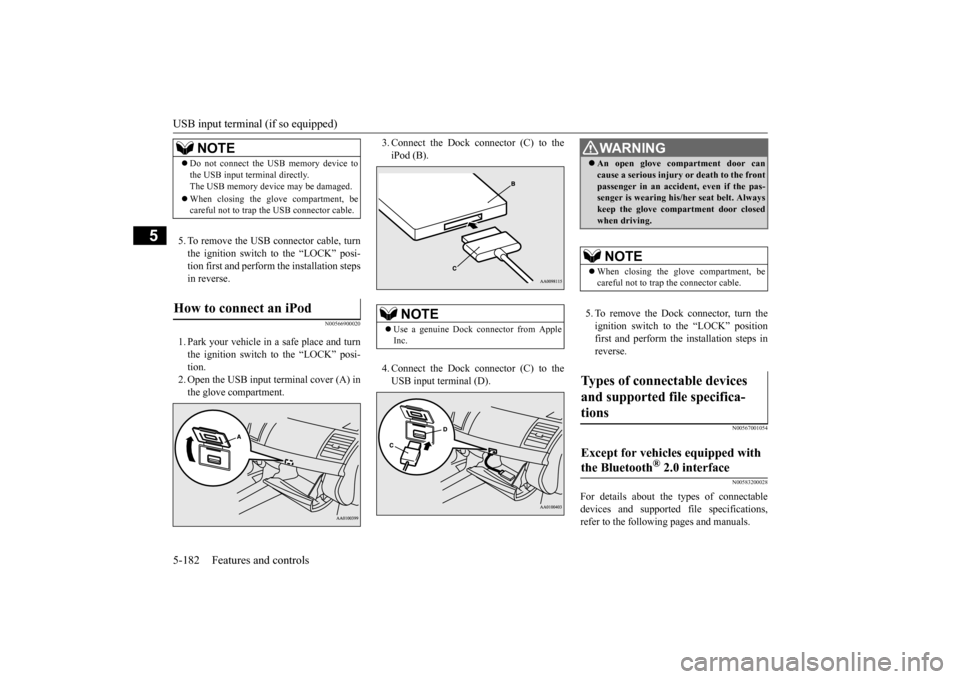
1. Park your vehicle in a safe place and turnthe ignition switch to the “LOCK” posi- tion. 2. Open the USB input terminal cover (A) inthe glove compartment.
3. Connect the Dock connector (C) to the iPod (B). 4. Connect the Dock connector (C) to the USB input terminal (D).
5. To remove the Dock connector, turn the ignition switch to the “LOCK” position first and perform the installation steps inreverse.
N00567001054 N00583200028
For details about the types of connectable devices and supported file specifications, refer to the following pages and manuals.
NOTE
Do not connect the USB memory device to the USB input terminal directly. The USB memory device may be damaged. When closing the glove compartment, be careful not to trap the USB connector cable.
How to connect an iPod
NOTE
Use a genuine Dock connector from Apple Inc.
WA R N I N G An open glove compartment door can cause a serious injury or death to the front passenger in an accident, even if the pas- senger is wearing his/her seat belt. Always keep the glove compartment door closedwhen driving. NOTE
When closing the glove compartment, be careful not to trap the connector cable.
Types of connectable devices and supported file specifica- tions
Except for vehicles equipped with the Bluetooth
® 2.0 interface
BK0210300US.book
182 ページ 2014年4月8日 火曜日 午前10時46分