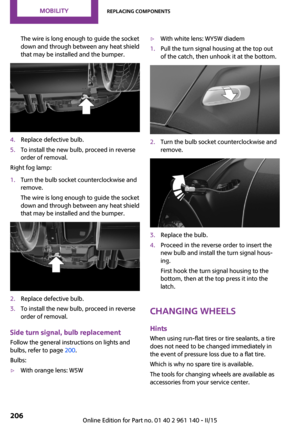
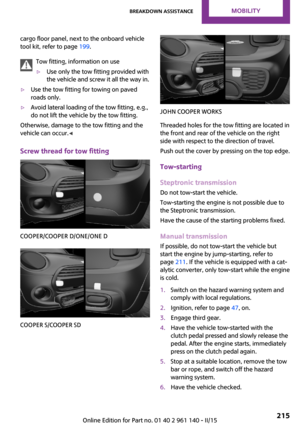
Page 129 of 251

2.Pull the cargo cover out of the brackets on
the left and right.
Installation
1.Slide the cover forward horizontally into the
two side brackets until it audibly latches.2.Attach the left and right retaining straps at
the tailgate.
Enlarging the trunk
General information
The trunk can be enlarged by folding down the
rear seat backrest.
The rear seat backrest is divided into two parts
at a ratio of 60 to 40. The backrest of the left
seat is connected to the backrest center sec‐
tion.
Hints Danger of jamming
Before folding down the rear seat back‐
rests, ensure that the area of movement of the
backrests is clear. Ensure that no one is located
in or reaches into the area of movement of the
rear seat backrests. Otherwise, injury or dam‐
age may result. ◀
Ensuring the stability of the child seat
When installing child restraint systems,
make sure that the child seat is securely fas‐
tened to the backrest of the seat. Angle and
headrest of the backrest might need to be ad‐
justed or possibly be removed. Make sure that
all backrests are securely locked. Otherwise the
stability of the child seat can be affected, and
there is an increased risk of injury because of
unexpected movement of the seat backrest. ◀
Using the middle safety belt
If the middle safety belt in the rear is
used, the larger side of the backrest must be
locked. Otherwise, the safety belt will not have
a restraining effect. ◀
Push the headrests down, before the
backrests are folded down
Before folding down the rear seat backrests,
make sure that the corresponding headrest is
pushed all the way down; otherwise, damage
may result. ◀
Folding down rear seat backrest The rear seat backrests can be folded down
from the front or from the trunk.
Before the backrest is folded down, hook the
corresponding safety belt into the safety belt
on the side.
Pull the release upward and fold the backrest
toward the front.
Folding back the backrest Ensure that the lock is securely engaged
When you fold back the backrest make
sure that it locks in place. When this happens
the red warning field on the seat disappears.
Otherwise transported cargo could shoot into
the car's interior during braking or evasive ma‐
neuvers and endanger occupants. ◀
Seite 125Interior equipmentCONTROLS125
Online Edition for Part no. 01 40 2 961 140 - II/15
Page 130 of 251
Fold up the backrest and press it into the latch.
Make sure that the safety belt is not pinched.
Adjusting the backrest tilt Do not install any child restraint systems
When the backrests are set at steeper po‐
sition, do not install any child restraint systems
on the backrest; otherwise, their protective ef‐
fect may be impaired. ◀
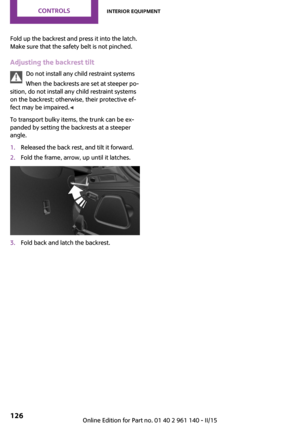
To transport bulky items, the trunk can be ex‐
panded by setting the backrests at a steeper
angle.1.Released the back rest, and tilt it forward.2.Fold the frame, arrow, up until it latches.3.Fold back and latch the backrest.Seite 126CONTROLSInterior equipment126
Online Edition for Part no. 01 40 2 961 140 - II/15
Page 131 of 251

Storage compartmentsVehicle features and op‐
tions
This chapter describes all standard, country-
specific and optional features offered with the
series. It also describes features that are not necessarily available in your car, e. g., due to
the selected options or country versions. This
also applies to safety-related functions and sys‐
tems. The respectively applicable country provi‐
sions must be observed when using the respec‐
tive features and systems.
Hints No loose objects in the car's interior
Do not stow any objects in the car's inte‐
rior without securing them; otherwise, they
may present a danger to occupants e.g., during
braking and evasive maneuvers. ◀
Do not place anti-slip mats on the dash‐
board
Do not place anti-slip mats on the dashboard.
The mat materials could damage the dash‐
board. ◀
Overview
The following storage compartments are avail‐
able in the vehicle interior:▷Storage compartment in front of the cu‐
pholders.▷Storage tray in the center console.▷Glove compartment on the front passenger
side.▷Storage compartment above the glove
compartment.▷Storage compartment in the center arm‐
rest.▷Compartments in the doors.▷Pockets on the backrests of the front seats.
Glove compartment
Note Close the glove compartment again im‐mediately
Close the glove compartment immediately after
use while driving; otherwise, injury may occur
during accidents. ◀
Opening
Pull the handle.
The light in the glove compartment switches
on.
Closing Fold up the cover.
Seite 127Storage compartmentsCONTROLS127
Online Edition for Part no. 01 40 2 961 140 - II/15
Page 132 of 251

Storage compartment
above the glove com‐
partment
Note Immediately close the storage compart‐
ment
Close the storage compartment immediately
after use while driving; otherwise, injury may
occur during accidents. ◀
Opening
Press the lower edge of the cover.
Closing Push the cover back into the original position.
Compartments in the
doors
Do not stow any breakable objects
Do not store any breakable objects, e. g.
glass bottles, in the compartments, or there is
an increased risk of injury in the event of an ac‐
cident. ◀
Center armrest
The center armrest contains a storage compart‐
ment.
Opening
Press button, arrow 1, and open center arm
rest upward, arrow 2.
Adjusting the height
Press button, arrow 1, and swing center arm
rest upward or downward into the desired
height, arrow 2.
Cupholders
Hints Shatter-proof containers and no hot
drinks
Use light and shatter-proof containers and do
not transport hot drinks. Otherwise, there is the
increased danger of injury in an accident. ◀
Unsuitable containers
Do not forcefully push unsuitable contain‐
ers into the cupholders. This may result in dam‐
age. ◀
Seite 128CONTROLSStorage compartments128
Online Edition for Part no. 01 40 2 961 140 - II/15
Page 133 of 251

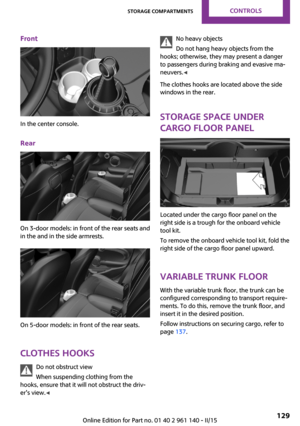
Front
In the center console.Rear
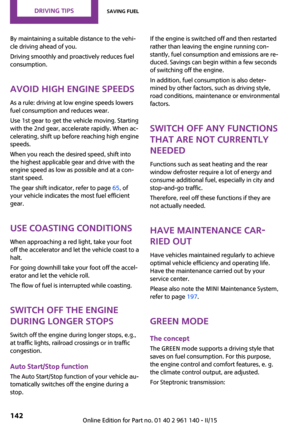
On 3-door models: in front of the rear seats and
in the and in the side armrests.
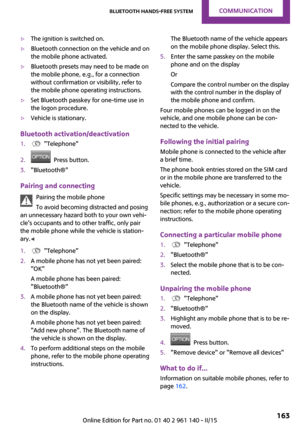
On 5-door models: in front of the rear seats.
Clothes hooks Do not obstruct view
When suspending clothing from the
hooks, ensure that it will not obstruct the driv‐
er's view. ◀
No heavy objects
Do not hang heavy objects from the
hooks; otherwise, they may present a danger
to passengers during braking and evasive ma‐
neuvers. ◀
The clothes hooks are located above the side
windows in the rear.
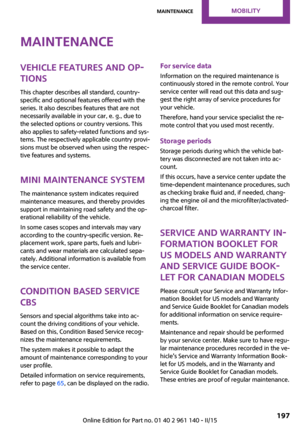
Storage space under
cargo floor panel
Located under the cargo floor panel on the
right side is a trough for the onboard vehicle
tool kit.
To remove the onboard vehicle tool kit, fold the
right side of the cargo floor panel upward.
Variable trunk floor
With the variable trunk floor, the trunk can be
configured corresponding to transport require‐
ments. To do this, remove the trunk floor, and
insert it in the desired position.
Follow instructions on securing cargo, refer to
page 137.
Seite 129Storage compartmentsCONTROLS129
Online Edition for Part no. 01 40 2 961 140 - II/15
Page 134 of 251

Removing the cargo floor panel
On 5-door models: To change the position of
the cargo floor panel, first fold up the rear part
of the cargo floor panel.
Grasp the cargo floor panel in the rear and fold
slightly upward. Next, pull it backward from the
supports.
The cargo floor panel can be removed from the
trunk above the tail lamps.
Lower position
▷Larger objects can be transported.▷Space for smaller objects remains between
the fixed and variable trunk floor.Folded up position
The variable cargo floor panel may not be
used as a partition net to separate the
trunk and the vehicle interior.▷Only use the variable cargo floor in the
folded-up position when the backrests are
folded up and locked.▷Always secure cargo against shifting, using
straps, belts and lashing eyes, e.g.
If you don't follow these precautions you can
endanger vehicle's occupants and damage the
cargo floor during braking. ◀
Fold up the cargo floor panel in the lower posi‐
tion and push it behind the locks on the left
and right, arrow. You've reached the maximum
cargo height.
Upper position
▷With the backrests folded down, a long, flat
loading surface is produced.▷On 3-door models:
Maximum load in this position:
330 lbs/150 kg.Seite 130CONTROLSStorage compartments130
Online Edition for Part no. 01 40 2 961 140 - II/15
Page 135 of 251
▷On 5-door models:
Maximum load in this position:
441 lbs/200 kg.▷Space for objects remains between the
fixed and variable trunk floor.Seite 131Storage compartmentsCONTROLS131
Online Edition for Part no. 01 40 2 961 140 - II/15
Page 136 of 251
DRIVE ME.
Online Edition for Part no. 01 40 2 961 140 - II/15