2015 MINI COUPE ROADSTER CONVERTIBLE winter tires
[x] Cancel search: winter tiresPage 116 of 231
Things to remember when drivingVehicle equipmentThis chapter describes all series equipment as
well as country-specific and special equipment
offered for this model series. Therefore, it also
describes equipment that may not be found in
your vehicle, for instance due to the selected
special equipment or the country version. This
also applies to safety-related functions and sys‐
tems.
When using the features and systems described
here, adhere to local regulations.
Breaking-in period
General information Moving parts need to be broken in to adjust to
each other.
The following instructions will help achieve a
long vehicle life and good economy.
Engine and differential
Always obey all official speed limits.
Up to 1,200 miles/2,000 kmDrive at various engine and vehicle speeds, but
do not exceed:▷For a gasoline engine, 4,500 rpm and
100 mph/160 km/h.
Avoid full-throttle operation and use of the
transmission's kickdown mode for the initial
miles.
From 1,200 miles/2,000 km
The engine and vehicle speed can gradually be
increased.
Tires
Due to technical factors associated with their
manufacture, tires do not achieve their full trac‐
tion potential until after an initial breaking-in
period.
Drive conservatively for the first
200 miles/300 km.
Brake system Brakes require an initial break-in period of ap‐
prox. 300 miles/500 km to achieve optimized
contact and wear patterns between brake pads
and discs. Drive cautiously during this break-in
period.
Clutch
The clutch requires an initial break-in period of
approx. 300 miles/500 km to function at an op‐
timal level.
During this break-in period, engage the clutch
gently.
Following part replacement
The same breaking in procedures should be ob‐
served if any of the components mentioned
above have to be renewed in the course of the
vehicle's operating life.
General driving notes
Ground clearance Ensure adequate ground clearance
Ensure adequate ground clearance, e.g.,
when driving into underground garages, when
driving over curbs, or when driving in winter;
otherwise, damage may occur to the vehicle. ◀Seite 114DRIVING TIPSThings to remember when driving114
Online Edition for Part no. 01 40 2 961 029 - II/15
Page 165 of 231

Uniform Tire Quality Grading
Quality grades can be found where applicable
on the tire sidewall between tread shoulder
and maximum section width. For example:
Treadwear 200 Traction AA
Temperature A
DOT Quality Grades
Treadwear
Traction AA A B C
Temperature A B C
Conform to Federal Safety Requirements
All passenger car tires must conform to
Federal Safety Requirements in addition to
these grades. ◀
Treadwear
The treadwear grade is a comparative rating based on the wear rate of the tire when tested
under controlled conditions on a specified gov‐
ernment test course. For example, a tire graded
150 would wear one and one-half (1 1/2) times
as well on the government course as a tire graded 100. The relative performance of tires
depends upon the actual conditions of their
use, however, and may depart significantly
from the norm due to variations in driving hab‐
its, service practices and differences in road
characteristics and climate.
Traction The traction grades, from highest to lowest, are
AA, A, B, and C.
Those grades represent the tire's ability to stop
on wet pavement as measured under control‐
led conditions on specified government test
surfaces of asphalt and concrete. A tire marked
C may have poor traction performance.
The traction grade assigned to this tire is based
on straight-ahead braking traction tests, and
does not include acceleration, cornering, hy‐
droplaning, or peak traction characteristics.Temperature
The temperature grades are A, the highest, B,
and C, representing the tire's resistance to the
generation of heat and its ability to dissipate
heat when tested under controlled conditions
on a specified indoor laboratory test wheel.
Sustained high temperature can cause the ma‐
terial of the tire to degenerate and reduce tire
life, and excessive temperature can lead to
sudden tire failure. The grade C corresponds to
a level of performance which all passenger car
tires must meet under the Federal Motor Vehi‐
cle Safety Standard No. 109. Grades B and A
represent higher levels of performance on the
laboratory test wheel than the minimum re‐
quired by law.
Temperature grade for this tire
The temperature grade for this tire is es‐
tablished for a tire that is properly inflated and
not overloaded. Excessive speed, underinfla‐
tion, or excessive loading, either separately or
in combination, can cause heat buildup and
possible tire failure. ◀
RSC – Run-flat tires
The symbol identifying run-flat tires is a circle
with the letters RSC on the sidewall, refer to
page 166.
M+S
Winter and all-season tires.
These have better winter properties than
summer tires.
XL Designation for specially reinforced tires.
Tire treadSummer tires
The tread depth should not be less than
0.12 in/3 mm, although European legislation,Seite 163Wheels and tiresMOBILITY163
Online Edition for Part no. 01 40 2 961 029 - II/15
Page 166 of 231
for example, requires a minimum tread depth
of only 0.063 in/1.6 mm. At tread depths less
than 0.12 in/3 mm, there is a great danger of
hydroplaning even in low water depths and at
raised speeds.
Winter tires The suitability of winter tires for winter driving
is reduced noticeably when their tread depth
becomes less than 0.16 in/4 mm.
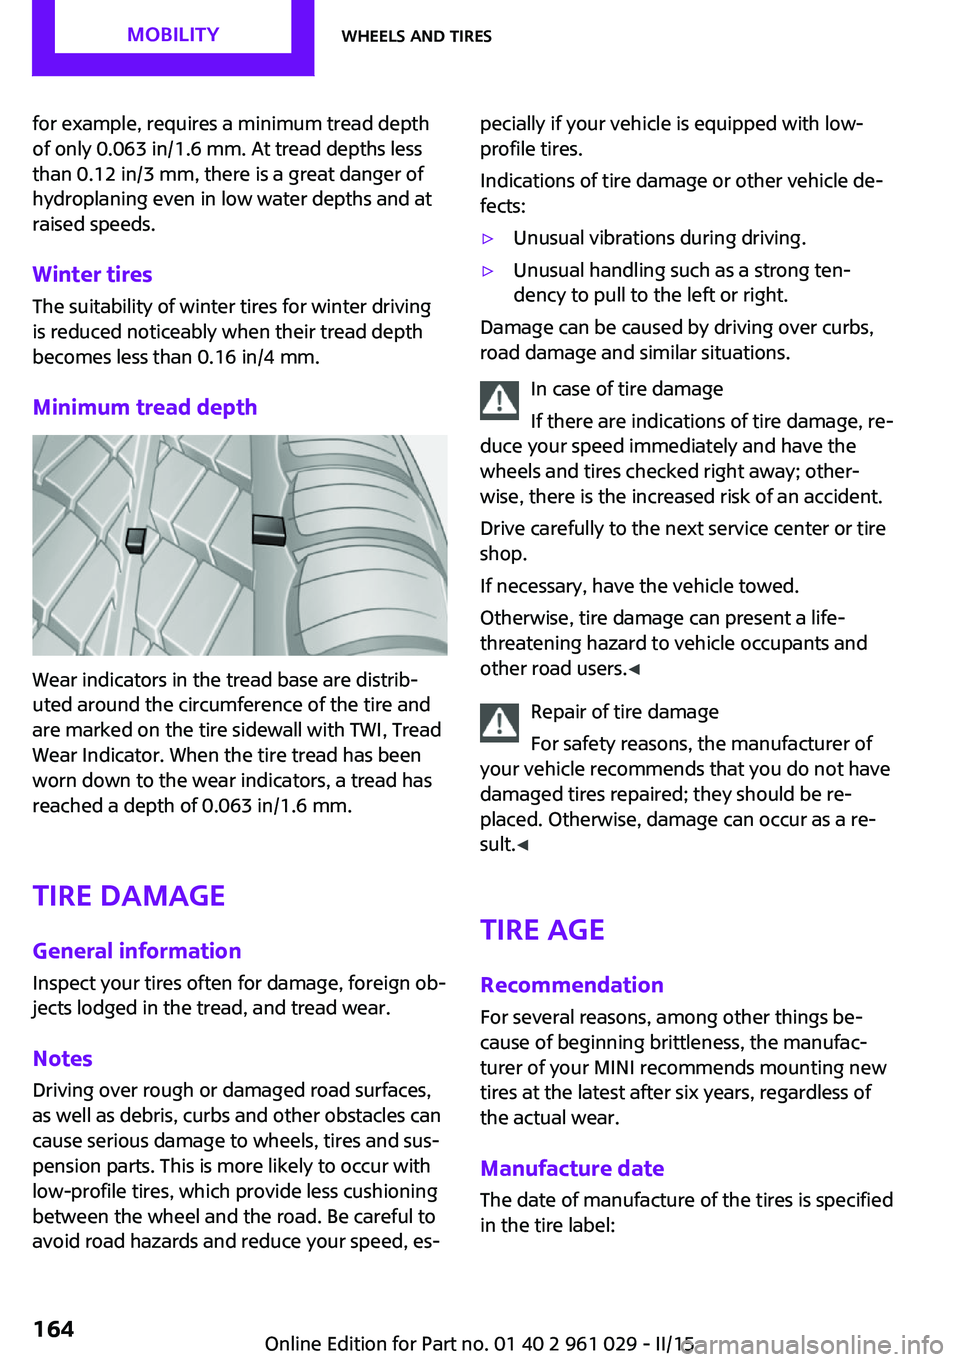
Minimum tread depth
Wear indicators in the tread base are distrib‐
uted around the circumference of the tire and
are marked on the tire sidewall with TWI, Tread
Wear Indicator. When the tire tread has been
worn down to the wear indicators, a tread has
reached a depth of 0.063 in/1.6 mm.
Tire damage
General information Inspect your tires often for damage, foreign ob‐
jects lodged in the tread, and tread wear.
Notes
Driving over rough or damaged road surfaces,
as well as debris, curbs and other obstacles can
cause serious damage to wheels, tires and sus‐
pension parts. This is more likely to occur with
low-profile tires, which provide less cushioning
between the wheel and the road. Be careful to
avoid road hazards and reduce your speed, es‐
pecially if your vehicle is equipped with low-
profile tires.
Indications of tire damage or other vehicle de‐
fects:▷Unusual vibrations during driving.▷Unusual handling such as a strong ten‐
dency to pull to the left or right.
Damage can be caused by driving over curbs,
road damage and similar situations.
In case of tire damage
If there are indications of tire damage, re‐
duce your speed immediately and have the
wheels and tires checked right away; other‐
wise, there is the increased risk of an accident.
Drive carefully to the next service center or tire
shop.
If necessary, have the vehicle towed.
Otherwise, tire damage can present a life-
threatening hazard to vehicle occupants and
other road users. ◀
Repair of tire damage
For safety reasons, the manufacturer of
your vehicle recommends that you do not have
damaged tires repaired; they should be re‐
placed. Otherwise, damage can occur as a re‐
sult. ◀
Tire age RecommendationFor several reasons, among other things be‐
cause of beginning brittleness, the manufac‐
turer of your MINI recommends mounting new
tires at the latest after six years, regardless of
the actual wear.
Manufacture date The date of manufacture of the tires is specified
in the tire label:
Seite 164MOBILITYWheels and tires164
Online Edition for Part no. 01 40 2 961 029 - II/15
Page 167 of 231
DOT … 0315: the tire was manufactured in the
3rd week of 2015.
Changing wheels and
tires
Mounting Information on mounting tires
Have mounting and balancing performed
only by a service center or tire specialist.
If this work is not carried out properly, there is
the danger of subsequent damage and related
safety hazards. ◀
Wheel and tire combination
Information on the right wheel and tire combi‐
nation and rim version for your vehicle can be
obtained from the service center.
Incorrect wheel and tire combinations impair
the function of a variety of systems such as ABS
or DSC.
To maintain good handling and vehicle re‐
sponse, use only tires with a single tread con‐
figuration from a single manufacturer.
Following tire damage, have the original wheel
and tire combination remounted on the vehicle
as soon as possible.
Approved wheels and tires
The manufacturer of your vehicle recom‐
mends that you use only wheels and tires that
have been approved for your particular vehicle
model.
For example, despite having the same official
size ratings, variations can lead to body contact
and with it, the risk of severe accidents.
The manufacturer of your vehicle cannot evalu‐
ate non-approved wheels and tires to deter‐
mine if they are suited for use, and therefore
cannot ensure the operating safety of the vehi‐
cle if they are mounted. ◀Wheels with electronics for TPM Tire
Pressure Monitor
When mounting new tires or changing from
summer to winter tires or vice versa, only use
wheels with TPM electronics; otherwise, the
Tire Pressure Monitor will not be able to detect
a flat tire, refer to page 86. Your service center
will be glad to advise you.
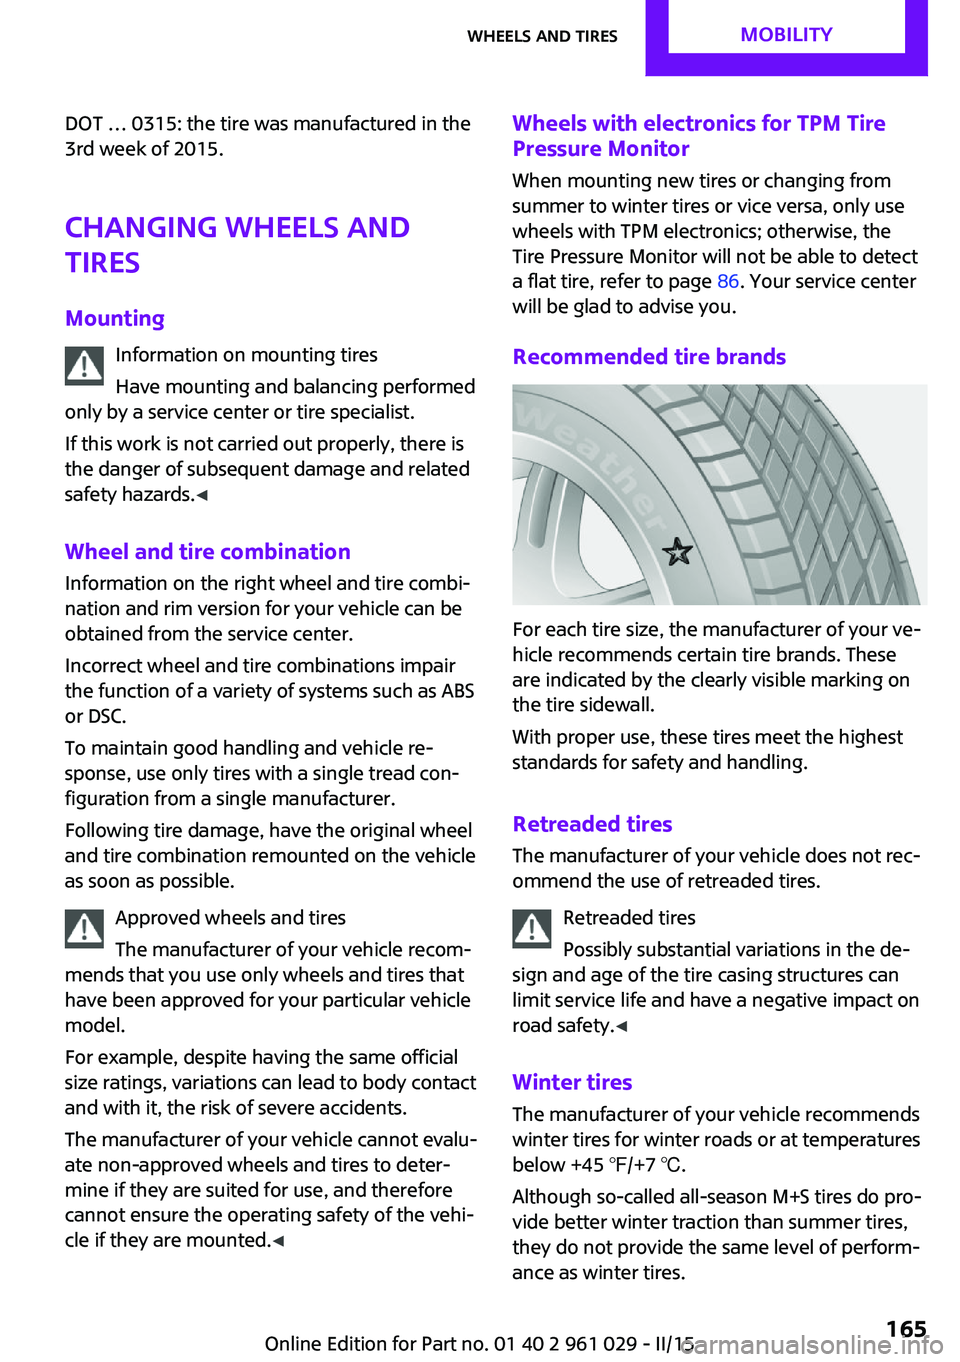
Recommended tire brands
For each tire size, the manufacturer of your ve‐
hicle recommends certain tire brands. These
are indicated by the clearly visible marking on
the tire sidewall.
With proper use, these tires meet the highest
standards for safety and handling.
Retreaded tires
The manufacturer of your vehicle does not rec‐
ommend the use of retreaded tires.
Retreaded tires
Possibly substantial variations in the de‐
sign and age of the tire casing structures can
limit service life and have a negative impact on
road safety. ◀
Winter tires The manufacturer of your vehicle recommends
winter tires for winter roads or at temperatures
below +45 ℉/+7 ℃.
Although so-called all-season M+S tires do pro‐
vide better winter traction than summer tires,
they do not provide the same level of perform‐
ance as winter tires.
Seite 165Wheels and tiresMOBILITY165
Online Edition for Part no. 01 40 2 961 029 - II/15
Page 168 of 231
Maximum speed of winter tires
If the maximum speed of the vehicle is higher
than the permissible speed for the winter tires,
then display a corresponding sign in the field of
vision. You can obtain this sign from the tire
specialist or from your service center.
Maximum speed for winter tires
Do not exceed the maximum speed for
the winter tires; otherwise, tire damage and ac‐
cidents can occur. ◀
Run-flat tires When mounting new tires or changing fromsummer to winter tires or vice versa, use run-
flat tires for your own safety. Also, a compact
wheel is not available in case of a flat tire. Your
service center will be glad to advise you.
Rotating wheels between axles
Different wear patterns occur on the front and
rear axles, depending on the individual condi‐
tions of use.
To ensure even wear on the tires, the wheels
can be rotated between the axles. Your service
center will be glad to advise you.
After changing the tires, check the tire inflation
pressure and correct it if necessary.
Storage Store wheels and tires in a cool, dry place with
as little exposure to light as possible.
Always protect tires against all contact with oil,
grease and fuels.
Do not exceed the maximum tire inflation pres‐
sure indicated on the side wall of the tire.Run-flat tires
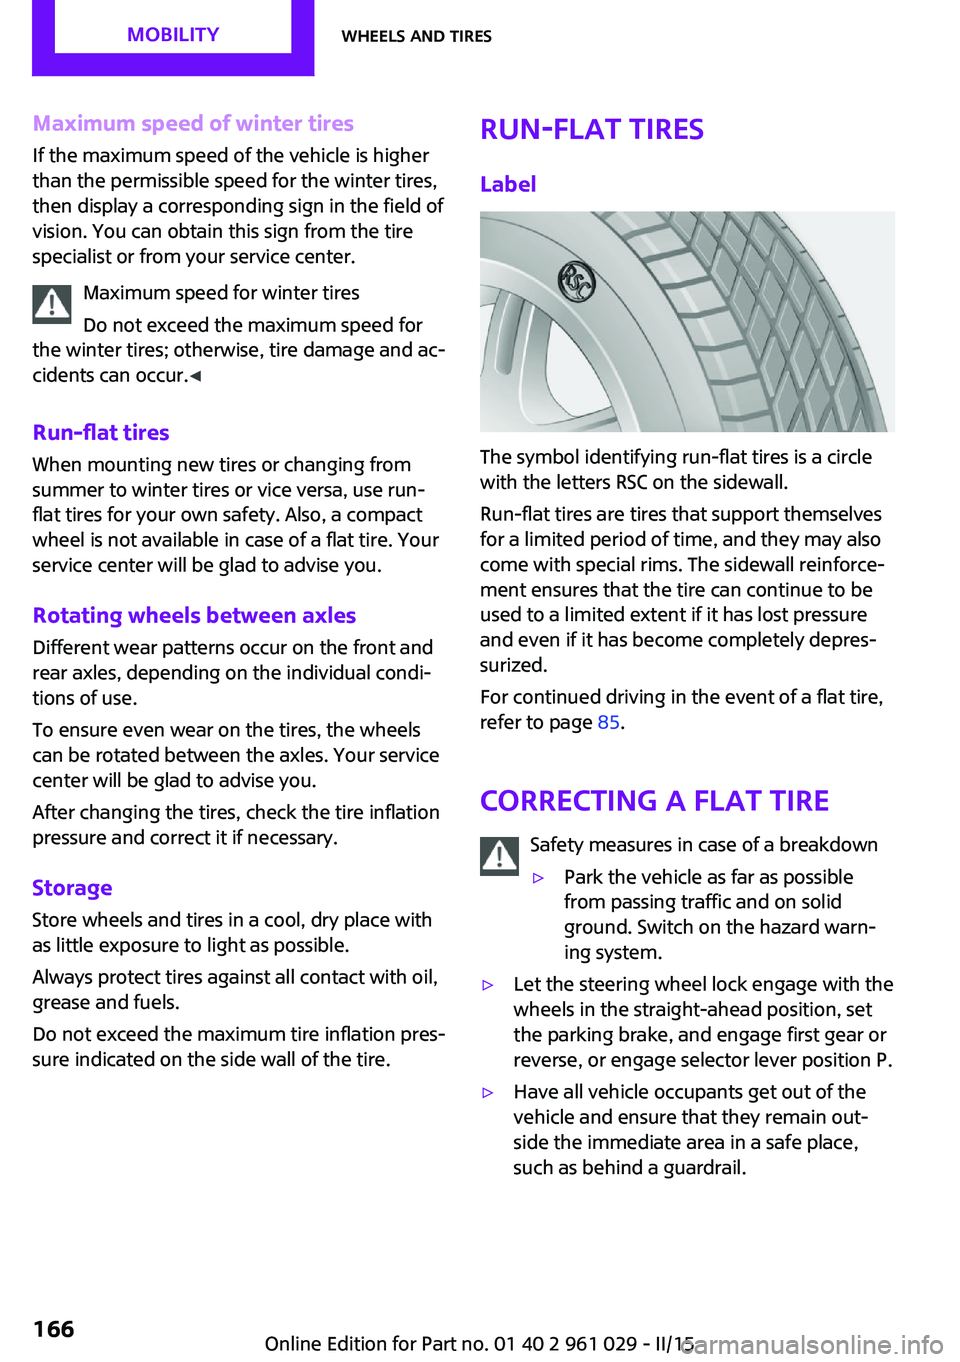
Label
The symbol identifying run-flat tires is a circle
with the letters RSC on the sidewall.
Run-flat tires are tires that support themselves
for a limited period of time, and they may also
come with special rims. The sidewall reinforce‐
ment ensures that the tire can continue to be
used to a limited extent if it has lost pressure
and even if it has become completely depres‐
surized.
For continued driving in the event of a flat tire,
refer to page 85.
Correcting a flat tire Safety measures in case of a breakdown
▷Park the vehicle as far as possible
from passing traffic and on solid
ground. Switch on the hazard warn‐
ing system.▷Let the steering wheel lock engage with the
wheels in the straight-ahead position, set
the parking brake, and engage first gear or
reverse, or engage selector lever position P.▷Have all vehicle occupants get out of the
vehicle and ensure that they remain out‐
side the immediate area in a safe place,
such as behind a guardrail.Seite 166MOBILITYWheels and tires166
Online Edition for Part no. 01 40 2 961 029 - II/15
Page 188 of 231
driving characteristics could result, for example
reduced track stability on braking, extended
braking distance, and altered self-steering
characteristics in the limit range. In conjunction
with winter tires, these characteristics are more
pronounced. ◀
Only mount one compact wheel
Only one compact wheel may be
mounted. Restore the wheels and tires to their
original size as quickly as possible. Failure to do
so is a safety risk. ◀
Check the tire inflation pressure at the next op‐
portunity and correct it if necessary. Replace
the defective tire as soon as possible and have
the new wheel balanced.
Preparing wheel change
Observe the safety precautions regarding flat
tires, refer to page 166.
Additional safety precautions in the event
of a wheel change
Change the wheel only on a level, firm surface
which is not slippery.
The vehicle or the jack could slip to the side if
you attempt to raise the vehicle on a soft or
slippery surface, snow, ice, tiles, etc. Do not use
a wooden block or similar object as a support
base for the jack, as this would prevent it from
extending to its full support height and reduce
its load-carrying capacity.
To avoid serious or fatal injury: never lie under
the vehicle, and never start the engine while it
is supported by the jack. ◀1.Place the folding wheel chock behind the
front wheel of the other vehicle side; if the
vehicle is on an incline, place it in front of
this wheel. If the vehicle is parked on a
steep incline, additionally secure the vehi‐
cle against rolling.2.Expose the lug bolts if necessary.3.Loosen the lug bolts a half turn.Jacking up vehicle
The vehicle jack is designed for changing
wheels only.
The vehicle jack is designed for changing
wheels only. Do not attempt to raise another
vehicle model with it or to raise any load of any
kind. To do so could cause accidents and per‐
sonal injury. ◀
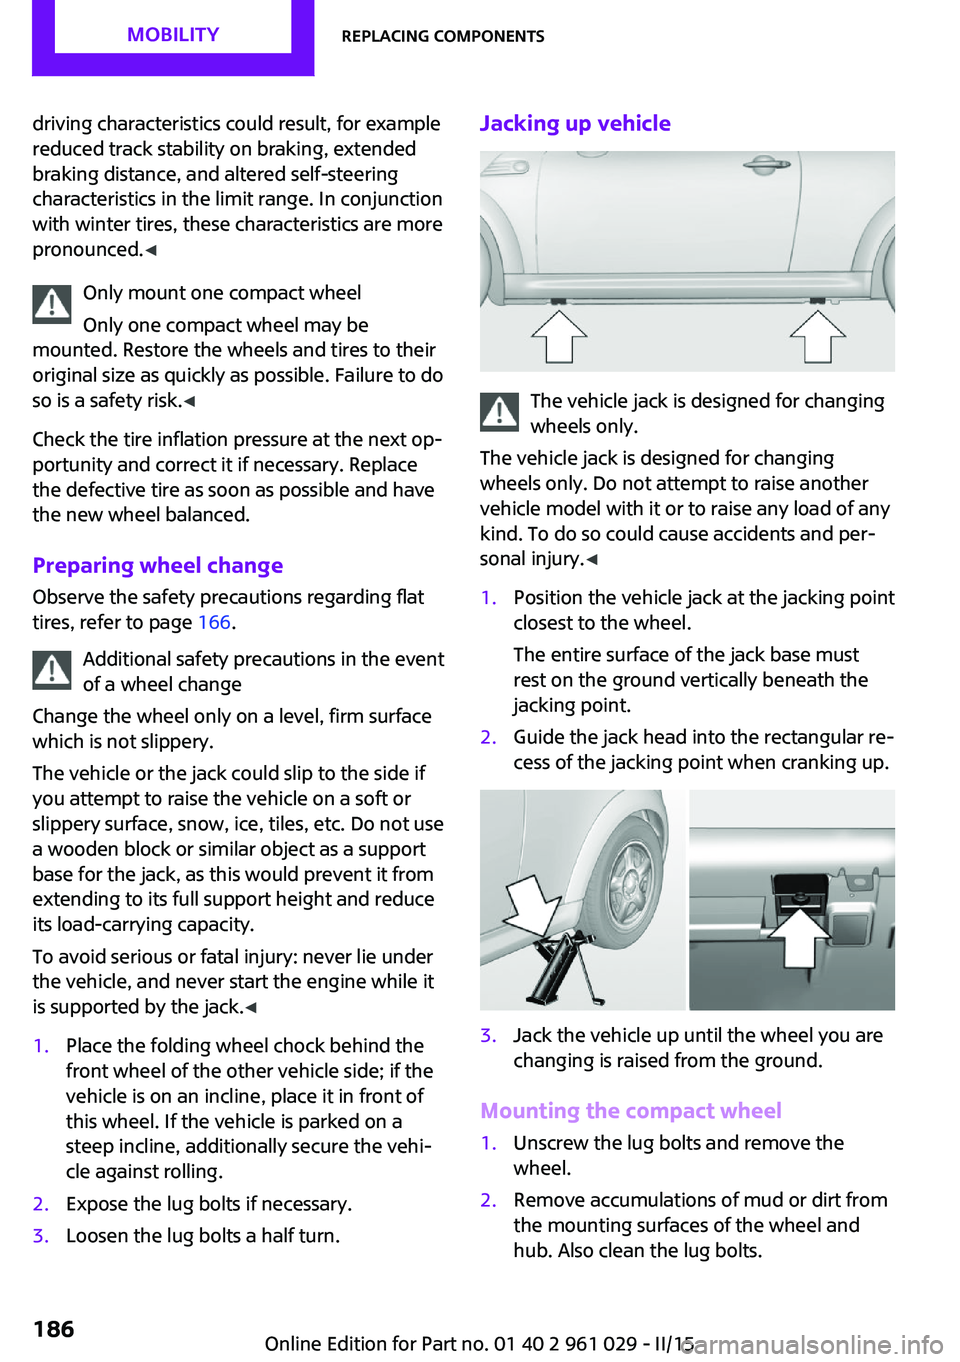
1.Position the vehicle jack at the jacking point
closest to the wheel.
The entire surface of the jack base must
rest on the ground vertically beneath the
jacking point.2.Guide the jack head into the rectangular re‐
cess of the jacking point when cranking up.3.Jack the vehicle up until the wheel you are
changing is raised from the ground.
Mounting the compact wheel
1.Unscrew the lug bolts and remove the
wheel.2.Remove accumulations of mud or dirt from
the mounting surfaces of the wheel and
hub. Also clean the lug bolts.Seite 186MOBILITYReplacing components186
Online Edition for Part no. 01 40 2 961 029 - II/15
Page 225 of 231

Lighting, vehicle, refer toLamps 75
Lights, parking lamps/low beams 75
Light switch 75
Lock buttons on doors, refer to Locking 26
Locking from the inside 26
Locking, from the outside 23
Locking, setting the confirma‐ tion signal 24
Locking the vehicle from the inside 26
Locking vehicle, from the out‐ side 22
Locking without remote con‐ trol, refer to Comfort Ac‐
cess 29
Longlife oils, alternative oil types 173
Longlife oils, refer to Ap‐ proved engine oils 173
Low beams 75
Low beams, automatic 75
Low beams, bulb replace‐ ment 180
Lower back support, refer to Lumbar support 46
Luggage compartment lid, re‐ fer to Tailgate 27
Luggage compartment, refer to Cargo area 27
Lumbar support 46
M
Main inspection, refer to Serv‐ ice requirements 71
Maintenance, refer to Service booklet
Maintenance, refer to Service requirements 71
Maintenance require‐ ments 175
Maintenance system MINI 175 Makeup mirror 105
Malfunction, convertible top 36, 42
Malfunction, door lock 26
Malfunction, fuel filler flap 152
Malfunction, Steptronic trans‐ mission 65
Malfunction, tailgate 27
Malfunction warnings, refer to Check Control 73
Manual air distribution, air conditioner 100
Manual air distribution, auto‐ matic climate control 103
Manual convertible top 39
Manual mode, Steptronic transmission 64
Manual operation, door lock 26
Manual operation, electrical convertible top 36, 42
Manual operation, fuel filler flap 152
Manual operation, selector lever lock, Steptronic trans‐
mission 65
Manual operation, tailgate 27
Marking on approved tires 165
Maximum cooling 103
Maximum speed, winter tires 166
Mechanical convertible top 39
Microfilter 101
Microfilter, with automatic cli‐ mate control 103
MINI Homepage 6
MINI Internet page 6
MINI maintenance sys‐ tem 175
MINI Mobility System 167
Minimum tread, tires 164
Mirrors 49
Mirrors, folding in and out 49 Mirrors, interior mirror 50
Mobile communication devi‐ ces in the vehicle 115
Mobile phone, refer to Tele‐ phone 140
Mobility System 167
Modifications, technical, refer to Safety 6
Mounting of child restraint fix‐ ing systems 51
N Neck restraints, refer to Head restraints 48
New wheels and tires 165
Notes 6
Nozzles, refer to Ventila‐ tion 104
O
OBD Onboard Diagnos‐ tics 176
OBD socket, refer to Socket for OBD Onboard Diagno‐
sis 176
Octane number, refer to Fuel quality 154
Octane rating, refer to Recom‐ mended fuel grade 154
Odometer 66
Oil additives 173
Oil level 172
Oil types, alternative 173
Oil types, approved 173
Onboard Diagnostics OBD 176
Onboard vehicle tool kit 177
Opening and closing, Comfort Access 29
Opening and closing from the inside 26
Opening and closing, from the outside 22 Seite 223Everything from A to ZREFERENCE223
Online Edition for Part no. 01 40 2 961 029 - II/15
Page 227 of 231

Run-flat tires, flat tire 85
Run-flat tires, tire inflation pressure 156
S
Safe braking 116
Safety 6
Safety belts 47
Safety belts, care 197
Safety belts, damage 48
Safety belts, indicator/warning lamp 48
Safety belts, reminder 48
Safety systems, airbags 81
Safety systems, safety belts 47
Saving fuel 121
Seat adjustment, manual 45
Seat heating 47
Seats 45
Seats, adjusting 45
Seats, heating 47
Seats, sitting safely 45
Selector lever lock, overrid‐ ing 65
Selector lever lock, refer to Se‐ lector level positions, chang‐
ing, shiftlock 63
Selector lever positions, Step‐ tronic transmission 63
Selector lever, Steptronic transmission 63
Service and warranty 7
Service data in the remote control 175
Service interval display, refer to Condition Based Service
CBS 175
Service interval display, refer to Service requirements 71
Service requirements 71
Service requirements, CBS Condition Based Service 175
Settings and information 69
Settings, clock 70 Settings, configuring, refer to
Personal Profile 21
Shifting, manual transmis‐ sion 62
Shifting, Steptronic transmis‐ sion 64
Shift lever, Steptronic trans‐ mission 63
Shift paddles on the steering wheel 64
Side airbags 81
Side windows, refer to Win‐ dows 33
Sitting safely 45
Slot for remote control 56
Snap-in adapter, mobile phone 147
Snow chains 169
Socket, OBD Onboard Diagno‐ sis 176
Special equipment, series equipment 6
Speed, average 68
Speedometer 14
Speed, with winter tires 166
Sport button 93
Sport program, Steptronic transmission 64
Stability control systems 91
Start/Stop button 56
Start/Stop button, starting the engine 57
Start/Stop button, switching off the engine 58
Starting the engine 57
Start problems, refer to Jump- starting 189
Steering wheel 50
Steering wheel, adjusting 50
Steering wheel lock 56
Steering wheel, shift pad‐ dles 64
Steptronic transmission 63
Steptronic transmission, kick‐ down 64 Steptronic transmission, over‐
riding the selector lever
lock 65
Stopping, engine 58
Storage, tires 166
Storing the vehicle 198
Summer tires, refer to Wheels and tires 156
Summer tires, tread 163
Sun visor 105
Switches, refer to Cockpit 12
Switching off, engine 58
Switching off, vehicle 58
Symbols 6
T Tachometer 67
Tailgate 27
Tailgate, Comfort Access 30
Tailgate, emergency opera‐ tion 28
Tailgate, emergency unlock‐ ing 28
Tailgate, opening/closing 27
Tailgate, opening from the outside 27
Tailgate, unlocking man‐ ually 27
Tailgate, unlocking with re‐ mote control 24
Tail lights 182
Tank gauge, refer to Fuel gauge 67
Technical changes, refer to Safety 6
Telephone 140
Temperature, air condi‐ tioner 100
Temperature, automatic cli‐ mate control 103
Temperature, coolant, refer to Coolant temperature 67
Temperature display– External temperature warn‐
ing 66Seite 225Everything from A to ZREFERENCE225
Online Edition for Part no. 01 40 2 961 029 - II/15