2015 MINI COUPE ROADSTER CONVERTIBLE child lock
[x] Cancel search: child lockPage 36 of 231

After the ignition is switched off
The windows can be operated for approx. 1 mi‐
nute after the remote control is removed or the
ignition is switched off.
Take the remote control with you
Take the remote control with you when
leaving the vehicle so that children, for exam‐
ple, cannot operate the power windows and in‐
jure themselves. ◀
MINI Convertible:
convertible top with
integrated sliding sun‐ roof
If possible, conserve the battery by only operat‐
ing the convertible top while the engine is run‐
ning.
Before closing the convertible top, remove all
foreign objects from the windshield frame as
these could prevent the top from closing prop‐
erly.
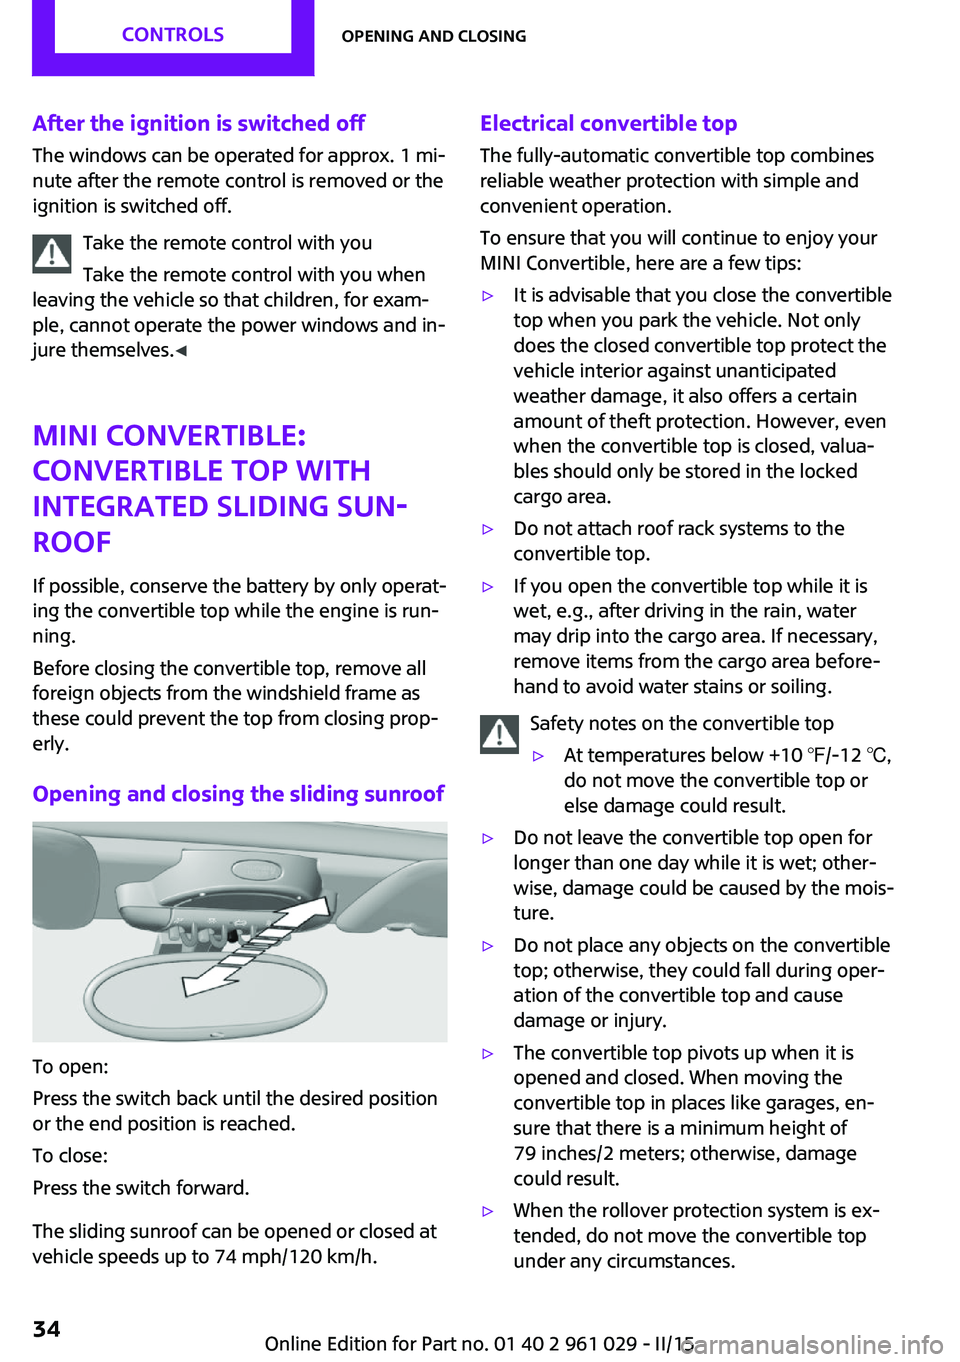
Opening and closing the sliding sunroof
To open:
Press the switch back until the desired position
or the end position is reached.
To close:
Press the switch forward.
The sliding sunroof can be opened or closed at
vehicle speeds up to 74 mph/120 km/h.
Electrical convertible top
The fully-automatic convertible top combines
reliable weather protection with simple and
convenient operation.
To ensure that you will continue to enjoy your
MINI Convertible, here are a few tips:▷It is advisable that you close the convertible
top when you park the vehicle. Not only
does the closed convertible top protect the
vehicle interior against unanticipated
weather damage, it also offers a certain
amount of theft protection. However, even
when the convertible top is closed, valua‐
bles should only be stored in the locked
cargo area.▷Do not attach roof rack systems to the
convertible top.▷If you open the convertible top while it is
wet, e.g., after driving in the rain, water
may drip into the cargo area. If necessary,
remove items from the cargo area before‐
hand to avoid water stains or soiling.
Safety notes on the convertible top
▷At temperatures below +10 ℉/-12 ℃,
do not move the convertible top or
else damage could result.▷Do not leave the convertible top open for
longer than one day while it is wet; other‐
wise, damage could be caused by the mois‐
ture.▷Do not place any objects on the convertible
top; otherwise, they could fall during oper‐
ation of the convertible top and cause
damage or injury.▷The convertible top pivots up when it is
opened and closed. When moving the
convertible top in places like garages, en‐
sure that there is a minimum height of
79 inches/2 meters; otherwise, damage
could result.▷When the rollover protection system is ex‐
tended, do not move the convertible top
under any circumstances.Seite 34CONTROLSOpening and closing34
Online Edition for Part no. 01 40 2 961 029 - II/15
Page 54 of 231

and side airbags on the front passenger side
are deactivated.
Deactivating the front passenger airbags
If a child restraint fixing system is used in
the front passenger seat, the front passenger
airbags must be deactivated; otherwise, there
is an increased risk of injury to the child when
the airbags are triggered, even with a child re‐
straint fixing system. ◀
Seat position and height
Before installing a child restraint fixing system,
move the front passenger seat as far back as
possible and adjust its height to the highest po‐
sition to obtain the best possible position for
the belt and to offer optimal protection in the
event of an accident.
Do not change this seat position once it has
been set.
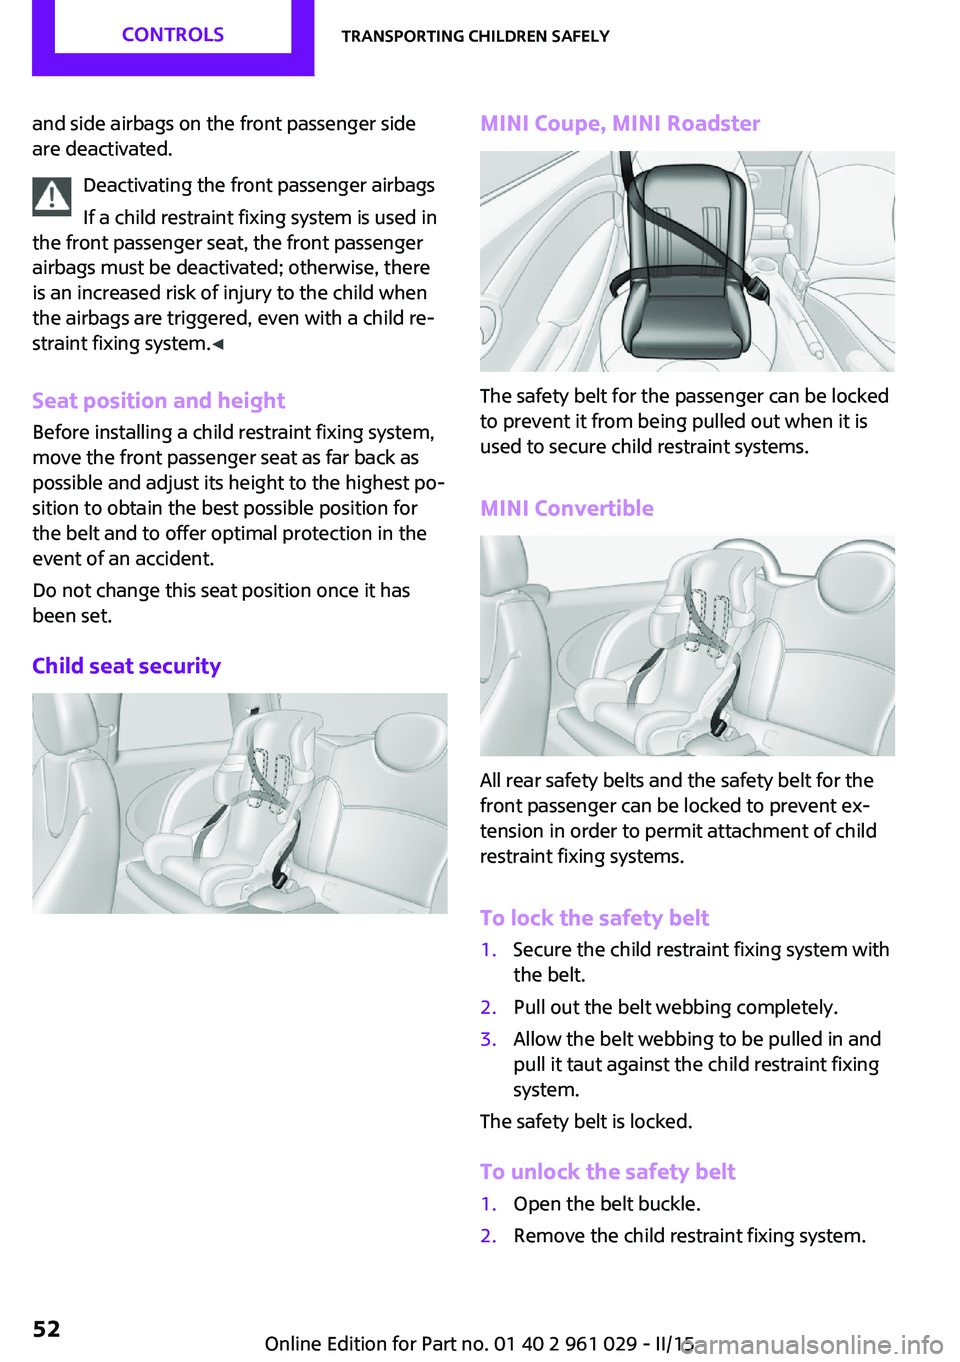
Child seat securityMINI Coupe, MINI Roadster
The safety belt for the passenger can be locked
to prevent it from being pulled out when it is
used to secure child restraint systems.
MINI Convertible
All rear safety belts and the safety belt for the
front passenger can be locked to prevent ex‐
tension in order to permit attachment of child
restraint fixing systems.
To lock the safety belt
1.Secure the child restraint fixing system with
the belt.2.Pull out the belt webbing completely.3.Allow the belt webbing to be pulled in and
pull it taut against the child restraint fixing
system.
The safety belt is locked.
To unlock the safety belt
1.Open the belt buckle.2.Remove the child restraint fixing system.Seite 52CONTROLSTransporting children safely52
Online Edition for Part no. 01 40 2 961 029 - II/15
Page 57 of 231

Attaching the upper retaining strap to
the mounting point
MINI Coupe1.Remove the front cargo cover, refer to
page 107.2.Slide the head restraint upward.3.Guide the upper retaining strap between
the supports of the head restraint.4.Attach the upper retaining strap to the
mounting point with the hook.5.Slide the head restraint into the bottom po‐
sition.6.Pull the upper retaining strap taut.
MINI Convertible
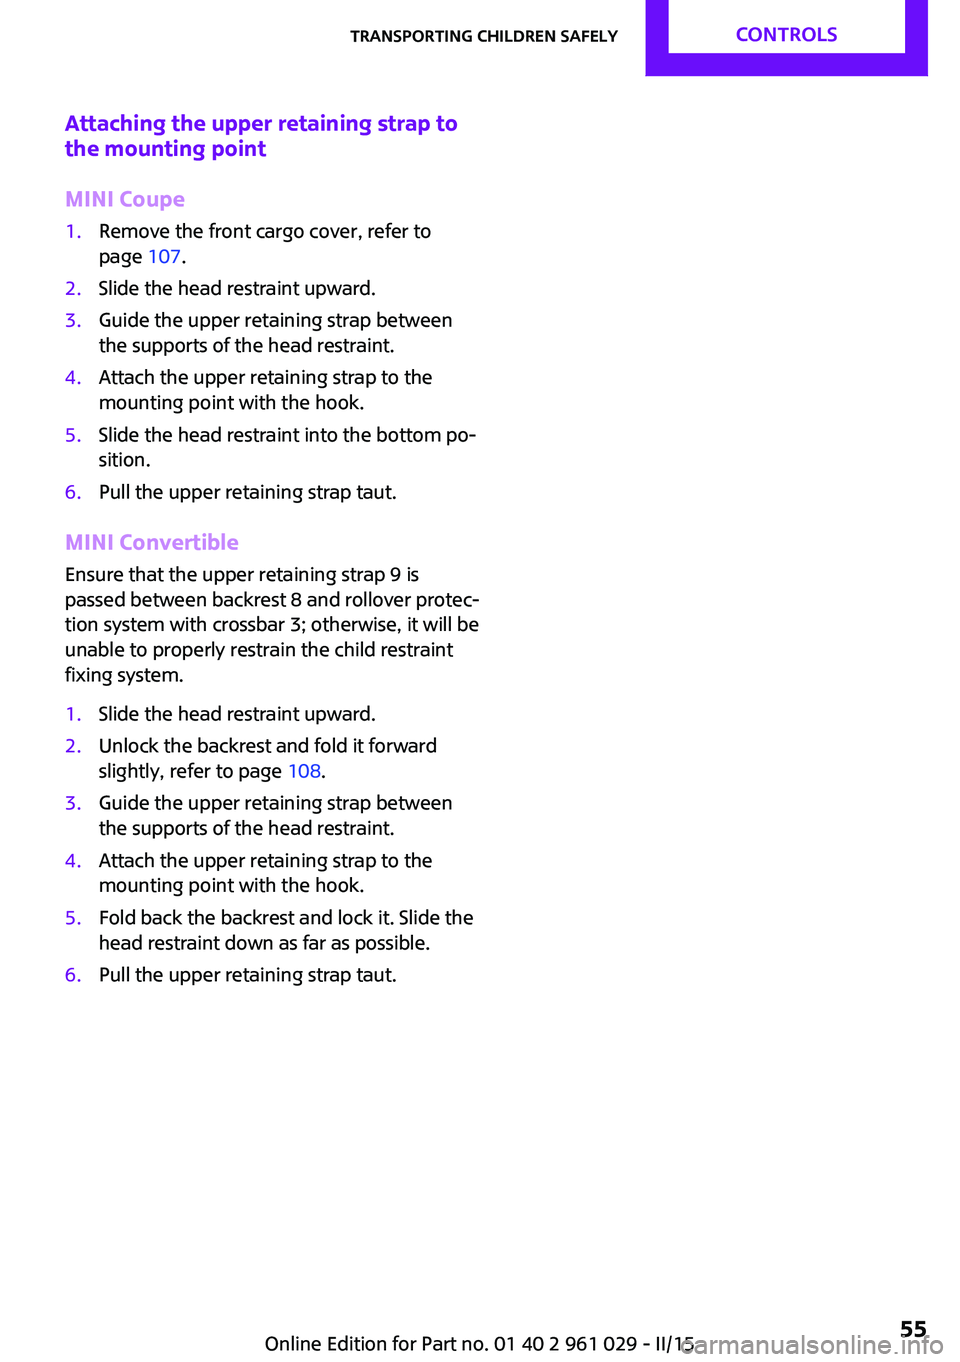
Ensure that the upper retaining strap 9 is
passed between backrest 8 and rollover protec‐
tion system with crossbar 3; otherwise, it will be
unable to properly restrain the child restraint
fixing system.
1.Slide the head restraint upward.2.Unlock the backrest and fold it forward
slightly, refer to page 108.3.Guide the upper retaining strap between
the supports of the head restraint.4.Attach the upper retaining strap to the
mounting point with the hook.5.Fold back the backrest and lock it. Slide the
head restraint down as far as possible.6.Pull the upper retaining strap taut.Seite 55Transporting children safelyCONTROLS55
Online Edition for Part no. 01 40 2 961 029 - II/15
Page 60 of 231

3.Press the Start/Stop button.
The ignition is activated automatically for a cer‐
tain time and is stopped as soon as the engine
starts.
Engine stop
General information Take the remote control with you
Take the remote control with you when
leaving the vehicle so that children, for exam‐
ple, cannot operate the windows and injure
themselves. ◀
Set the parking brake and further secure
the vehicle as required
Set the parking brake firmly when parking; oth‐
erwise, the vehicle may roll. On steep upward
and downward inclines, further secure the ve‐
hicle, for example, by turning the steering
wheel in the direction of the curb. ◀
Before driving into a car wash To make it possible for the vehicle to roll in an
automatic car wash, follow the information on
Washing in automatic car washes, refer to
page 194.
Switching off the engine
Manual transmission
1.With the vehicle at a standstill, press the
Start/Stop button.2.Shift into first gear or reverse.3.Set the parking brake firmly.4.Remove the remote control from the igni‐
tion lock.Steptronic transmission1.Engage transmission position P with the ve‐
hicle stopped.2.Press the Start/Stop button.3.Set the parking brake firmly.4.Remove the remote control from the igni‐
tion lock.
Parking brake
The concept
The parking brake is primarily intended to pre‐
vent the vehicle from rolling while parked; it
brakes the rear wheels.
Also follow the instructions under Switching off
the engine, refer to page 58.
Setting The lever engages automatically.
Releasing
Pull up slightly, press the button, and lower the
lever.
Notes Using the parking brake while driving
If it should become necessary to use the
parking brake while driving, do not pull the
parking brake too forcefully. Keep the button
on the parking brake lever pressed at all times.
Seite 58CONTROLSDriving58
Online Edition for Part no. 01 40 2 961 029 - II/15
Page 64 of 231

Do not use the washing facilities when
the hood is open
Only use the washing facilities when the hood
is fully locked; otherwise, the headlamp washer
system may become damaged. ◀
Windshield washer nozzles The windshield washer nozzles are heated au‐
tomatically while the engine is running or the
ignition is switched on.
Washer fluid
General information Antifreeze for washer fluid
Antifreeze is flammable and can cause in‐
juries if used improperly.
Therefore, keep it away from sources of igni‐
tion.
Only keep it in the closed original container and
inaccessible to children.
Follow the notes and instructions on the con‐
tainer.
United States: The washer fluid mixture ratio is
regulated by the U.S. EPA and many individual
states; do not exceed the allowable washer
fluid dilution ratios limits that apply. Follow the
usage instructions on the washer fluid con‐
tainer. Use BMW's Windshield Washer Concen‐
trate or the equivalent. ◀
Washer fluid reservoir Adding washer fluid
Only add washer fluid when the engine is
cool, and then close the cover completely to
avoid contact between the washer fluid and
hot engine parts.
Otherwise, there is the danger of fire and a risk
to personal safety if the fluid is spilled. ◀
All washer nozzles are supplied from one reser‐
voir.
The recommended minimum filling quantity is
0.2 US gal/1 liter.
Fill with a mixture of window washing concen‐
trate and water; if needed, add antifreeze ac‐
cording to the manufacturer instructions.
Mix the washer fluid before adding to maintain
the correct mixing ratio.
Do not fill in undiluted window washing con‐
centrate and do not fill in pure water; this could
damage the washer system.
Do not mix window washing concentrate from
different manufacturers; this could cause the
washer nozzles to clog.
Manual transmission
Pay attention to the shift plane
When shifting into 5th or 6th gear, push
the gearshift lever to the right; otherwise inad‐
vertent shifting into the 3rd or 4th gear could
lead to engine damage. ◀
Seite 62CONTROLSDriving62
Online Edition for Part no. 01 40 2 961 029 - II/15
Page 221 of 231

Brakes, service require‐ments 71
Brake system, MINI mainte‐ nance system 175
Braking, notes 116
Braking, parking brake 58
Breakdown assistance, Road‐ side Assistance 189
Breaking in 114
Button for starting the engine, refer to Start/Stop button 56
C
California Proposition 65 Warning 7
Car battery, refer to Vehicle battery 187
Car care products 195
Care, displays 198
Care, vehicle 195
Cargo area, Comfort Ac‐ cess 30
Cargo area door, refer to Tail‐ gate 27
Cargo area, emergency opera‐ tion, refer to Unlocking man‐
ually 27
Cargo area, emergency un‐ locking 28
Cargo area light, refer to Inte‐ rior lights 79
Cargo area, opening from the outside 27
Car horn, refer to Horn 12
Carpet, care 198
Car phone, refer to Tele‐ phone 140
Car wash 194
CBC, Cornering Brake Con‐ trol 91
CBS Condition Based Serv‐ ice 175
CD/DVD drives, care 198 Center console, refer to
Around the center con‐
sole 15
Central locking, Comfort Ac‐ cess 29
Central locking from the in‐ side 26
Central locking system, con‐ cept 21
Central locking system, from the outside 21
Changes, technical, refer to Safety 6
Changing wheels/tires 165
Check Control 73
Children, transporting 51
Child restraint fixing system LATCH 53
Child restraint fixing sys‐ tems 51
Child restraint fixing systems, mounting 51
Child seat, mounting 51
Child seats, refer to Transport‐ ing children safely 51
Chrome parts, care 197
Circulation of air, refer to Re‐ circulated air mode, air con‐
ditioner 100
Circulation of air, refer to Re‐ circulated air mode, auto‐
matic climate control 102
Cleaning, displays 198
Cleaning, refer to Care 194
Climate 99
Climate mode, ventila‐ tion 104
Clock 66
Clock, 12h/24h mode 70
Closing from the inside 26
Closing, from the outside 22
Clutch, breaking in 114
Cockpit 12
Cold start, refer to Starting the engine 57 Combination instrument, refer
to Displays 14
Combination switch, refer to Turn signal/high-beams/
headlight flasher 59
Combination switch, refer to Washer/wiper system 60
Comfort Access 29
Comfort Access, in the car wash 30
Comfort Access, replacing the battery 31
Comfort area, refer to Around the center console 15
Compact wheel, inflation pres‐ sure 161
Compartment for remote con‐ trol, refer to Ignition lock 56
Computer 67
Computer, displaying informa‐ tion 67
Condition Based Service CBS 175
Confirmation signals for vehi‐ cle locking/unlocking 24
Consumption, refer to Aver‐ age fuel consumption 68
Control Display, care 198
Controls and displays 12
Control systems, driving stabil‐ ity 91
Convenient operation, win‐ dow 23
Convertible top 34
Convertible top, manual 39
Convertible top, mechani‐ cal 39
Coolant temperature 67
Cooling function, switching on and off 103
Cooling, maximum 103
Cornering Brake Control, CBC 91
Corrosion on brake discs 116 Seite 219Everything from A to ZREFERENCE219
Online Edition for Part no. 01 40 2 961 029 - II/15
Page 224 of 231

Headlamps, care 195
Headlight control, auto‐ matic 75
Headlight courtesy delay fea‐ ture 77
Headlight flasher 59
Headlights 75
Headlights, cleaning, washer fluid 62
Head restraints 48
Head restraints, adjusting the height 48
Head restraints, removing 48
Heatable rear window, air conditioner 100
Heatable windshield 103
Heating, rear window with au‐ tomatic climate control 103
Heating, seats 47
Heating, windshield 103
Height adjustment, seats 45
High-beams 76
High beams, bulb replace‐ ment 180
Hill drive-off assistant 93
Hills 116
Holder for remote control, re‐ fer to Ignition lock 56
Homepage 6
Hood 171
Hood, closing 171
Hood, opening 171
Hood, unlocking 171
Horn 12
Hydraulic brake assistant 91
I
Ice warning, refer to External temperature warning 66
Icy roads, refer to External temperature warning 66
Identification marks, run-flat tires 166
Identification marks, tires 162
Ignition 57 Ignition key position 1, refer
to Radio ready state 56
Ignition key position 2, refer to Ignition on 57
Ignition key, refer to Remote control with integrated
key 20
Ignition lock 56
Ignition, switched off 57
Ignition, switched on 57
Indicator and warning lamps, overview 199
Indicator and warning lamps, Tire Pressure Monitor
TPM 87
Indicator and warning lights 15
Individual air distribution 100
Inflation pressure monitor, re‐ fer to Flat Tire Monitor 84
Inflation pressure monitor, re‐ fer to Tire Pressure Monitor
TPM 86
Inflation pressure, refer to Tire inflation pressure 156
Initializing, Flat Tire Monitor FTM 84
Instrument cluster, refer to Displays 14
Instrument lighting 78
Instruments, refer to Cock‐ pit 12
Integrated key 20
Interior lights 79
Interior lights, remote con‐ trol 24
Interior mirror 50
Interior motion sensor 32
Interior temperature, setting, air conditioner 99
Interior temperature, setting, automatic climate con‐
trol 101
Internet page 6 J
Jump-starting 189
K
Keyless Go, refer to Comfort Access 29
Keyless opening and closing, refer to Comfort Access 29
Key Memory, refer to Personal Profile 21
Key, refer to Remote control with integrated key 20
Kickdown, Steptronic trans‐ mission 64
Knocking control 154
L Lamp and bulb replacement, bulb replacement 178
Lamp, replacing, refer to Lamp and bulb replace‐
ment 178
Lamps 75
Lamps, automatic headlight control 75
Lap-and-shoulder belt, refer to Safety belts 47
LATCH child restraint fixing system 53
Leather, care 196
Leather care 196
LEDs, light-emitting di‐ odes 179
License plate light, bulb re‐ placement 182
Light-alloy wheels, care 197
Light-emitting diodes, LEDs 179
Lighter, socket 106
Lighting, instruments 78
Lighting, lamp and bulb re‐ placement 178 Seite 222REFERENCEEverything from A to Z222
Online Edition for Part no. 01 40 2 961 029 - II/15
Page 225 of 231

Lighting, vehicle, refer toLamps 75
Lights, parking lamps/low beams 75
Light switch 75
Lock buttons on doors, refer to Locking 26
Locking from the inside 26
Locking, from the outside 23
Locking, setting the confirma‐ tion signal 24
Locking the vehicle from the inside 26
Locking vehicle, from the out‐ side 22
Locking without remote con‐ trol, refer to Comfort Ac‐
cess 29
Longlife oils, alternative oil types 173
Longlife oils, refer to Ap‐ proved engine oils 173
Low beams 75
Low beams, automatic 75
Low beams, bulb replace‐ ment 180
Lower back support, refer to Lumbar support 46
Luggage compartment lid, re‐ fer to Tailgate 27
Luggage compartment, refer to Cargo area 27
Lumbar support 46
M
Main inspection, refer to Serv‐ ice requirements 71
Maintenance, refer to Service booklet
Maintenance, refer to Service requirements 71
Maintenance require‐ ments 175
Maintenance system MINI 175 Makeup mirror 105
Malfunction, convertible top 36, 42
Malfunction, door lock 26
Malfunction, fuel filler flap 152
Malfunction, Steptronic trans‐ mission 65
Malfunction, tailgate 27
Malfunction warnings, refer to Check Control 73
Manual air distribution, air conditioner 100
Manual air distribution, auto‐ matic climate control 103
Manual convertible top 39
Manual mode, Steptronic transmission 64
Manual operation, door lock 26
Manual operation, electrical convertible top 36, 42
Manual operation, fuel filler flap 152
Manual operation, selector lever lock, Steptronic trans‐
mission 65
Manual operation, tailgate 27
Marking on approved tires 165
Maximum cooling 103
Maximum speed, winter tires 166
Mechanical convertible top 39
Microfilter 101
Microfilter, with automatic cli‐ mate control 103
MINI Homepage 6
MINI Internet page 6
MINI maintenance sys‐ tem 175
MINI Mobility System 167
Minimum tread, tires 164
Mirrors 49
Mirrors, folding in and out 49 Mirrors, interior mirror 50
Mobile communication devi‐ ces in the vehicle 115
Mobile phone, refer to Tele‐ phone 140
Mobility System 167
Modifications, technical, refer to Safety 6
Mounting of child restraint fix‐ ing systems 51
N Neck restraints, refer to Head restraints 48
New wheels and tires 165
Notes 6
Nozzles, refer to Ventila‐ tion 104
O
OBD Onboard Diagnos‐ tics 176
OBD socket, refer to Socket for OBD Onboard Diagno‐
sis 176
Octane number, refer to Fuel quality 154
Octane rating, refer to Recom‐ mended fuel grade 154
Odometer 66
Oil additives 173
Oil level 172
Oil types, alternative 173
Oil types, approved 173
Onboard Diagnostics OBD 176
Onboard vehicle tool kit 177
Opening and closing, Comfort Access 29
Opening and closing from the inside 26
Opening and closing, from the outside 22 Seite 223Everything from A to ZREFERENCE223
Online Edition for Part no. 01 40 2 961 029 - II/15