2015 MINI COUPE ROADSTER CONVERTIBLE audio
[x] Cancel search: audioPage 18 of 231
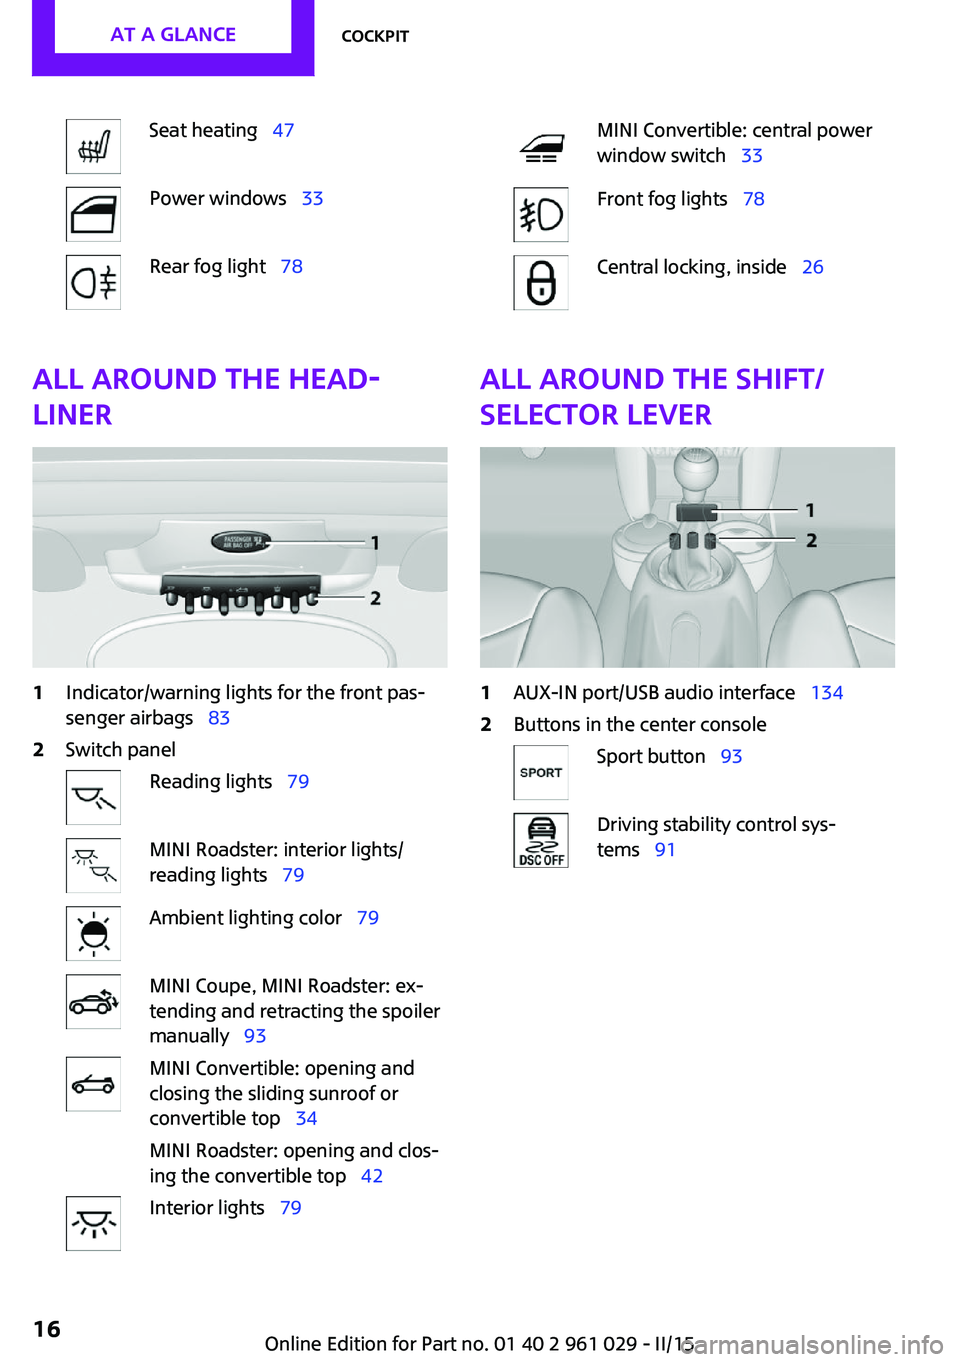
Seat heating 47Power windows 33Rear fog light 78MINI Convertible: central power
window switch 33Front fog lights 78Central locking, inside 26All around the head‐
liner1Indicator/warning lights for the front pas‐
senger airbags 832Switch panelReading lights 79MINI Roadster: interior lights/
reading lights 79Ambient lighting color 79MINI Coupe, MINI Roadster: ex‐
tending and retracting the spoiler
manually 93MINI Convertible: opening and
closing the sliding sunroof or
convertible top 34
MINI Roadster: opening and clos‐
ing the convertible top 42Interior lights 79All around the shift/
selector lever1AUX-IN port/USB audio interface 1342Buttons in the center consoleSport button 93Driving stability control sys‐
tems 91Seite 16AT A GLANCECockpit16
Online Edition for Part no. 01 40 2 961 029 - II/15
Page 113 of 231
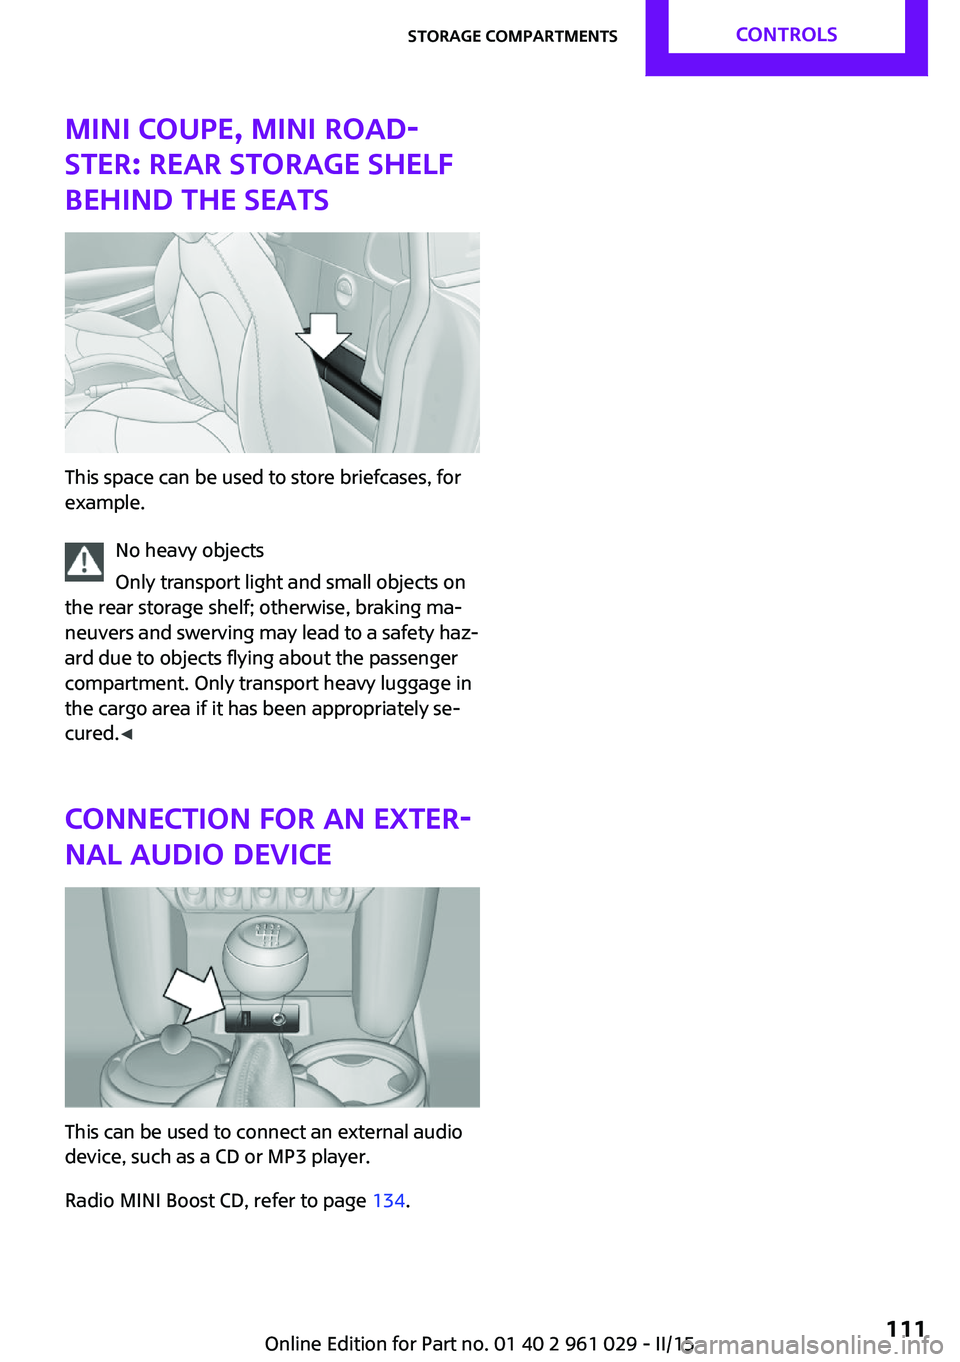
MINI Coupe, MINI Road‐
ster: rear storage shelf
behind the seats
This space can be used to store briefcases, for
example.
No heavy objects
Only transport light and small objects on
the rear storage shelf; otherwise, braking ma‐
neuvers and swerving may lead to a safety haz‐
ard due to objects flying about the passenger
compartment. Only transport heavy luggage in
the cargo area if it has been appropriately se‐
cured. ◀
Connection for an exter‐
nal audio device
This can be used to connect an external audio
device, such as a CD or MP3 player.
Radio MINI Boost CD, refer to page 134.
Seite 111Storage compartmentsCONTROLS111
Online Edition for Part no. 01 40 2 961 029 - II/15
Page 128 of 231

Radio MINI Boost CDVehicle equipment
This chapter describes all series equipment as
well as country-specific and special equipment
offered for this model series. Therefore, it also
describes equipment that may not be found in
your vehicle, for instance due to the selectedspecial equipment or the country version. This
also applies to safety-related functions and sys‐
tems.
When using the features and systems described
here, adhere to local regulations.
General information
At a glance
1Change the audio sources.2On/off, volume.▷Press: switch on/off.▷Turn: adjust the volume.3Show the tone settings.4Function buttons for selecting the menu
items shown directly above them on the
display.5Change the station or track.6Display.7Select the functions.▷Turn: highlight the menu item on the
display or set the value.▷Press: select the highlighted menu item
or store the settings.8Place/end calls.9Opens the main menu.10Manually select the frequency.Seite 126ENTERTAINMENTRadio MINI Boost CD126
Online Edition for Part no. 01 40 2 961 029 - II/15
Page 129 of 231

11CD slot.12Eject the CD.Representation in the Owner's Manual
"…" Identifies radio display texts used to select individual functions.
Menu navigation Radio and telephone functions can be opened
using buttons on the radio and menus.
Opening menu items
To display the menu items:▷ Press the button once for the audio
sources menu.▷ Press the button for the main
menu.
Selecting menu items
There are several ways to select a menu item
on the display.
Using the right knob
▷To mark a menu item: turn the right knob,
arrow 2.▷To select a menu item: press the right knob,
arrow 1.
Using the function buttons
Press the left or right side of the function
button under the menu item.
If only one menu item is displayed above the
function button, press the middle of the button.
Via the MODE button Press the button repeatedly until the
desired audio menu is selected.
Symbols on the displaySymbolMeaning Function is selected. Function is activated. The function is deactivated. Leave the menu, one menu back. Display additional menu items. Scroll display. The list contains more
than two entries. Change to the higher level directory.
Setting values
For setting numerical values or values on a
scale:
1.Mark the desired menu item and press the
right knob.2.Turn the right knob to set the value.3.Press the right knob to store the value.
Switching on/off
Press the left knob. The radio selects the audio
source set last: radio, satellite radio, CD, exter‐
nal audio device, or USB audio interface.
Listening to the radio with the ignition
switched off
When the radio ready state or the ignition is
switched off, the radio functions are available
Seite 127Radio MINI Boost CDENTERTAINMENT127
Online Edition for Part no. 01 40 2 961 029 - II/15
Page 130 of 231
for approx. 20 minutes. To listen to the radio,
switch it back on.
To spare the battery, ensure that the radio is
switched off when you leave the vehicle.
Adjusting the volume Turn the left knob. The setting is stored for the
remote control currently in use.
When a call is placed using the hands-free sys‐
tem, the audio sources are muted.
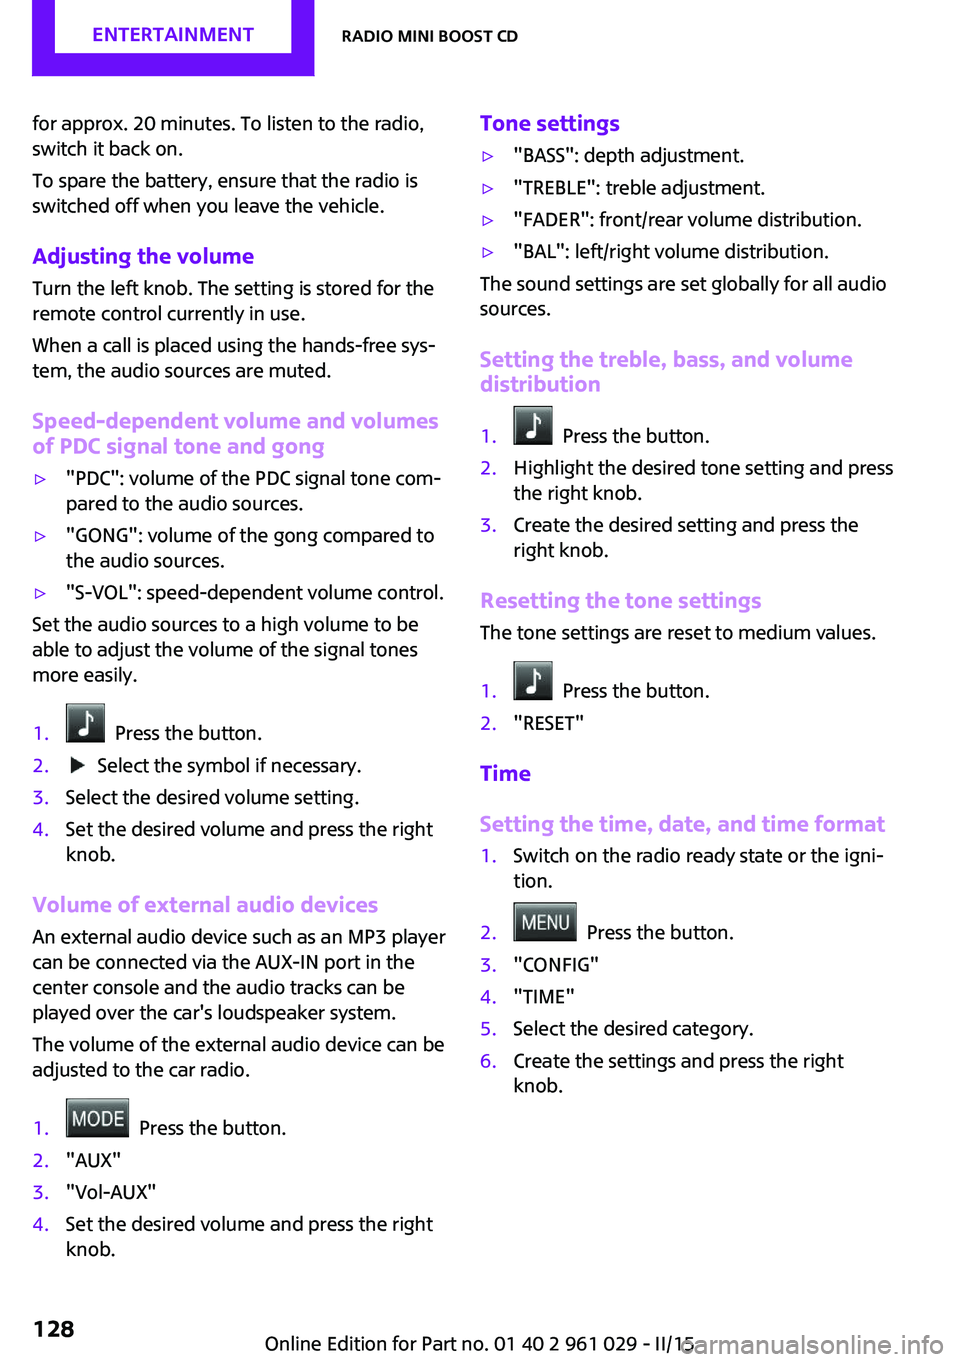
Speed-dependent volume and volumes
of PDC signal tone and gong▷"PDC": volume of the PDC signal tone com‐
pared to the audio sources.▷"GONG": volume of the gong compared to
the audio sources.▷"S-VOL": speed-dependent volume control.
Set the audio sources to a high volume to be
able to adjust the volume of the signal tones
more easily.
1. Press the button.2. Select the symbol if necessary.3.Select the desired volume setting.4.Set the desired volume and press the right
knob.
Volume of external audio devices
An external audio device such as an MP3 player
can be connected via the AUX-IN port in the
center console and the audio tracks can be
played over the car's loudspeaker system.
The volume of the external audio device can be
adjusted to the car radio.
1. Press the button.2."AUX"3."Vol-AUX"4.Set the desired volume and press the right
knob.Tone settings▷"BASS": depth adjustment.▷"TREBLE": treble adjustment.▷"FADER": front/rear volume distribution.▷"BAL": left/right volume distribution.
The sound settings are set globally for all audio
sources.
Setting the treble, bass, and volume distribution
1. Press the button.2.Highlight the desired tone setting and press
the right knob.3.Create the desired setting and press the
right knob.
Resetting the tone settings
The tone settings are reset to medium values.
1. Press the button.2."RESET"
Time
Setting the time, date, and time format
1.Switch on the radio ready state or the igni‐
tion.2. Press the button.3."CONFIG"4."TIME"5.Select the desired category.6.Create the settings and press the right
knob.Seite 128ENTERTAINMENTRadio MINI Boost CD128
Online Edition for Part no. 01 40 2 961 029 - II/15
Page 135 of 231
Playback begins automatically.
Reading can take a few minutes with com‐
pressed audio files.
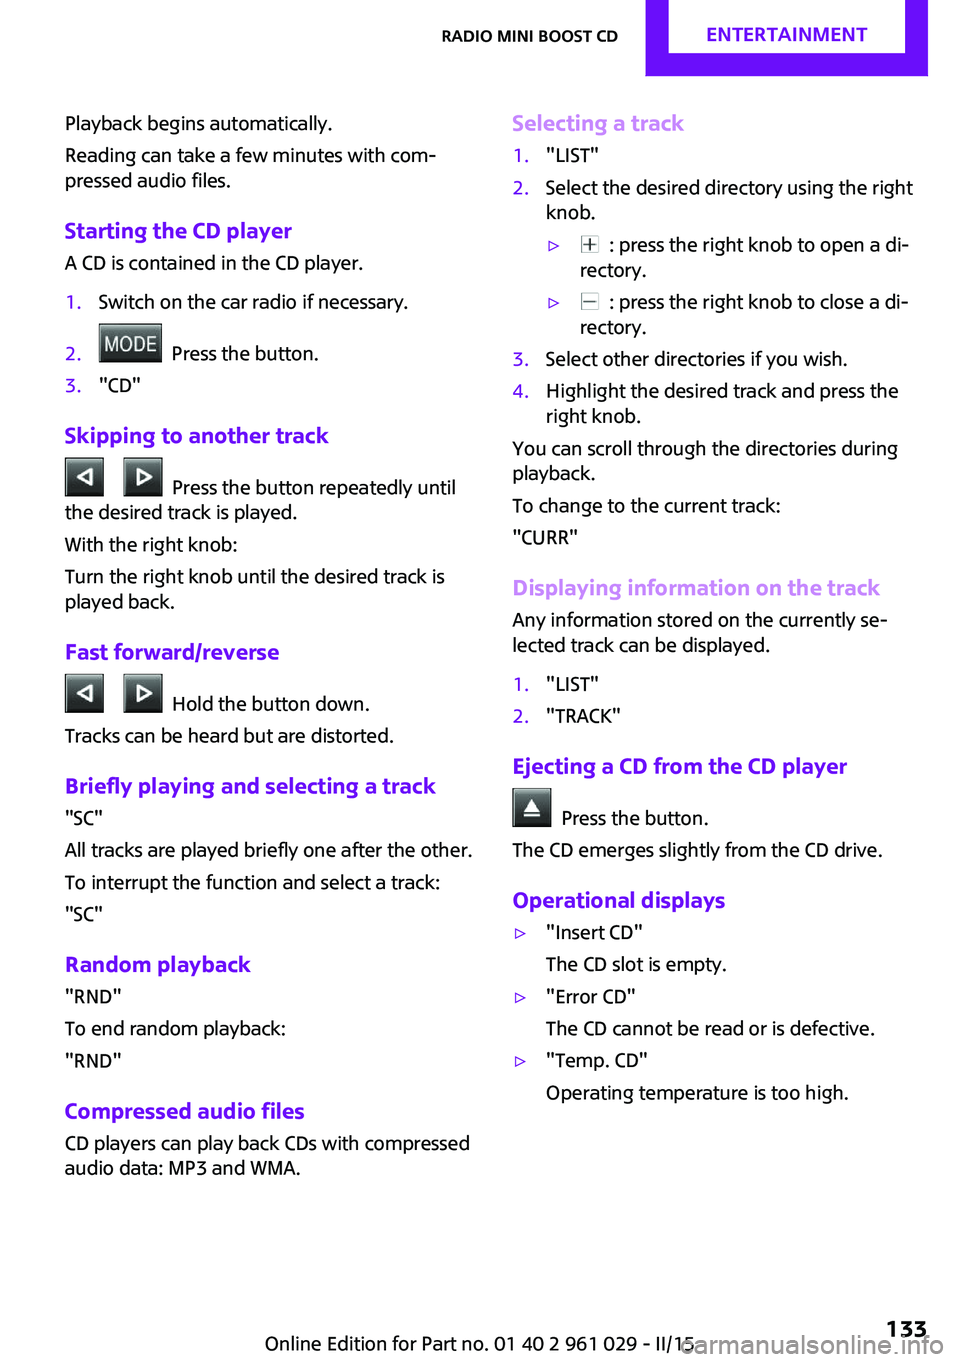
Starting the CD player
A CD is contained in the CD player.1.Switch on the car radio if necessary.2. Press the button.3."CD"
Skipping to another track
Press the button repeatedly until
the desired track is played.
With the right knob:
Turn the right knob until the desired track is
played back.
Fast forward/reverse
Hold the button down.
Tracks can be heard but are distorted.
Briefly playing and selecting a track
"SC"
All tracks are played briefly one after the other.
To interrupt the function and select a track:
"SC"
Random playback "RND"
To end random playback:
"RND"
Compressed audio files CD players can play back CDs with compressed
audio data: MP3 and WMA.
Selecting a track1."LIST"2.Select the desired directory using the right
knob.▷ : press the right knob to open a di‐
rectory.▷ : press the right knob to close a di‐
rectory.3.Select other directories if you wish.4.Highlight the desired track and press the
right knob.
You can scroll through the directories during
playback.
To change to the current track:
"CURR"
Displaying information on the track
Any information stored on the currently se‐
lected track can be displayed.
1."LIST"2."TRACK"
Ejecting a CD from the CD player
Press the button.
The CD emerges slightly from the CD drive.
Operational displays
▷"Insert CD"
The CD slot is empty.▷"Error CD"
The CD cannot be read or is defective.▷"Temp. CD"
Operating temperature is too high.Seite 133Radio MINI Boost CDENTERTAINMENT133
Online Edition for Part no. 01 40 2 961 029 - II/15
Page 136 of 231
Notes
CD player Do not remove the cover
The CD players are officially designated
Class 1 laser products. Do not operate if the
cover is damaged; otherwise, severe eye dam‐
age can result. ◀
CDs Using CDs▷Do not use self-recorded CDs with la‐
bels applied, as these can become
detached during playback due to
heat buildup and can cause irrepara‐
ble damage to the device.▷Only use round CDs with a standard diame‐
ter of 4.7 in/12 cm and do not play CDs
with an adapter, e.g., single CDs; otherwise,
the CDs or the adapter may jam and no lon‐
ger eject. ◀
General malfunctions
▷The CD players have been optimized for
performance in vehicles. In some instances
they may be more sensitive to faulty CDs
than stationary devices would be.▷If a CD cannot be played, first check if it has
been inserted correctly.
Humidity
High levels of humidity can lead to condensa‐
tion on the CD or the laser's scan lens, and tem‐
porarily prevent playback.
Malfunctions with particular CDs If malfunctions occur only with particular CDs,
this can be due to one of the following causes:
Self-recorded CDs
▷Possible reasons for malfunctions with self-
recorded CDs are inconsistent data creationor recording processes, or poor quality or
old age of the blank CD.▷Only label CDs on the upper side with a pen
intended for this purpose.
Damage
▷Avoid fingerprints, dust, scratches and
moisture.▷Store CDs in a sleeve.▷Do not subject CDs to temperatures over
50 ℃/122 ℉, high humidity, or direct sun‐
light.
CDs with copy protection
CDs are often provided with a copy protection
feature by the manufacturer. This can mean
that some CDs cannot be played or can only be
played to a limited extent.
MACROVISION
This product contains copyrighted technology
that is based on multiple registered US patents
and the intellectual property of the Macrovision
Corporation and other manufacturers. The use
of this copy protection must be approved by
Macrovision. Media protected by this product -
unless otherwise agreed with Macrovision -
may only be used for private purposes. Copying
of this technology is prohibited.
External devices AUX-IN port
At a glance
▷For connecting audio devices, e.g., MP3
player. The sound is output on the vehicle
loudspeakers.▷Recommendation: use medium tone and
volume settings on the audio device. The
tone depends on the quality of the audio
files.Seite 134ENTERTAINMENTRadio MINI Boost CD134
Online Edition for Part no. 01 40 2 961 029 - II/15
Page 137 of 231
Connecting
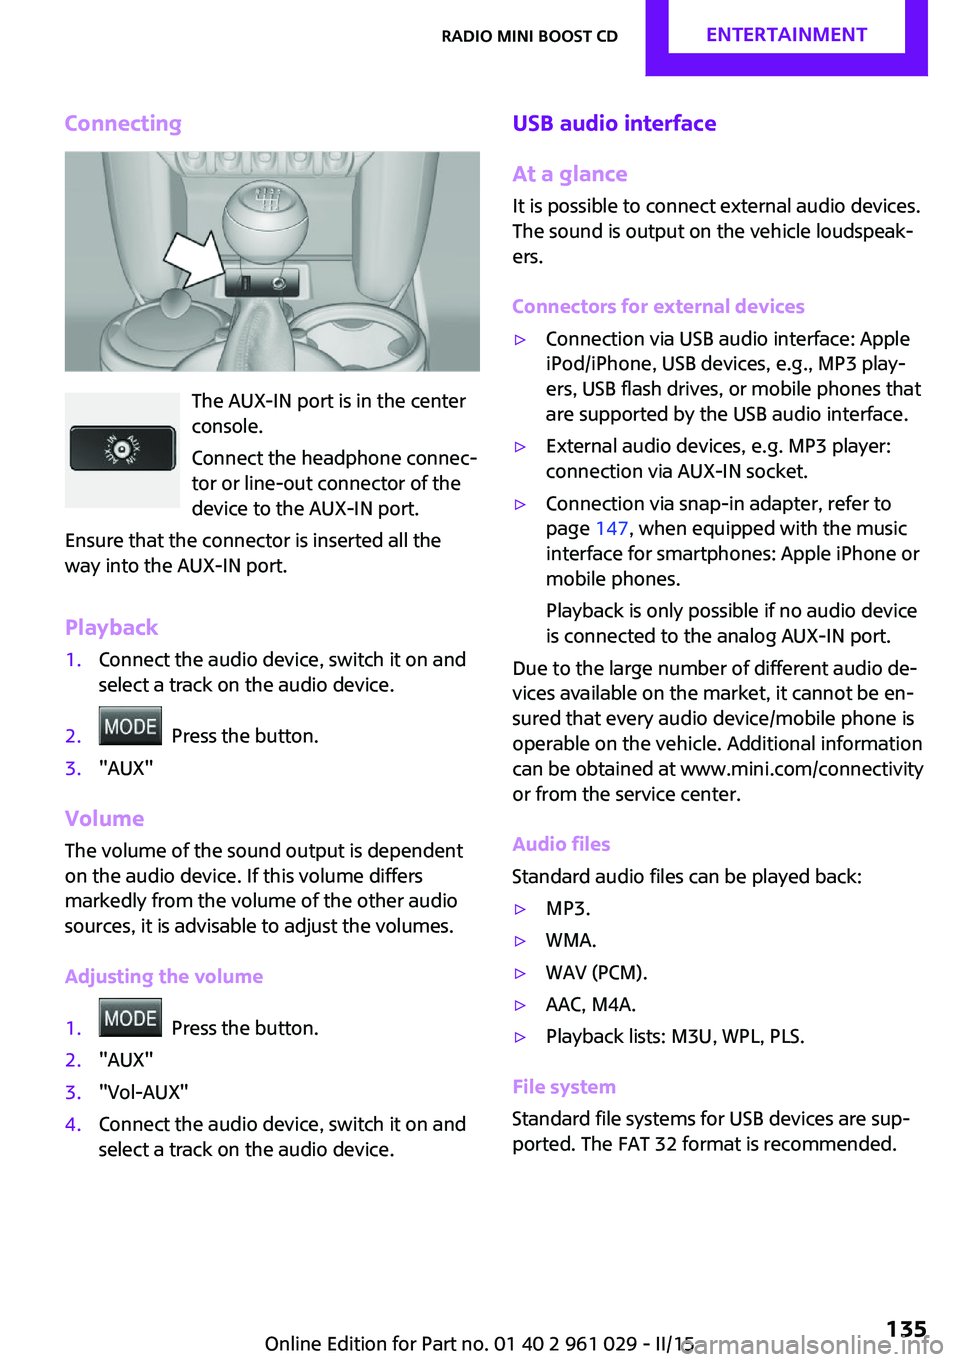
The AUX-IN port is in the center
console.
Connect the headphone connec‐
tor or line-out connector of the
device to the AUX-IN port.
Ensure that the connector is inserted all the
way into the AUX-IN port.
Playback
1.Connect the audio device, switch it on and
select a track on the audio device.2. Press the button.3."AUX"
Volume
The volume of the sound output is dependent
on the audio device. If this volume differs
markedly from the volume of the other audio
sources, it is advisable to adjust the volumes.
Adjusting the volume
1. Press the button.2."AUX"3."Vol-AUX"4.Connect the audio device, switch it on and
select a track on the audio device.USB audio interface
At a glance
It is possible to connect external audio devices.
The sound is output on the vehicle loudspeak‐
ers.
Connectors for external devices▷Connection via USB audio interface: Apple
iPod/iPhone, USB devices, e.g., MP3 play‐
ers, USB flash drives, or mobile phones that
are supported by the USB audio interface.▷External audio devices, e.g. MP3 player:
connection via AUX-IN socket.▷Connection via snap-in adapter, refer to
page 147, when equipped with the music
interface for smartphones: Apple iPhone or
mobile phones.
Playback is only possible if no audio device
is connected to the analog AUX-IN port.
Due to the large number of different audio de‐
vices available on the market, it cannot be en‐
sured that every audio device/mobile phone is
operable on the vehicle. Additional information
can be obtained at www.mini.com/connectivity
or from the service center.
Audio files
Standard audio files can be played back:
▷MP3.▷WMA.▷WAV (PCM).▷AAC, M4A.▷Playback lists: M3U, WPL, PLS.
File system
Standard file systems for USB devices are sup‐
ported. The FAT 32 format is recommended.
Seite 135Radio MINI Boost CDENTERTAINMENT135
Online Edition for Part no. 01 40 2 961 029 - II/15