2015 MINI COOPER CONVERTIBLE lock
[x] Cancel search: lockPage 176 of 231

CoolantVehicle equipment
This chapter describes all series equipment as
well as country-specific and special equipment
offered for this model series. Therefore, it also
describes equipment that may not be found in
your vehicle, for instance due to the selected
special equipment or the country version. This
also applies to safety-related functions and sys‐
tems.
When using the features and systems described
here, adhere to local regulations.
General information Danger of burns from hot engine
Do not open the cooling system while the
engine is hot; otherwise, escaping coolant may
cause burns. ◀
Suitable additives
Only use suitable additives; otherwise,
engine damage may occur. The additives are
harmful to your health. ◀
Coolant consists of water and additives.
Not all commercially available additives are
suitable for your MINI vehicle. Ask your service
center for suitable additives.
Coolant temperature
If the coolant and therefore the engine over‐
heat, a warning lamp lights up, refer to
page 199.Coolant level
Checking1.Do not open the hood until the engine has
cooled down.2.Turn the expansion tank cap counterclock‐
wise slightly to allow any accumulated
pressure to escape; then continue turning
to open.3.The coolant level is correct if it is between
the markings. The markings are located on
the side of the coolant reservoir.
Refilling
1.Do not open the hood until the engine has
cooled down.2.Turn the expansion tank cap counterclock‐
wise slightly to allow any accumulated
pressure to escape, then continue turning
to open.3.If the coolant level is low, slowly add cool‐
ant up to the specified level; do not overfill.4.Twist the cap closed.5.Have the cause of the coolant loss elimi‐
nated as soon as possible.
Disposal
Comply with the appropriate environ‐mental protection regulations when dis‐
posing of coolant additives.
Seite 174MOBILITYCoolant174
Online Edition for Part no. 01 40 2 961 029 - II/15
Page 180 of 231

MINI Coupe, MINI Roadster: replacing
the wiper blades1.Fold up and hold the wiper arm.2.Squeeze the locking spring, arrows 1, and
fold out the wiper blade, arrow 2.3.Take the wiper blade out of the catch
mechanism toward the front.4.Press the new wiper blade into the fixation
until it engages audibly.5.Fold down the wiper arm.
Risk of damage
Before opening the hood, ensure that the
wiper arms with wiper blades are folded onto
the window; otherwise, damage may occur. ◀
MINI Convertible: replacing the wiper
blades
1.Fold up and hold the wiper arm.2.Squeeze the locking spring, arrows 1, and
fold toward the wiper blade, arrows 2.3.While squeezing the locking spring, pull the
wiper blade off of the wiper arm, arrow 3.4.Slide the new wiper blade onto the wiper
arm until it engages audibly.5.Fold down the wiper arm.
Risk of damage
Before opening the hood, ensure that the
wiper arms with wiper blades are folded onto
the window; otherwise, damage may occur. ◀
Lamp and bulb replace‐
ment
Notes
Lamps and bulbs Lamps and bulbs make an essential contribu‐
tion to vehicle safety. Therefore, exercise cau‐
tion when handling lights and bulbs.
The manufacturer of the vehicle recommends
that you entrust corresponding procedures to
the service center if you are unfamiliar with
them or they are not described here.
You can obtain a selection of replacement
bulbs at the service center.
Danger of burns
Only change bulbs when they are cool;
otherwise, there is the danger of getting
burned. ◀
Working on the lighting system
When working on the lighting system,
you should always switch off the lights affected
to prevent short circuits.
To avoid possible injury or equipment damage
when replacing bulbs, observe any instructions
provided by the bulb manufacturer. ◀
Do not touch the bulbs
Do not touch the glass of new bulbs with
your bare hands, as even minute amounts of
contamination will burn into the bulb's surface
and reduce its service life.
Seite 178MOBILITYReplacing components178
Online Edition for Part no. 01 40 2 961 029 - II/15
Page 182 of 231

Lower LED front lights1Parking lights / daytime running lights2Fog lights
Halogen low beams and high-beams
H13 bulb, 60/55 watt
Wear protective goggles and glovesHalogen bulbs are pressurized. Therefore,
wear protective goggles and gloves. Otherwise,
there is a danger of injuries if the bulb is acci‐
dentally damaged during replacement. ◀
Attach the cover carefully
When attaching the cover, proceed care‐
fully; otherwise, leaks may occur, causing dam‐
age to the headlamp system. ◀
Access to the bulbs through the engine
compartment
Follow the general instructions on lamps and
bulbs, refer to page 178.
Low beam/high-beam bulbs can be changed
from the engine compartment.
To remove the cover:
1.Press the tab.2.Fold away the cover and take it out of the
holder.
Proceed in reverse order to attach the cover.
Attach the cover carefully
When attaching the cover, proceed care‐
fully; otherwise, leaks may occur, causing dam‐
age to the headlamp system. ◀
Replacing the bulb
1.Turn the bulb counterclockwise, arrow 1,
and remove it, arrow 2.2.Press the release, arrow 1, and pull off the
connector, arrow 2.Seite 180MOBILITYReplacing components180
Online Edition for Part no. 01 40 2 961 029 - II/15
Page 183 of 231
3.Insert the new bulb and attach the cover in
reverse order.
LED parking lights/LED fog lights/LED
daytime running lights
Follow the general instructions on lamps and
bulbs, refer to page 178.
Lights are implemented using LED technology.
Contact your service center in the event of a
malfunction.
Turn signals/parking lights/roadside
parking lights/fog lights/and daytime
running lights
Access to the bulbs via the wheel housing
Follow the general instructions on lamps and
bulbs, refer to page 178.
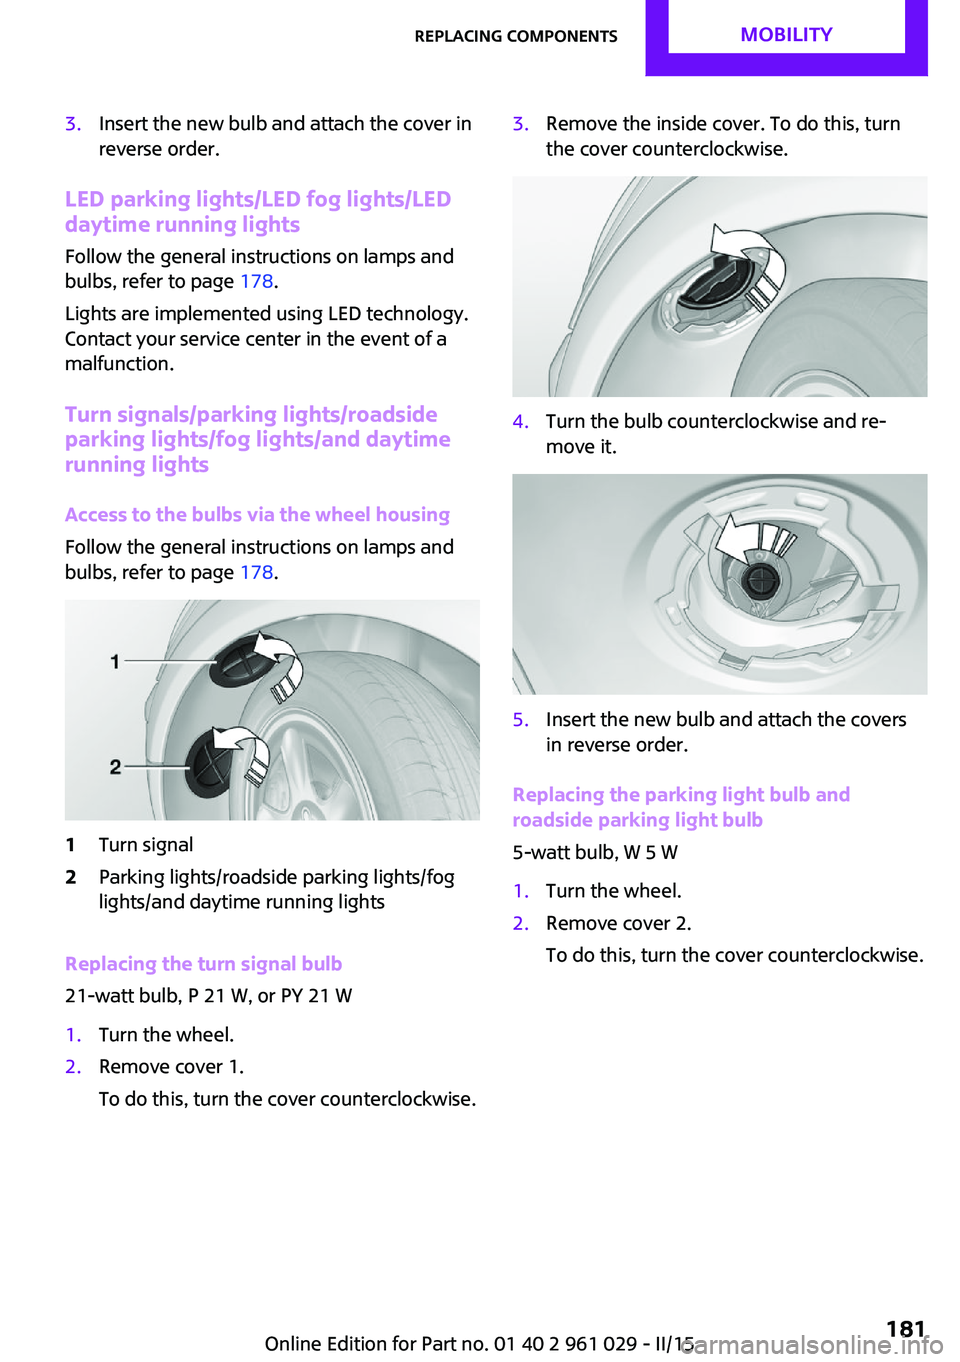
1Turn signal2Parking lights/roadside parking lights/fog
lights/and daytime running lights
Replacing the turn signal bulb
21-watt bulb, P 21 W, or PY 21 W
1.Turn the wheel.2.Remove cover 1.
To do this, turn the cover counterclockwise.3.Remove the inside cover. To do this, turn
the cover counterclockwise.4.Turn the bulb counterclockwise and re‐
move it.5.Insert the new bulb and attach the covers
in reverse order.
Replacing the parking light bulb and
roadside parking light bulb
5-watt bulb, W 5 W
1.Turn the wheel.2.Remove cover 2.
To do this, turn the cover counterclockwise.Seite 181Replacing componentsMOBILITY181
Online Edition for Part no. 01 40 2 961 029 - II/15
Page 184 of 231
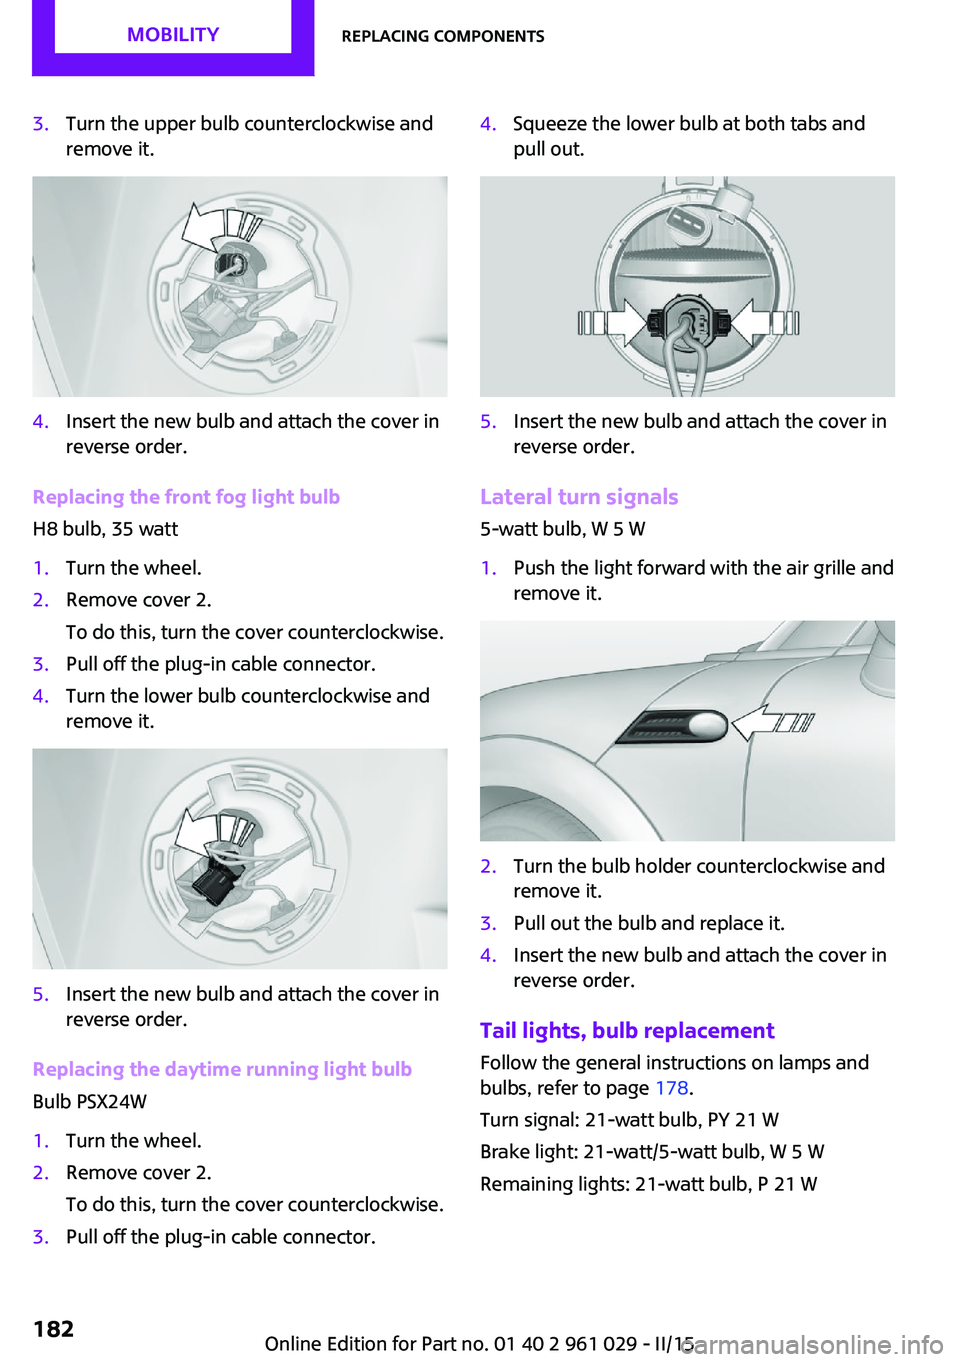
3.Turn the upper bulb counterclockwise and
remove it.4.Insert the new bulb and attach the cover in
reverse order.
Replacing the front fog light bulb
H8 bulb, 35 watt
1.Turn the wheel.2.Remove cover 2.
To do this, turn the cover counterclockwise.3.Pull off the plug-in cable connector.4.Turn the lower bulb counterclockwise and
remove it.5.Insert the new bulb and attach the cover in
reverse order.
Replacing the daytime running light bulb
Bulb PSX24W
1.Turn the wheel.2.Remove cover 2.
To do this, turn the cover counterclockwise.3.Pull off the plug-in cable connector.4.Squeeze the lower bulb at both tabs and
pull out.5.Insert the new bulb and attach the cover in
reverse order.
Lateral turn signals
5-watt bulb, W 5 W
1.Push the light forward with the air grille and
remove it.2.Turn the bulb holder counterclockwise and
remove it.3.Pull out the bulb and replace it.4.Insert the new bulb and attach the cover in
reverse order.
Tail lights, bulb replacement
Follow the general instructions on lamps and
bulbs, refer to page 178.
Turn signal: 21-watt bulb, PY 21 W
Brake light: 21-watt/5-watt bulb, W 5 W
Remaining lights: 21-watt bulb, P 21 W
Seite 182MOBILITYReplacing components182
Online Edition for Part no. 01 40 2 961 029 - II/15
Page 185 of 231
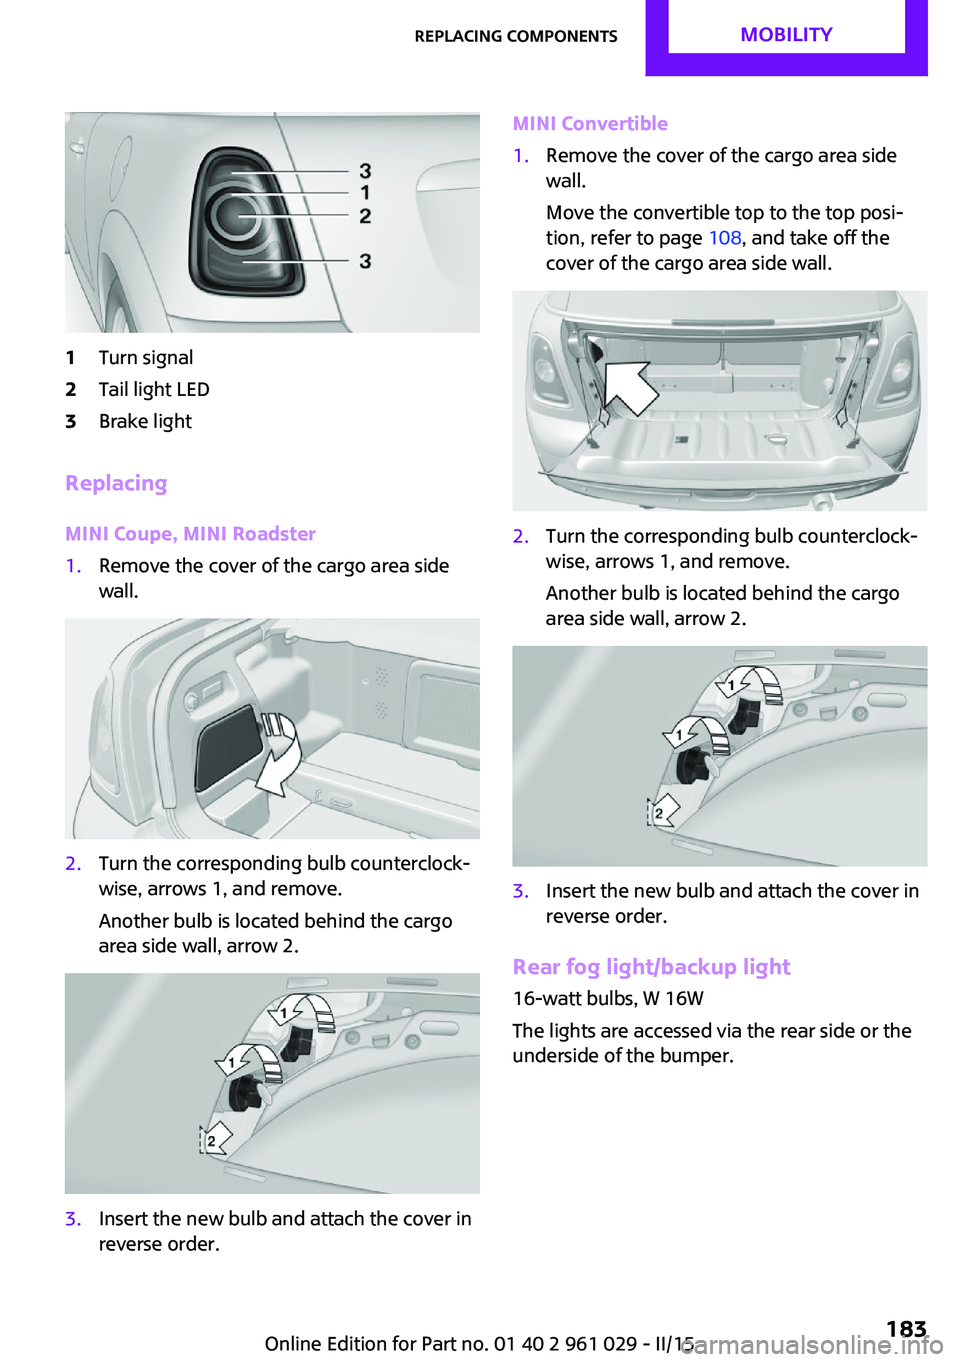
1Turn signal2Tail light LED3Brake light
Replacing
MINI Coupe, MINI Roadster
1.Remove the cover of the cargo area side
wall.2.Turn the corresponding bulb counterclock‐
wise, arrows 1, and remove.
Another bulb is located behind the cargo
area side wall, arrow 2.3.Insert the new bulb and attach the cover in
reverse order.MINI Convertible1.Remove the cover of the cargo area side
wall.
Move the convertible top to the top posi‐
tion, refer to page 108, and take off the
cover of the cargo area side wall.2.Turn the corresponding bulb counterclock‐
wise, arrows 1, and remove.
Another bulb is located behind the cargo
area side wall, arrow 2.3.Insert the new bulb and attach the cover in
reverse order.
Rear fog light/backup light
16-watt bulbs, W 16W
The lights are accessed via the rear side or the
underside of the bumper.
Seite 183Replacing componentsMOBILITY183
Online Edition for Part no. 01 40 2 961 029 - II/15
Page 186 of 231
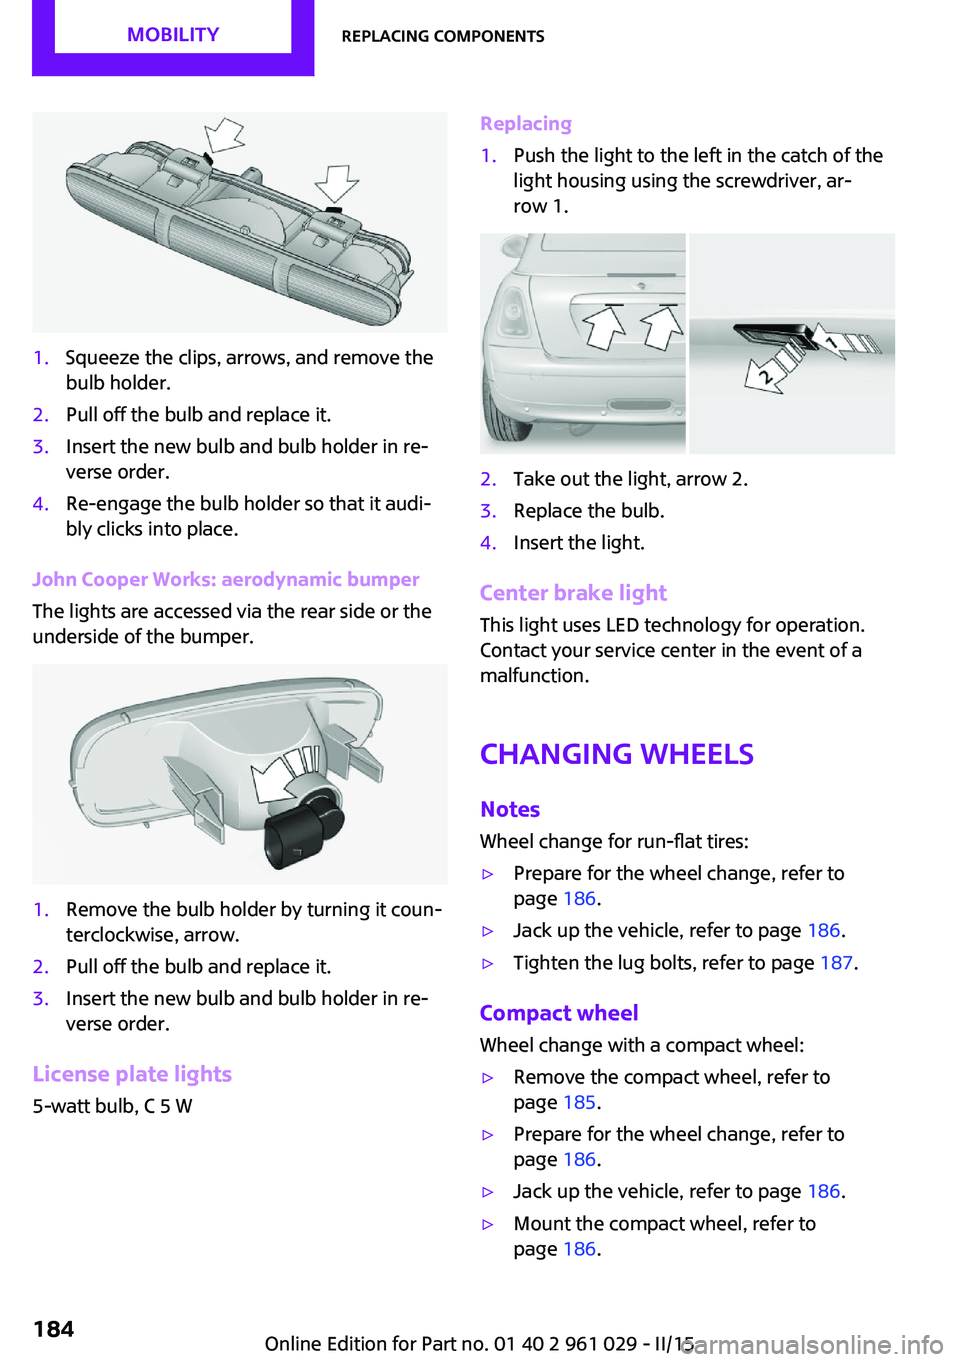
1.Squeeze the clips, arrows, and remove the
bulb holder.2.Pull off the bulb and replace it.3.Insert the new bulb and bulb holder in re‐
verse order.4.Re-engage the bulb holder so that it audi‐
bly clicks into place.
John Cooper Works: aerodynamic bumper
The lights are accessed via the rear side or the
underside of the bumper.
1.Remove the bulb holder by turning it coun‐
terclockwise, arrow.2.Pull off the bulb and replace it.3.Insert the new bulb and bulb holder in re‐
verse order.
License plate lights
5-watt bulb, C 5 W
Replacing1.Push the light to the left in the catch of the
light housing using the screwdriver, ar‐
row 1.2.Take out the light, arrow 2.3.Replace the bulb.4.Insert the light.
Center brake light
This light uses LED technology for operation.
Contact your service center in the event of a
malfunction.
Changing wheels NotesWheel change for run-flat tires:
▷Prepare for the wheel change, refer to
page 186.▷Jack up the vehicle, refer to page 186.▷Tighten the lug bolts, refer to page 187.
Compact wheel
Wheel change with a compact wheel:
▷Remove the compact wheel, refer to
page 185.▷Prepare for the wheel change, refer to
page 186.▷Jack up the vehicle, refer to page 186.▷Mount the compact wheel, refer to
page 186.Seite 184MOBILITYReplacing components184
Online Edition for Part no. 01 40 2 961 029 - II/15
Page 187 of 231
▷Tighten the lug bolts, refer to page 187.▷Drive with the compact wheel, refer to
page 185.
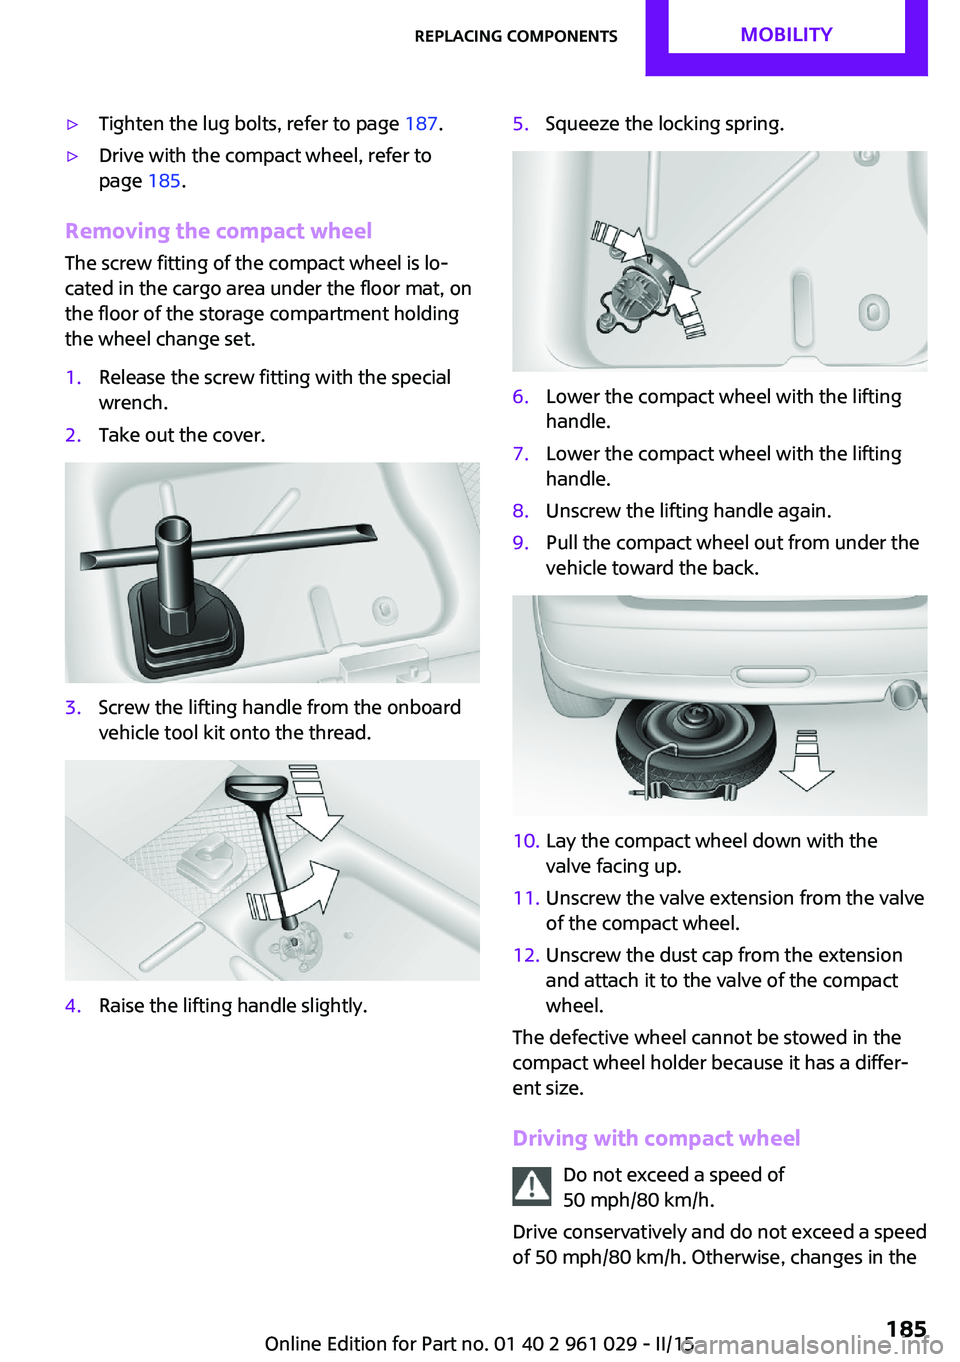
Removing the compact wheel
The screw fitting of the compact wheel is lo‐
cated in the cargo area under the floor mat, on
the floor of the storage compartment holding
the wheel change set.
1.Release the screw fitting with the special
wrench.2.Take out the cover.3.Screw the lifting handle from the onboard
vehicle tool kit onto the thread.4.Raise the lifting handle slightly.5.Squeeze the locking spring.6.Lower the compact wheel with the lifting
handle.7.Lower the compact wheel with the lifting
handle.8.Unscrew the lifting handle again.9.Pull the compact wheel out from under the
vehicle toward the back.10.Lay the compact wheel down with the
valve facing up.11.Unscrew the valve extension from the valve
of the compact wheel.12.Unscrew the dust cap from the extension
and attach it to the valve of the compact
wheel.
The defective wheel cannot be stowed in the
compact wheel holder because it has a differ‐
ent size.
Driving with compact wheel Do not exceed a speed of
50 mph/80 km/h.
Drive conservatively and do not exceed a speed
of 50 mph/80 km/h. Otherwise, changes in the
Seite 185Replacing componentsMOBILITY185
Online Edition for Part no. 01 40 2 961 029 - II/15