2015 MERCEDES-BENZ SPRINTER climate settings
[x] Cancel search: climate settingsPage 16 of 334

Off-road driving
Checklist after driving off-road ...... 158
Important safety notes .................. 156
Rules for driving off-road ............... 158
Oil
see Engine oil
On-board computer
Display message ............................1 97
Lighting submenu .......................... 192
On-board computer (vehicles with
steering wheel buttons)
Audio menu ................................... 187
Display message ............................ 184
Menu overview .............................. 186
Operating ....................................... 184
Operation menu ............................ .186
Settings menu ............................... 188
Standard displa y............................ 187
Telephone menu ............................ 196
Trip computer menu ...................... 195
On-board computer (vehicles with-
out steering wheel buttons)
Display message ............................ 198
General notes ................................ 182
Setting the clock ............................ 183
Standard display ............................ 182
Operating Instructions
Before the first journey .................... 22
Limited Warranty ............................. 22
Operating safety
Vehicle registration .......................... 28
Operating safety and vehicle
approval
Attachments and bodie s.................. 26
BlueTEC exhaust gas aftertreat-
ment ................................................ 25
Changing the engine power out-
put ................................................... 25
Correct use ...................................... 22
Declaration of conformity ................ 24
Equipment and conversions ............. 26
Important safety notes .................... 24
Information about body/equip-
ment mounting directives ................ 26
Notes on operating the vehicle ........ 24
Qualified specialist worksho p.......... 25
Registering your vehicl e................... 25 Operating system
see On-board computer
Operator's Manual
General notes .................................. 22
Vehicle equipment ........................... 22
Outline lamp
Replacing bulb s............................. 105
Outside temperature display ........... 181
Overhead control panel ...................... 38
Overrevving range ............................. 181
Overrun cutoff ................................... 152 P
Paintwork (cleaning instructions) ... 267
Paper holder ...................................... 233
Parking ............................................... 149
Important safety notes .................. 149
Parking brake ................................ 150
Wheel chock .................................. 151
see PARKTRONIC
Parking aid
see PARKTRONIC
Parking assistance
see PARKTRONIC
Parking brake
Display message ............................ 207
Notes/function .............................. 150
Parking lamps
Replacing bulb s............................. 100
PARKTRONIC
Deactivating/activating ................. 169
Driving system ............................... 167
Function/note s............................. 167
Important safety notes .................. 167
Problem (malfunction) ................... 171
Range of the sensors ..................... 168
Roll-back warning .......................... 169
Trailer towing ................................. 170
Warning display ............................. 169
Partition sliding door
Important safety notes .................... 77
Opening/closing .............................. 77
Passenger compartment air-condi-
tioning system
see Climate control
Passenger compartment heating
see Climate control 14
Index
Page 114 of 334

Useful information
This Operator's Manual describes all models
as well as standard and optional equipment of your vehicle that were available at the time of going to print. Country-specific variations are
possible. Note that your vehicle may not be
equipped with all of the described functions.
This also applies to systems and functions
relevant to safety.
Read the information on qualified specialist
workshops (Y page 25). Overview of climate control systems
Important safety notes
Observe the recommended settings on the
following pages. Otherwise, the windows
could fog up.
Climate control regulates the temperature
and the humidity in the vehicle interior and
filters undesirable substances from the air.
Climate control is only operational when the
engine is running. The system only functions
optimally when the side windows are closed.
i Ventilate the vehicle for a brief period
during warm weather. In order to cool the
vehicle more rapidly, switch climate control
to air-recirculation mode briefly. This will
speed up the cooling process and the
desired vehicle interior temperature will be reached more quickly.
i The integrated filter can filter out most
particles of dust and completely filters out
pollen. A clogged filter reduces the airflow
into the vehicle interior. For this reason,
you should always observe the interval for
replacing the filter, which is specified in the Maintenance Booklet. As it depends on
environmental conditions, e.g. heavy air
pollution, the interval may be shorter than
that stated in the Maintenance Booklet. 112
Overview of climate control systemsClimate control
Page 119 of 334

Activating/deactivating rear-compart-
ment climate control via the control
panel X
Turn the key to position 2in the ignition
lock.
Vehicle with rear-compartment heating/
rear-compartment air conditioning
X To switch on/off: press the0074switch.
If the indicator lamp in the button lights up, the rear-compartment heating/rear-com-
partment air conditioning is switched on. Switching the cooling with air dehu-
midification function on/off
Important information If you switch off the "Cooling with air dehu-
midification" function, the air inside the vehi- cle will not be cooled (in warm weather) or
dehumidified. The windows could fog up morequickly.
The cooling with air dehumidification function
is only available when the engine is running.
The air inside the vehicle is cooled and dehu- midified according to the temperature selec-
ted.
Condensation may appear on the underside
of the vehicle when in cooling mode. This is
normal and not a sign that there is a malfunc- tion.
Switching on/off Vehicle with air conditioning
X Press the 005Abutton.
If the indicator lamp in the button lights up, cooling with air dehumidification is
switched on. Setting the temperature
Increasing/reducing temperature in
the front compartment via the control
panel Only change the temperature in small incre-
ments. Start at the center position, or at 72 ‡
(22 †).
X Switch on climate control (Y page 116).
X Turn temperature control 0043clockwise to
increase or counterclockwise to reduce the temperature (Y page 114).
Increasing/reducing temperature in
the rear compartment via the control
panel Only change the temperature in small incre-
ments.
X Switch on climate control (Y page 116).
X Turn rear-compartment temperature con-
trol 0087(Ypage 115) or rear-compartment
air-conditioning system 0044(Ypage 116)
clockwise to increase or counterclockwise
to reduce the temperature.
i Vehicles with additional air conditioning
and heating in the rear compartment: if you set the temperature control to the center
position, only one of the two climate con-
trol systems works in the rear compart-
ment and in air-recirculation mode
(Y page 120). Setting the air distribution
Air distribution settings The air distribution symbols have the follow-
ing meanings:
0078
Directs air through the center and
side air vents
007E
0085 Directs air to the windshield and the
air vents Operating the climate control system
117Climate control
Page 120 of 334

007C
Directs air to the windshield, the air
vents and into the footwell
007D Directs air to the air vents and into
the footwell
Adjusting X
Switch on climate control (Y page 116).
X Set air-distribution control 0085for the heat-
ing (Y page 113 )or air-conditioning system
0083 (Ypage 114) to the corresponding sym-
bol. Setting the airflow
X Switch on climate control (Y page 116).
X Vehicle with heating/rear-compart-
ment heating: set airflow control 0044of the
heating (Y page 113) or of the rear-com-
partment heating (Y page 115) to the
desired level.
X Vehicle with air conditioning/rear-com-
partment air conditioning: press the
0095 button to reduce or the 0097button
to increase the airflow.
The blower speeds are shown in bars next
to the buttons. Defrosting the windows
You can use the "defrosting" function to
defrost the windshield or to demist the inside of the windshield and the side windows.
Only use the following settings until the win-
dows are clear again.
X Vehicle with window heating: switch on
the front (Y page 119) and/or rear window
defroster (Y page 119) .
X Switch on climate control (Y page 116).
Vehicle with heating
X Set temperature control 0043and airflow
control 0044to0085 (Ypage 113).
X Set air-distribution control 0085to007E
0085 (Ypage 113). X
Close the center air vents (Y page 121) and
the air outlets for the headroom and the
rear compartment (Y page 121).
X Direct the side air vents towards the side
windows and open the defroster vents for
the side windows (Y page 121).
Vehicle with air conditioning X Set temperature control 0043to
0085 (Ypage 114).
X Press the 0097button until the maximum
blower output is reached.
All bars in the display next to the button
light up.
X Set air-distribution control 0083to007E
0085 (Ypage 114).
X Close the center air vents (Y page 121) and
the air outlets for the headroom and the
rear compartment (Y page 121).
X Direct the side air vents towards the side
windows and open the defroster vents for
the side windows (Y page 121). Clearing condensation from the win-
dows
Windows fogged up on the inside You should only select this setting until the
windows are clear again.
X Vehicle with window heating: switch on
the front (Y page 119) and/or rear window
defroster (Y page 119) .
X Switch on climate control (Y page 116).
X Switch off air-recirculation mode
(Y page 120).
Vehicle with heating
X Set temperature control 0043to a higher tem-
perature (Y page 113).
X Set airflow control 0044to a higher blower
setting. It should be set at least to level two
(Y page 113).
X Set air-distribution control 0085to007E
0085 (Ypage 113). 118
Operating the climate control systemClimate control
Page 126 of 334

i
Switch the heater booster function on or
off with the 006Abutton (Y page 130).
X To activate the auxiliary heating sys-
tem: press and hold the upper section of
the 0084 switch for longer than 2 seconds.
The red indicator lamp in the button lights
up. The auxiliary heating heats or ventilates the interior to the temperature that you
have set. The blower switches to the first
level.
X To switch off auxiliary heating: press the
upper section of the 0084button.
or
X Turn the key in the ignition lock to posi-
tion 0.
The red indicator lamp in the button goes
out. The auxiliary heating operates for
another 2 minutes and then switches off
automatically. Selecting a switch-on time
Important information You can use the on-board computer to define
up to three switch-on times, one of which canbe selected.
The yellow indicator lamp in the 0084button
goes out after 30 minutes, if you:
R have selected the switch-on time and
R turn the key to position 0in the ignition lock
On-board computer without steering
wheel buttons X
Turn the key to position 2in the ignition
lock.
X Press the 0084button.
The 0084 symbol flashes in the display.
or
X Press the 0079menu button on the instru-
ment cluster repeatedly until the 0084
symbol flashes in the display.
X Use the 0074or0075 buttons on the instrument
cluster to select the switch-on time 1 1to 3
3. The switch-on time selected is displayed.
X Wait 10 seconds for the standard display to
appear.
The switch-on time is selected. The yellow
indicator lamp in the 0084button lights up.
If you do not preselect a switch-on time,
and --:-- --:-- is shown in the display, this
means that the automatic switch-on mode
is switched off. The yellow indicator lamp in the 0084 button goes out.
On-board computer with steering wheel
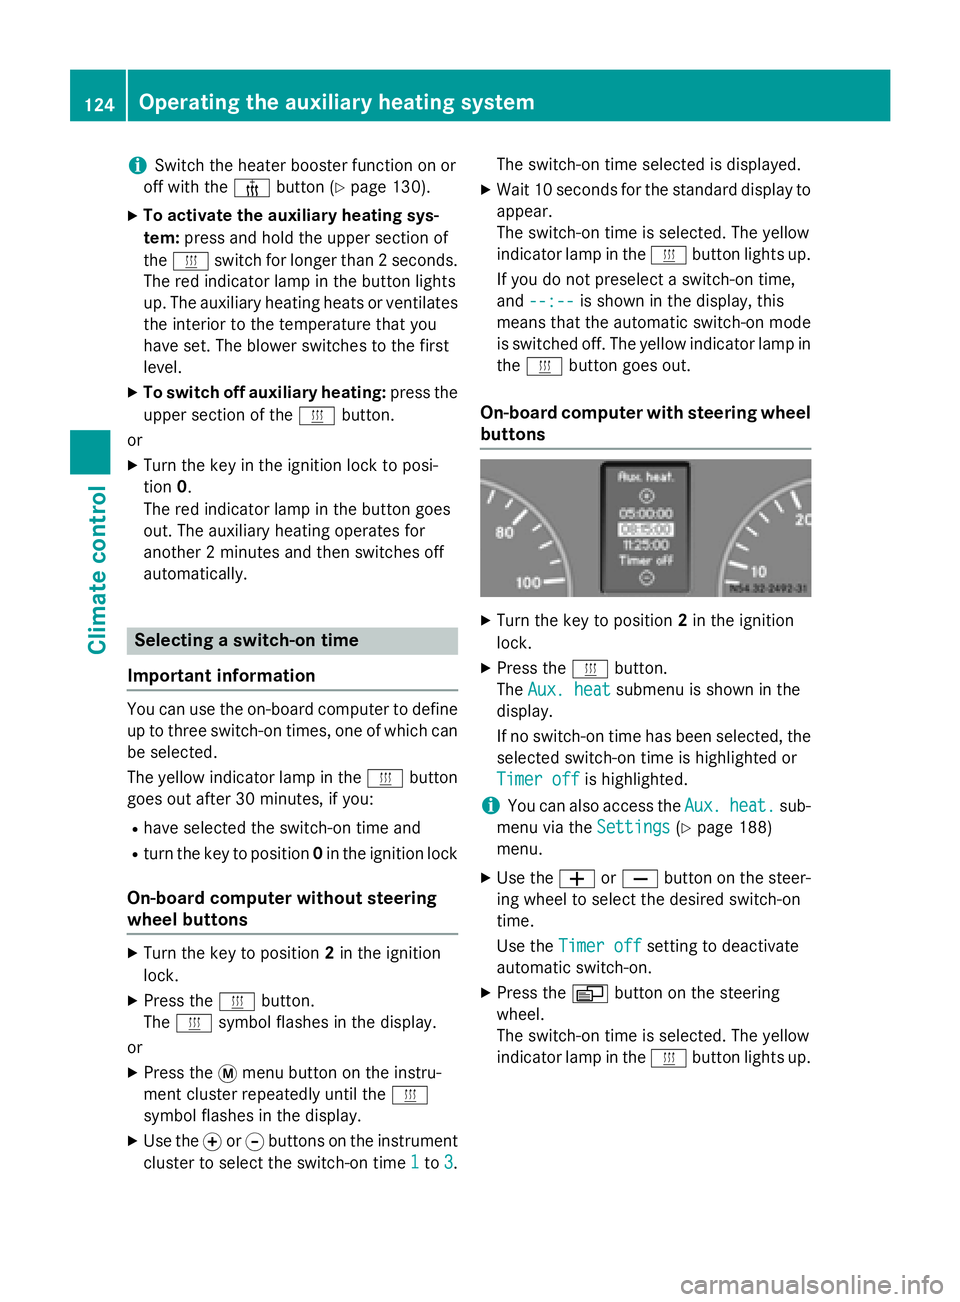
buttons X
Turn the key to position 2in the ignition
lock.
X Press the 0084button.
The Aux. heat Aux. heat submenu is shown in the
display.
If no switch-on time has been selected, the
selected switch-on time is highlighted or
Timer off Timer off is highlighted.
i You can also access the
Aux.
Aux.heat.
heat. sub-
menu via the Settings
Settings(Ypage 188)
menu.
X Use the 0081or0082 button on the steer-
ing wheel to select the desired switch-on
time.
Use the Timer off Timer off setting to deactivate
automatic switch-on.
X Press the 0080button on the steering
wheel.
The switch-on time is selected. The yellow
indicator lamp in the 0084button lights up. 124
Operating the auxiliary heating systemClimate control
Page 127 of 334

Setting the switch-on time
X Use the same method to select a switch-on
time as described in the "Preselecting a
switch-on time" section.
On-board computer without steering
wheel buttons
X Press the 0045reset button on the instru-
ment cluster.
The hour display flashes.
X Use the 0074and 0075buttons on the instru-
ment cluster to set the hours.
X Press the 0045reset button
The minute display flashes.
X Use the 0074and 0075buttons to set the
minutes.
The switch-on time is set and selected.
On-board computer with steering wheel
buttons
X Press the 0063button on the steering
wheel.
The display shows the Hours
Hours menu.
X Use the 0081and0082 buttons on the
steering wheel to set the hours.
X Press the 0063button.
The display shows the Minutes
Minutes menu.
X Use the 0081and0082 buttons to set the
minutes.
X Press the 0080button.
The switch-on time is set and selected. Operation with the remote control
Important information You can switch the auxiliary heating on/off
and set the operating duration using the
remote control. You can use up to 4 remote
control units on the vehicle. These must be
synchronized for the receiver in your vehicle
(Y page 126). The remote control has a maximum range of
approximately 600 meters. This range is
reduced by:
R sources of interference
R solid objects between the remote control
and the vehicle
R the remote control being in an unfavorable
position in relation to the vehicle
R transmitting from an enclosed space
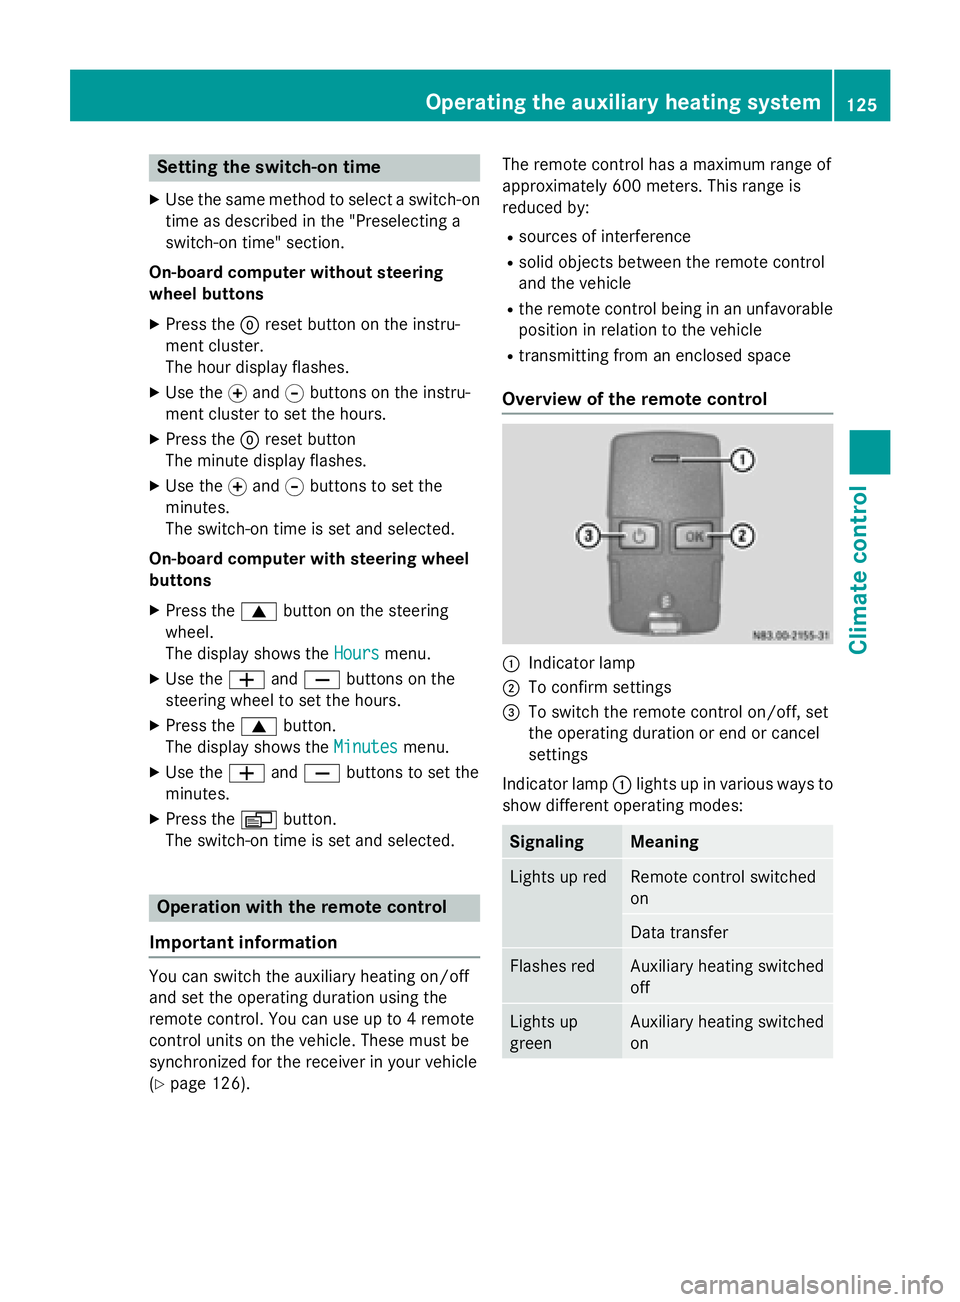
Overview of the remote control 0043
Indicator lamp
0044 To confirm settings
0087 To switch the remote control on/off, set
the operating duration or end or cancel
settings
Indicator lamp 0043lights up in various ways to
show different operating modes: Signaling Meaning
Lights up red Remote control switched
on
Data transfer
Flashes red Auxiliary heating switched
off
Lights up
green Auxiliary heating switched
onOperating the auxiliary heating system
125Climate control Z
Page 129 of 334

The remote control is in synchronizing
mode.
i If you press the
00D0button again on the
remote control after starting synchroniza-
tion, you will only synchronize this remote
control unit with the receiver. Any other
remote control units that were synchron-
ized will be cleared. Indicator lamp 0043
flashes alternately red and green (very
slowly).
X Press the 0070button on the remote con-
trol.
During data transmission, indicator
lamp 0043lights up red.
When remote control indicator lamp 0043
emits two long green flashes, the selected
operating time is synchronized. The indica-
tor lamp in the 0084auxiliary heating but-
ton goes out. Operation with the timer
Important safety notes This is only for vehicles with a hot-water aux-
iliary heater. G
DANGER
If a switch-on time has been selected, the
auxiliary heating switches on automatically.
R If the ventilation is insufficient, poisonous
exhaust gases can collect, in particular car-
bon monoxide. This is the case in enclosed
spaces, for example. There is a risk of fatal
injuries.
R If highly flammable substances or flamma-
ble materials are nearby, there is a risk of a
risk of fire and explosion.
Always deactivate the preselected switch-on
times if you stop the vehicle in such or similar situations.
Use the timer to: R activate/deactivate immediate heating
mode
R set up to three switch-on times R
set the operating duration from 10to
120 minutes or to continuous operation
R set the heating level (preselected temper-
ature) to a range between 10 and 30
Timer overview Timer above the overhead control panel
0043
Program column
0059
Sets preselection memory 1 – 3
(Y page 129)
Sets weekday (Mon. – Sun.)
(Y page 128)
0044 Menu bar
0084
Activates/deactivates immediate
heating mode (Y page 128)
0045 Sets the program times
(Y page 129)
0045 Sets the day, time and the operating
duration (Y page 128)
00D1 Sets the heating level
(Y page 129)
0087 Display panel for: time, heating level
and operating duration
00D5 Continuous operation mode active
00D1 Heating level set
0085 Selects options in program column 0043or
menu bar 0044(forwards)
Increases values
0083 Confirms a selection or setting
0084 Status bar
0084
Heating mode activated
006B Activates the timer
Cancels or ends settings in a menu Operating the auxiliary heating system
127Climate control Z