2015 MERCEDES-BENZ SLS AMG GT ROADSTER clock
[x] Cancel search: clockPage 73 of 290
If you use the mechanical key to unlock and
open the driver's door, the anti-theft alarm
system willbet riggered (Ypage 58).
X Take the mechanical key out of the Smart-
Key (Y page 64).
X Insert the mechanical key into the lock of
the driver's door as far as it willg o.
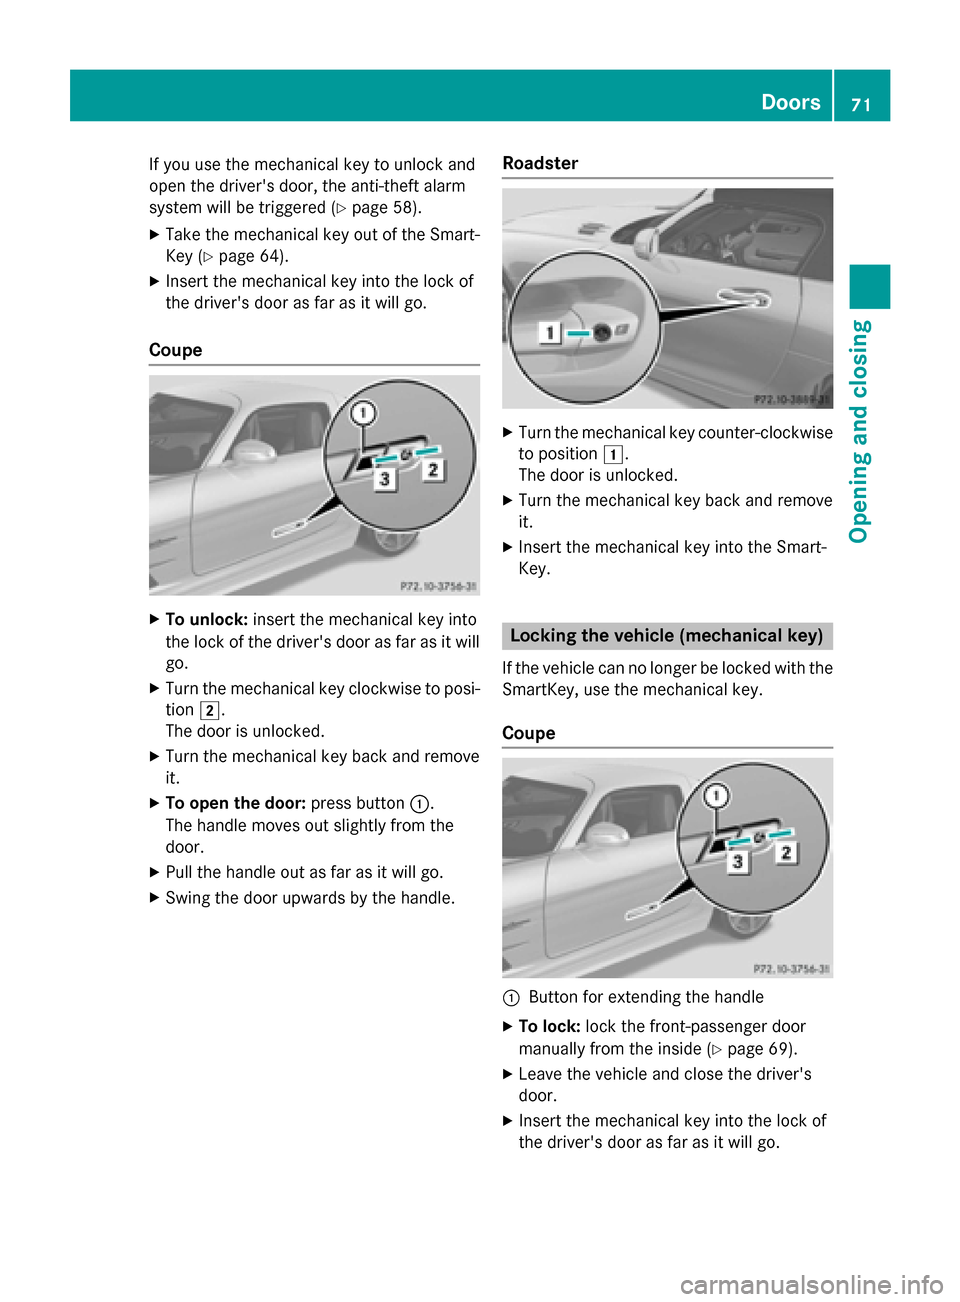
Coupe X
To unlock: insert the mechanical key into
the lock of the driver's door as far as it will go.
X Turn the mechanical key clockwise to posi-
tion 0048.
The door is unlocked.
X Turn the mechanical key back and remove
it.
X To open the door: press button0043.
The handle moves out slightly from the
door.
X Pullt he handle out as far as it willg o.
X Swing the door upwards by the handle. Roadster X
Turn the mechanical key counter-clockwise
to position 0047.
The door is unlocked.
X Turn the mechanical key back and remove
it.
X Insert the mechanical key into the Smart-
Key. Locking the vehicle (mechanical key)
If the vehicle can no longer be locked with the
SmartKey, use the mechanical key.
Coupe 0043
Button for extending the handle
X To lock: lock the front-passenger door
manually from the inside (Y page 69).
X Leave the vehicle and close the driver's
door.
X Insert the mechanical key into the lock of
the driver's door as far as it willg o. Doors
71Opening and closing Z
Page 74 of 290
X
Turn the mechanical key counter-clockwise
to position 0049.
The door is locked.
X Turn the mechanical key back and remove
it.
X Check that both doors are locked.
i If you lock the vehicle as described above,
the fuel filler flap is not locked. The anti-
theft alarm system is not armed.
Roadster X
Open the driver's door.
X Close the front-passenger door and the
trunk lid.
X Press the lockin gbutton (Y page 70).
X Check that the lockin gknobisint he lower
position on the front-passenger door. Press the lockin gknobd own by hand, if neces-
sary.
X Close the driver's door.
X Take the mechanical key out of the Smart-
Key (Y page 64).
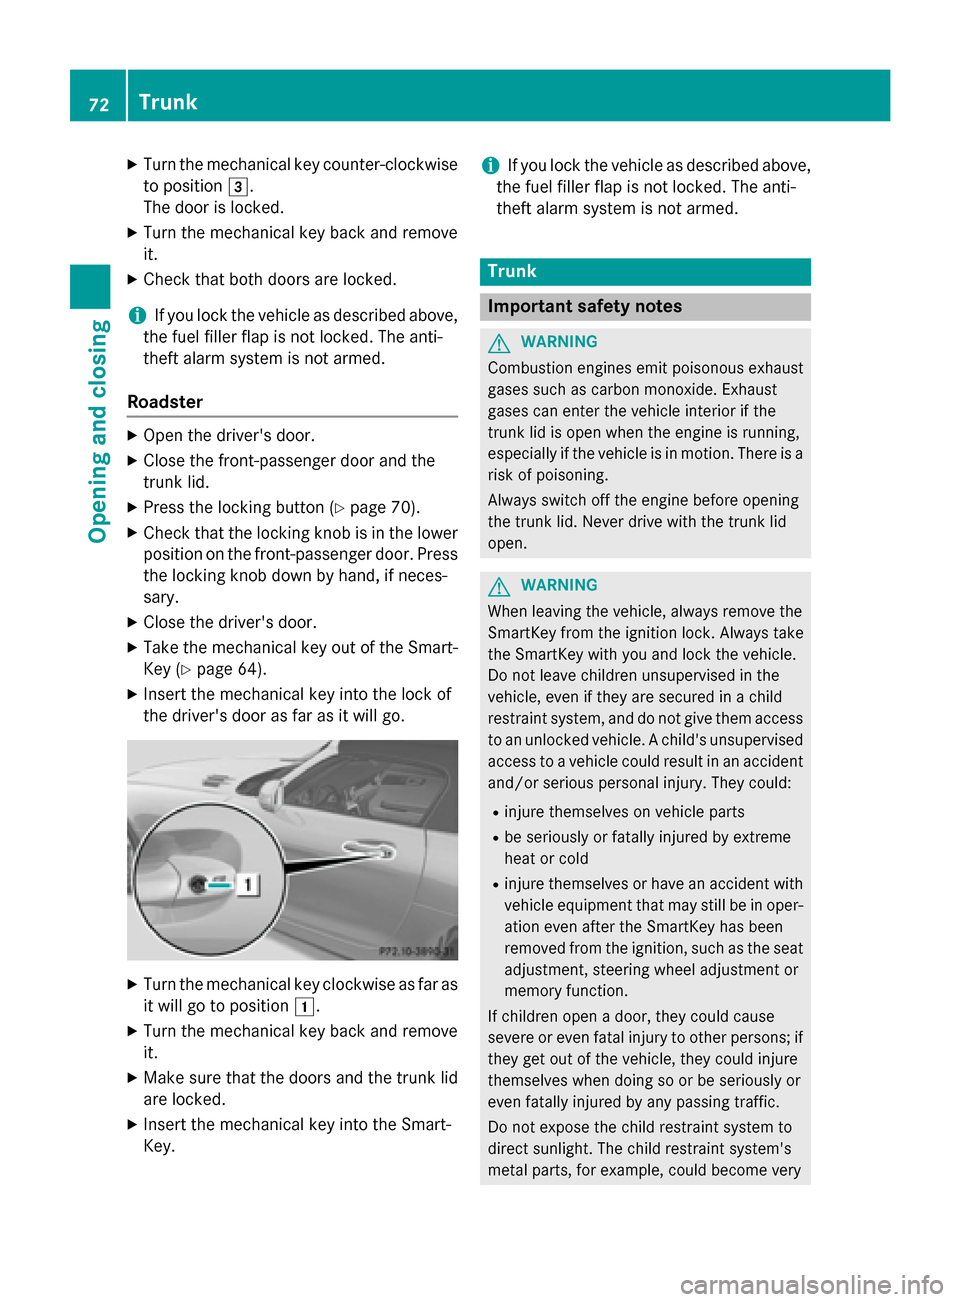
X Insert the mechanical key into the lock of
the driver's door as far as it will go. X
Turn the mechanical key clockwise as far as
it will go to position 0047.
X Turn the mechanical key back and remove
it.
X Make sure that the doors and the trunk lid
are locked.
X Insert the mechanical key into the Smart-
Key. i
If you lock the vehicle as described above,
the fuel filler flap is not locked. The anti-
theft alarm system is not armed. Trunk
Important safety notes
G
WARNING
Combustion engines emit poisonous exhaust
gases such as carbon monoxide. Exhaust
gases can enter the vehicle interior if the
trunk lid is open when the engine is running,
especially if the vehicle is in motion .There is a
risk of poisoning.
Always switch off the engine before opening
the trunk lid. Never drive with the trunk lid
open. G
WARNING
When leaving the vehicle, alway sremove the
SmartKey from the ignition lock. Always take
the SmartKey with you and lock the vehicle.
Do not leave children unsupervised in the
vehicle, even if they are secured in achild
restraint system, and do not give them access to an unlocked vehicle. Achild's unsupervised
access to avehicle could result in an accident
and/or serious personal injury. They could:
R injure themselves on vehicle parts
R be seriously or fatally injured by extreme
heat or cold
R injure themselves or have an accident with
vehicle equipment that may still be in oper-
ation even after the SmartKey has been
removed from the ignition ,such as the seat
adjustment, steerin gwheel adjustmen tor
memory function.
If children open adoor, they could cause
severe or even fatal injury to other persons; if they get out of the vehicle, they could injure
themselves when doing so or be seriously or
even fatally injured by any passing traffic.
Do not expose the child restraint system to
direct sunlight. The child restraint system's
metal parts, for example, could become very 72
TrunkOpening and closing
Page 76 of 290
X
Press trunkl id remotecontrol button 0043.
The trunkl id opens slightly. Locking the trunk separately
You can lock the trunks eparately. If you then
unlock the vehicle centrally, the trunk
remains locked and cannot be opened.
X Close the trunkl id.
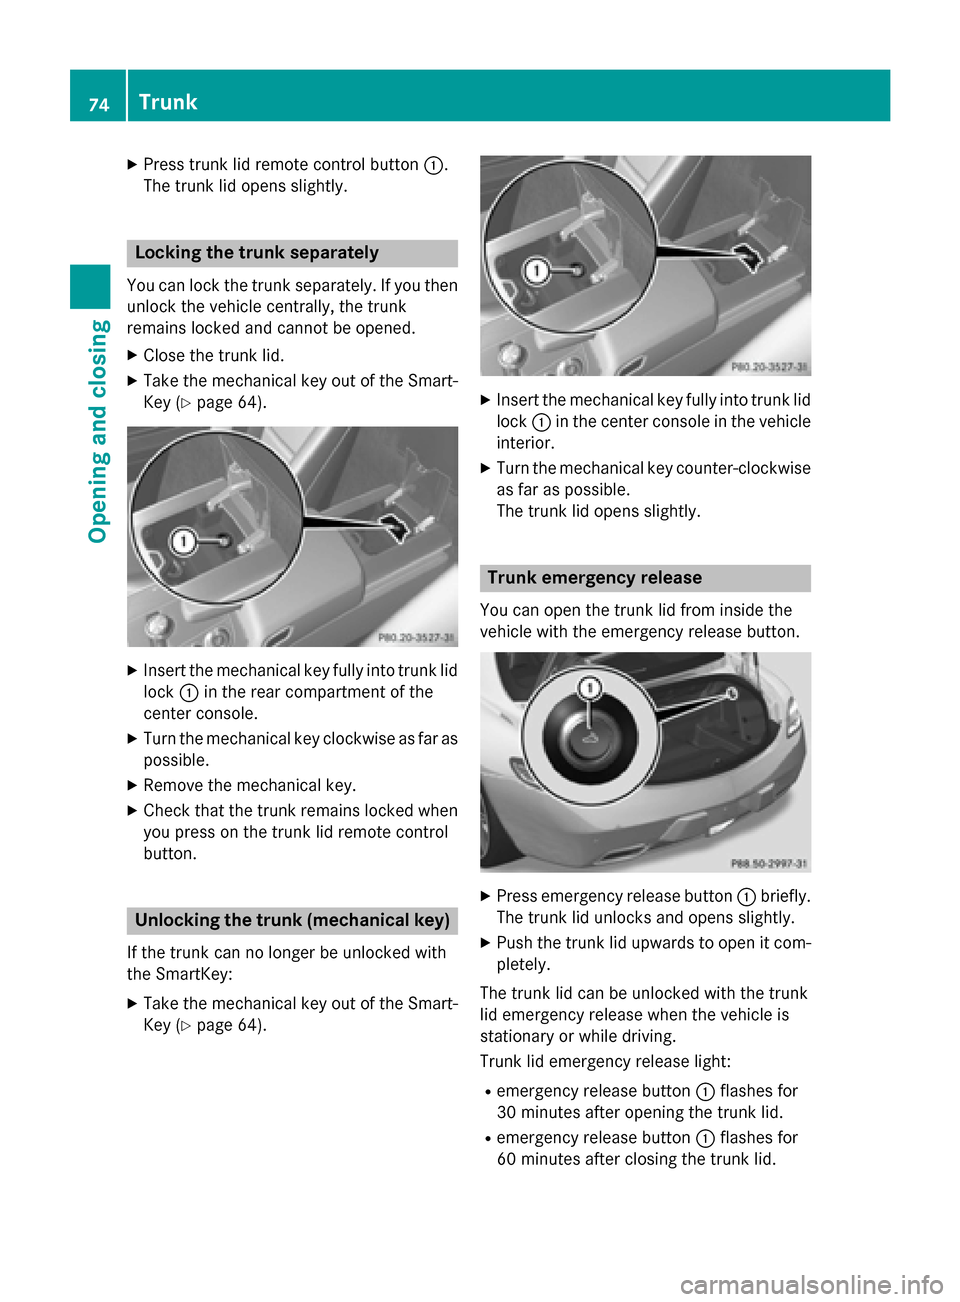
X Take the mechanical key out of the Smart-
Key (Y page 64). X
Inser tthe mechanical key fully into trunkl id
lock 0043in the rear compartment of the
center console.
X Turn the mechanical key clockwise as far as
possible.
X Remove the mechanical key.
X Check that the trunkr emains locked when
you press on the trunkl id remotecontrol
button. Unlocking the trunk (mechanical key)
If the trunkc an no longer be unlocked with
the SmartKey:
X Take the mechanical key out of the Smart-
Key (Y page 64). X
Inser tthe mechanical key fully into trunkl id
lock 0043in the center console in the vehicle
interior.
X Turn the mechanical key counter-clockwise
as far as possible.
The trunkl id opens slightly. Trunk emergency release
You can open the trunkl id from inside the
vehicle with the emergenc yrelease button. X
Press emergenc yrelease button 0043briefly.
The trunkl id unlocksand opens slightly.
X Push the trunkl id upwards to open it com-
pletely.
The trunkl id can be unlocked with the trunk
lid emergenc yrelease when the vehicle is
stationary or while driving.
Trunk lid emergenc yrelease light:
R emergenc yrelease button 0043flashes for
30 minutes after opening the trunkl id.
R emergenc yrelease button 0043flashes for
60 minutes after closing the trunkl id.74
TrunkOpening and closing
Page 112 of 290
Problems with the "Cooling with air dehumidification" function
Problem
Possible causes/consequences and
0050
0050Solutions The indicator lamp in
the
005A button
flashes three times or
remains off. The "Cool-
ing with air dehumidifi-
cation" function cannot
be switched on. Cooling with air dehumidification has been deactivated due to a
malfunction.
X Visit aqualified specialist workshop. Setting climate control to automatic
General notes In automatic mode, the set temperature is
controlled automatically. The system auto-
matically regulates the temperature of the
dispensed air, the airflow and the air distri-
bution.
The automatic mode functions optimally
when the "Cooling with air dehumidification"
function is activated. If necessary, cooling
with air dehumidification can be deactivated.
If you deactivate the "Cooling with air-dehu-
midification" function, the air inside the vehi- cle will not be cooled. The air inside the vehi-
cle will also not be dehumidified. The win-
dows can fog up more quickly. Therefore,
deactivate the cooling with air-dehumidifica-
tion function only briefly.
Activating/switching X
Select key position 2with the Start/Stop
button (Y page 119).
X Set the desired temperature.
X To activate: press the0058button.
The indicator lamp in the 0058button lights
up. Automatic air distribution and airflow
are activated.
X To switch to manualm ode:press the
0058 button.
The indicator lamp in the 0058button goes
out. Automatic air distribution and airflow
are deactivated. Setting the temperature
Differentt emperatures can be set for the
driver's and front-passenger sides.
X Select key position 2with the Start/Stop
button (Y page 119).
X To increase/reduce: turn controls0043and
006C clockwise or counter-clockwise
(Y page 107).
Only change the temperature settingin
small increments. Start at 72 ‡(22 †). Setting the air distribution
Air distribution settings 0061
Directsa ir through the defroster vents
009C Directsa ir through the center and side
air vents
009B Directsa ir through the footwell air
vents
009F Directsa ir through the center, side and
footwell vents
008F Directst he airflow to the entire vehicle
interior
0087 Directsa ir through the defroster,
center and side air vents
0086 Directsa ir through the defroster and
footwell vents 110
Operating the climate control systemsClimatec
ontrol
Page 113 of 290
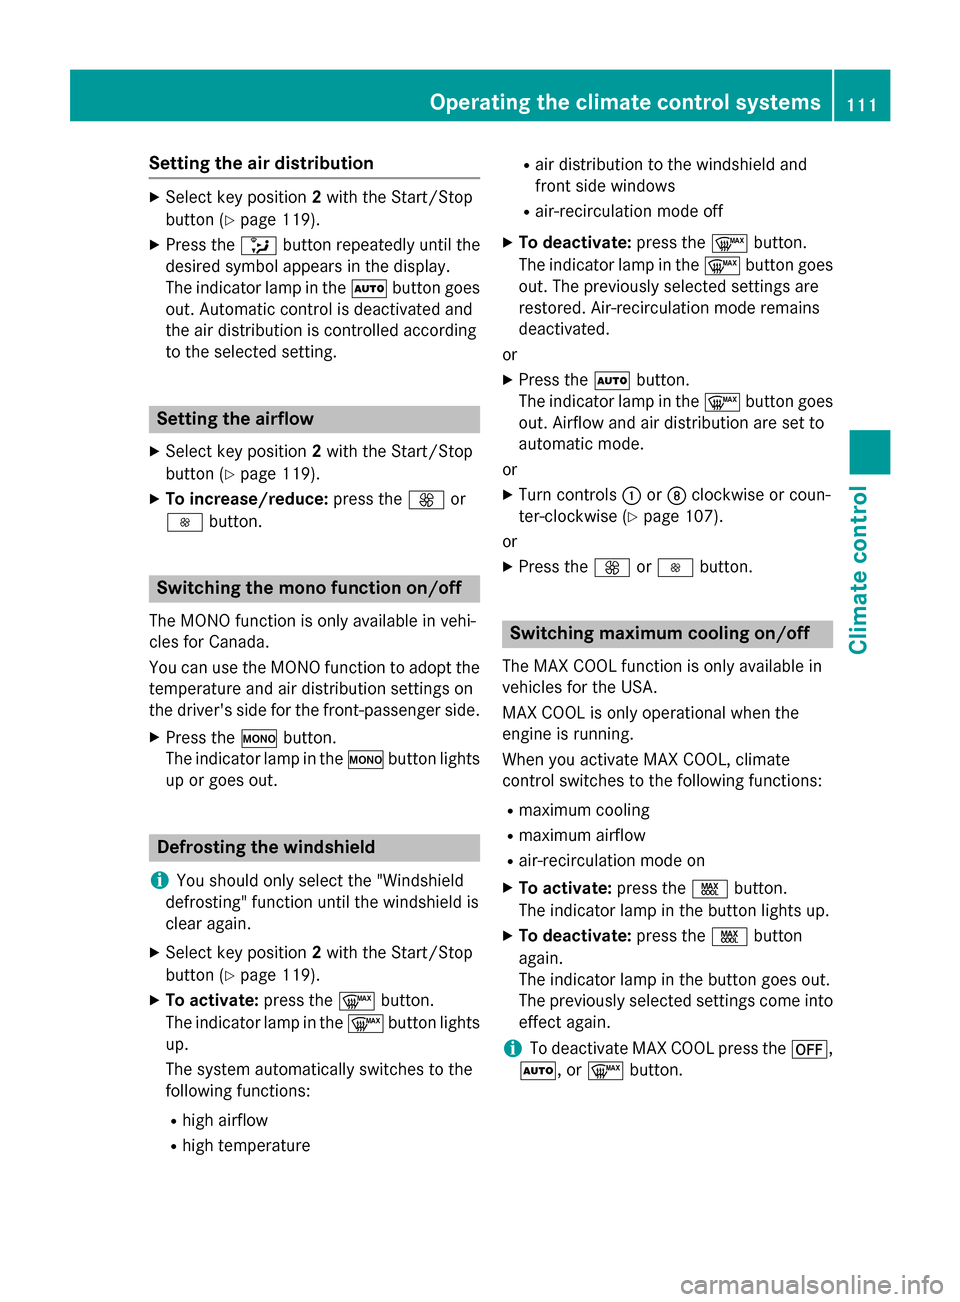
Setting the air distribution
X
Select key position 2with the Start/Stop
button (Y page 119).
X Press the 008Fbutton repeatedly until the
desired symbol appears in the display.
The indicator lamp in the 0058button goes
out. Automatic control is deactivated and
the air distribution is controlled according
to the selected setting. Setting the airflow
X Select key position 2with the Start/Stop
button (Y page 119).
X To increase/reduce: press the0097or
0095 button. Switching the mono function on/off
The MONO function is only available in vehi-
cles for Canada.
You can use the MONO function to adopt the temperature and air distribution settings on
the driver's side for the front-passenger side.
X Press the 005Bbutton.
The indicator lamp in the 005Bbutton lights
up or goes out. Defrosting the windshield
i You should only select the "Windshield
defrosting" function until the windshield is
clear again.
X Select key position 2with the Start/Stop
button (Y page 119).
X To activate: press the0064button.
The indicator lamp in the 0064button lights
up.
The system automatically switches to the
following functions:
R high airflow
R high temperature R
air distribution to the windshield and
front side windows
R air-recirculation mode off
X To deactivate: press the0064button.
The indicator lamp in the 0064button goes
out. The previously selected settings are
restored. Air-recirculation mode remains
deactivated.
or X Press the 0058button.
The indicator lamp in the 0064button goes
out. Airflow and air distribution are set to
automatic mode.
or
X Turn controls 0043or006C clockwise or coun-
ter-clockwise (Y page 107).
or
X Press the 0097or0095 button. Switching maximum cooling on/off
The MAX COOL function is only available in
vehicles for the USA.
MAX COOL is only operational when the
engine is running.
When you activate MAX COOL, climate
control switches to the following functions:
R maximum cooling
R maximum airflow
R air-recirculation mode on
X To activate: press the00C9button.
The indicator lamp in the button lights up.
X To deactivate: press the00C9button
again.
The indicator lamp in the button goes out.
The previously selected settings come into
effect again.
i To deactivate MAX COOL press the
0078,
0058,or 0064button. Operating the climate control systems
111Climatecontrol
Page 128 of 290
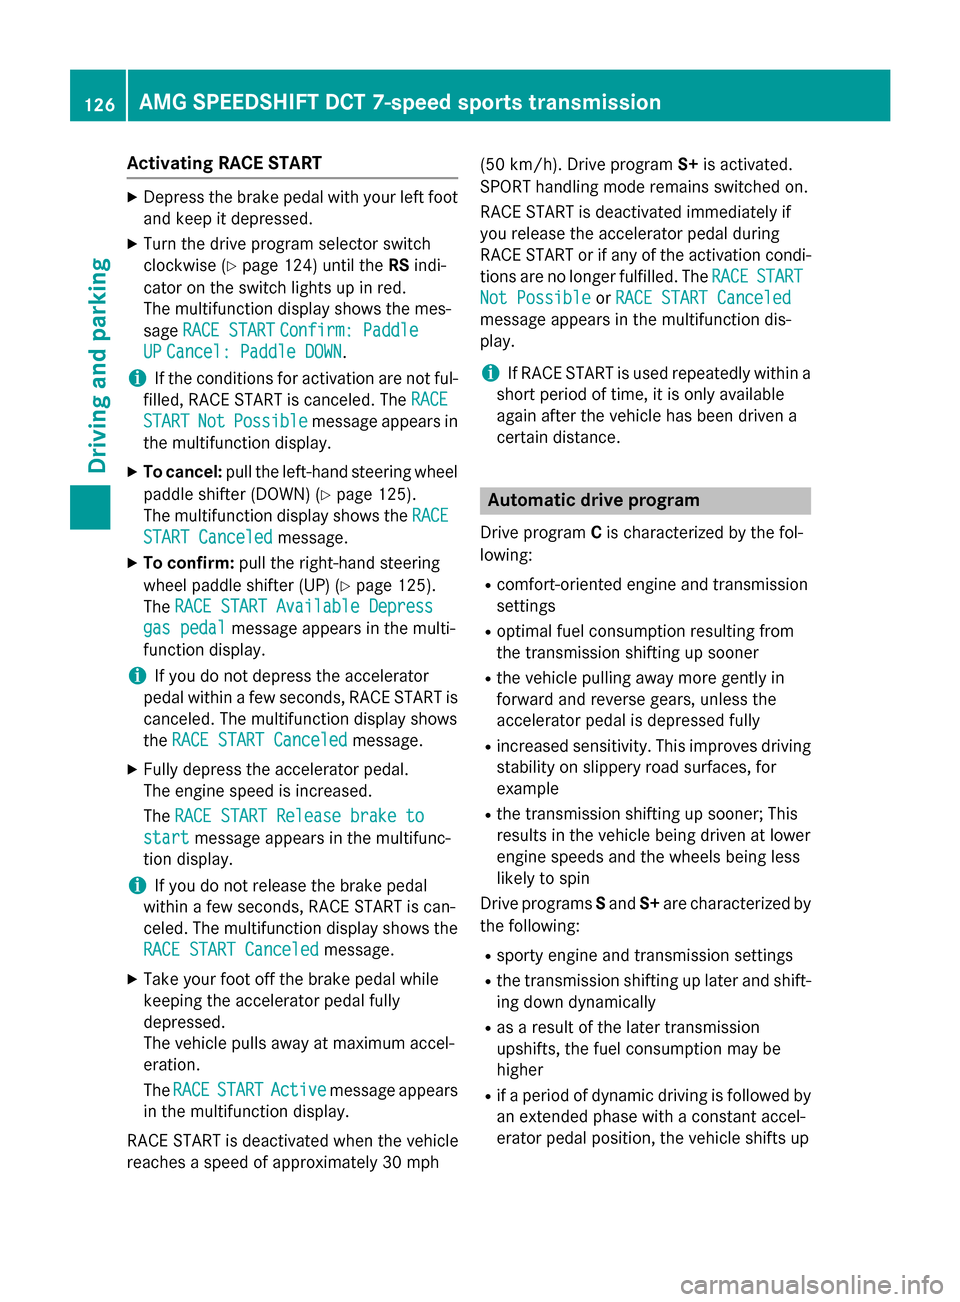
Activating RACE START
X
Depress th ebrak epedal wit hyour lef tfoot
and keep it depressed.
X Turn th edrivep rogram selector switch
clockwise (Y page 124) until the RSindi-
cator on th eswitch lights up in red.
The multifunction display shows th emes-
sage RACES TART
RAC ES TART Confirm: Paddle
Confirm: Paddle
UP
UP Cancel :Paddle DOWN
Cancel :Paddle DOWN.
i If th
econditi onsfor activation are no tful-
filled, RACE START is canceled. The RACE
RACE
START
START Not
NotPossible
Possible message appear sin
th em ultifunction display.
X To cancel: pull theleft-han dsteering wheel
paddle shifte r(DO WN )(Ypage 125).
The multifunction display shows the RACE
RACE
START Canceled
START Canceled message.
X To confirm: pull theright-hand steering
whee lpaddle shifte r(UP) (Y page 125).
The RACES TART Available Depress
RAC ES TART Available Depress
gas pedal
gas pedal message appear sinthemulti-
function display.
i If you do no
tdepress th eaccelerator
pedal within afew seconds, RACE START is
canceled. The multifunction display shows
the RACES TART Canceled
RAC ES TART Canceled message.
X Full ydepress th eaccelerato rpedal.
The engin espee disi ncreased.
The RACES TART Releas ebrake to
RAC ES TART Releas ebrake to
start
start message appear sinthemultifunc-
tion display.
i If you do no
trelease th ebrak epedal
within afew seconds, RACE START is can-
celed. The multifunction display shows the
RAC ES TART Canceled
RAC ES TART Canceled message.
X Tak eyour foo toff th ebrak epedal while
keepin gthe accelerato rpedal fully
depressed.
The vehicl epulls away at maximum accel-
eration.
The RACE RACE START
START Active
Active message appears
in th emultifunction display.
RACE START is deactivated when th evehicle
reaches aspee dofa pproximately 30 mph (50 km/h). Drive program
S+is activated.
SPORT handlin gmoder emain sswitched on.
RACE START is deactivated immediately if
you release th eaccelerato rpedal during
RACE START or if any of th eactivation condi-
tion sare no longer fulfilled .The RACE RACE START
START
Not Possible
Not Possible orRAC ES TART Canceled
RAC ES TART Canceled
message appear sinthemultifunction dis-
play.
i If RACE START is used repeatedly within a
short period of time, it is only available
again after th evehicl ehas been driven a
certain distance. Automati
cdrive program
Drive program Cis characterized by th efol-
lowing:
R comfort-oriented engin eand transmission
settings
R optimal fuel consumption resulting from
th et ransmission shifting up sooner
R thev ehicl epullin gaway mor egentl yin
forward and revers egears, unless the
accelerato rpedal is depressed fully
R increased sensitivity. This improve sdriving
stabilit yonslippery road surfaces, for
example
R thet ransmission shifting up sooner; This
result sinthevehicl ebeingd riven at lower
engin espeeds and th ewheels bein gless
likely to spin
Drive programs Sand S+are characterized by
th ef ollowing:
R sport yenginea nd transmission settings
R thet ransmission shifting up later and shift-
ing down dynamically
R as aresult of th elater transmission
upshifts, th efuel consumption may be
higher
R ifap eriod of dynamic driving is followed by
an extended phas ewithac onstant accel-
erator pedal position ,the vehicl eshifts up 126
AMG SPEEDSHIFT DCT 7-speed sports trans
missionDriving andparking
Page 132 of 290
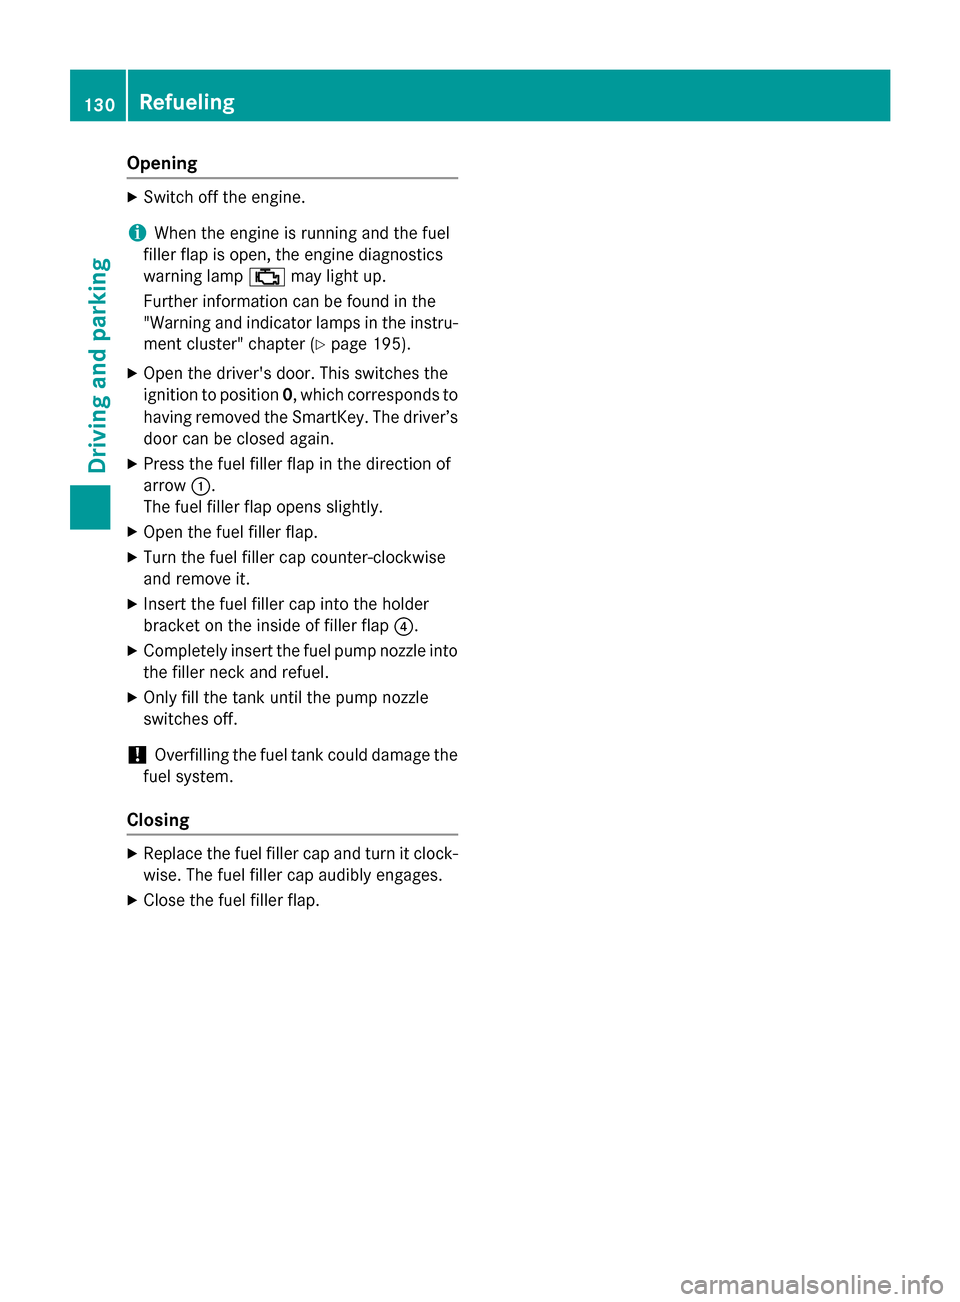
Opening
X
Switc hoff the engine.
i When the engin
eisrunning and the fuel
filler flap is open, the engin ediagnostics
warning lamp 00B9may light up.
Further information can be found in the
"Warning and indicator lamps in the instru-
ment cluster "chapter (Y page 195).
X Open the driver's door. This switches the
ignition to position 0,which corresponds to
having removed the SmartKey. The driver’s
door can be closed again.
X Press the fuel filler flap in the direction of
arrow 0043.
The fuel filler flap opens slightly.
X Open the fuel filler flap.
X Turn the fuel filler cap counter-clockwise
and remove it.
X Inser tthe fuel filler cap intot he holder
bracket on the inside of filler flap 0085.
X Completely insert the fuel pump nozzle into
the filler necka nd refuel.
X Only fill the tank until the pump nozzle
switches off.
! Overfilling the fuel tank could damage the
fuel system.
Closing X
Replace the fuel filler cap and turn it clock-
wise. The fuel filler cap audibly engages.
X Close the fuel filler flap. 130
RefuelingDriving and parking
Page 202 of 290
Useful information
i This Operator's Manual describes all
models and all standard and optional equip- ment of your vehicle available at the time of
publication of the Operator's Manual.
Country-specific differences are possible.
Please not ethat your vehicle may not be
equipped with all feature sdescribed. This
also applies to safety-related system sand
functions.
i Please read the information on qualified
specialist workshops (Y page 23).Stowage areas
Stowage space
Important safet ynotes G
WARNING
If you do not correctly stor eobjects in the
vehicle interior, they can slip or be flung
around, thus strikin gvehicle occupants.
There is arisk of injury, especially when brak-
ing or abruptly changing directions.
R Always stor eobjects so that they cannot be
flung around in thes eorinsimilar situa-
tions.
R Always make sure that objects do not pro-
trude from stowage compartments, parcel
net sors towage nets.
R Close lockable stowage compartments
while driving.
R Stow and secure objects that are heavy,
hard, pointy, sharp-edged, fragile or too
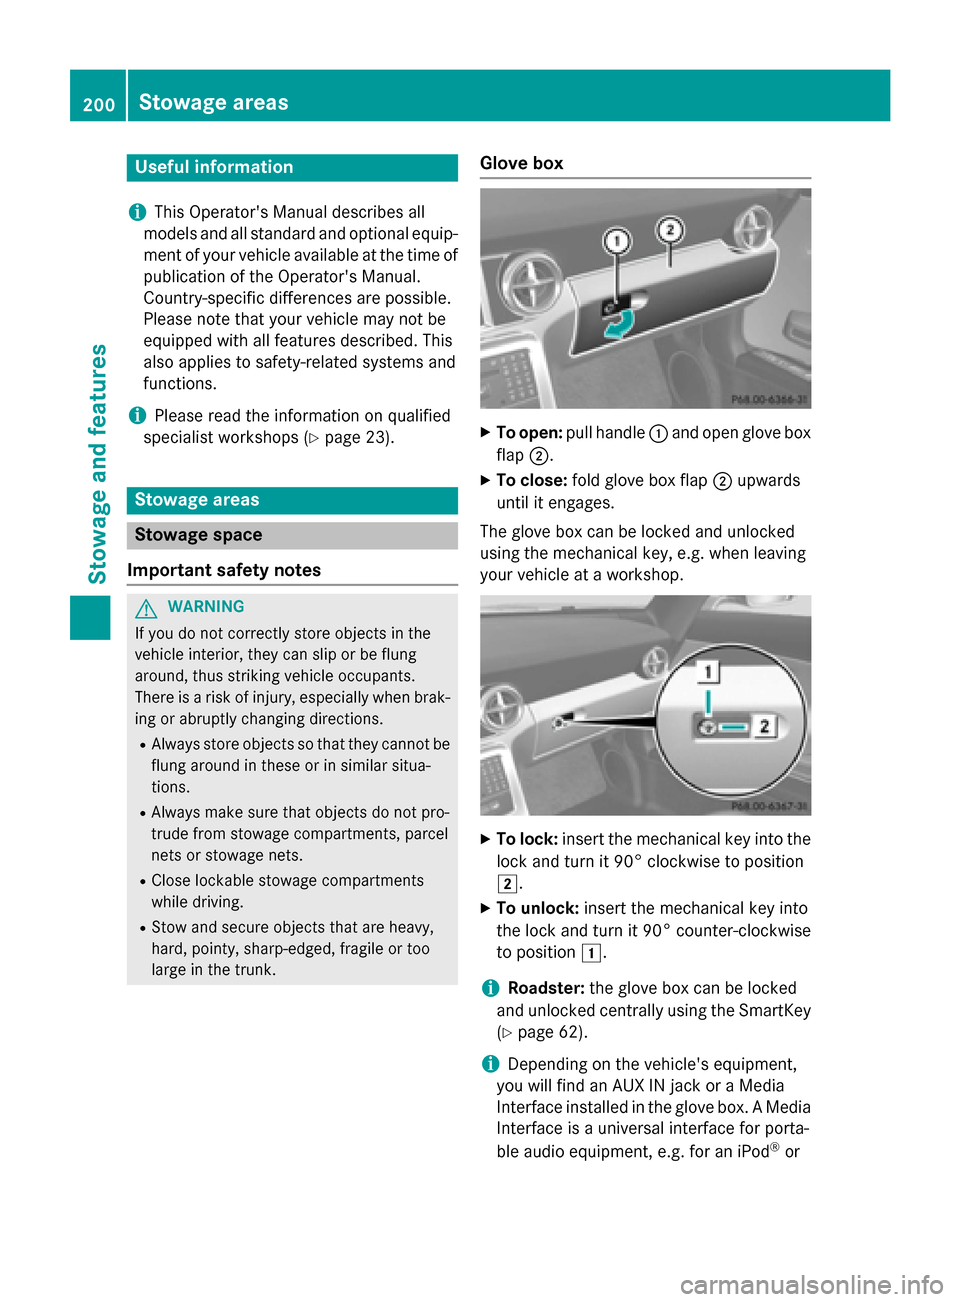
large in the trunk. Glove box X
To open: pull handle 0043and open glove box
flap 0044.
X To close: fold glove box flap 0044upwards
until it engages.
The glove box can be locked and unlocked
using the mechanical key, e.g. when leaving
your vehicle at aworkshop. X
To lock: insertthe mechanical key int othe
lock and turn it 90° clockwise to position
0048.
X To unlock: insertthe mechanical key into
the lock and turn it 90° counter-clockwise
to position 0047.
i Roadster:
the glove box can be locked
and unlocked centrally using the SmartKey (Y page 62).
i Depending on the vehicle'
sequipment,
you will find an AUX IN jack or aMedia
Interfac einstalled in the glove box. AMedia
Interfac eisauniversal interfac efor porta-
ble audio equipment ,e.g. for an iPod ®
or 200
Stowage areasStowage and features