2015 MERCEDES-BENZ SLS AMG GT ROADSTER ESP
[x] Cancel search: ESPPage 211 of 290
The system calculates the route and subse-
quently start sthe route guidance with the
address entered.
i If you select
No
No,t he address can be stored
in the address book.
i The Destination Download function is
available if the corresponding mobile
phone network is available and data trans- fer is possible.
Route Assistance
This service is part of the mbrace PLUS Pack- age and cannot be purchased separately.
i You can also use the Route Assistance
function if your vehicle is not equipped with
an avigation system.
Within the framework of this service, you
receive aprofessional and reliable form of
navigation support without having to leave
your vehicle.
The customer service representative deter-
mines asuitable driving route based on your
curren tvehicle position and the desired des-
tination and guides you live through the cur-
rent sections of the route.
Search &Send "Search
&Send" is adestination entry
service. You can find further information on
"Search &Send" in the separate COMAND
operating instructions.
Vehicle remot eclosing The remot
eclosing feature can be used when
you have forgotten to lock the vehicle and you
are no longer nearby. The vehicle can then be
locked by the Mercedes-Benz Customer
Assistance Center.
The vehicle can be locked remotely up to four
days after the ignition was last switched off.
X Contact the following service hotlines: R
USA: Mercedes-Benz Customer Assis-
tanceC enter at 1-800-FOR-MERCedes
(1-800-367-6372)o r1-866-990-9007
R Canada: Customer Servic eat
1-888-923-8367
You will be asked for your PIN.
The next time you are inside the vehicle and
you switch on the ignition, the Tele Aid
Tele Aid
Doors Locked Remotely Doors Locked Remotely message appears
in the multifunction display.
USA only: alternatively, the vehicle can be
locked via:
R the Internet,u nder the "Owners Online"
section
R the telephone application (e.g. iPhone ®
,
Blackberry)
To do this, you will need your identification
number and password.
i The vehicle remote closing feature is
available when the relevant mobile phone
network is available and data connection is
possible.
Stolen vehicle recovery service If your vehicle has been stolen:
X Notify the police.
The police will issue anumbered incident
report.
X This number will be forwarded to the
Mercedes-Benz Customer Assistance
Center together with your PIN.
The Mercedes-Benz Customer Assistance
Center then attempt stolocate the mbrace
system. The Mercedes-Benz Customer
Assistance Center contacts you and the
local law enforcement agency if the vehicle
is located. However, only the law enforce-
ment agency is informed of the location of
the vehicle.
i If the anti-theft alarm system is active for
longer than 30 seconds, mbrace automat-
ically informs the Mercedes-Benz Cus-
tomer Assistance Center. Features
209Stowage and features Z
Page 214 of 290
i
Notes aboutt
he declaration of conformity
can be found here (Y page 22).
USA: FCC ID: CB2HMIHL4
Canada: IC: 279B-HMIHL4
Programming Programing buttons
Pay attention to the "Important safety notes"
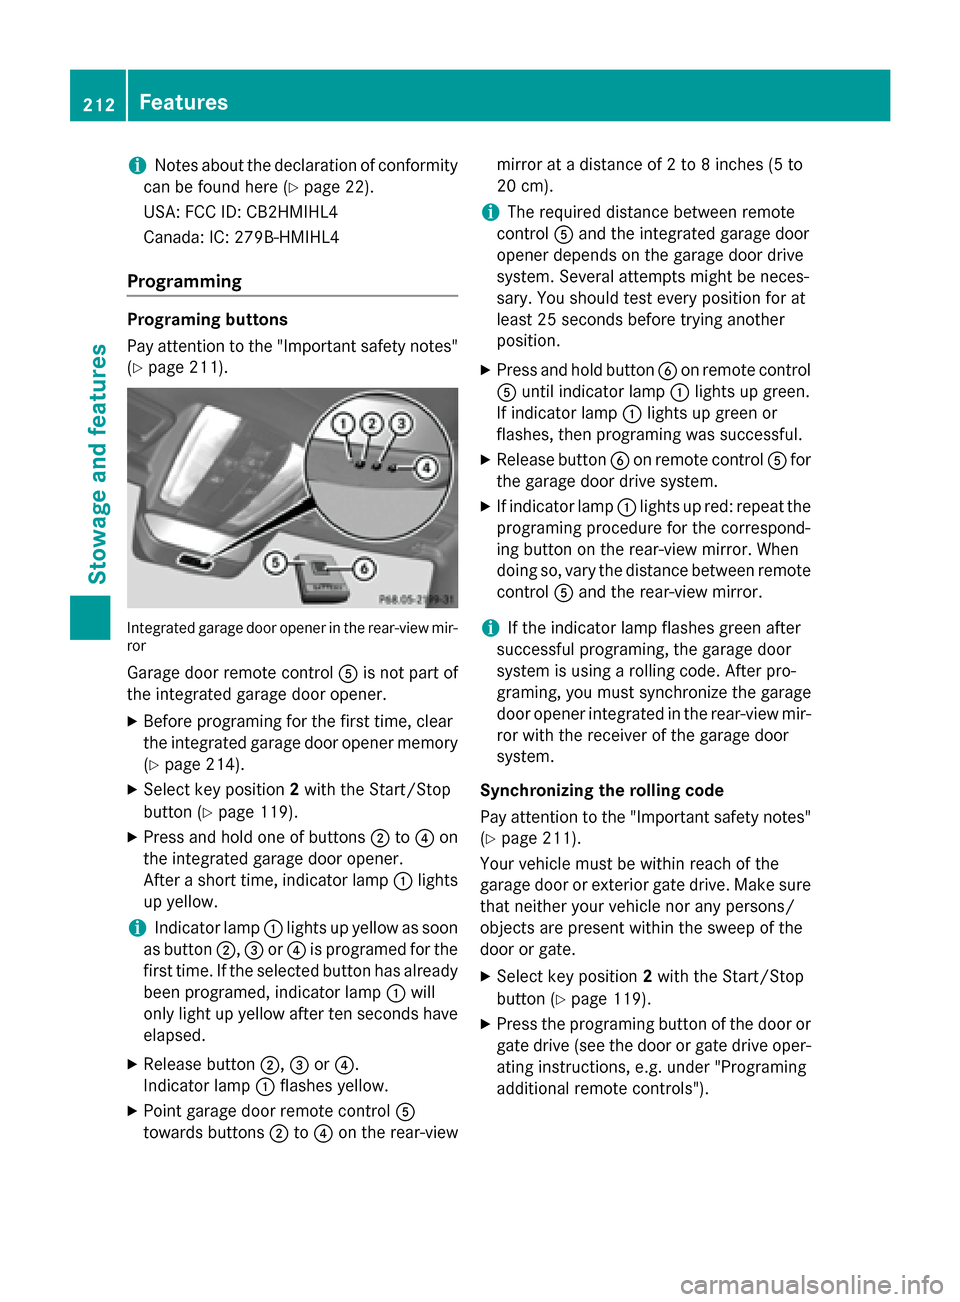
(Y page 211). Integrated garaged
oor opener in the rear-view mir-
ror
Garage door remote control 0083is not part of
the integrated garaged oor opener.
X Before programing for the first time, clear
the integrated garaged oor opener memory
(Y page 214).
X Select key position 2with the Start/Stop
button (Y page 119).
X Press and hold one of buttons 0044to0085 on
the integrated garaged oor opener.
After ashort time, indicator lamp 0043lights
up yellow.
i Indicator lamp
0043lights up yellow as soon
as button 0044,0087or0085 is programed for the
first time. If the selected button has already been programed ,indicator lamp 0043will
only light up yellow after ten seconds have
elapsed.
X Release button 0044,0087or0085.
Indicator lamp 0043flashesy ellow.
X Point garaged oor remote control 0083
towards buttons 0044to0085 on the rear-view mirror at
adistance of 2to8i nches (5 to
20 cm).
i The required distance between remote
control 0083and the integrated garaged oor
opener depends on the garaged oor drive
system. Several attempts might be neces-
sary. You shouldt est every position for at
least 25 seconds before trying another
position.
X Press and hold button 0084on remote control
0083 until indicator lamp 0043lights up green.
If indicator lamp 0043lights up green or
flashes, then programing was successful.
X Release button 0084on remote control 0083for
the garaged oor drive system.
X If indicator lamp 0043lights up red: repeatt he
programing procedure for the correspond-
ing button on the rear-view mirror. When
doing so, vary the distance between remote
control 0083and the rear-view mirror.
i If the indicator lamp flashesg
reen after
successful programing, the garaged oor
system is using arolling code. After pro-
graming, you must synchronize the garage
door opener integrated in the rear-view mir- ror with the receiver of the garaged oor
system.
Synchronizing the rollingc ode
Pay attention to the "Important safety notes" (Y page 211).
Your vehicle must be within reach of the
garaged oor or exterior gate drive. Make sure
that neither yourv ehicle nor any persons/
objects are present within the sweep of the
door or gate.
X Select key position 2with the Start/Stop
button (Y page 119).
X Press the programing button of the door or
gate drive (see the door or gate drive oper- ating instructions, e.g. under "Programing
additional remote controls"). 212
FeaturesStowagea
nd features
Page 225 of 290
sary service work has been carried out. You
can also obtain further information on main-
tenancew ork, for example.
! If the service interval displayh
as been
reset unintentionally,h ave the setting cor-
rected at aMercedes-Benz Center.
Have service work carried out as described in the Maintenance Booklet. This may oth-
erwise lead to increased wear and damage
to the major assemblies or the vehicle.
Special service requirements
The specified maintenance interval takes only the normal operation of the vehicle into
account. Under arduouso perating conditions
or increased load on the vehicle, mainte-
nance work must be carried out more fre-
quently, for example:
R regularc ity driving with frequent intermedi-
ate stops
R if the vehicle is primarily used to travel
short distances
R use in mountainous terrain or on poor road
surfaces
R if the engine is often left idling for long peri-
ods
Under these or similarc onditions, have, for
example, the air filter, engine oil and oil filter
replaced or changed more frequently. Under
arduouso perating conditions, the tires must
be checked more often. Further information
can be obtained at aqualified specialist work-
shop, e.g. an authorized Mercedes-Benz
Center.
Driving abroad
An extensive Mercedes-Benz Service network is also available in other countries. You can
obtain further information from any author-
ized Mercedes-Benz Center. Care
General notes
Regular care of your vehicle is acondition for
retaining the quality in the long term.
Use care products and cleaning agents rec-
ommended and approved by Mercedes-Benz.
! For cleaning your vehicle, do not use any
of the following:
R dry, rough or hard cloths
R abrasive cleaning agents
R solvents
R cleaning agents containing solvents
Do not scrub.
Do not touch the surfaces or protective
films with hard objects, e.g. aring or ice
scraper. You could otherwise scratch or
damage the surfaces and protective film. H
Environmental note
Dispose of empty packaging and cleaning
cloths in an environmentally responsible man-
ner.
! Do not park the vehicle for an extended
period straight after cleaning it, particularly after having cleaned the wheels with wheel cleaner. Wheel cleaners could cause
increased corrosion of the brake discs and
brake pads/linings. For this reason, you
should drive for afew minutes after clean-
ing. Braking heats the brake discs and the
brake pads/linings, thus drying them. The
vehicle can then be parked. Exterior care
Automatic car wash G
WARNING
Braking efficiency is reduced after washing
the vehicle. There is arisk of an accident.
After the vehicle has been washed, brake
carefully while paying attention to the traffic
conditions until full braking power is restored. Care
223Maintenance and care Z
Page 226 of 290
You can wash the vehicle in an automatic car
wash fro mthe very start.
If the vehicle is very dirty, pre-wash it before
cleaning it in an automatic car wash.
! Never clean your vehicle in
aTouchless
Automatic Car Wash as these use special
cleaning agents. These cleaning agent scan
damage the paintwork or plastic parts.
! When washing your vehicle in
atow-
through car wash, use the SmartKey
instead of the Start/Stop button.
Start the engin eusing the SmartKey.. Move
the transmission to Nwith the E-SELECT
lever .Use the SmartKey to switc hthe
engin eoff again and the nturn the Smart-
Key to position 2.Make sure that you then
leave the SmartKey in position 2.You may
otherwise damage the vehicle, the trans-
missio northe car wash.
Check the transmission position in the
instrumen tcluster.
! Use the E‑SELECT lever to shift the trans-
missio ntoNbefore switching the engine
off .Ify ou open the driver's or front-
passenger door, the transmission remains
in this position for up to 30 minutes if the
SmartKey is in the ignition, even if the
engin eisswitched off .Ifyou do not shift the
transmission to Nusing the E‑SELECT lever
beforehand, it shift sautomatically to park-
ing position Pand lock sthe wheels if the
driver's or front-passenge rdoor is opened
and the engin eisswitched off .This may
damage the vehicle, the transmission or
the car wash.
Observe the information on maneuvering
(Y page 131). !
Before drivin
gintoana utomatic car wash,
make sure that it is suitable for the dimen- sion soft he vehicle. In particular, make
sure that:
R there is enough groun dclearance
betwee nthe vehicle underbody and the
guide rails of the automatic car wash.
R the clearance width of the automatic car
wash is sufficient ,particularly the width
of the guide rails.
R you enter the automatic car wash
straight and in the center of the guide
rails in order to avoid damagin gthe tires
or wheel rims.
Fold in the exterior mirrors befor ethe vehi-
cle is washed. The exterior mirrors could
otherwise be damaged.
! Make sure that:
R the side windows and the roof are com-
pletely closed
R the climat econtrol blower is switched off
R the windshield wiper switc hisatposition
0
The vehicle could otherwise be damaged.
! In portal car washes, the windshield wip-
ers may be move dupthe windshield by the
cleaning brushes when the ignition is
switched off.
Set the Start/Stop button to key position 2
to reset the windshield wipers to their orig-
inal position.
! Preferably use automatic car washes with
adjustable high-pressure pre-cleaning. This corresponds with the specification for the
Cabriolet program. In car washes that use
high water pressures, there is arisk that a
small amount of water may leak int othe
vehicle.
! Cabriolet:
do not treat the vehicle with
hot wax under any circumstances.
After using an automatic car wash, wipe off
wax and drying agent sfromt he windshield
and the wiper blades. This will prevent smears 224
CareMaintenance and care
Page 231 of 290
!
Do not clean the camera lens and the area
around the rear view camera with apower
washer.
Cleaning the exhaust pipes G
WARNING
The exhaust tail pipe and tail pipe trim can
become very hot. If you come into contact
with these parts of the vehicle, you could burn
yourself. There is arisk of injury.
Alwaysbep articularlycareful around the
exhaust tail pipe and the tail pipe trim. Allow
these componentstoc ool down before touch-
ing them.
! Do not clean the exhaust pipe with acid-
based cleaning agents such as sanitary
cleansers or wheel cleaners.
Impurities combined with the effects of road
grit and corrosive environmental factors may cause flash rust to form on the surface. You
can restore the original shine of the exhaust
pipe by cleaning it regularly, especially in win- ter and after washing.
X Cleant he exhaust pipe with achrome care
product tested and approved by Mercedes-
Benz. Interior care
Cleaning the display !
For cleaning, do not use any of the fol-
lowing:
R alcohol-based thinner or gasoline
R abrasive cleaning agents
R commercially-available householdc lean-
ing agents
These may damage the displays urface. Do
not put pressure on the displays urface
when cleaning. This could lead to irrepara-
ble damage to the display. X
Before cleaning the display, make sure that
it is switched off and has cooled down.
X Cleant he displays urface using acommer-
cially available microfiber cloth and
TFT/LCD displayc leaner.
X Dry the displays urface usingadry micro-
fiber cloth.
Cleaning the plastic trim G
WARNING
Care products and cleaning agents containing solvents cause surfaces in the cockpit to
become porous. As aresult, plastic parts may
come loose in the event of air bag deploy-
ment. There is arisk of injury.
Do not use any care products and cleaning
agents to clean the cockpit.
! Do not affix the following to plastic surfa-
ces:
R stickers
R films
R scented oil bottles or similari tems
You can otherwise damage the plastic.
! Do not allowc
osmetics, insect repellent
or sunscreen to come into contact with the
plastic trim. This maintains the high-quality look of the surfaces.
X Wipe the plastic trim with adamp, lint-free
cloth, e.g. amicrofiber cloth.
X Heavy soiling: use car care and cleaning
products recommended and approved by
Mercedes-Benz.
The surface may change color temporarily.
Wait until the surface is dry again.
Cleaning the steering wheela nd selec-
tor lever X
Thoroughlyw ipe withadamp cloth or use
leather care agents that have been recom- mended and approved by Mercedes-Benz. Care
229Maintenance and care Z
Page 240 of 290
X
Stow the TIREFIT kit in asafea nd accessi-
bl ep lace in the vehicle.
X Pul lawa yimmediately.
The maximum speed for atire seale dwitht ire
sealant is 50 mph (80 km/h). The uppe rpart
of the TIREFIT sticke rmustb ea ffixe dtot he
instrument cluster in the driver' sfield of
vision.
! After use, exces
sTIREFIT may run ou tof
the fille rhose. Thi scould cause stains.
X Stop afte rdriving for approximatel yten
minutes and check the tire pressure with
the tire inflation compressor.
The tire pressure mus tnow be at least
130 kPa (1.3 bar/19 psi).
i On tire
stha tare equipped with atire pres-
sure sensor (tire pressure monitor) ,the use
of sealant can lead to malfunction mes-
sages and incorrect displays. Therefore,
us ep ressure gauge 0084in the TIREFIT kit to
check and correct the tire pressure. G
WARNING
If the required tire pressure is not reached
afte rdriving for ashort period, the tire is too
badl ydam aged .The tire sealant canno trepair
the tire in this instance. Damaged tire sand a
tire pressure tha tist oo lo wcan significantly
impai rthe vehicle's braking and driving char-
acteristics. There is ariskofa ccident.
Do not continu edriving .Contact aquali fied
specialist workshop.
X Correct the tire pressure if it is stil latleast
130 kPa (1.3 bar/20 psi )(fort he values,
see the Tire and Loading Information plac-
ard on the driver' ssideB -pillar or tire pres-
sure table on the fue lfille rflap).
To increase the tire pressure: switch on
the tire inflation compressor.
To reduc ethe tire pressure: openrelease
screw 006B.
! The manufacturer doe
snot guarantee
tha talltire damag ecan be repaired using
the TIREFIT kit, particularly in the cas eofcuts and puncture
swithad iameter of more
tha nfou rm illimeters or on the sidewall. The
manufacturer is not responsible for dam-
ag ec aused by inappropriate us eofthe
TIREFIT kit.
X Drive to the neares tworksho pand have the
tire changed there.
X Hav ethe tire sealant bottl ereplaced as
soo naspossible at aquali fied specialist
workshop, e.g. at an authorized Mercedes- Benz Center. H
Environmental note
Hav ethe used tire sealant bottl edisposed of
professionally ,e.g. at an authorized
Mercedes-Benz Center.
X Hav ethe TIREFIT kit replaced every four
years at aquali fied specialist workshop,
e.g. an authorized Mercedes-Benz Center. Battery (vehicle)
Important safety notes
Specia ltool sand expert knowledge are
required when working on the battery ,e.g.
removal and installing .You shoul dtherefore
have al lworki nvolving the battery carrie dout
at aq uali fied specialist workshop. G
WARNING
Wor kcarrie doutincorrectl yonthe battery
can lead ,for example, to ashort circuit and
thu sdam aget he vehicl eelectronics. Thi scan
lead to function restrictions applying to
safety-relevant systems ,e.g. the lighting sys-
tem, ABS (anti-lock braking system) or ESP ®
(Electronic Stability Program). The operating
safety of your vehicl emay be restricted. You
could lose contro lofthe vehicle, for example:
R braking
R in the event of abrup tsteering maneuver
and/or when the vehicle's speed is not
adapted to the roa dconditions
There is ariskofana ccident. 238
Battery (vehicle)Breakdown assistance
Page 242 of 290
electronic components, such as the
alternator, may be damaged.
R you first remove the negativ eterminal
clamp and then the positive terminal
clamp. Never swap the terminal clamps.
Otherwise, the vehicle's electronic sys-
tem may be damaged.
R the transmission is locked in position P
after disconnectingt he battery. The vehi-
cle is secured against rolling away. You
can then no longer move the vehicle.
The batter yand the cover of the positive
terminal clamp must be installed securely
during operation.
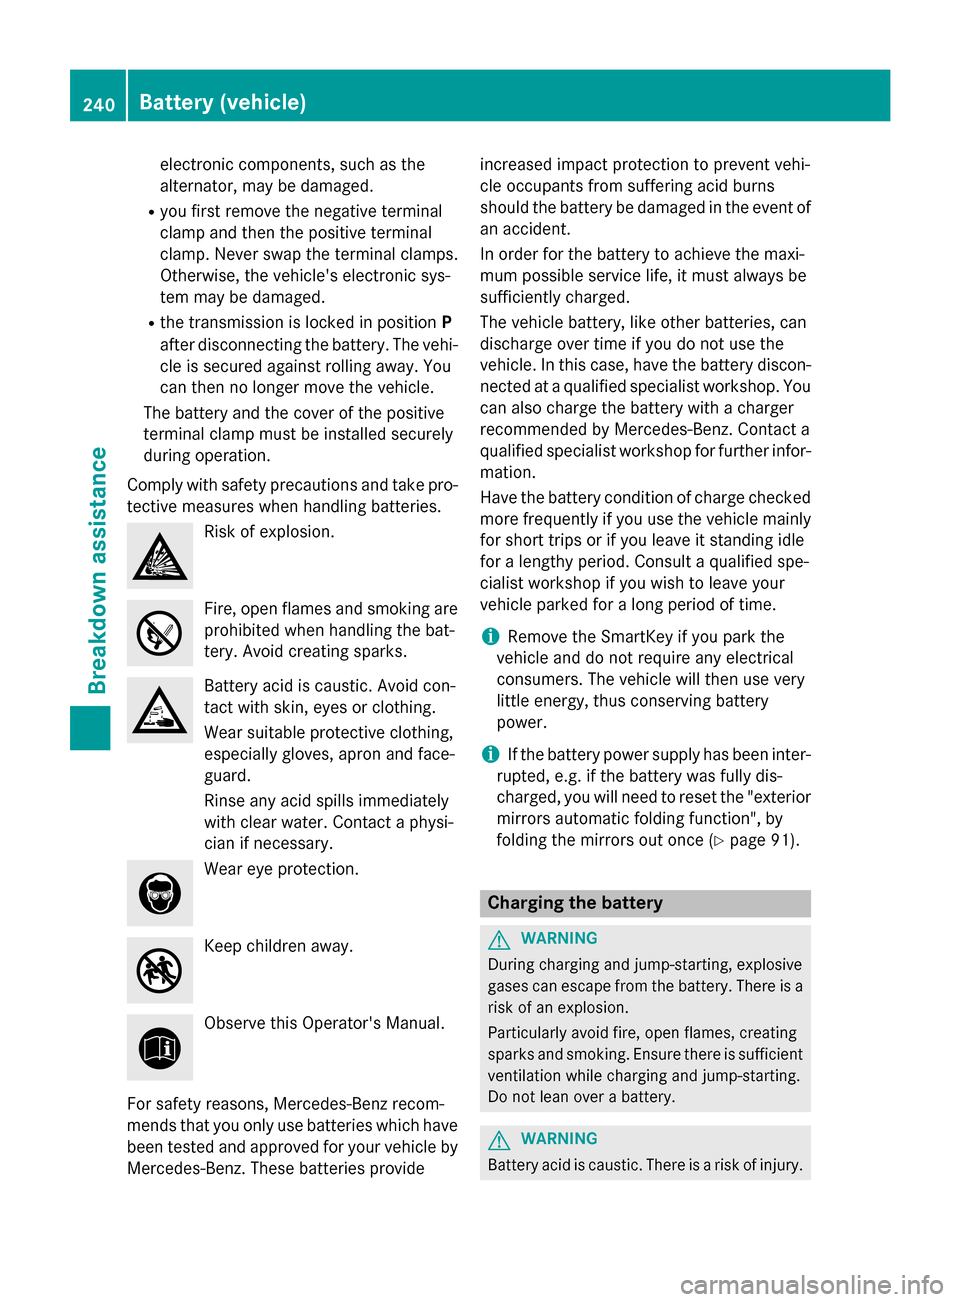
Comply with safety precaution sand take pro-
tective measures when handling batteries. Risk of explosion.
Fire, open flames and smoking are
prohibited when handling the bat-
tery. Avoid creating sparks. Battery acid is caustic
.Avoid con-
tact with skin ,eyes or clothing.
Wear suitable protective clothing,
especially gloves, apron and face-
guard.
Rinse any acid spills immediately
with clear water. Contac taphysi-
cian if necessary. Wear eye protection.
Keep children away.
Observe this Operator's Manual.
For safety reasons, Mercedes-Benzr ecom-
mends that you only use batteries which have been tested and approved for your vehicle by
Mercedes-Benz. These batteries provide increased impact protection to preven
tvehi-
cle occupants from sufferin gacid burns
should the batter ybedamaged in the event of
an accident.
In order for the batter ytoachieve the maxi-
mum possible servic elife, it must alway sbe
sufficiently charged.
The vehicle battery, like other batteries, can
discharge over time if you do not use the
vehicle. In this case, have the batter ydiscon-
nected at aqualified specialist workshop. You
can also charge the batter ywithacharger
recommended by Mercedes-Benz. Contac ta
qualified specialist worksho pfor further infor-
mation.
Have the batter ycondition of charge checked
more frequently if you use the vehicle mainly
for short trips or if you leave it standing idle
for alengthy period. Consult aqualified spe-
cialist worksho pifyou wish to leave your
vehicle parked for along period of time.
i Remove the SmartKey if you park the
vehicle and do not require any electrical
consumers. The vehicle will then use very
little energy, thus conservin gbattery
power.
i If the batter
ypower supply has been inter-
rupted, e.g. if the batter ywas fully dis-
charged, you will need to reset the "exterior
mirror sautomatic folding function", by
folding the mirror sout once( Ypage 91). Charging the battery
G
WARNING
Durin gchargin gand jump-starting, explosive
gases can escape from the battery. There is a risk of an explosion.
Particularly avoid fire, open flames, creating
sparks and smoking. Ensure there is sufficient
ventilation while chargin gand jump-starting.
Do not lean over abattery. G
WARNING
Battery acid is caustic .There is arisk of injury. 240
Battery (vehicle)Breakdown assistance
Page 247 of 290
!
Tow-starting the vehicle is not permitted.
The transmission may otherwise be dam-
aged.
If the vehicle can no longer be driven because of an accident or breakdown, you have the
following options:
R transportingt he vehicle
As arule, you should have the vehicle trans-
ported.
R towing the vehicle with the rear axle raised
Only tow the vehicle with the rear axle
raised in exceptional cases.
R towing the vehicle with atow rope or tow
bar
Only tow the vehicle in exceptional cases.
The engine must be running if you tow the
vehicle with atow rope or tow bar. Observe
the following notes.
Also observe the following notes:
R If the engine does not start, try jump-start-
ing it (Y page 242). Tow-starting the vehicle
is not permitted.
R If it is not possibletoj ump-start the vehicle,
have it transported to the nearest qualified specialist workshop, e.g. an authorized
Mercedes-Benz Center.
R If the vehicle has transmission damage,
have it transported to aqualified specialist
workshop. Observe the displaym essages
in the instrument cluster. Installing/removing the towing eye
Installingt he towing eye X
Take the towing eye and the wheel wrench 4
out of the wheel-change tool kit
(Y page 234).
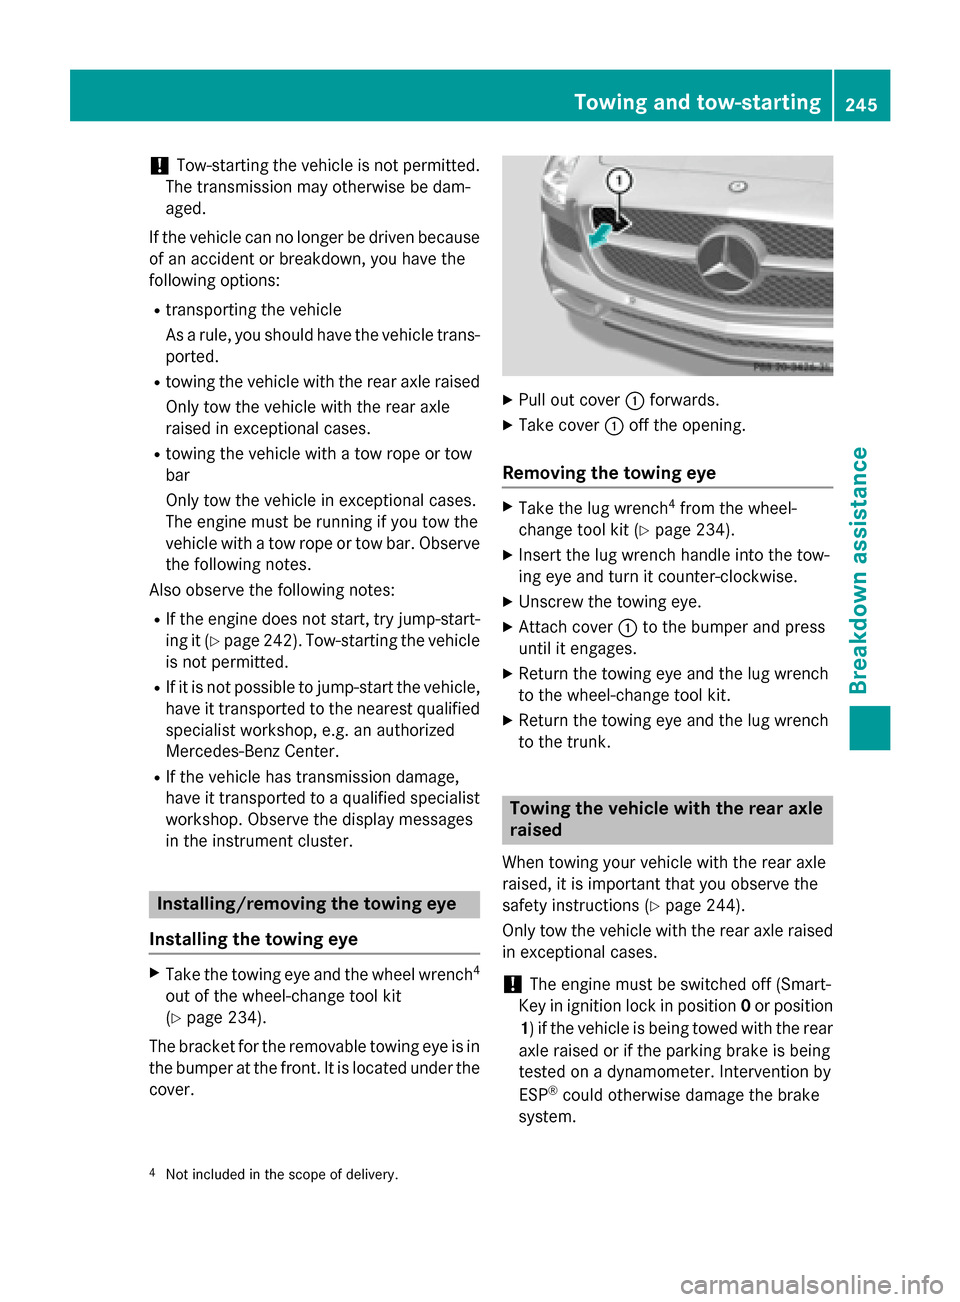
The bracket for the removable towing eye is in
the bumper at the front.Itisl ocated under the
cover. X
Pull out cover 0043forwards.
X Take cover 0043off the opening.
Removing the towing eye X
Take the lug wrench 4
from the wheel-
change tool kit (Y page 234).
X Insert the lug wrench handle into the tow-
ing eye and turn it counter-clockwise.
X Unscrew the towing eye.
X Attach cover 0043to the bumper and press
until it engages.
X Return the towing eye and the lug wrench
to the wheel-change tool kit.
X Return the towing eye and the lug wrench
to the trunk. Towing the vehiclew
ith the rear axle
raised
When towing your vehicle with the rear axle
raised, it is important that you observe the
safety instructions (Y page 244).
Only tow the vehicle with the rear axle raised in exceptional cases.
! The engine must be switched off (Smart-
Key in ignition lock in position 0or position
1)ift he vehicle is being towed with the rear
axle raised or if the parking brake is being
tested on adynamometer. Intervention by
ESP ®
could otherwise damage the brake
system.
4 Not included in the scope of delivery. Towing and tow-starting
245Breakdown assistance Z