2015 MERCEDES-BENZ SLS AMG GT ROADSTER battery
[x] Cancel search: batteryPage 206 of 290
matically cut. This ensures that there is suf-
ficient powe rtostart the vehicle.
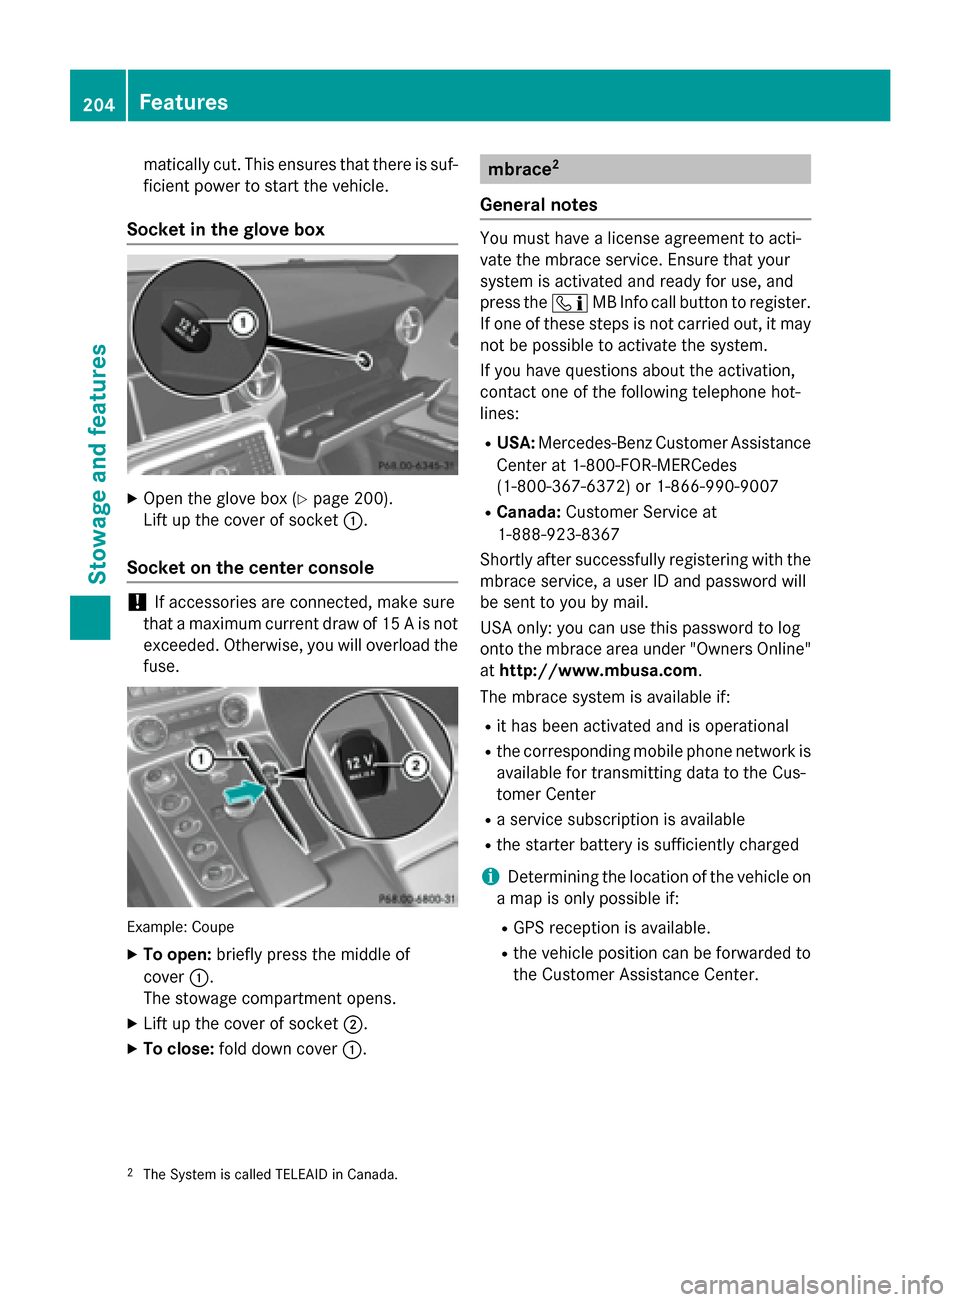
Socket in the glove box X
Open the glove box (Y page200).
Lift up the cover of socket 0043.
Socket on the center console !
If accessories are connected, make sure
that amaximu mcurrent draw of 15 Aisnot
exceeded. Otherwise, you will overload the fuse. Example: Coupe
X To open: briefly press the middle of
cover 0043.
The stowage compartment opens.
X Lift up the cover of socket 0044.
X To close: fold down cover 0043. mbrace
2
General notes You must have
alicense agreement to acti-
vate the mbrace service. Ensure that your
system is activated and ready for use, and
press the 00D9MB Info call button to register.
If one of these steps is not carried out, it may not be possible to activate the system.
If you have questions aboutt he activation,
contact one of the following telephone hot-
lines:
R USA: Mercedes-Benz Customer Assistance
Center at 1-800-FOR-MERCedes
(1-800-367-6372) or 1-866-990-9007
R Canada: Customer Service at
1-888-923-8367
Shortly after successfully registering with the
mbrace service, auser ID and password will
be sent to you by mail.
USA only: you can use this password to log
onto the mbrace area under "Owners Online"
at http://www.mbusa.com.
The mbrace system is available if:
R it has been activated and is operational
R the corresponding mobile phone network is
available for transmitting data to the Cus-
tomer Center
R as ervice subscription is available
R the starter battery is sufficiently charged
i Determining the location of the vehicle on
am ap is only possible if:
R GPS reception is available.
R the vehicle position can be forwarded to
the Customer Assistance Center.
2 The System is called TELEAID in Canada. 204
FeaturesStowage and features
Page 216 of 290
also read th
eoperatin ginstruction sfor the
garag edoor system.
X Select ke yposition 2wit hthe Start/Stop
button.
X Press button 0044,0087or0085 whic hyou have
programed to operate th egarag edoor.
Garage door system wit hafixed code: indi-
cator lamp 0043light supg reen.
Garage door system wit harolling code:
indicator lamp 0043flashes green.
i The transmitte
rwill transmit asignal as
lon gast hebutto nisp ressed. The trans-
mission is halted after amaximum of ten
seconds and indicator lamp 0043light sup
yellow. Press button 0044,0087or0085 again if
necessary.
Clearing th ememory X
Select ke yposition 2wit hthe Start/Stop
button.
X Press buttons 0044and 0085.
The indicator lamp light supyellow.
X Press and hold buttons 0044and 0085until the
indicator lamp turns green.
i Mak
esure that you clear th ememory of
th ei ntegrate dgarag edoor opener before
sellin gthe vehicle. Charg
emaintenance socket
The battery may drain if th evehicle is left sta-
tionar yfor lon gperiods. In this case,
Mercedes-Ben zrecommends attaching the
trickle charge rtothecharge maintenance
socket.
The charge maintenance socke tisdesigned
solely for connecting atrickle charger. A
trickle charge rcan be obtaine dfroman
authorized Mercedes-Ben zCenter, for exam-
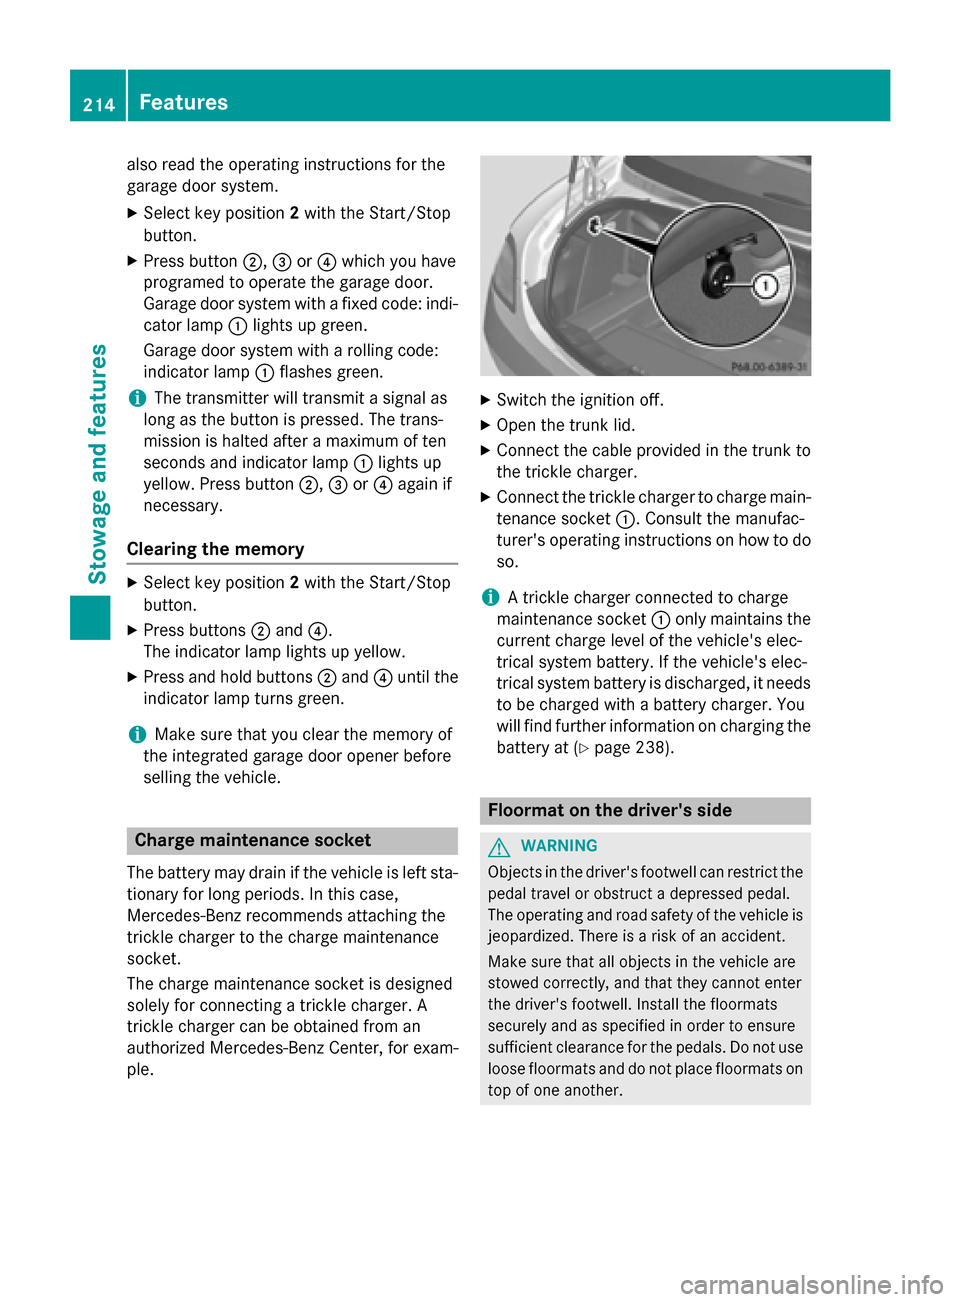
ple. X
Switch th eignition off.
X Open th etrunk lid.
X Connect th ecabl ep rovide dinthetrunk to
th et rickle charger.
X Connect th etrickle charge rtocharge main-
tenance socket 0043.Consult th emanufac-
turer' soperatin ginstruction sonhow to do
so.
i At
rickle charge rconnected to charge
maintenance socket 0043only maintain sthe
curren tcharge leve lofthevehicle's elec-
trical system battery. If th evehicle's elec-
trical system battery is discharged, it needs
to be charge dwithab attery charger. You
will fin dfurther informatio nonchargin gthe
battery at (Y page 238). Floorma
tonthedriver's side G
WARNING
Object sinthedriver' sfootwell can restrict the
pedal travel or obstruc tadepressed pedal.
The operatin gand road safety of th evehicle is
jeopardized. Ther eisariskofana ccident.
Mak esure that all object sinthevehicle are
stowed correctly, and that they canno tenter
th ed river' sfootwell. Install th efloormats
securely and as specifie dinorder to ensure
sufficient clearance for th epedals .Don otuse
loos efloormats and do no tplac efloormats on
to pofo neanother. 214
FeaturesStowage and features
Page 224 of 290
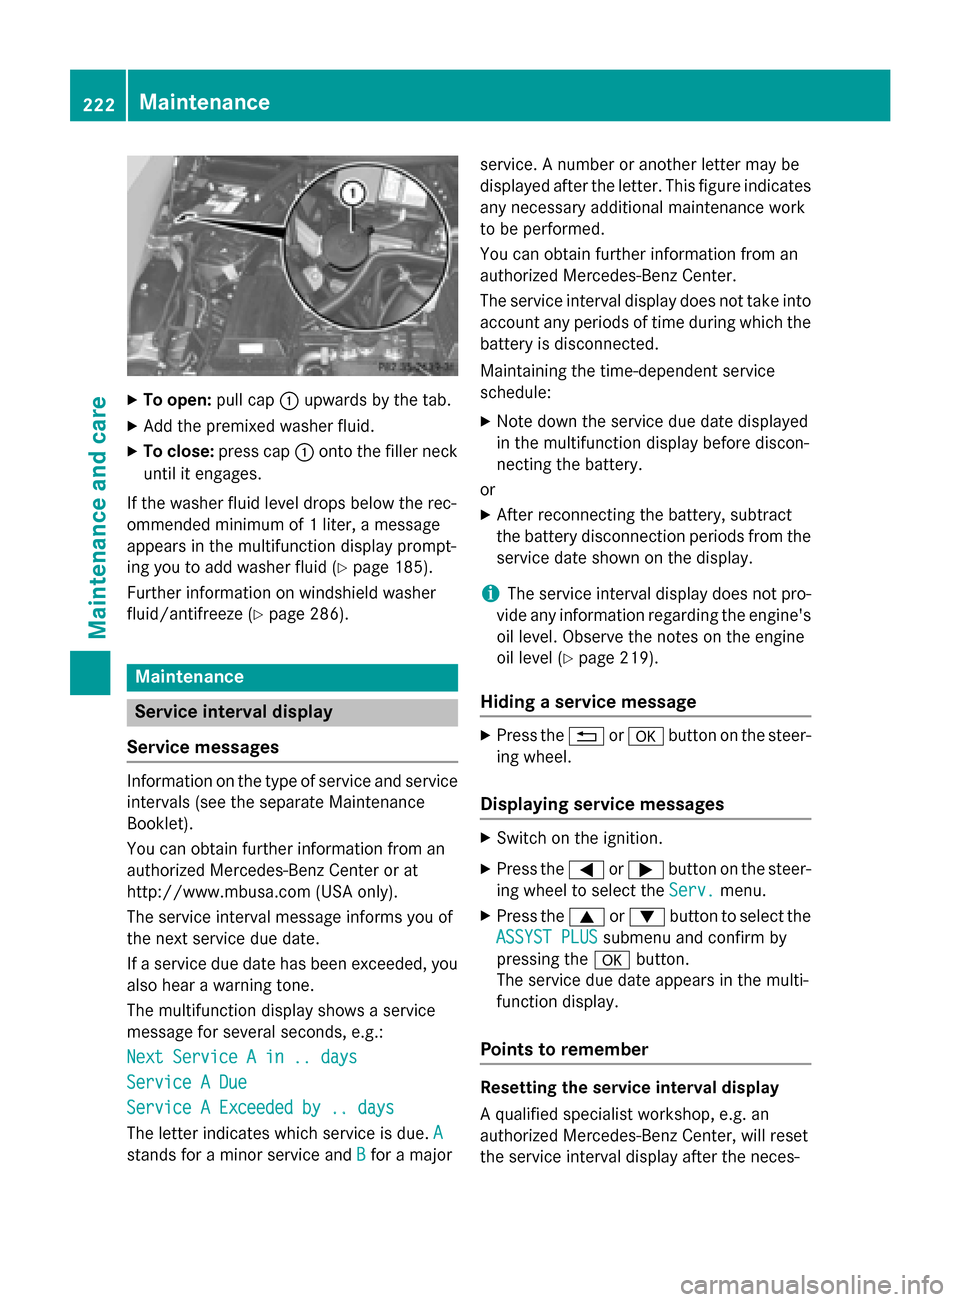
X
To open: pull cap0043upwards by the tab.
X Add the premixe dwashe rfluid.
X To close: press cap 0043onto the fille rneck
unti lite ngages.
If the washe rfluid level drops belo wthe rec-
ommended minimu mof1liter, am essage
appear sinthe multifunctio ndisplay prompt-
ing yo utoaddwashe rfluid (Y page 185).
Further informatio nonwindshield washer
fluid/antifreeze (Y page 286).Maintenance
Service interval display
Service messages Informatio
nonthe typ eofserviceand service
intervals (see the separate Maintenance
Booklet).
Yo uc an obtai nfurthe rinformatio nfrom an
authorize dMercedes-Benz Center or at
http://www.mbusa.com (USA only).
The servic einterva lmessage informs yo uof
the next servic eduedate.
If as ervic eduedate ha sbeene xceeded ,you
also hea rawarning tone.
The multifunctio ndisplay shows aservice
message for severa lseconds, e.g.:
Nex tServic eAin..d ays
Nex tServic eAin..d ays
Servic eADue
Servic eADue
Servic eAExceeded by .. days
Servic eAExceeded by .. days
The letter indicates which servic eisdue.A A
stands for aminorservic eand B
Bfor am ajor service.
Anumbe roranother letter ma ybe
displayed after the letter. Thi sfigur eindicates
any necessary additional maintenance work
to be performed.
Yo uc an obtai nfurthe rinformatio nfrom an
authorize dMercedes-Benz Center.
The servic einterva ldisplay does not take into
account any periods of time during which the battery is disconnected.
Maintaining the time-dependent service
schedule:
X Note down the servic eduedate displayed
in the multifunctio ndisplay before discon-
necting the battery.
or
X After reconnecting the battery ,sub tract
the battery disconnectio nperiods from the
servic edates hown on the display.
i The servic
einterva ldisplay does not pro-
vid eany informatio nregarding the engine's
oi llev el.O bserv ethe notes on the engine
oi llev el (Y page 219).
Hiding aservice message X
Press the 0038or0076 button on the steer-
ing wheel.
Displaying service messages X
Switch on the ignition.
X Press the 0059or0065 button on the steer-
ing whee ltoselect the Serv. Serv.menu.
X Press the 0063or0064 button to select the
ASSYST PLUS
ASSYST PLUS submenu and confirm by
pressing the 0076button.
The servic eduedate appear sinthe multi-
functio ndisplay.
Points to remember Resetting the service interval display
Aq
uali fied specialist workshop ,e.g.an
authorize dMercedes-Benz Center, will reset
the servic einterva ldisplay after the neces- 222
MaintenanceMaintenance and care
Page 227 of 290
and reduc
ewipin gnoises caused by residue
on th ewindshield.
Washin gbyhand In som
ecountries ,washin gbyh andiso nly
allowed at specially equippe dwashin gbays.
Observ ethe legal requirements in each coun-
try.
X Do no tuse hot wate rand do no twash the
vehicle in direct sunlight.
X Use asofts ponge to clean.
X Use amild cleanin gagent, suc hasacar
shampoo approved by Mercedes-Benz.
X Thoroughl yhosed own th evehicle wit ha
gentle je tofwater.
X Do no tpoin tthe wate rjet directly towards
th ea ir inlet.
X Use plenty of wate rand rinse out the
sponge frequently.
X Rins ethe vehicle wit hclean wate rand dry
thoroughly wit hachamois.
X Do no tlet th ecleanin gagen tdry on the
paintwork.
Carefully remove all deposits of road salt as
soon as possible when driving in winter.
Power washers G
WARNING
The wate rjet from acircular je tnozzle (dirt
blasters )can caus einvisible exterior damage
to th etires or chassis components. Compo-
nent sdamaged in this way may fail unexpect-
edly. Ther eisariskofana ccident.
Do no tuse power washers wit hcircular jet
nozzles to clean th evehicle .Haved amaged
tires or chassis component sreplace dimme-
diately.
! Always maintain
adistanc eofatl east
11.8 in (30 cm)between thev ehicle and the
power washe rnozzle .Inf ormation about
th ec orrec tdistanc eisavailabl efromt he
equipmen tmanufacturer. Mov
ethe power washe rnozzle around
when cleanin gyour vehicle.
Do no taim directly at any of th efollowing:
R tires
R door gaps, roo fgaps, joints, etc.
R electrical components
R battery
R connectors
R lights
R seals
R trim
R ventilatio nslots
Damaged seals or electrical components
can lead to leak sorfailures.
Cleaning th ewheels !
Do no
tuse acidic wheel cleanin gproducts
to remove brak edust .This could damage
wheel bolt sand brak ecom ponents.
! Do no
tpark th evehicle for an extended
period straigh tafter cleanin git, particularly
after havin gcleane dthe wheels wit hwheel
cleaner. Whee lcleaners could cause
increased corrosio nofthebrak ediscsa nd
brak epads/linings. For this reason ,you
should driv efor afew minute safter clean-
ing .Brakin gh eat sthe brak ediscsa nd the
brak epads/linings, thus dryin gthem. The
vehicle can then be parked.
Cleaning th epaintwork Scratches, corrosiv
edeposits ,areas affected
by corrosio nand damag ecaused by inade-
quat ecarec anno talways be completely
repaired. In suc hcases, visit aqualified spe-
cialist workshop, e.g .anauthorized
Mercedes-Ben zCenter.
X Remove impurities immediately, where
possible, whils tavoiding rubbing to ohard.
X Soak insect remains wit hinsect remover
and rinse off th etreated areas afterwards.
X Soak bird droppings wit hwaterand rinse
off th etreated areas afterwards. Care
225Maintenance and care Z
Page 240 of 290
X
Stow the TIREFIT kit in asafea nd accessi-
bl ep lace in the vehicle.
X Pul lawa yimmediately.
The maximum speed for atire seale dwitht ire
sealant is 50 mph (80 km/h). The uppe rpart
of the TIREFIT sticke rmustb ea ffixe dtot he
instrument cluster in the driver' sfield of
vision.
! After use, exces
sTIREFIT may run ou tof
the fille rhose. Thi scould cause stains.
X Stop afte rdriving for approximatel yten
minutes and check the tire pressure with
the tire inflation compressor.
The tire pressure mus tnow be at least
130 kPa (1.3 bar/19 psi).
i On tire
stha tare equipped with atire pres-
sure sensor (tire pressure monitor) ,the use
of sealant can lead to malfunction mes-
sages and incorrect displays. Therefore,
us ep ressure gauge 0084in the TIREFIT kit to
check and correct the tire pressure. G
WARNING
If the required tire pressure is not reached
afte rdriving for ashort period, the tire is too
badl ydam aged .The tire sealant canno trepair
the tire in this instance. Damaged tire sand a
tire pressure tha tist oo lo wcan significantly
impai rthe vehicle's braking and driving char-
acteristics. There is ariskofa ccident.
Do not continu edriving .Contact aquali fied
specialist workshop.
X Correct the tire pressure if it is stil latleast
130 kPa (1.3 bar/20 psi )(fort he values,
see the Tire and Loading Information plac-
ard on the driver' ssideB -pillar or tire pres-
sure table on the fue lfille rflap).
To increase the tire pressure: switch on
the tire inflation compressor.
To reduc ethe tire pressure: openrelease
screw 006B.
! The manufacturer doe
snot guarantee
tha talltire damag ecan be repaired using
the TIREFIT kit, particularly in the cas eofcuts and puncture
swithad iameter of more
tha nfou rm illimeters or on the sidewall. The
manufacturer is not responsible for dam-
ag ec aused by inappropriate us eofthe
TIREFIT kit.
X Drive to the neares tworksho pand have the
tire changed there.
X Hav ethe tire sealant bottl ereplaced as
soo naspossible at aquali fied specialist
workshop, e.g. at an authorized Mercedes- Benz Center. H
Environmental note
Hav ethe used tire sealant bottl edisposed of
professionally ,e.g. at an authorized
Mercedes-Benz Center.
X Hav ethe TIREFIT kit replaced every four
years at aquali fied specialist workshop,
e.g. an authorized Mercedes-Benz Center. Battery (vehicle)
Important safety notes
Specia ltool sand expert knowledge are
required when working on the battery ,e.g.
removal and installing .You shoul dtherefore
have al lworki nvolving the battery carrie dout
at aq uali fied specialist workshop. G
WARNING
Wor kcarrie doutincorrectl yonthe battery
can lead ,for example, to ashort circuit and
thu sdam aget he vehicl eelectronics. Thi scan
lead to function restrictions applying to
safety-relevant systems ,e.g. the lighting sys-
tem, ABS (anti-lock braking system) or ESP ®
(Electronic Stability Program). The operating
safety of your vehicl emay be restricted. You
could lose contro lofthe vehicle, for example:
R braking
R in the event of abrup tsteering maneuver
and/or when the vehicle's speed is not
adapted to the roa dconditions
There is ariskofana ccident. 238
Battery (vehicle)Breakdown assistance
Page 241 of 290
In the event of
ashort circuit or asimilar inci-
dent, contact aqualifieds pecialist workshop
immediately.Don ot drive any further. You
shouldh ave all work involving the battery car-
ried out at aqualifieds pecialist workshop. G
WARNING
Electrostatic build-up can leadtot he creation
of sparks, which could ignite the highlye xplo-
sive gases of abattery. There is arisk of an
explosion.
Before handling the battery, touch the vehicle body to remove any existing electrostatic
build-up.
The highlyf lammable gas mixture forms when
charging the battery as wellasw hen jump-
starting.
Alwaysm ake sure that neither you nor the
battery is electrostatically charged. Abuild-
up of electrostatic charge can be caused, for
example:
R by wearing clothing made from synthetic
fibers
R due to friction betwee nclothing and seats
R if you push or pullt he battery across the
carpet or other synthetic materials
R if you wipet he battery with acloth G
WARNING
During the charging process, abattery produ-
ces hydrogen gas. If ashort circuit occurs or
sparks are created, the hydrogen gas can
ignite. There is arisk of an explosion.
R Make sure that the positive terminal of a
connected battery does not come into con- tact with vehicle parts.
R Never place metal objects or tools on abat-
tery.
R It is important that you observe the descri-
bed order of the battery terminals when
connecting and disconnecting abattery.
R When jump-starting, make sure that the
battery polesw ith identical polarity are
connected. R
It is particularly important to observe the
describe dorder when connecting and dis-
connecting the jumper cables.
R Never connect or disconnect the battery
terminals whilet he engine is running. G
WARNING
Battery acid is caustic. There is arisk of injury.
Avoid contact with the skin, eyes or clothing.
Do not inhalea ny battery gases.Don ot lean
over the battery. Keep childre nawayfrom
batteries. Wash battery acid immediately with water and seek medica lattention. H
Environmental note Batteries contain dangerous
substances. It is against the
law to dispose of them with
the household rubbish. They
must be collected separately
and recycled to protect the
environment. Dispose of batteries in an
environmentally friendly
manner. Take discharged
batteries to
aqualifieds pe-
cialist workshop or aspecial
collection point for used bat- teries.
! Have the battery checked regularly at a
qualified specialist workshop.
Observe the service intervals in the Main-
tenance Booklet or contact aqualified spe-
cialist workshop for more information.
! You shouldh
ave all work involving the
battery carried out at aqualified specialist
workshop. In the exceptional case that it is
necessary for you to disconnect the battery yourself, make sure that:
R you switch off the engine and remove the
SmartKey. On vehicle swith KEYLESS-
GO, ensure that the ignition is switched
off. Check that all the indicator lampsin
the instrument cluster are off. Otherwise, Battery (vehicle)
239Breakdownassistance Z
Page 242 of 290
electronic components, such as the
alternator, may be damaged.
R you first remove the negativ eterminal
clamp and then the positive terminal
clamp. Never swap the terminal clamps.
Otherwise, the vehicle's electronic sys-
tem may be damaged.
R the transmission is locked in position P
after disconnectingt he battery. The vehi-
cle is secured against rolling away. You
can then no longer move the vehicle.
The batter yand the cover of the positive
terminal clamp must be installed securely
during operation.
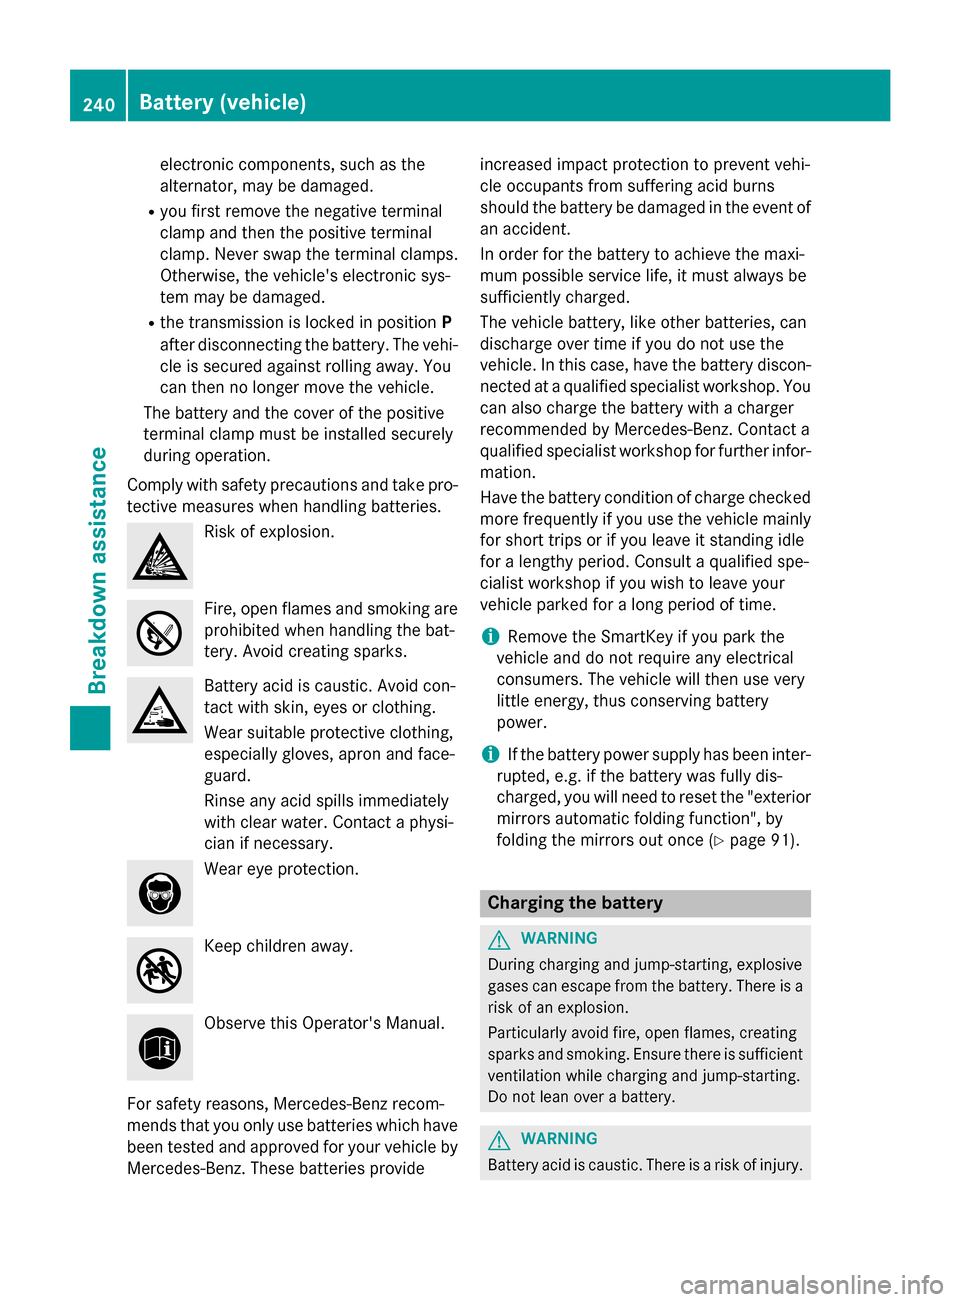
Comply with safety precaution sand take pro-
tective measures when handling batteries. Risk of explosion.
Fire, open flames and smoking are
prohibited when handling the bat-
tery. Avoid creating sparks. Battery acid is caustic
.Avoid con-
tact with skin ,eyes or clothing.
Wear suitable protective clothing,
especially gloves, apron and face-
guard.
Rinse any acid spills immediately
with clear water. Contac taphysi-
cian if necessary. Wear eye protection.
Keep children away.
Observe this Operator's Manual.
For safety reasons, Mercedes-Benzr ecom-
mends that you only use batteries which have been tested and approved for your vehicle by
Mercedes-Benz. These batteries provide increased impact protection to preven
tvehi-
cle occupants from sufferin gacid burns
should the batter ybedamaged in the event of
an accident.
In order for the batter ytoachieve the maxi-
mum possible servic elife, it must alway sbe
sufficiently charged.
The vehicle battery, like other batteries, can
discharge over time if you do not use the
vehicle. In this case, have the batter ydiscon-
nected at aqualified specialist workshop. You
can also charge the batter ywithacharger
recommended by Mercedes-Benz. Contac ta
qualified specialist worksho pfor further infor-
mation.
Have the batter ycondition of charge checked
more frequently if you use the vehicle mainly
for short trips or if you leave it standing idle
for alengthy period. Consult aqualified spe-
cialist worksho pifyou wish to leave your
vehicle parked for along period of time.
i Remove the SmartKey if you park the
vehicle and do not require any electrical
consumers. The vehicle will then use very
little energy, thus conservin gbattery
power.
i If the batter
ypower supply has been inter-
rupted, e.g. if the batter ywas fully dis-
charged, you will need to reset the "exterior
mirror sautomatic folding function", by
folding the mirror sout once( Ypage 91). Charging the battery
G
WARNING
Durin gchargin gand jump-starting, explosive
gases can escape from the battery. There is a risk of an explosion.
Particularly avoid fire, open flames, creating
sparks and smoking. Ensure there is sufficient
ventilation while chargin gand jump-starting.
Do not lean over abattery. G
WARNING
Battery acid is caustic .There is arisk of injury. 240
Battery (vehicle)Breakdown assistance
Page 243 of 290
Avoi
dcontact with the skin, eyes or clothing.
Do not inhal eany battery gases .Donot lean
ove rthe battery .Keepc hildren away from
batteries. Wash battery aci dimmediatel ywith
water and see kmedica lattention. G
WARNING
Ad ischarge dbattery can freeze at tempera-
ture sbelow freezing point. Whe njump-start-
ing the vehicl eorcharging the battery ,gases
can escap efrom the battery .There is ariskof
an explosion.
Allow the froze nbattery to tha woutbefore
charging it or jump-starting.
! Onl
yusebattery chargers with amaxi-
mu mc harging voltag eof14.8V.
! Only
charge the battery using the jump-
starting connection point.
The jump-starting connection point is in the
engine compartment (Y page 242).
Neve rcharge the battery if it is stil linstalled in
the vehicle ,unless yo uuseab attery charger
which ha sbeent ested and approved by
Mercedes-Benz. Abattery charge runits pe-
ciall yadapt ed for Mercedes-Benz vehicles
and tested and approved by Mercedes-Benz
is available as an accessory. It permits the
charging of the battery in its installed posi-
tion. Contact an authorized Mercedes-Benz
Center for further information and availabil-
ity .C harget he battery in accordance with the
separate instructions for the accessory bat-
tery charger.
Read the battery charger's operating instruc- tions before charging the battery.
X Ope nthe hoo d(Ypage 218).
X Connect the battery charge rtothe positive
terminal and ground point in the same
order as when connecting the dono rbat-
tery in the jump-starting procedure
(Y page 242). Battery (vehicle)
241Breakdown assistance Z