Page 216 of 290

also read th
eoperatin ginstruction sfor the
garag edoor system.
X Select ke yposition 2wit hthe Start/Stop
button.
X Press button 0044,0087or0085 whic hyou have
programed to operate th egarag edoor.
Garage door system wit hafixed code: indi-
cator lamp 0043light supg reen.
Garage door system wit harolling code:
indicator lamp 0043flashes green.
i The transmitte
rwill transmit asignal as
lon gast hebutto nisp ressed. The trans-
mission is halted after amaximum of ten
seconds and indicator lamp 0043light sup
yellow. Press button 0044,0087or0085 again if
necessary.
Clearing th ememory X
Select ke yposition 2wit hthe Start/Stop
button.
X Press buttons 0044and 0085.
The indicator lamp light supyellow.
X Press and hold buttons 0044and 0085until the
indicator lamp turns green.
i Mak
esure that you clear th ememory of
th ei ntegrate dgarag edoor opener before
sellin gthe vehicle. Charg
emaintenance socket
The battery may drain if th evehicle is left sta-
tionar yfor lon gperiods. In this case,
Mercedes-Ben zrecommends attaching the
trickle charge rtothecharge maintenance
socket.
The charge maintenance socke tisdesigned
solely for connecting atrickle charger. A
trickle charge rcan be obtaine dfroman
authorized Mercedes-Ben zCenter, for exam-
ple. X
Switch th eignition off.
X Open th etrunk lid.
X Connect th ecabl ep rovide dinthetrunk to
th et rickle charger.
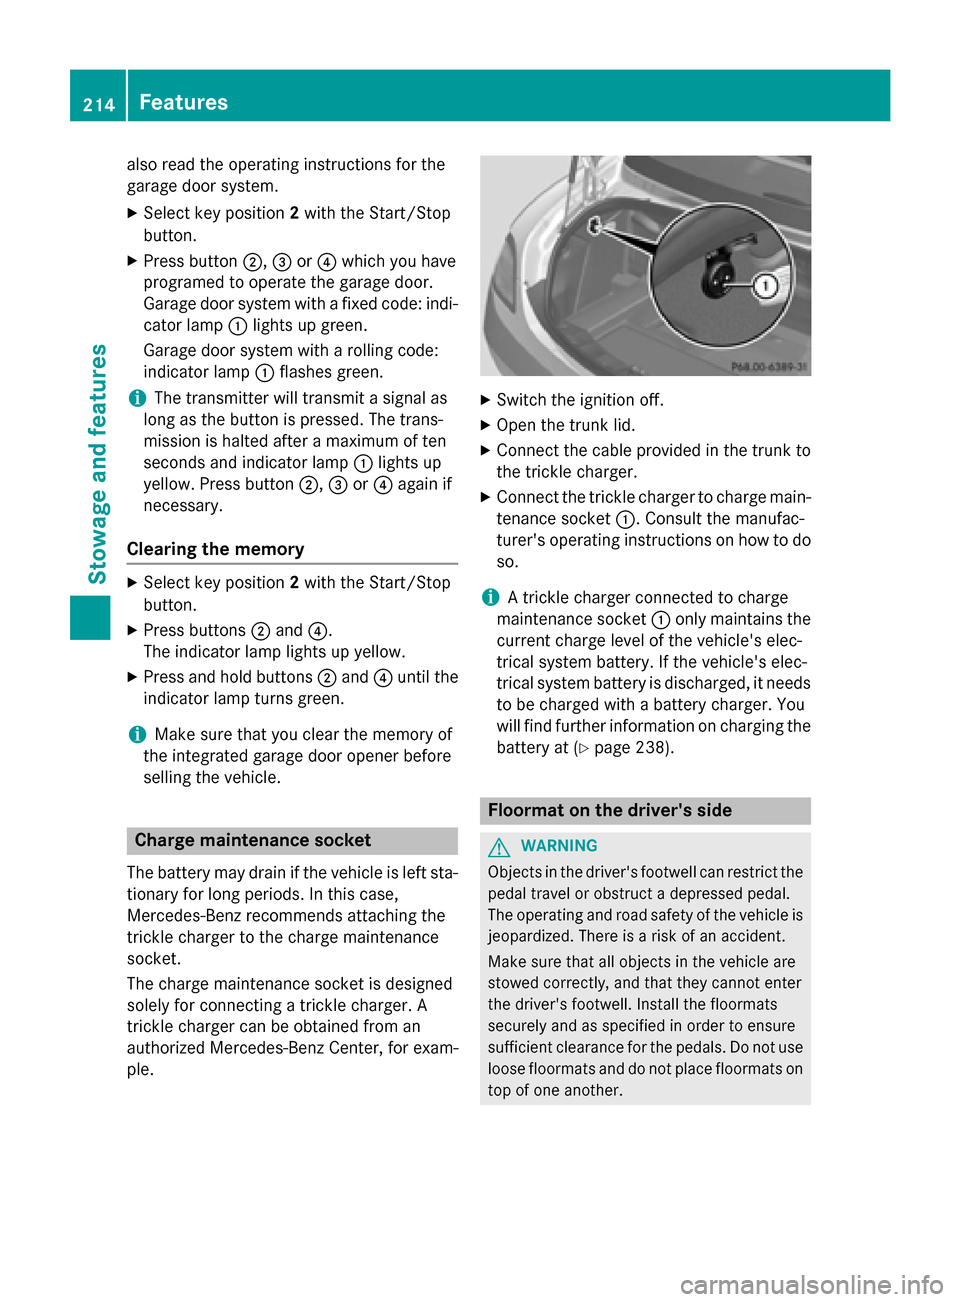
X Connect th etrickle charge rtocharge main-
tenance socket 0043.Consult th emanufac-
turer' soperatin ginstruction sonhow to do
so.
i At
rickle charge rconnected to charge
maintenance socket 0043only maintain sthe
curren tcharge leve lofthevehicle's elec-
trical system battery. If th evehicle's elec-
trical system battery is discharged, it needs
to be charge dwithab attery charger. You
will fin dfurther informatio nonchargin gthe
battery at (Y page 238). Floorma
tonthedriver's side G
WARNING
Object sinthedriver' sfootwell can restrict the
pedal travel or obstruc tadepressed pedal.
The operatin gand road safety of th evehicle is
jeopardized. Ther eisariskofana ccident.
Mak esure that all object sinthevehicle are
stowed correctly, and that they canno tenter
th ed river' sfootwell. Install th efloormats
securely and as specifie dinorder to ensure
sufficient clearance for th epedals .Don otuse
loos efloormats and do no tplac efloormats on
to pofo neanother. 214
FeaturesStowage and features
Page 230 of 290

!
Do not clean wiper blades too often and
do not rub them too hard. Otherwise, the
graphite coating could be damaged. This
could cause wiper noise.
X Switch off the engine.
X Remove your foot from the brake pedal.
X Set the windshieldw iper to the00AAposi-
tion on the combination switch.
X Press the Start/Stop button repeatedly
until the windshieldw iper starts.
X When the wiper arms have reached aver-
tical position, press the Start/Stop button.
X Fold the wiper arm awayf rom the wind-
shield until it engages.
X Set the wiper bladeatr ight angles to the
wiper arm.
X Carefully clean the wiper blades with a
damp cloth.
X Fold the windshieldw iper arms back again
before switching on the ignition.
! Hold the wiper arm securely when folding
back. The windshieldc ould be damagedif
the wiper arm smacks against it suddenly.
Cleaning the exterior lighting X
Cleant he plastic lenses of the exterior
lighting using awet sponge and amild
cleaning agent, e.g. Mercedes-Benz car
shampoo or cleaning cloths.
! Only use cleaning agents or cleaning
cloths which are suitablef or plastic light
lenses. Unsuitable cleaning agents or
cleaning cloths could scratch or damage
the plastic light lenses.
Cleaning the mirror turns ignals!
Only use cleaning agents or cleaning
cloths that are suitablef or plastic lenses.
Unsuitable cleaning agents or cleaning
cloths could scratch or damage the plastic
lenses of the mirror turn signals.
X Cleant he plastic lenses of the mirror turn
signals in the exterior mirror housing using aw
et sponge and amild cleaning agent,
e.g. Mercedes-Benz car shampoo or clean-
ing cloths.
Cleaning the sensors !
If you clean the sensors with
apower
washer, make sure that you keep adis-
tance of at least 11.8 in (30 cm) between
the vehicle and the power washer nozzle.
Information aboutt he correct distance is
available from the equipment manufac-
turer. X
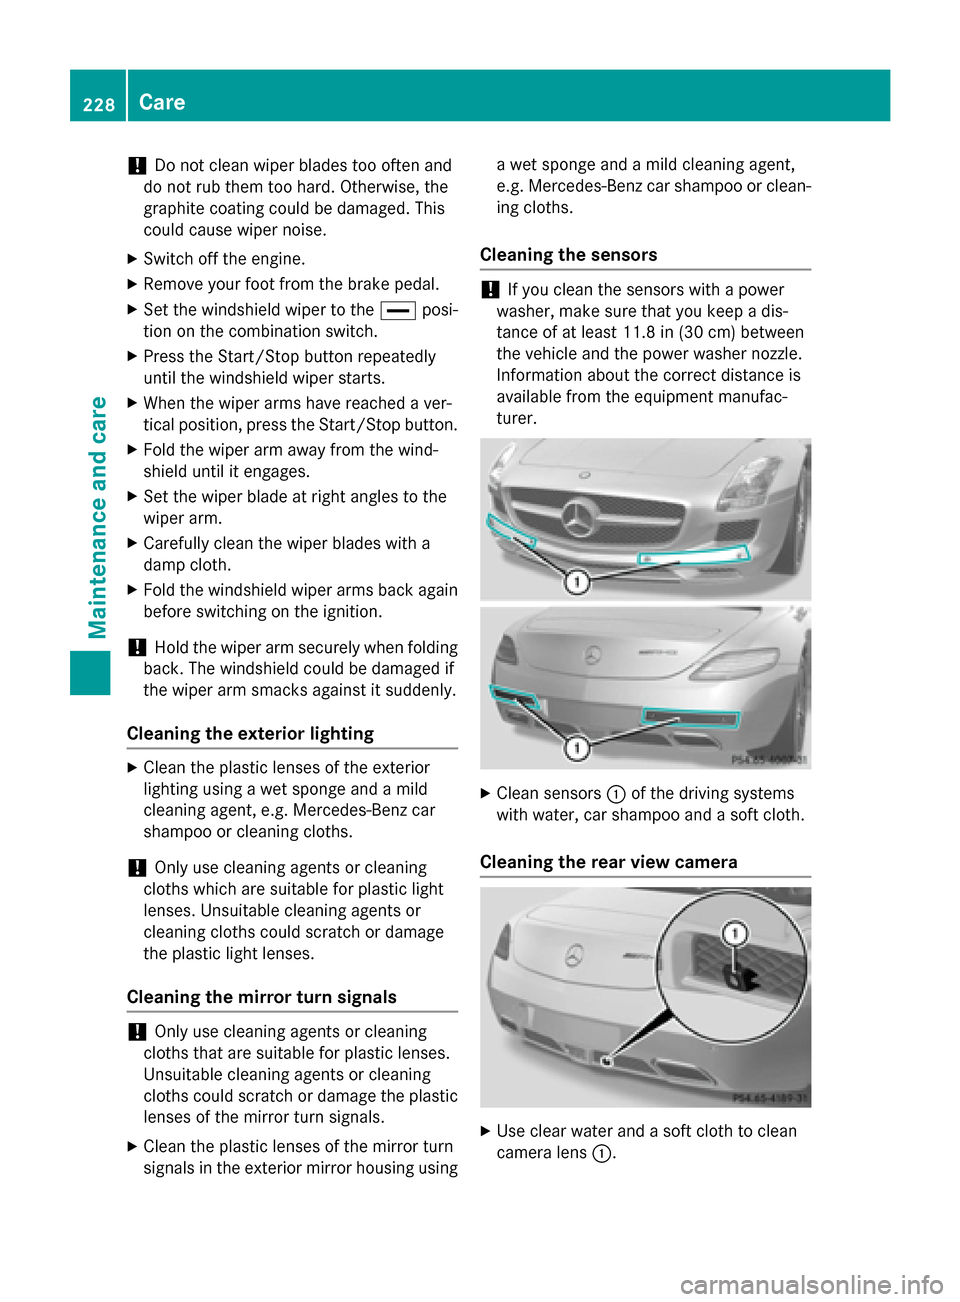
Cleans ensors0043of the driving systems
with water, car shampoo and asoft cloth.
Cleaning the rear view camera X
Use clear water and asoft cloth to clean
camera lens 0043.228
CareMaintenance and care
Page 248 of 290

X
Switch on the hazard warning lamps
(Y page 98).
X Make sure tha tthe SmartKey is in position
2 in the ignition and tha tthe engine is run-
ning throughout the towing procedure.
X Mov ethe transmissio ntoNwith the E-
SELECT lever. Check the transmissio nposi-
tion in the instrument cluster. Towin
gavehicle with both axles on
the ground
It is important tha tyou observe the safety
instructions when towing away your vehicle
(Y page 244).
X Switch on the hazard warning lamps
(Y page 98).
i Whe
ntowing with the hazard warning
flashers switche don, us ethe combination
switch as usua ltosignal in which direction
yo ua re changing. In this case, onl ythe
indicator lamps for the direction of travel
flash. Whe nyou reset the combination
switch, the hazard warning flashers start
flashing again.
X Insert the SmartKey into the ignition lock
(Y page 119).
X Start the engine and leave the SmartKey in
the ignition.
X Mov ethe transmissio ntoNwith the E-
SELECT lever.
X Check the transmissio nposition in the
instrument cluster display (Y page 123).
X Leave the engine running throughout the
entir etowing procedure Transporting the vehicle
The towing ey ecan be used to pull the vehicle
onto atraile rort ransporter for transporting
purposes.
! Yo
um ay onl ysecure the vehicl ebythe
wheels, not by parts of the vehicl esuchas axl
eors teering components .Otherwise,
the vehicl ecould be damaged.
X Start the engine.
X Make sure tha tthe SmartKey is in position
2 in the ignition and tha tthe engine is run-
ning during the entir eloadin goperation.
X Mov ethe transmissio ntoNwith the E-
SELECT lever. Check the transmissio nposi-
tion in the instrument cluster.
As soon as the vehicle has been loaded: X Prevent the vehicl efrom rolling away by
applying the electri cparking brake.
X Shift the transmissio ntoPwith the button
in the center console.
X Turn the SmartKey to position 0in the igni-
tion lock and remove the SmartKey from
the ignition lock.
X Secure the vehicle. Fuses
Important safety notes
G
WARNING
If yo umanipulate or bridge afaulty fus eorif
yo ur eplace it with afusew ithah ighe ramper-
age, the electri ccable scould be overloaded.
Thi scould resul tinafire. There is ariskofan
accident and injury.
Alway sreplace faulty fuses with the specified
new fuses having the correct amperage.
! Only us
efuses tha thaveb eena pproved
for Mercedes-Benz vehicles and which
have the correct fus erating for the system
concerned. Otherwise, components or sys-
tems could be damaged.
The fuses in your vehicl eserve to close down
faulty circuits. If afuseb lows ,allthe compo-
nents on the circuit and thei rfunctions stop
operating.
Blown fuses mus tbereplaced with fuses of
the same rating, which yo ucan recognize by 246
FusesBreakdown assistance