2015 MERCEDES-BENZ SLS AMG GT COUPE tire size
[x] Cancel search: tire sizePage 17 of 290
DOT (Department of Transporta-
tion) (definition) ............................. 268
GAW
R(GrossA xle Weight Rating)
(definition) .................................... .268
GVW (Gross Vehicle Weight) (def-
inition) .......................................... .268
GVW R(Gross Vehicle Weight Rat-
ing) (definition) .............................. 269
Important safety notes .................. 250
Increase dvehicle weight due to
optional equipment (definition) ...... 268
Kilopascal (kPa )(definition) ........... 269
Labeling (overview )........................ 264
Loa dbearing index (definition) ...... 270
Loa dindex ..................................... 266
Loa dindex (definition) ................... 269
Maximu mloaded vehicleweight
(definition) ..................................... 269
Maximu mloadona tire (definition) .. 269
Maximu mpermissibl etire pres-
sure (definition) ............................. 269
Maximu mtire load ......................... 267
Maximu mtire load (definition) ....... 269
Optiona lequipment weight (defi-
nition) ............................................ 269
PSI (pounds pe rsquare inch )(de f-
inition) ........................................... 269
Replacing ....................................... 270
Service life ..................................... 252
Sidewal l(de finition) ....................... 269
Speed rating (definition) ................ 268
Storing ........................................... 271
Structure and characteristics
(definition) ..................................... 268
Technica ldata. .............................. 277
Temperature .................................. 264
TIN (Tire Identification Number)
(definition) ..................................... 270
Tire bead (definition) ...................... 269
Tire pressure (definition) ................ 269
Tire pressures (recommended )...... 268
Tire size (data )............................... 275
Tire size designation, load-bearing capacity, speed rating .................... 264
Tire trea d....................................... 251
Tire trea d(definition) ..................... 269
Tota lloa dlim it (definition) ............. 270
Tractio n......................................... 263 Tractio
n(definition) ....................... 270
Tread wear ..................................... 263
Uniform Tire Quality Grading
Standard s...................................... 263
Uniform Tire Quality Grading
Standard s(de finition) .................... 268
Wea rindicator (definition) ............. 270
Wheel rim (definition) .................... 268
see Fla ttire
Top Tether ............................................ 53
Tow-away alarm .................................. 59
Towing Important safety guideline s........... 244
Installing the towing ey e................ 245
Removing the towing ey e............... 245
With the rea raxler aised ................ 245
Towin gaway
With both axles on the ground ....... 246
Transmission
Driving tip s.................................... 124
Selector lever ................................ 121
Shift rang e..................................... 127
Transmissio nposition display ......... 123
Transmissio npositions .................... 123
Transporting the vehicle .................. 246
Trim piece s(clea ning instructions) .. 230
Trip computer (on-board computer) .. 153
Trip odometer Calling up ....................................... 152
Trunk
Emergency release .......................... 74
Important safety guideline s............. 72
Locking separatel y........................... 74
Opening (automatically from
inside ).............................................. 73
Trunk lid
Displa ymessage ............................ 184
Opening/closing ........................ 72, 73
Opening dimensions ...................... 286
Trunk load (maximum) ...................... 286
see Technical data
Turn signal (display message) ......... 174
Turn signals Switching on/of f.............................. 98
Type identificatio nplate
see Vehicl eide ntification plate Index
15
Page 18 of 290
U
Unlocking Emergenc yunlocking .......................70
From inside the vehicle (central
unlocking button) ............................. 70
Upshift indicator ............................... 128V
Vanity mirror (i nthe sun visor) ........ 202
Vehicle Correct us e...................................... 23
Displa ymessag e............................ 184
Equipment ....................................... 19
Individua lsettings .......................... 157
Limite dWarranty ............................. 24
Loading .......................................... 260
Locking (i nanemergency) ............... 71
Locking (SmartKey ).......................... 62
Lowering ........................................ 275
Maintenance .................................... 20
Parking for alon gp eriod. ............... 134
Pulling away ................................... 120
Raising ........................................... 272
Reporting problems ......................... 23
Towing away .................................. 244
Transporting .................................. 246
Unlocking (i nanemergency) ........... 70
Unlocking (SmartKey )................ 62, 68
Vehicl edata. .................................. 286
Vehicl edata ....................................... 286
see Technica ldata
Vehicl edimensions ........................... 286
see Technica ldata
Vehicl eemergenc yloc king ................ 71
Vehicl eidentificatio nnumber
see VIN
Vehicl eidentificatio nplate .............. 280
Vehicl etoolkit.................................. 234
Vehicl eweigh ts
see Technica ldata
Vide o(DV D)........................................ 155
VIN ...................................................... 280 W
Warning and indicator lamps ABS ................................................ 192
Brakes ................................... 190 ,192
Check Engine ................................. 195
Cruise control ................................ 139
ESP ®
.............................................. 193
Fue ltank ........................................ 196
Overview .......................................... 28
PASSENGER AIR BAG OFF indica-
tor lamp ........................................... 42
Reserve fue l................................... 196
Sea tbelt. ....................................... 191
SPOR Thandling mod e................... 193
SRS ................................................ 194
Tire pressure monitor .................... 197
Warranty ...................................... 19, 280
Washer fluid see Windshield washe rsystem
Washer fluid (display message) ....... 185
Weight see Technical data
Wheel bolt tightenin gtorque ........... 275
Wheel chock ...................................... 271
Wheels Checking ........................................ 251
Cleaning ......................................... 225
Important safety notes .................. 250
Interchanging/changing ................ 270
Mounting anew whee l................... 274
Mounting awheel .......................... 271
Removing awheel .......................... 273
Storing ........................................... 271
Tightening torque ........................... 275
Wheel size/tire size ....................... 275
Windows
see Sid ewindows
Win dscreen ......................................... 80
Windshiel dwasher system .............. 221
Filling capacity ............................... 286
Note s............................................. 286
Windshiel dwipers
Problem (malfunction) ................... 103
Replacing the wipe rblade s............ 102
Switching on/of f........................... 101 16
Index
Page 58 of 290
may be show
ninthe instrument cluster
(Y page1 70).
i Only use wheels with the recommended
tire sizes. Only then willE SP®
function
properly.
Characteristics of ESP ®ESP
®
is activated automatically when the
engine is started.
If ESP ®
intervenes, the 0089ESP®
warning
lamp flashes in the instrument cluster.
If ESP ®
intervenes:
X Do not deactivate ESP ®
under any circum-
stances.
X Only depress the accelerator peda lasfar as
necessary when pulling away.
X Adapt yourd riving style to suitt he prevail-
ing road and weather conditions.
Deactivating/activating ESP ®Important safety notes
i Observe the "Important safety notes" sec-
tion (Y page54).
You can select between the following states
of ESP ®
:
R ESP ®
is activated.
R SPORT handling mode is activated.
R ESP ®
is deactivated. G
WARNING
When SPORT handling mode is activated,
there is agreater risk of skidding and acci-
dents.
Only activate SPORT handling mode in the sit- uations described in the following. G
WARNING
If you deactivate ESP ®
,E SP ®
no longer sta-
bilizes the vehicle. There is an increase drisk
of skidding and an accident. Only deactivate ESP
®
in the situations descri-
bed in the following.
In the following situations, it may be better to activate SPORT handling mode or deactivate
ESP ®
:
R when using snow chains
R in deep snow
R on sand or gravel
R when driving on designated road swhen the
vehicle's own oversteering and understeer-
ing characteristics are desired
Driving in SPORT handling mode or without
ESP ®
requires an extremely qualified and
experienced driver.
i Activate ESP ®
as soon as the situations
described above no longer apply.E SP®
will
otherwise not be abletos tabilize the vehi-
cle if the vehicl estarts to skid or awheel
starts to spin.
! Avoid spinning the driven wheels for an
extended perio dwith ESP ®
deactivated.
You could otherwise damage the drivetrain.
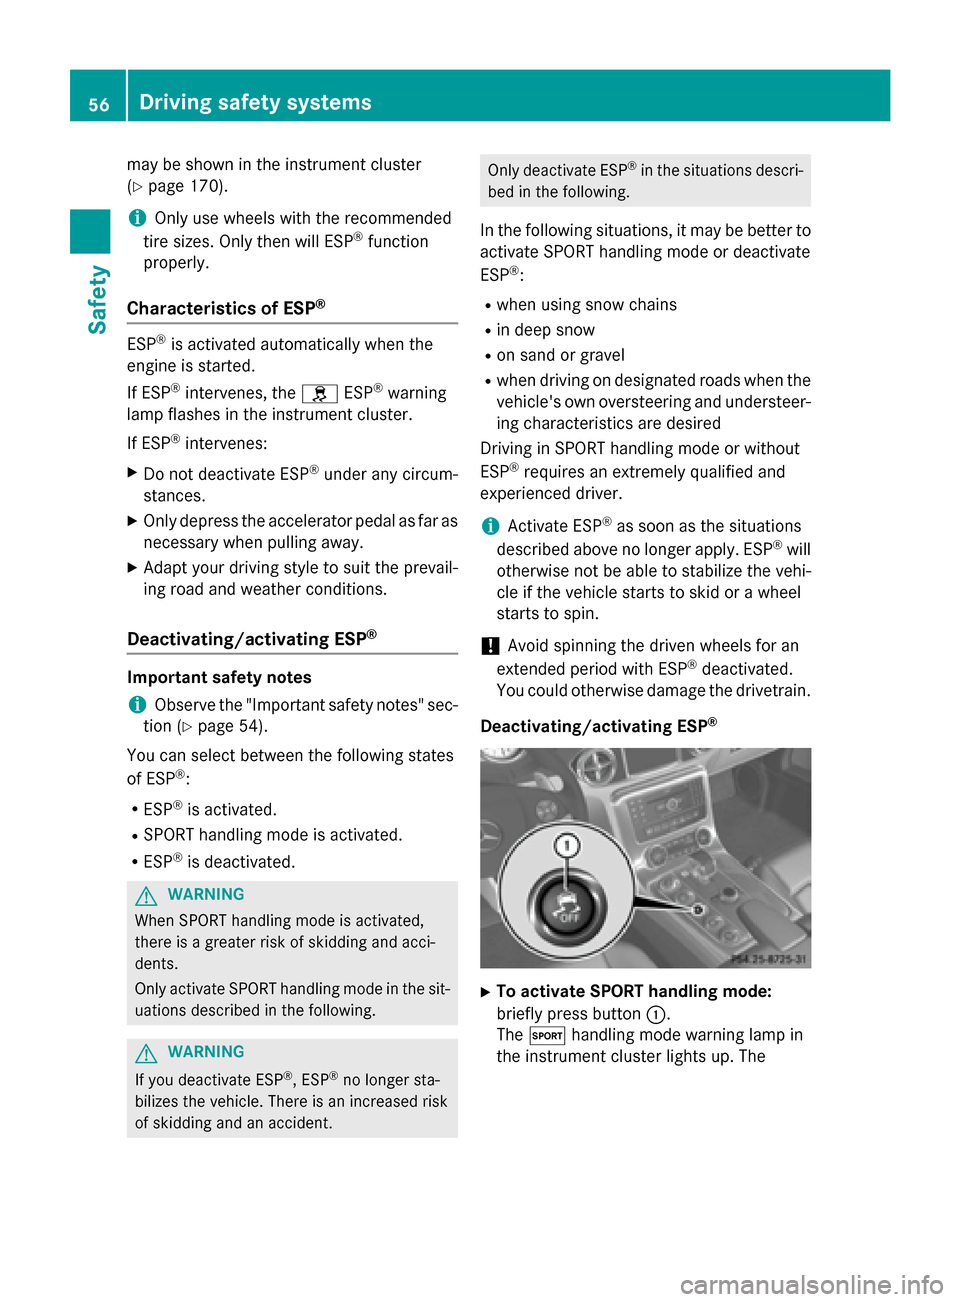
Deactivating/activating ESP ® X
To activate SPORT handlin gmode:
briefl ypress button 0043.
The 0074 handling mode warning lamp in
the instrument cluster lights up. The 56
Driving safety systemsSafety
Page 252 of 290
Useful information
i This Operator's Manual describes all
models and all standard and optional equip- ment of your vehicle available at the time of
publication of the Operator's Manual.
Country-specific differences are possible.
Please not ethat your vehicle may not be
equipped with all feature sdescribed. This
also applies to safety-related system sand
functions.
i Please read the information on qualified
specialist workshops (Y page 23).Important safet
ynotes G
WARNING
If wheels and tires of the wrong size are used, the wheel brakes or suspensio ncomponents
may be damaged. There is arisk of an acci-
dent.
Always replace wheels and tires with those
that fulfill the specification softhe original
part.
When replacin gwheels, make sure to use the
correct:
R designation
R model
When replacin gtires ,make sure to use the
correct:
R designation
R manufacturer
R model G
Warning
Af lat tire severely impairs the driving, steer-
ing and brakin gcharacteristic softhe vehicle.
There is arisk of an accident.
do not drive with aflat tire. Immediately
replace the flat tire with your spare wheel, or
consult aqualified specialist workshop.
Accessories that are not approved for your
vehicle by Mercedes-Benz or that are not being used correctly can impair the operating
safety.
Before purchasin gand using non-approved
accessories, visit aqualified specialist work-
shop and inquire about:
R suitability
R legal stipulations
R factory recommendations
Information on dimensions and types of
wheels and tires for your vehicle can be found (Y page 275).
Information on air pressure for the tires on
your vehicle can be found:
R on the vehicle' sTire and Loading Informa-
tion placard on the B-pillar
R on the tire pressure label on the fuel filler
flap
R under "Tire pressure"
i Further information on wheels and tires
can be obtained at any qualified specialist
workshop. Operation
Information on driving
R If the vehicle is heavily loaded, chec kthe
tire pressures and correct them if neces-
sary.
R While driving, pay attention to vibrations,
noises and unusual handling characteris-
tics, e.g. pulling to one side. This may indi- cate that the wheels or tires are damaged.If you suspect that atire is defective,
reduce your speed immediately. Stop the
vehicle as soon as possible to chec kthe
wheels and tires for damage. Hidden tire
damage could also be causing the unusual
handling characteristics. If you find no
signs of damage, have the wheels and tires checked at aqualified specialist workshop.
R When parkin gyour vehicle, make sure that
the tires do not get deformed by the curb or
other obstacles. If it is necessary to drive
over curbs, speed humps or similar eleva- 250
OperationWheels and tires
Page 254 of 290
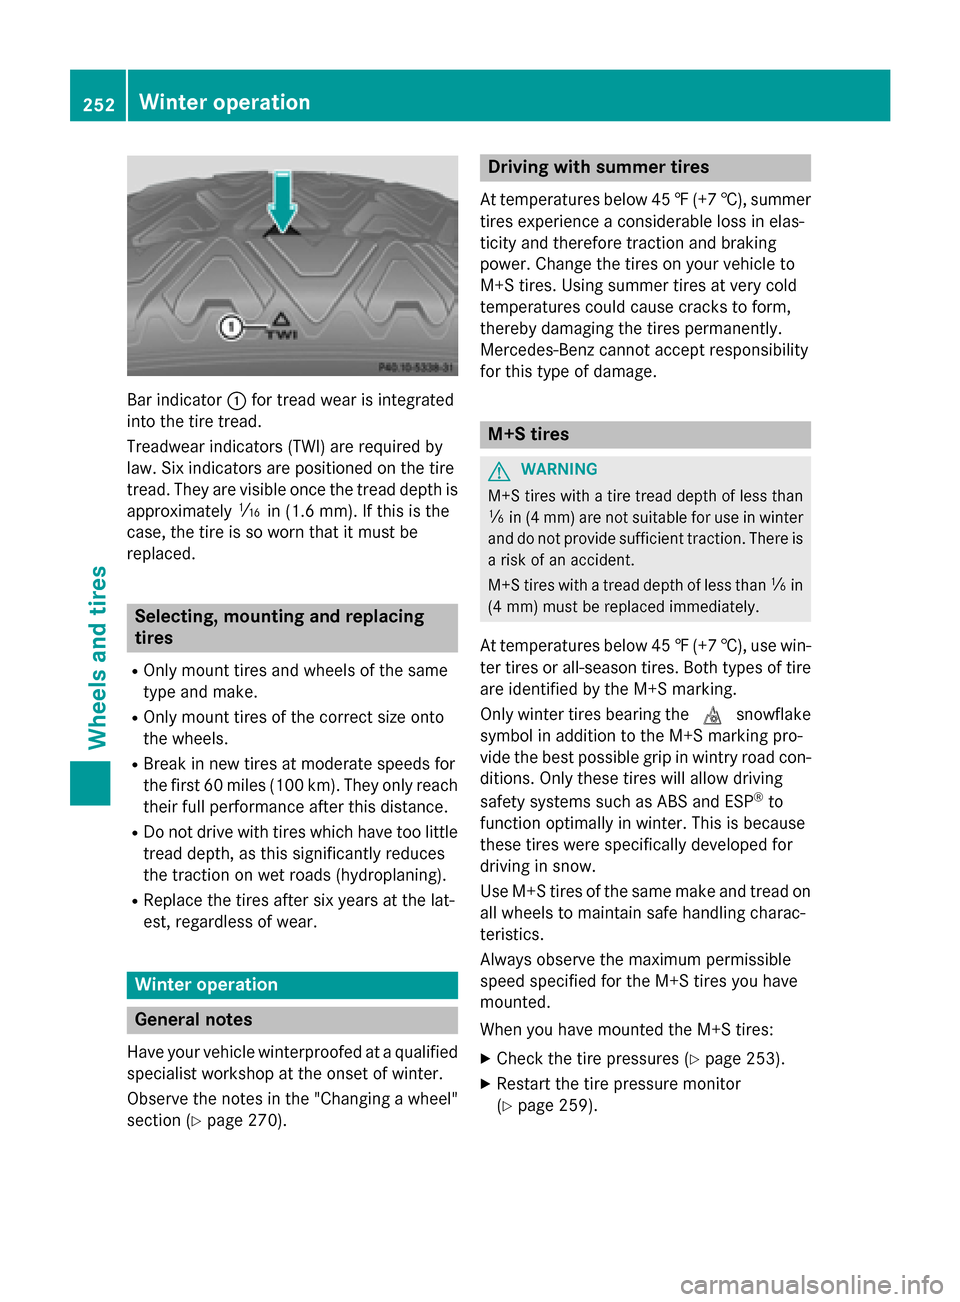
Bar indicator
0043for trea dwearisi ntegrated
into the tire tread.
Treadwear indicator s(TWI) are required by
law. Six indicator sare positioned on the tire
tread. The yare visible once the trea ddepth is
approximately 00CDin (1.6 mm). If this is the
case ,the tire is so worn that it mus tbe
replaced. Selecting, mounting and replacing
tires
R Only mount tire sand wheel softhe same
typ eand make.
R Only mount tire softhe correct size onto
the wheels.
R Brea kinn ew tire satmoderate speeds for
the firs t60miles (100 km) .The yo nly reach
thei rfullp erformance afte rthis distance.
R Do not drive with tire swhich have too little
trea ddepth, as this significantl yreduces
the traction on we troads (hydroplaning).
R Replace the tire saftersix years at the lat-
est, regardless of wear. Winter operation
General notes
Have your vehicle winterproofe dataqualified
specialist worksho patthe onse tofwinter.
Observe the notes in the "Changing awheel"
section (Y page 270). Drivin
gwiths ummer tires
At temperatures below 45 ‡(+7† ), summer
tires experience aconsiderable loss in elas-
ticity and therefore traction and braking
power. Change the tires on you rvehicle to
M+S tires. Using summe rtires at very cold
temperatures coul dcause cracks to form,
thereb ydamaging the tires permanently.
Mercedes-Benz cannot accep tresponsibility
for this type of damage. M+S tires
G
WARNING
M+S tires with atire tread depth of less than
00CF in (4 mm )are not suitabl efor use in winter
and do not provide sufficient traction. There is
ar isk of an accident.
M+S tires with atread depth of less than 00CFin
(4 mm) must be replaced immediately.
At temperatures below 45 ‡(+7† ), use win-
ter tires or all-season tires. Both type softire
are identified by the M+S marking.
Only winter tires bearing the 004Dsnowflake
symbol in addition to the M+S marking pro-
vide the best possibl egrip in wintry road con-
ditions. Only these tires will allow driving
safety systems such as ABS and ESP ®
to
function optimally in winter. Thi sisbecause
these tires were specifically developed for
driving in snow.
Use M+S tires of the same make and tread on
allw heels to maintain safe handling charac-
teristics.
Always observe the maximu mpermissible
spee dspecified for the M+S tires you have
mounted.
When you have mounted the M+S tires:
X Check the tire pressure s(Ypag e253).
X Restart the tire pressure monitor
(Y pag e259). 252
Winte
roperationWheels and tires
Page 255 of 290
Snow chains
G
WARNING
If snow chains are installed to the front
wheels, they may drag against the vehicle
body or chassis components. This could
cause damage to the vehicle or the tires.
There is arisk of an accident.
To avoid hazardous situations:
R never install snow chains to the front
wheels
R always install snow chains in pairs to the
rear wheels.
! On some tire sizes there is not enough
space for snow chains. To avoid damage to
the vehicle or tires, observe the "Wheel and tire combinations" section under "Tires and
wheels".
For safety reasons, Mercedes-Benz recom-
mends that you only use snow chains that
have been specially approved for your vehicle by Mercedes-Benz, or are of acorresponding
standard of quality.
R You may not attach snow chains to all
wheel-tire combination ,see the informa-
tion under "Wheels and tires" in the "Tech-
nical data" section.
R Only use snow chains when driving on
roads completely covered by snow.
Remove the snow chains as soon as possi- ble when you come to aroad that is not
snow-covered.
R Local regulations may restrictt he use of
snow chains. Observe the appropriate reg- ulations if you wish to mount snow chains.
R Do not exceed the maximum permissible
speed of 30 mph (50 km/h).
i You can deactivate ESP ®
(Y page 55)
when pulling away with snow chains instal-
led. You can thereby allow the wheels to
spin in acontrolled manner, achieving an
increased driving force (cuttinga ction). Tire pressure
Tire pressures
pecifications
Important safety notes G
WARNING
Underinflated or overinflated tires pose the
following risks:
R the tires may burst, especially as the load
and vehicle speed increase.
R the tires may wear excessively and/or
unevenly, which may greatly impair tire
traction.
R the driving characteristics, as well as steer-
ing and braking, may be greatly impaired.
There is arisk of an accident.
Follow recommended tire inflation pressures
and check the pressure of all the tires includ-
ing the spare wheel:
R monthly, at least
R if the load changes
R before beginning along journey
R under different operating conditions, e.g.
off-road driving
If necessary, correct the tire pressure.
i The specifications on the sample Tire and
Loading Information placard and tire pres-
sure tables are examples. Tire pressure
specifications are vehicle-specific and may
deviate from the data shown here. The tire pressure specifications that are valid for
your vehicle can be found on the Tire and
Loading Information placard and tire pres-
sure table on the vehicle.
General notes The recommended tire pressures for the tires
mounted at the factory can be found on the
labels described here.
Further information on tire pressures can be
obtained at aqualified specialist workshop. Tire pressure
253Wheels and tires Z
Page 256 of 290
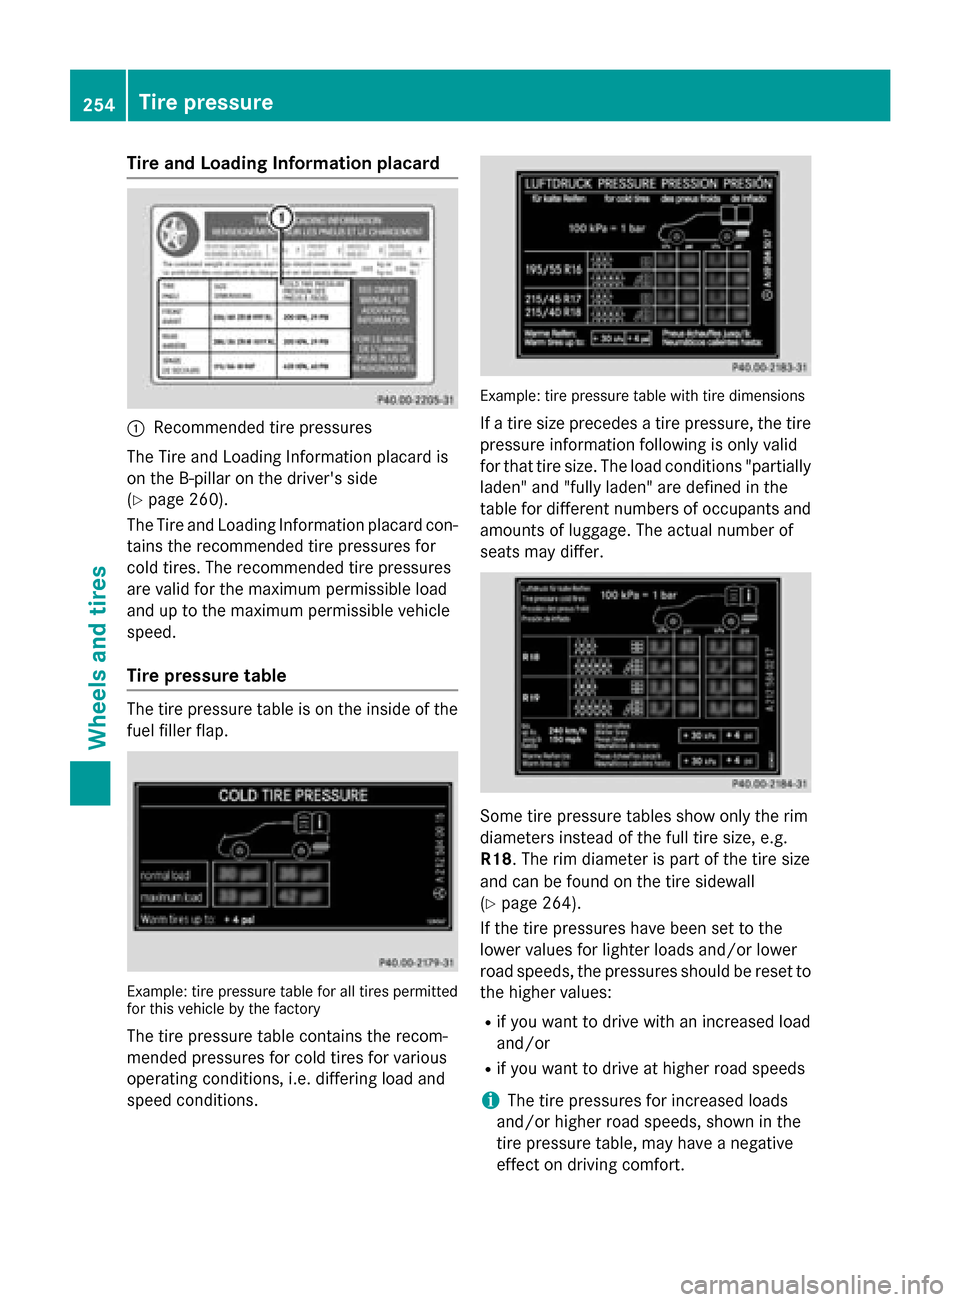
Tire and Loadin
gInfor matio nplacard 0043
Recommended tire pressures
The Tire and Loading Informatio nplacard is
on the B-pillar on the driver's side
(Y page 260).
The Tire and Loading Informatio nplacard con-
tains the recommende dtire pressures for
col dtires. The recommende dtire pressures
ar ev alid for the maximum permissibl eload
and up to the maximum permissibl evehicle
speed.
Tire pressure table The tire pressure table is on the insid
eofthe
fuel fille rflap. Example: tire pressure table for al
ltire sp ermitted
for thi svehicl ebyt he factory
The tire pressure table contains the recom-
mended pressures for col dtiresfor various
operating conditions, i.e .differing load and
spee dconditions. Example: tire pressure table with tire dimensions
If at ire size precedes atire pressure, the tire
pressure informatio nfollowing is onl yvalid
for tha ttire size. The load conditions "partially
laden" and "fully laden" ar edefine dint he
table for different numbers of occupants and
amounts of luggage. The actual numbe rof
seats ma ydiffer. Some tire pressure table
sshowo nlyt he rim
diameters instea dofthe full tire size, e.g.
R18 .The rim diamete rispartoft he tire size
and can be found on the tire sidewall
(Y page 264).
If the tire pressures have been se ttothe
lowe rvalues for lighte rloads and/or lower
roa dspeeds, the pressures shoul dbereset to
the highe rvalues:
R if yo uwanttod rive with an increase dload
and/or
R if yo uwanttod rive at highe rroa ds peeds
i The tire pressures for increase
dloads
and/or highe rroa ds peeds, shown in the
tire pressure table ,mayhave anegative
effect on driving comfort. 254
Tire pressureWheel
sand tires
Page 259 of 290
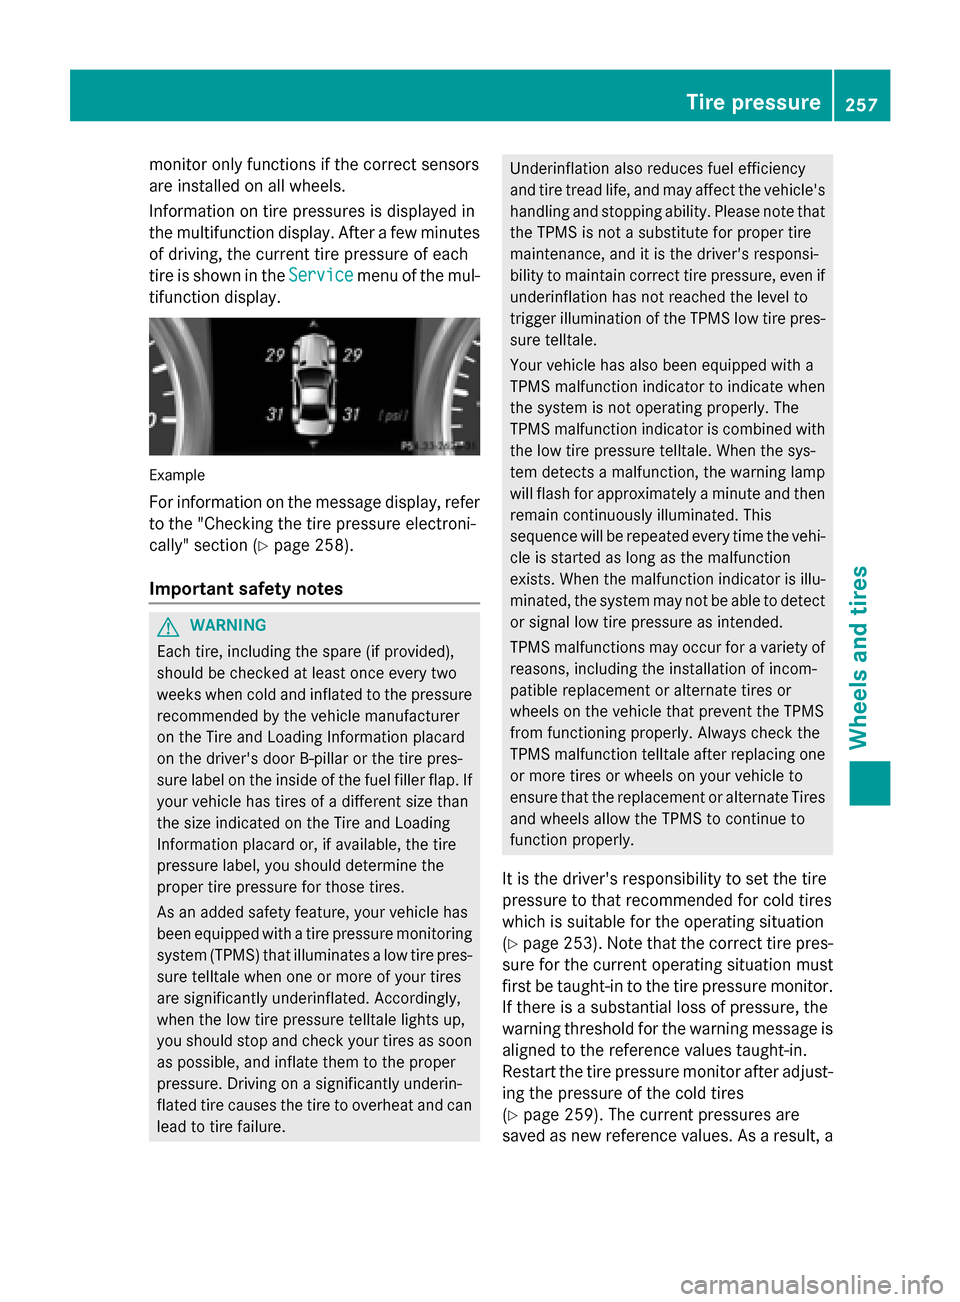
monitor only functions if the correct sensors
are installed on all wheels.
Information on tire pressures is displayed in
the multifunction display.A fterafew minutes
of driving, the current tire pressure of each
tire is show nintheService Service menu of the mul-
tifunction display. Example
For informatio nonthe message display,r efer
to the "Checking the tire pressure electroni-
cally" section (Y page258).
Important safety notes G
WARNING
Each tire, including the spare (if provided),
should be checked at least once every two
weeks when cold and inflated to the pressure recommended by the vehicl emanufacturer
on the Tire and Loading Information placard
on the driver' sdoor B-pillar or the tire pres-
sure label on the inside of the fuel filler flap .If
yourv ehiclehas tires of adifferent size than
the size indicated on the Tire and Loading
Information placard or, if available, the tire
pressure label, you should determine the
prope rtire pressure for those tires.
As an added safety feature ,you rv ehicl ehas
been equippe dwithatire pressure monitoring
system (TPMS) that illuminates alow tire pres-
sure telltal ewhen one or more of yourt ires
are significantly underinflated. Accordingly,
when the low tire pressure telltal elights up,
you should stop and check yourt ires as soon
as possible, and inflate them to the proper
pressure. Driving on asignificantly underin-
flated tire cause sthe tire to overhea tand can
leadtot ire failure. Underinflation alsor
educes fuel efficiency
and tire tread life ,and may affect the vehicle's
handling and stopping ability .Please note that
the TPMS is not asubstitute for prope rtire
maintenance, and it is the driver' sresponsi-
bility to maintai ncorrect tire pressure, even if
underinflation has not reache dthe level to
trigger illumination of the TPMS low tire pres-
sure telltale.
Yourv ehiclehas alsob een equippe dwith a
TPMS malfunction indicator to indicate when
the system is not operating properly. The
TPMS malfunction indicator is combined with
the low tire pressure telltale. When the sys-
tem detects amalfunction, the warning lamp
willf lashf or approximatel yaminute and then
remai ncontinuously illuminated. This
sequence willber epeated every time the vehi-
cle is started as long as the malfunction
exists. When the malfunction indicator is illu-
minated, the system may not be abletod etect
or signa llow tire pressure as intended.
TPMS malfunctions may occur for avariety of
reasons, including the installation of incom-
patible replacement or alternate tires or
wheels on the vehicl ethat prevent the TPMS
from functioning properly. Always check the
TPMS malfunction telltal eafter replacing one
or more tires or wheels on yourv ehicleto
ensure that the replacement or alternate Tires
and wheels allow the TPMS to continue to
function properly.
It is the driver' sresponsibility to set the tire
pressure to that recommended for cold tires
which is suitable for the operating situation
(Y page2 53).Note that the correct tire pres-
sure for the current operating situation must
first be taught-in to the tire pressure monitor.
If there is asubstantial loss of pressure, the
warning threshol dfor the warning message is
aligned to the reference values taught-in.
Restart the tire pressure monitor after adjust-
ing the pressure of the cold tires
(Y page2 59).The current pressures are
saved as new reference values. As aresult, a Tire pressure
257Wheelsand tires Z