2015 MERCEDES-BENZ SLS AMG GT COUPE change wheel
[x] Cancel search: change wheelPage 237 of 290
X
Remove th ejackf romt heleft-han dstow-
age spac einthetrunk to allow th estowage
compartmen ttobeopened.
X Turn fastener 0044in th edirection of the
arrow.
X Ope nstowage compartment 0043.
X Remove th eTIREFI Tkit,w hee lchock ,align-
men tbolt and gloves. Flat tire
Preparing th
evehicle
Your vehicl eisequipped wit haTIREFI Tkit.
X Stop th evehicl eons olid, non-slipper yand
level ground ,asfar away as possibl efrom
traffic.
X Switc hont hehazard warnin glamps.
X Apply th eelectric parkin gbrak em anually
(Y page 133).
X Brin gthe fron twheels into th estraight-
ahead position.
X Shift th etransmission to Pwit hthe button
in th ecenter console.
X Switc hoff th eengine.
X Remove th eSmartKey from th eignition
lock.
X Allo ccupant smustg et out of th evehicle.
Mak esuret hatthe ya re no tend angered as
they do so.
X Mak esuret hatnoo neis near th edanger
area while awhee lisb eingchanged. Any-
on ew ho is no tdirectl yassistin ginthe
whee lcha ng es hould, for example, stand
behind th ebarrier.
X Get out of th evehicle. Pay attention to traf-
fic condition swhen doin gso.
X Clos ethe driver's door. TIREFIT kit
Usin gthe TIREFIT kit TIREFI
Tisat ires ealant.
You can use TIREFI Ttoseal punctures of up to
0.16 in (4 mm), particularly those in th etire
tread. You can use TIREFI Tatoutside tem-
peratures down to 00F84‡(00F820 †). G
WARNING
In th efollowin gsituations, th etires ealant is
unable to provid esufficien tbreakdown assis-
tance ,asitisu nable to seal th etirep roperly:
R there are cut sorpunctures in th etirel arger
than those mentioned above.
R thew hee lrim is damaged.
R you hav edriven at ver ylow tire pressures or
on aflat tire.
There is ariskofana ccident.
Do no tdrive th evehicle. Contac taqualified
specialist workshop. G
WARNING
The tire sealant is harmful and causes irrita-
tion .Itm ustn otcome into contact wit hyour
skin ,eyes or clothin gorbeswallowed .Donot
inhale TIREFI Tfumes. Kee ptires ealant away
from children .There is ariskofi njury.
If you come into contact wit hthe tire sealant,
observ ethe following:
R Rinse off th etires ealant from your skin
immediately wit hwater.
R If th etires ealant comes into contact with
your eyes ,immediately rinse them thor-
oughly wit hclean water.
R If tire sealant is swallowed ,immediately
rinse your mout hout thoroughl yand drink
plenty of water. Do no tind ucev omiting,
and see kmedica lattention immediately.
R Immediately chang eout of clothin gwhich
has come into contact wit htires ealant.
R If an allergic reaction occurs, see kmedical
attention immediately. Flat ti
re
235Breakdo wn assis tance Z
Page 247 of 290
!
Tow-starting the vehicle is not permitted.
The transmission may otherwise be dam-
aged.
If the vehicle can no longer be driven because of an accident or breakdown, you have the
following options:
R transportingt he vehicle
As arule, you should have the vehicle trans-
ported.
R towing the vehicle with the rear axle raised
Only tow the vehicle with the rear axle
raised in exceptional cases.
R towing the vehicle with atow rope or tow
bar
Only tow the vehicle in exceptional cases.
The engine must be running if you tow the
vehicle with atow rope or tow bar. Observe
the following notes.
Also observe the following notes:
R If the engine does not start, try jump-start-
ing it (Y page 242). Tow-starting the vehicle
is not permitted.
R If it is not possibletoj ump-start the vehicle,
have it transported to the nearest qualified specialist workshop, e.g. an authorized
Mercedes-Benz Center.
R If the vehicle has transmission damage,
have it transported to aqualified specialist
workshop. Observe the displaym essages
in the instrument cluster. Installing/removing the towing eye
Installingt he towing eye X
Take the towing eye and the wheel wrench 4
out of the wheel-change tool kit
(Y page 234).
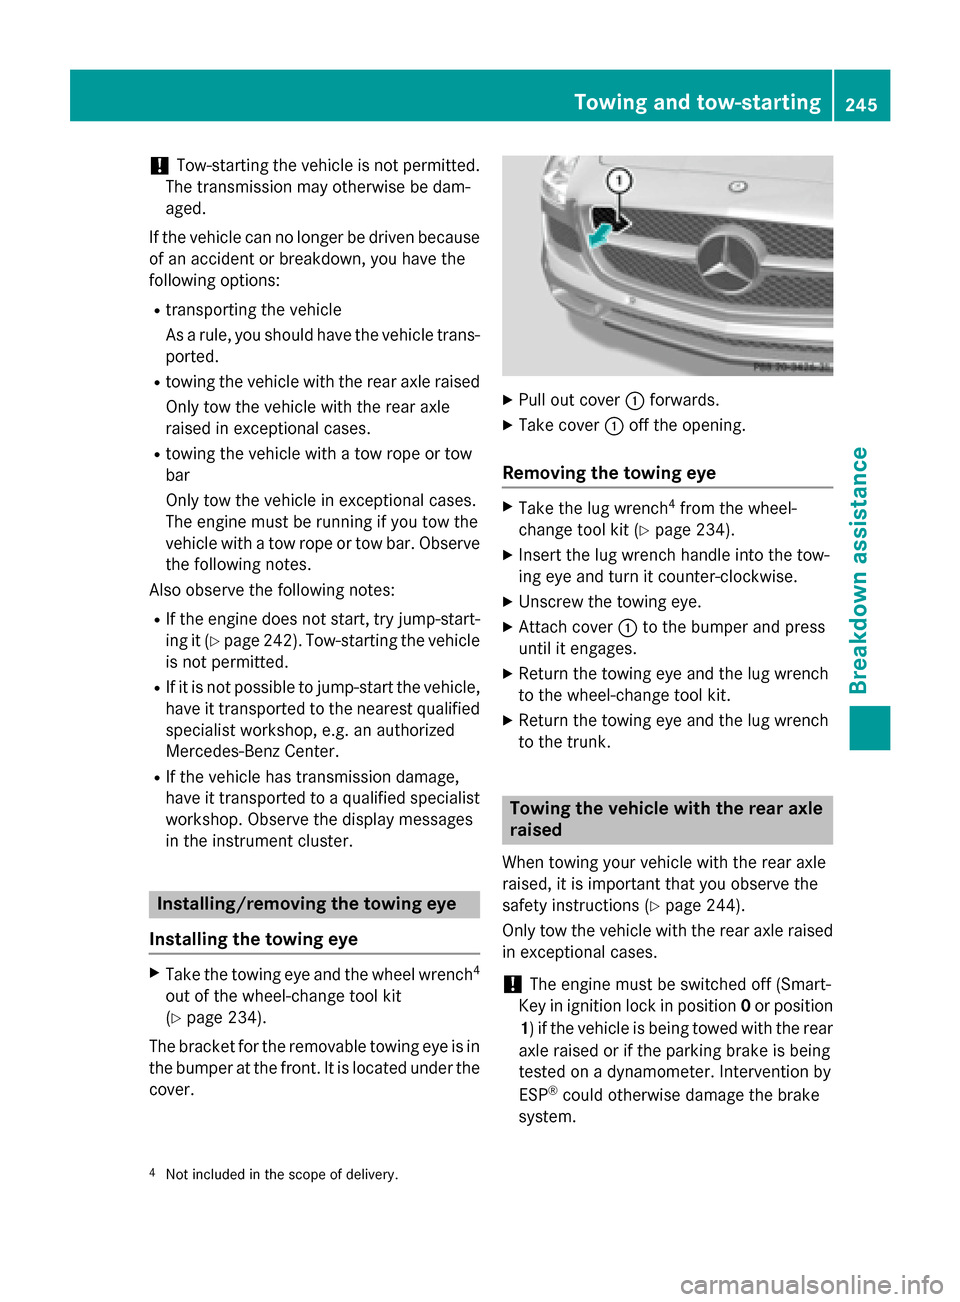
The bracket for the removable towing eye is in
the bumper at the front.Itisl ocated under the
cover. X
Pull out cover 0043forwards.
X Take cover 0043off the opening.
Removing the towing eye X
Take the lug wrench 4
from the wheel-
change tool kit (Y page 234).
X Insert the lug wrench handle into the tow-
ing eye and turn it counter-clockwise.
X Unscrew the towing eye.
X Attach cover 0043to the bumper and press
until it engages.
X Return the towing eye and the lug wrench
to the wheel-change tool kit.
X Return the towing eye and the lug wrench
to the trunk. Towing the vehiclew
ith the rear axle
raised
When towing your vehicle with the rear axle
raised, it is important that you observe the
safety instructions (Y page 244).
Only tow the vehicle with the rear axle raised in exceptional cases.
! The engine must be switched off (Smart-
Key in ignition lock in position 0or position
1)ift he vehicle is being towed with the rear
axle raised or if the parking brake is being
tested on adynamometer. Intervention by
ESP ®
could otherwise damage the brake
system.
4 Not included in the scope of delivery. Towing and tow-starting
245Breakdown assistance Z
Page 254 of 290
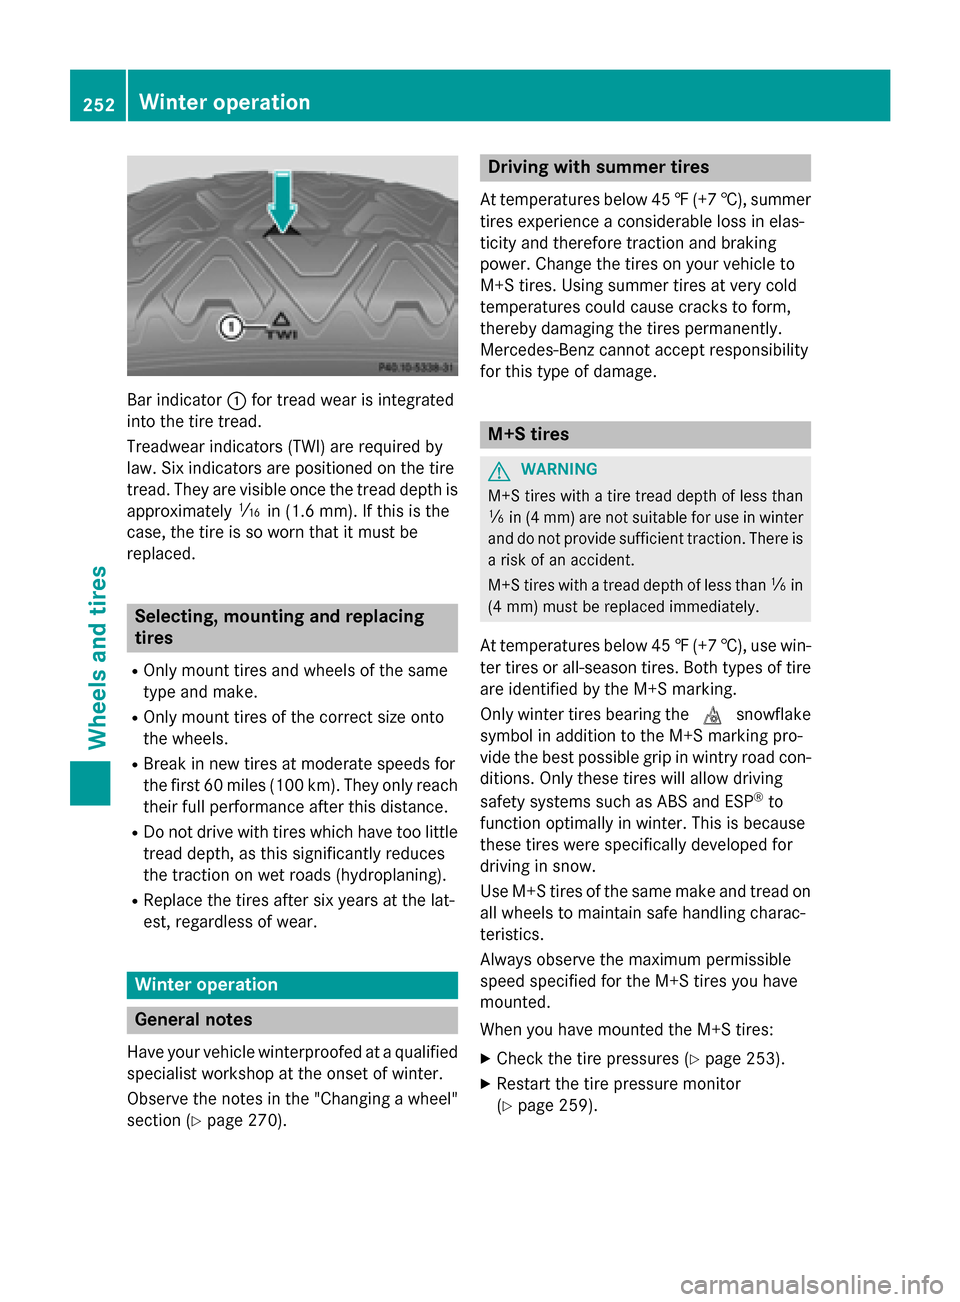
Bar indicator
0043for trea dwearisi ntegrated
into the tire tread.
Treadwear indicator s(TWI) are required by
law. Six indicator sare positioned on the tire
tread. The yare visible once the trea ddepth is
approximately 00CDin (1.6 mm). If this is the
case ,the tire is so worn that it mus tbe
replaced. Selecting, mounting and replacing
tires
R Only mount tire sand wheel softhe same
typ eand make.
R Only mount tire softhe correct size onto
the wheels.
R Brea kinn ew tire satmoderate speeds for
the firs t60miles (100 km) .The yo nly reach
thei rfullp erformance afte rthis distance.
R Do not drive with tire swhich have too little
trea ddepth, as this significantl yreduces
the traction on we troads (hydroplaning).
R Replace the tire saftersix years at the lat-
est, regardless of wear. Winter operation
General notes
Have your vehicle winterproofe dataqualified
specialist worksho patthe onse tofwinter.
Observe the notes in the "Changing awheel"
section (Y page 270). Drivin
gwiths ummer tires
At temperatures below 45 ‡(+7† ), summer
tires experience aconsiderable loss in elas-
ticity and therefore traction and braking
power. Change the tires on you rvehicle to
M+S tires. Using summe rtires at very cold
temperatures coul dcause cracks to form,
thereb ydamaging the tires permanently.
Mercedes-Benz cannot accep tresponsibility
for this type of damage. M+S tires
G
WARNING
M+S tires with atire tread depth of less than
00CF in (4 mm )are not suitabl efor use in winter
and do not provide sufficient traction. There is
ar isk of an accident.
M+S tires with atread depth of less than 00CFin
(4 mm) must be replaced immediately.
At temperatures below 45 ‡(+7† ), use win-
ter tires or all-season tires. Both type softire
are identified by the M+S marking.
Only winter tires bearing the 004Dsnowflake
symbol in addition to the M+S marking pro-
vide the best possibl egrip in wintry road con-
ditions. Only these tires will allow driving
safety systems such as ABS and ESP ®
to
function optimally in winter. Thi sisbecause
these tires were specifically developed for
driving in snow.
Use M+S tires of the same make and tread on
allw heels to maintain safe handling charac-
teristics.
Always observe the maximu mpermissible
spee dspecified for the M+S tires you have
mounted.
When you have mounted the M+S tires:
X Check the tire pressure s(Ypag e253).
X Restart the tire pressure monitor
(Y pag e259). 252
Winte
roperationWheels and tires
Page 255 of 290
Snow chains
G
WARNING
If snow chains are installed to the front
wheels, they may drag against the vehicle
body or chassis components. This could
cause damage to the vehicle or the tires.
There is arisk of an accident.
To avoid hazardous situations:
R never install snow chains to the front
wheels
R always install snow chains in pairs to the
rear wheels.
! On some tire sizes there is not enough
space for snow chains. To avoid damage to
the vehicle or tires, observe the "Wheel and tire combinations" section under "Tires and
wheels".
For safety reasons, Mercedes-Benz recom-
mends that you only use snow chains that
have been specially approved for your vehicle by Mercedes-Benz, or are of acorresponding
standard of quality.
R You may not attach snow chains to all
wheel-tire combination ,see the informa-
tion under "Wheels and tires" in the "Tech-
nical data" section.
R Only use snow chains when driving on
roads completely covered by snow.
Remove the snow chains as soon as possi- ble when you come to aroad that is not
snow-covered.
R Local regulations may restrictt he use of
snow chains. Observe the appropriate reg- ulations if you wish to mount snow chains.
R Do not exceed the maximum permissible
speed of 30 mph (50 km/h).
i You can deactivate ESP ®
(Y page 55)
when pulling away with snow chains instal-
led. You can thereby allow the wheels to
spin in acontrolled manner, achieving an
increased driving force (cuttinga ction). Tire pressure
Tire pressures
pecifications
Important safety notes G
WARNING
Underinflated or overinflated tires pose the
following risks:
R the tires may burst, especially as the load
and vehicle speed increase.
R the tires may wear excessively and/or
unevenly, which may greatly impair tire
traction.
R the driving characteristics, as well as steer-
ing and braking, may be greatly impaired.
There is arisk of an accident.
Follow recommended tire inflation pressures
and check the pressure of all the tires includ-
ing the spare wheel:
R monthly, at least
R if the load changes
R before beginning along journey
R under different operating conditions, e.g.
off-road driving
If necessary, correct the tire pressure.
i The specifications on the sample Tire and
Loading Information placard and tire pres-
sure tables are examples. Tire pressure
specifications are vehicle-specific and may
deviate from the data shown here. The tire pressure specifications that are valid for
your vehicle can be found on the Tire and
Loading Information placard and tire pres-
sure table on the vehicle.
General notes The recommended tire pressures for the tires
mounted at the factory can be found on the
labels described here.
Further information on tire pressures can be
obtained at aqualified specialist workshop. Tire pressure
253Wheels and tires Z
Page 257 of 290
If the tire pressure is not set correctly, this
can leadtoane xcessive build up of heat and
as udden loss of pressure.
For more information, contact aqualified spe-
cialist workshop. Important notes on tire pressure
G
WARNING
If the tire pressure drops repeatedly,t he
wheel, valve or tire may be damaged. Tire
pressure that is too low may resultina tire
blow-out. There is arisk of an accident.
R Check the tire for foreign objects.
R Check whether the wheelisl osing air or the
valve is leaking.
If you are unabletor ectify the damage, con-
tact aqualifieds pecialist workshop. G
WARNING
If you fit unsuitable accessorie sonto tire
valves ,the tire valves may be overloaded and
malfunction, which can cause tire pressure
loss. Due to their design, retrofitted tire pres- sure monitors keep the tire valve open. This
can also resultint ire pressure loss. There is a
risk of an accident.
Only screw the standard valve cap or other
valve caps approved by Mercedes-Benz for
yourv ehicle onto the tire valve.
Use asuitable pressure gauge to check the
tire pressure. The outer appearance of atire
does not permit any reliable conclusion about the tire pressure. On vehicle sequippedw ith
the electronic tire pressure monitor, the tire
pressure can be checked in the on-board
computer.
The tire temperature and pressure increase
when the vehicle is in motion. This is depend-
ent on the driving speed and the load.
Therefore ,you shouldo nly correct tire pres-
sures when the tires are cold. The tires are cold:
R if the vehicle has been parked without
direct sunlight on the tires for at least three
hours and
R if the vehicle has not been driven further
than 1mile (1.6 km)
The tire temperature changes depending on
the outsid etemperature ,the vehicle speed
and the tire load. If the tire temperature
changes by 18 ‡(10 †), the tire pressure
changes by approximately 10 kPa (0.1 bar/
1.5 psi).T ake this into account when check-
ing the pressure of warm tires. Only correct
the tire pressure if it is too low for the current
operating conditions. If you check the tire
pressure when the tires are warm, the result- ing valuew illbeh igherthan if the tires were
cold. This is normal. Do not reduce the tire
pressure to the values pecified for cold tires.
The tire pressure would otherwis ebetoo low.
Observe the recommended tire pressures for
cold tires:
R on the Tire and Loading Information placard
on the B-pilla ronthe driver's side
R in the tire pressure table on the inside of the
fuel filler flap Underinflated or overinflated tires
Underinflated tires G
WARNING
Tires with pressure that is too low can over-
heat and burst as aconsequence. In addition,
they also suffer from excessive and/or irreg-
ularw ear, which can severel yimpair the brak-
ing propertie sand the driving characteristics.
There is arisk of an accident.
Avoid tire pressures that are too low in all the
tires, including the spare wheel.
Underinflated tires may:
R overheat, leading to tire defects
R adversely affect handling Tire pressure
255Wheelsand tires Z
Page 261 of 290
Tire pressure monito
rwarning mes-
sages If the tire pressure monitor detects
apressure
loss in one or mor etires, awarnin gm essage
is shown in the multifunctio ndisplay and the
yellow tire pressure monitor warnin glamp
come son.
R If the Correc tTireP ressure
Correc tTireP ressure message
appear sinthe multifunctio ndisplay ,the
tire pressure in at leas tone tire is too low
and must be correcte datthe next oppor-
tunity.
R If the Check Tir ePressure
Check Tir ePressure message
appear sinthe multifunctio ndisplay ,the
tire pressure in one or mor etire sh asdrop-
pe ds ignificantl yand the tire smustbe
checked.
R If the TirePressure Warnin gTire
Tir ePressure Warnin gTire
Malfunction
Malfunction message appear sinthe mul-
tifunctio ndisplay ,the tire pressure in one
or mor etire sh asdropped suddenl yand the
tire sm ustbec hecked.
Observe the instructions and safety note sin
the displa ymessage sinthe "Tires" section
(Y page 182).
i If the whee
lposit ions on the vehicl eare
rotated ,the tire pressures ma ybedis-
played for the wrong positions for ashort
time .Thisisr ectifie dafter afew minute sof
driving ,and the tire pressures ar edisplayed
for the correct positions.
Restartin gthe tire pressure monitor When yo
urestar tthe tire pressure monitor, all
existing warnin gmessage saredeleted and
the warnin glam ps go out. The monitor uses
the currentl yset tire pressures as the refer-
ence values for monitoring. In mos tcases, the
tire pressure monitor will automatically
detect the new reference values after you
have change dthe tire pressure. However, you
can also define reference values manuall yas
describe dhere. The tire pressure monitor
then monitors the new tire pressure values. X
Set the tire pressure to the valu erecom-
mended for the corresponding driving sit-
uatio nont he Tire and Loading Information
placard on the driver's side
B-pillar (Y page 253).
Additiona ltire pressure values for different
load scan also be found on the tire pressure
table on the insid eofthe fuel fille rflap
(Y page 253).
X Make sure tha tthe tire pressure is correct
on al lfou rw heels.
X Make sure tha tthe SmartKe yisinposition
2 in the ignition lock.
X Press the 0059or0065 button on the steer-
ing whee ltoselect theServ.
Serv. menu.
X Press the 0063or0064 button to select
Tir ePressure
Tir ePressure.
X Press the 0076button.
The multifunctio ndisplay shows the cur-
rent tire pressure for the individual tire sor
the Tire Tire pressure
pressure will
willbe
bedisplayed
displayed
after drivin gafew minutes
after drivin gafew minutes mes-
sage.
X Press the 0064button.
The Use Curren tPressures as New
Use Curren tPressures as New
Reference Values
Reference Values message appearsin
the multifunctio ndisplay.
If yo uwishtoc onfirm the restart:
X Press the 0076button.
The TirePress. Monito rRestarted
Tir ePress. Monito rRestarted
message appear sinthe multifunctio ndis-
play.
After driving for afew minutes, the system
checks whether the current tire pressures
ar ew ithi nt he specifie drange.The new tire
pressures ar ethena ccepted as reference
values and monitored.
If yo uwishtoc ancel the restart:
X Press the 0038button.
The tire pressure values stored at the last
restar twillc ontinue to be monitored. Tire pressure
259Wheelsand tires Z
Page 272 of 290
the curb weight and the weight of the acces-
sories.
TIN (Tire Identificatio nNumber)
This is auniqu eide ntifier which can be used
by atirem anufacturer to identify tires ,for
exampl efor ap roduct recall, and thu side ntify
the purchasers. Th eTIN is made up of the
manufacturer's identity code, tir esize, tire
typ ecodea nd the manufacturing date.
Load bearin gind ex
Th eloa db eari ng index (als oloa dindex) is a
cod etha tcontains the maximum load bearing
capacity of atire.
Traction
Tractio nist he resul toffrictio nbetween the
tires and the roa dsurface.
Treadwea rind icators
This is indicated by narrow bars (treadwear
bars) tha tare distributed ove rthe tir etread. If
the tir etrea disl evel with the bars, the wear
limi tof 1
/ 16 in (1.
6mm) ha sbeenr eached.
Occupant distribution
Th ed istributio nofoccupants in avehicl eat
their designated seating positions.
Tota lloa dl im it
Rated cargo and luggag eloa dp lus68k ilo-
grams (15 0lb) times the vehicle' sdesig nated
seating capacity. Changin
gawheel Flat tire
Th e" Breakdown assistance" section
(Y page 235 )contains information and notes
on ho wtod ealw ithaf latt ire. Rotatin
gthe wheels G
WARNING
Interchanging the front and rea rwheel smay
severel yimpair the driving characteristics if
the wheels or tires have different dimensions. Th ew heel brakes or suspensio ncomponents
ma yalsobed amaged .The re is ariskofa cci-
dent.
Rotate front and rea rwheel sonlyift he wheels
and tires ar eofthe same dimensions.
! On vehicles equipped with
atirep ressure
monitor, electroni ccomponents are
locate dinthe wheel.
Tire-mounting tools shoul dnot be used
nea rthe valve. This could damage the elec-
troni ccomponents.
Onl yhavet ires change dataqualified spe-
cialist workshop.
Alway spayattentio ntothe instructions and
safety note swhenc hanging awheel
( Y page 271).
Th ew earp atterns on the front and rea rtires
differ, depending on the operating conditions.
Rotate the wheels befor eaclear wear pattern
ha sformed on the tires .Front tires typically
wear mor eonthe shoulders and the rea rtires
in the center.
If your vehicle' stirec onfiguration allows ,you
can change the wheels according to the inter-
vals in the tir emanufacturer's warranty book
in your vehicl edocum ents.Ifnow arranty
book is available, the tires shoul dberotated
every 3,000 to 6,000 mile s(5,000 to
10,000 km), or earlie riftirew earrequires .Do
not change the directio nofwheelrotation.
Clea nthe contact surfaces of the whee land
the brake disc thoroughly every tim eawheel
is rotated .Check the tir epressure and reac-
tivate the tir epressure monitor if necessary. Directio
nofrotation
Tires with aspecified directio nofrotation
have additional benefits, e.g .ifthere is arisk 270
Changin
gawheelWheels an dtires
Page 274 of 290
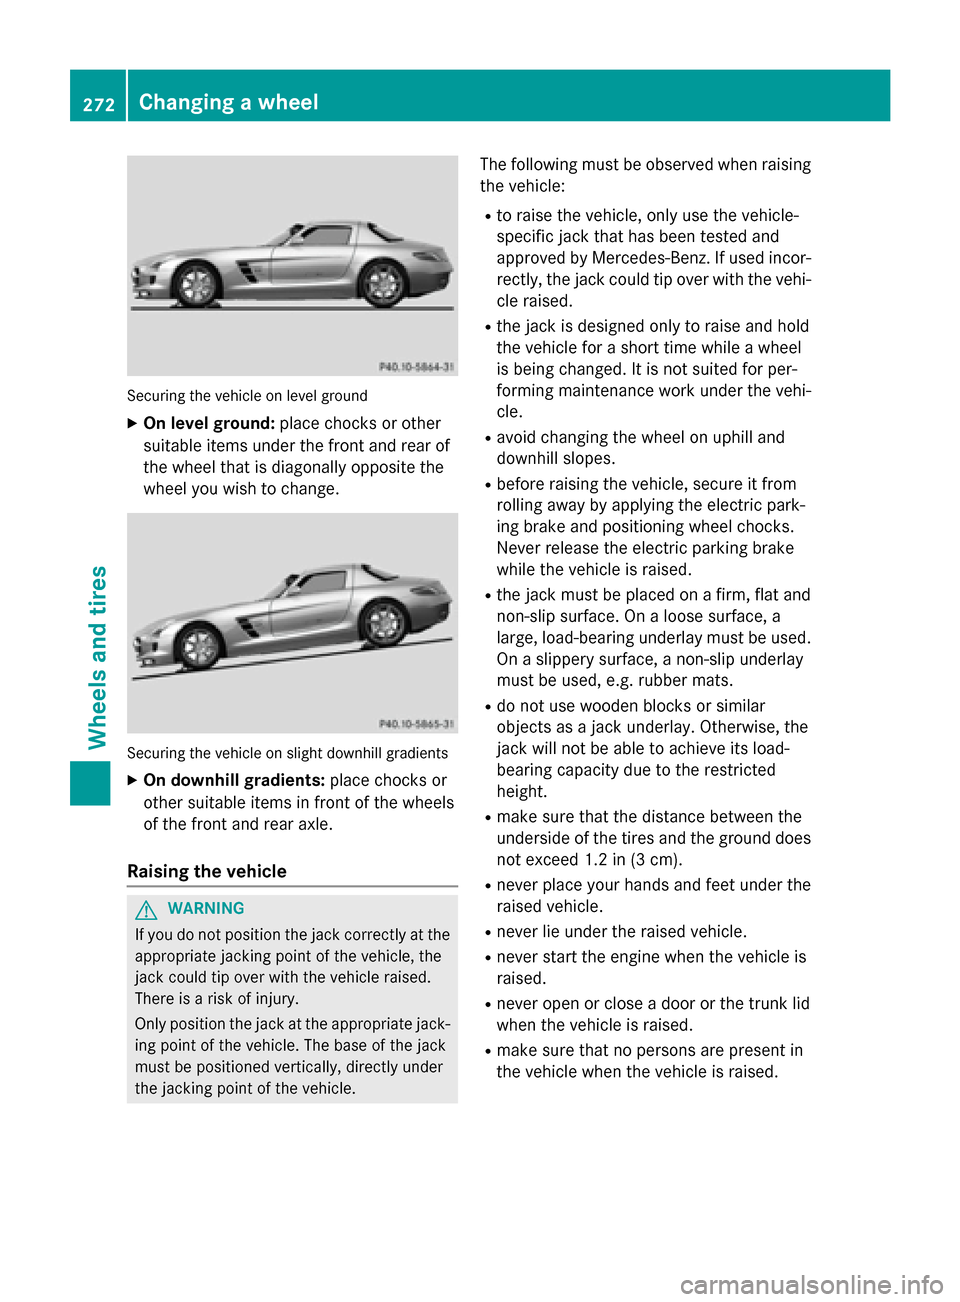
Securing the vehicle on level ground
X On level ground: place chocks or other
suitabl eitem sunder the front and rea rof
the wheel that is diagonall yopposite the
wheel yo uwishtoc hange. Securing the vehicle on slight downhil
lgradients
X On downhill gradients: place chocks or
othe rsuitabl eitem sinf ront of the wheels
of the front and rea raxle.
Raisin gthe vehicle G
WARNING
If yo udon ot position the jack correctly at the
appropriate jacking point of the vehicle ,the
jack could tip ove rwitht he vehicle raised.
There is ariskofi njury.
Only position the jack at the appropriate jack-
ing point of the vehicle .The base of the jack
mus tbep ositioned vertically ,directl yunder
the jacking point of the vehicle. The following mus
tbeo bserve dwhenr aising
the vehicle:
R to raise the vehicle ,only us ethe vehicle-
specifi cjack that ha sbeent ested and
approved by Mercedes-Benz. If used incor-
rectly, the jack could tip ove rwitht he vehi-
cle raised.
R the jack is designe donly to raise and hold
the vehicle for ashort time whil eawheel
is being changed .Itisnot suited for per-
forming maintenance work under the vehi-
cle.
R avoid changing the wheel on uphil land
downhil lslopes.
R before raising the vehicle ,secure it from
rolling away by applying the electri cpark-
ing brake and positioning wheel chocks.
Neve rrelease the electri cparking brake
whil ethe vehicle is raised.
R the jack mus tbep lace donaf irm,flata nd
non-slip surface. On aloose surface, a
large ,load-bearing underlay mus tbeu sed.
On aslippery surface, anon-slip underlay
mus tbeu sed, e.g. rubber mats.
R do not us ewoodenb locks or similar
objects as ajack underlay .Otherwise, the
jack will not be able to achieve its load-
bearing capacity du etothe restricted
height.
R make sure that the distance between the
underside of the tire sand the ground does
not excee d1.2 in (3 cm).
R never place your hands and fee tunder the
raised vehicle.
R never li eunder the raised vehicle.
R never star tthe engine when the vehicle is
raised.
R never ope norclosead oorort he trunk lid
when the vehicle is raised.
R make sure that no persons are present in
the vehicle when the vehicle is raised. 272
Changing
awheelWheels and tires