2015 MERCEDES-BENZ SLK-CLASS ROADSTER tire type
[x] Cancel search: tire typePage 19 of 358
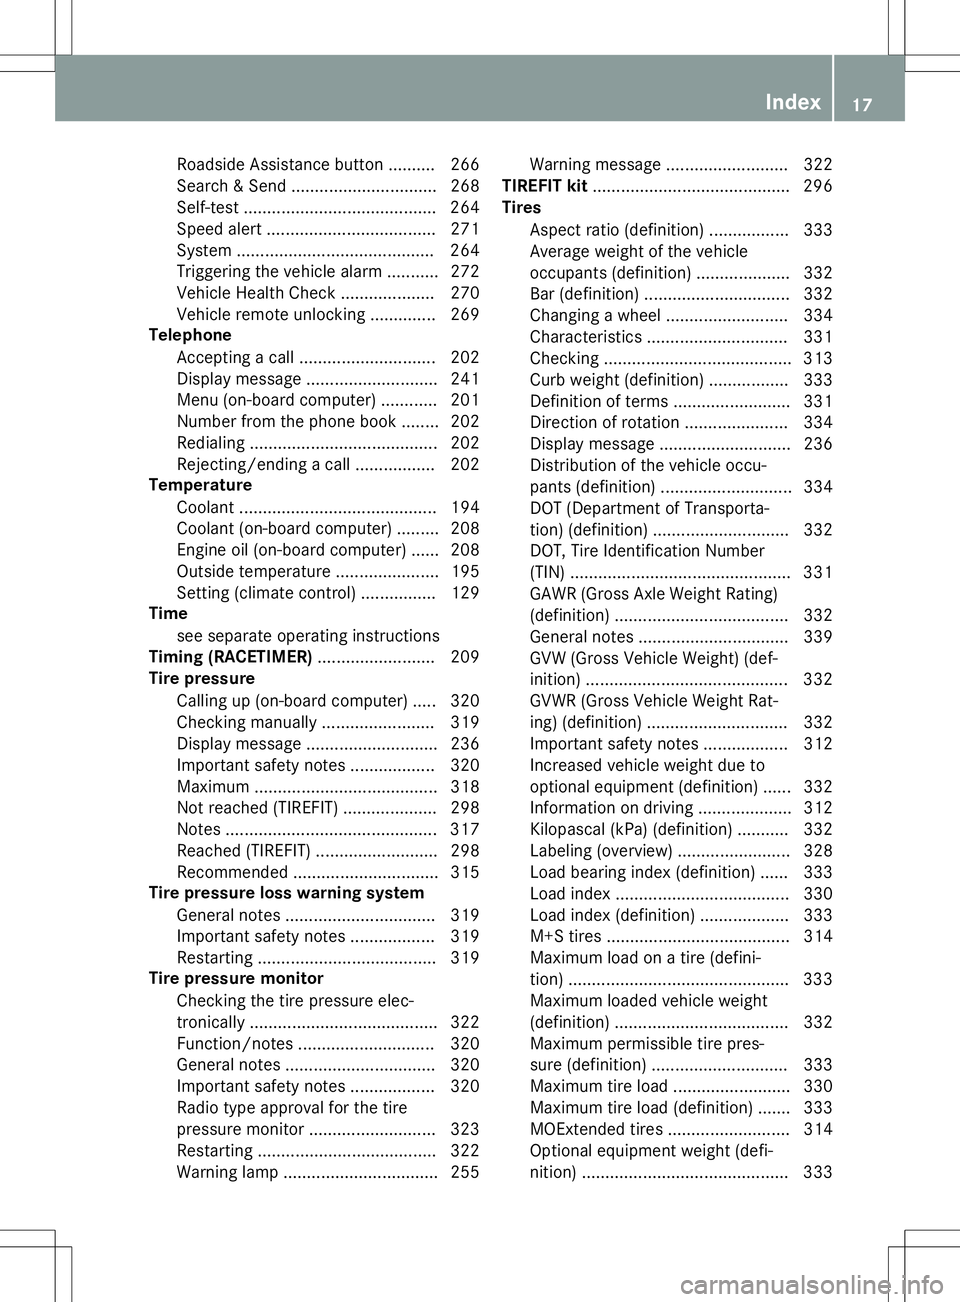
Roadside Assistance button ..........266
Search & Send ............................... 268
Self-test ......................................... 264
Speed alert ................................... .271
System .......................................... 264
Triggering the vehicle alarm ........... 272
Vehicle Health Check .................... 270
Vehicle remote unlocking .............. 269
Telephone
Accepting a call ............................ .202
Display message ............................ 241
Menu (on-board computer) ............ 201
Number from the phone book ....... .202
Redialing ........................................ 202
Rejecting/ending a call ................. 202
Temperature
Coolant .......................................... 194
Coolant (on-board computer) ......... 208
Engine oil (on-board computer) ...... 208
Outside temperature ..................... .195
Setting (climate control) ................ 129
Time
see separate operating instructions
Timing (RACETIMER) ......................... 209
Tire pressure
Calling up (on-board computer) ..... 320
Checking manually ........................ 319
Display message ............................ 236
Important safety notes .................. 320
Maximum ....................................... 318
Not reached (TIREFIT) .................... 298
Notes ............................................. 317
Reached (TIREFIT) .......................... 298
Recommended ............................... 315
Tire pressure loss warning system
General notes ................................ 319
Important safety notes .................. 319
Restarting ...................................... 319
Tire pressure monitor
Checking the tire pressure elec-
tronically ........................................ 322
Function/notes ............................ .320
General notes ................................ 320
Important safety notes .................. 320
Radio type approval for the tire
pressure monitor ........................... 323
Restarting ...................................... 322
Warning lamp ................................. 255 Warning message .......................... 322
TIREFIT kit .......................................... 296
Tires
Aspect ratio (definition) ................. 333
Average weight of the vehicle
occupants (definition) .................... 332
Bar (definition) ............................... 332
Changing a wheel .......................... 334
Characteristics .............................. 331
Checking ........................................ 313
Curb weight (definition) ................. 333
Definition of terms ......................... 331
Direction of rotatio n...................... 334
Display message ............................ 236
Distribution of the vehicle occu-
pants (definition) ............................ 334
DOT (Department of Transporta-
tion) (definition) ............................. 332
DOT, Tire Identification Number
(TIN) ............................................... 331
GAWR (Gross Axle Weight Rating)
(definition) ..................................... 332
General notes ................................ 339
GVW (Gross Vehicle Weight) (def-
inition) ........................................... 332
GVWR (Gross Vehicle Weight Rat- ing) (definition) .............................. 332
Important safety notes .................. 312
Increased vehicle weight due to
optional equipment (definition) ...... 332
Information on driving .................... 312
Kilopascal (kPa) (definition) ........... 332
Labeling (overview) ........................ 328
Load bearing index (definition) ...... 333
Load index ..................................... 330
Load index (definition) ................... 333
M+S tires ....................................... 314
Maximum load on a tire (defini-
tion) ............................................... 333
Maximum loaded vehicle weight
(definition) ..................................... 332
Maximum permissible tire pres-
sure (definition) ............................. 333
Maximum tire load ......................... 330
Maximum tire load (definition) ....... 333
MOExtended tire s.......................... 314
Optional equipment weight (defi-
nition) ............................................ 333
Index17
Page 20 of 358

Overview ........................................312
PSI (pounds per square inch) (def-
inition) .......................................... .333
Replacing ....................................... 334
Service life ..................................... 314
Sidewall (definition) ....................... 333
Speed rating (definition) ................ 332
Storing .......................................... .334
Structure and characteristics
(definition) ..................................... 331
Summer tires ................................. 314
Temperature .................................. 327
TIN (Tire Identification Number)
(definition) ..................................... 333
Tire bead (definition) ..................... .333
Tire pressure (definition) ................ 333
Tire pressures (recommended) ...... 332
Tire size (data) ............................... 339
Tire size designation, load-bearing capacity, speed rating .................... 328
Tire tread ....................................... 313
Tire tread (definition) ..................... 333
Total load limit (definition) ............. 334
Traction ......................................... 327
Traction (definition) ....................... 334
Tread wea r..................................... 327
Uniform Tire Quality Grading
Standards ...................................... 326
Uniform Tire Quality Grading
Standards (definition) .................... 332
Wear indicator (definition) ............. 334
Wheel and tire combination ........... 341
Wheel rim (definition) .................... 332
see Flat tire
Tow-starting
Emergency engine starting ............ 307
Important safety notes .................. 305
Installing the towing eye ................ 306
Removing the towing eye ............... 306
Towing away
Important safety guidelines ........... 305
Installing the towing eye ................ 306
Removing the towing eye ............... 306
With both axles on the ground ....... 306
With the rear axle raised ................ 307
Transmission
Selector lever ................................ 151
see Automatic transmission see Manual transmission
Transporting the vehicle .................. 307
Trim pieces (cleaning instruc-
tions) .................................................. 290
Trip computer (on-board com-puter) .................................................. 197
Trip odometer
Calling up ....................................... 197
Resetting (on-board computer) ...... 198
Trunk
Emergency release .......................... 82
Important safety notes .................... 80
Locking separately ........................... 82
Opening (automatically from out-
side) ................................................. 82
Opening/closing (manually from
outside) ............................................ 81
Overview .......................................... 80
Trunk lid
Display message ............................ 240
Opening dimensions ...................... 355
Opening/closing .............................. 80
Trunk load (maximum) ...................... 355
Trunk partition
Display message ............................ 241
General notes .................................. 89
Opening/closing .............................. 90
Turn signals
Changing bulbs (front) ................... 116
Display message ............................ 225
Switching on/of f........................... 110
Type identification plate
see Vehicle identification plate
U
UnlockingEmergency unlocking ....................... 80
From inside the vehicle (central
unlocking button) ............................. 79
V
Vanity mirror (in the sun visor) ........ 262
Vehicle
Correct use ...................................... 26
Data acquisition ............................... 27
Display message ............................ 238
18Index
Page 66 of 358
ETS remains active when you deactivate ESP®
.
iAMG vehicles: your vehicle may be
equipped with 20-inch tires on the rear
axle. If replaced with a 19-inch tire, ETS
may intervene noticeably sooner for the
first few kilometers. After approximately
10 km ETS will function as usual again.
Information on the dimensions and types of
wheels and tires for your vehicle can be
found in the "Wheel/tire combinations"
section ( Ypage 339).
Important safety notes
GWARNING
If ESP ®
is malfunctioning, ESP ®
is unable to
stabilize the vehicle. Additionally, further driv- ing safety systems are deactivated. This
increases the risk of skidding and an accident.
Drive on carefully. Have ESP ®
checked at a
qualified specialist workshop.
When towing the vehicle with the rear axle
raised, observe the notes on ESP ®
( Y page 307).
ESP ®
is only deactivated if the åwarning
lamp is lit continuously.
If the ÷ warning lamp and the åwarn-
ing lamp are lit continuously, ESP ®
not avail-
able due to a malfunction.
Observe the information on warning lamps ( Y page 248) and display messages which
may be shown in the instrument cluster( Y page 213).
iOnly use wheels with the recommended
tire sizes. Only then will ESP ®
function
properly.
Characteristics of ESP®
General information
If the ÷ ESP®
warning lamp goes out
before beginning the journey, ESP ®
is auto-
matically active. If ESP
®
intervenes, the ÷ESP®
warning
lamp flashes in the instrument cluster.
If ESP ®
intervenes:
X Do not deactivate ESP ®
under any circum-
stances.
X Only depress the accelerator pedal as far as
necessary when pulling away.
X Adapt your driving style to suit the prevail-
ing road and weather conditions.
ECO start/stop function
The ECO start/stop function switches the
engine off automatically when the vehicle
stops moving. The engine starts automati-
cally when the driver wants to pull away again. ESP ®
remains in its previously selected sta-
tus. Example: if ESP®
was deactivated before
the engine was switched off, ESP ®
remains
deactivated when the engine is switched on
again.
Deactivating/activating ESP®(except
AMG vehicles)
Important safety notes
iObserve the "Important safety notes" sec-
tion ( Ypage 61).
You can select between the following states
of ESP ®
:
R ESP ®
is activated.
R ESP ®
is deactivated.
GWARNING
If you deactivate ESP ®
, ESP ®
no longer sta-
bilizes the vehicle. There is an increased risk
of skidding and an accident.
Only deactivate ESP ®
in the situations descri-
bed in the following.
It may be best to deactivate ESP ®
in the fol-
lowing situations:
R when using snow chains
R in deep snow
R on sand or gravel
64Driving safety systems
Safety
Page 161 of 358
and, if applicable, the auxiliary heating beforerefueling.
GWARNING
Fuel is poisonous and hazardous to health.
There is a risk of injury.
You must make sure that fuel does not comeinto contact with your skin, eyes or clothing
and that it is not swallowed. Do not inhale fuel
vapors. Keep fuel away from children.
If you or others come into contact with fuel,
observe the following:
R Wash away fuel from skin immediately
using soap and water.
R If fuel comes into contact with your eyes,
immediately rinse them thoroughly with
clean water. Seek medical assistance with-
out delay.
R If fuel is swallowed, seek medical assis-
tance without delay. Do not induce vomit-
ing.
R Immediately change out of clothing which
has come into contact with fuel.
GWARNING
Electrostatic buildup can create sparks and
ignite fuel vapors. There is a risk of fire and
explosion.
Always touch the vehicle body before opening
the fuel filler flap or touching the fuel pump
nozzle. Any existing electrostatic buildup is
thereby discharged.
!Do not use diesel to refuel vehicles with a
gasoline engine. Do not switch on the igni- tion if you accidentally refuel with the
wrong fuel. Otherwise, the fuel will enter
the fuel system. Even small amounts of the
wrong fuel could result in damage to the
fuel system and the engine. Notify a quali-
fied specialist workshop and have the fuel
tank and fuel lines drained completely.
!Overfilling the fuel tank could damage the
fuel system.
!Take care not to spill any fuel on painted
surfaces. You could otherwise damage the paintwork.
!Use a filter when refueling from a fuel can.
Otherwise, the fuel lines and/or injection
system could be blocked by particles from
the fuel can.
Do not get into the vehicle again during the
refueling process. Otherwise, electrostatic
charge could build up again.
If you overfill the fuel tank, fuel could spray
out when the fuel pump nozzle is removed.
For further information on fuel and fuel quality
( Y page 350).
Refueling
General information
The fuel filler flap is unlocked or locked auto- matically when you unlock or lock the vehicle
with the key or using KEYLESS-GO.
The position of the fuel filler cap is displayed 8 in the instrument cluster. The arrow
next to the filling pump indicates the side of
the vehicle.
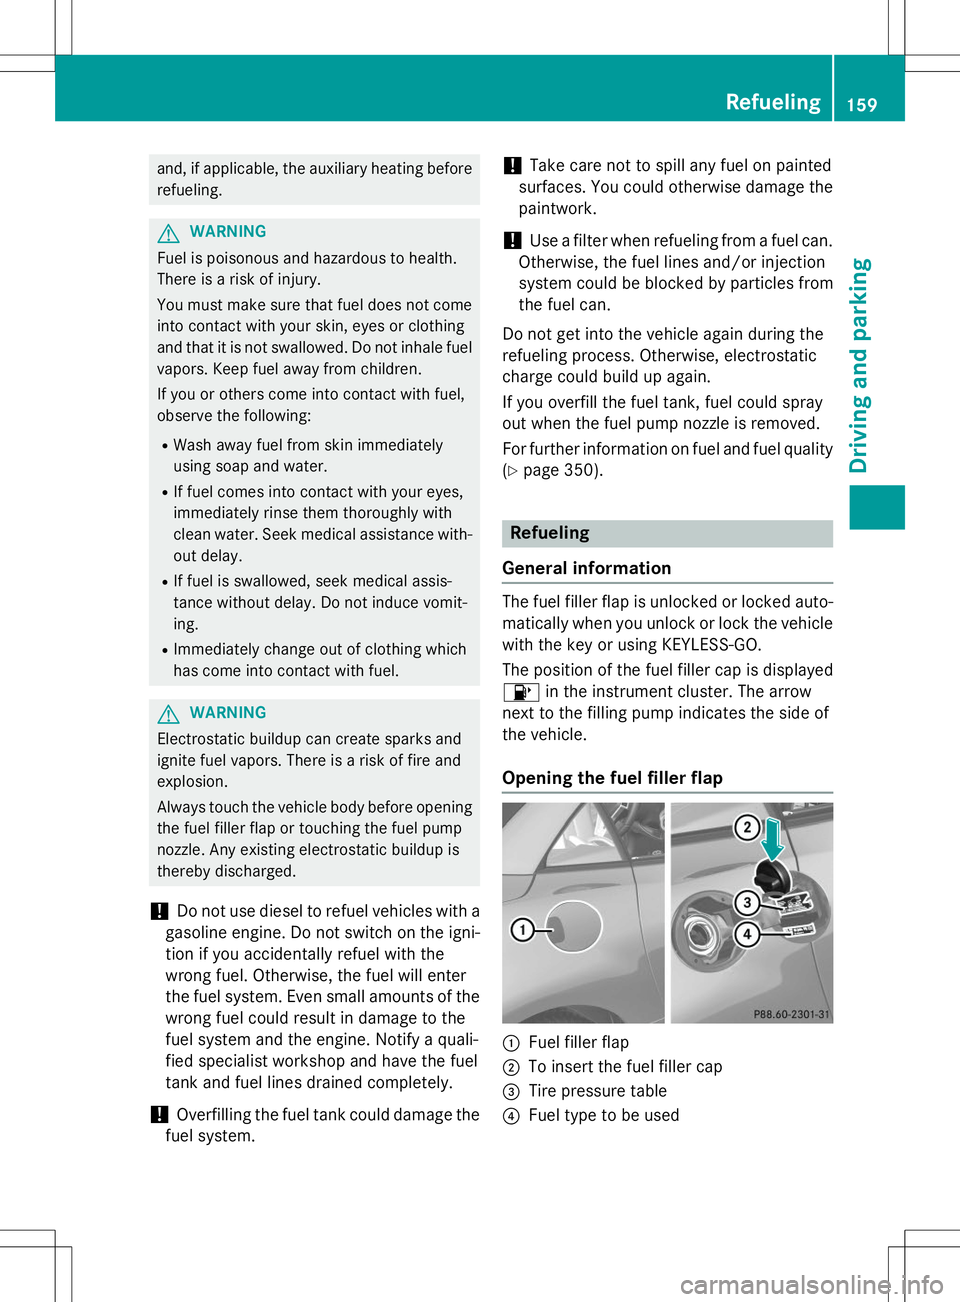
Opening the fuel filler flap
:Fuel filler flap
;To insert the fuel filler cap
=Tire pressure table
?Fuel type to be used
Refueling159
Driving and parking
Z
Page 168 of 358
Apart from driving style, consumption is
dependent on many factors such as, e.g.: Rload
R tire pressure
R cold start
R choice of route
R electrical consumers switched on
These factors are not included in the ECO dis-
play.
The evaluation of your driving style is carried
out using the following three categories:
R
Acceleration(evaluation of all accelera-
tion processes):
- The bar fills up: moderate acceleration,
especially at higher speeds
- The bar empties: sporty acceleration
R
Constant(assessment of driving behavior
at all times):
- The bar fills up: constant speed and
avoidance of unnecessary acceleration
and deceleration
- The bar empties: fluctuations in speed
R
Coasting(assessment of all deceleration
processes):
- The bar fills up: anticipatory driving,
keeping your distance and early release
of the accelerator. The vehicle can coast
without use of the brakes.
- The bar empties: frequent braking
iAn economical driving style specially
requires driving at moderate engine
speeds.
To achieve a higher value in the categories
AccelerationandConstant:
R observe the gearshift recommendations.
R drive in drive program E(vehicles with an
automatic transmission).
iOn long journeys at a constant speed, e.g.
on the highway, only the bar for
Constant
will change.
iThe ECO display summarizes the driving
characteristics from the start of the journey to its completion. For this reason, the bars
change dynamically at the beginning of the
journey. On longer journeys, there are
fewer changes. For more dynamic changes, carry out a manual reset.
For further information on the ECO display,
see ( Ypage 198).
Braking
Important safety notes
GWARNING
If you shift down on a slippery road surface in an attempt to increase the engine's braking
effect, the drive wheels could lose their grip.
There is an increased danger of skidding and
accidents.
Do not shift down for additional engine brak-
ing on a slippery road surface.
Downhill gradients
!On long, steep gradients, you must
reduce the load on the brakes. To use
engine braking, shift to a lower gear in good time. This helps you to avoid overheating
the brakes and wearing them out exces-
sively.
When making use of the engine braking
effect, it is possible that a drive wheel may
not turn for some time, e.g. in the case of
suddenly changing or slippery road surface conditions. This could cause damage to the
drive train. This type of damage is not cov- ered by the Mercedes-Benz warranty.
Change into a lower gear in good time on long
and steep downhill gradients. This is espe-
cially important if the vehicle is laden.
Heavy and light loads
GWARNING
If you rest your foot on the brake pedal while
driving, the braking system can overheat. This increases the stopping distance and can even
166Driving tips
Driving an d parking
Page 293 of 358

can lose their shine if chrome polish is
used. Use a damp, lint-free cloth instead
when cleaning the trim pieces.
If the chrome-plated trim pieces are very
dirty, you can use a chrome polish. If you
are unsure as to whether the trim pieces
are chrome-plated or not, consult an
authorized Mercedes-Benz Center.
X Wipe the wooden trim and trim pieces with
a damp, lint-free cloth, e.g. a microfiber
cloth.
X Heavy soiling: use car care and cleaning
products recommended and approved by
Mercedes-Benz.
Cleaning the seat covers
General notes
!Do not use microfiber cloths to clean gen-
uine leather, artificial leather or DINAMICA
covers. If used often, these can damage the cover.
iNote that regular care is essential to
ensure that the appearance and comfort of the covers is retained over time.
Genuine leather seat covers
!To retain the natural appearance of the
leather, observe the following cleaning
instructions:
R Clean genuine leather covers carefully
with a damp cloth and then wipe the cov-
ers down with a dry cloth.
R Make sure that the leather does not
become soaked. It may otherwise
become rough and cracked.
R Only use leather care agents that have
been tested and approved by Mercedes-
Benz. You can obtain these from a quali-
fied specialist workshop.
Leather is a natural product.
It exhibits natural surface characteristics, for
example: R
differences in the texture
R marks caused by growth and injury
R slight nuances of color
These are characteristics of leather and not
material defects.
Seat covers of other materials
!Observe the following when cleaning:
R clean artificial leather covers with a cloth
moistened with a solution containing 1%
detergent (e.g. dish washing liquid).
R clean cloth covers with a microfiber cloth
moistened with a solution containing 1%
detergent (e.g. dish washing liquid). Rub
carefully and always wipe entire seat sec-
tions to avoid leaving visible lines. Leave
the seat to dry afterwards. Cleaning
results depend on the type of dirt and
how long it has been there.
R clean DINAMICA covers with a damp
cloth. Make sure that you wipe entire
seat sections to avoid leaving visible
lines.
Cleaning the seat belts
GWARNING
Seat belts can become severely weakened if
bleached or dyed. This could cause the seat
belts to tear or fail, for instance, in the event of
an accident. This poses an increased risk of
injury or fatal injury.
Never bleach or dye the seat belts.
!Do not clean the seat belts using chemical
cleaning agents. Do not dry the seat belts
by heating at temperatures above 176 ‡
(80 †) or in direct sunlight.
X Use clean, lukewarm water and soap solu-tion.
Care291
Maintenance and care
Z
Page 298 of 358

You must not exceed a maximum speed of
50 mph (80 km/h).
iWhen replacing one or all tires, please
observe the following specifications for
your vehicle's tires:
R size
R type and
R the "MOExtended" mark
If a tire has gone flat and cannot be
replaced with a MOExtended tire, a stand-
ard tire may be used as a temporary meas- ure. Make sure that you use the proper size
and type (summer or winter tire).
iVehicles equipped with MOExtended tires
are not equipped with a TIREFIT kit at the
factory. It is therefore recommended that
you additionally equip your vehicle with a
TIREFIT kit if you mount tires that do not
feature run-flat properties, e.g. winter tires. A TIREFIT kit is available, for example, from
a qualified specialist workshop.
Important safety notes
GWARNING
When driving in emergency mode, the driving characteristics deteriorate, e.g. when corner-
ing, accelerating quickly and when braking.
There is a risk of an accident.
Do not exceed the stated maximum speed.
Avoid abrupt steering and driving maneuvers,
and driving over obstacles (curbs, potholes,
off-road). This applies in particular to a laden
vehicle.
Stop driving in emergency mode if:
R you hear banging noises.
R the vehicle starts to shake.
R you see smoke and smell rubber.
R ESP ®
is intervening constantly.
R there are tears in the sidewalls of the tire.
After driving in emergency mode, have the
wheel rims checked at a qualified specialist
workshop with regard to their further use. The defective tire must be replaced in every case.
TIREFIT kit
Important safety notes
TIREFIT is a tire sealant.
You can use TIREFIT to seal punctures of up to 0.16 in (4 mm), particularly those in the tire
tread. You can use TIREFIT at outside tem-
peratures down to Ò4 ‡ ( Ò20 †).
GWARNING
In the following situations, the tire sealant is
unable to provide sufficient breakdown assis-
tance, as it is unable to seal the tire properly:
R there are cuts or punctures in the tire larger
than those mentioned above.
R the wheel rim is damaged.
R you have driven at very low tire pressures or
on a flat tire.
There is a risk of an accident.
Do not drive the vehicle. Contact a qualified
specialist workshop.
GWARNING
The tire sealant is harmful and causes irrita-
tion. It must not come into contact with your
skin, eyes or clothing or be swallowed. Do not inhale TIREFIT fumes. Keep tire sealant away
from children. There is a risk of injury.
If you come into contact with the tire sealant,
observe the following:
R Rinse off the tire sealant from your skin
immediately with water.
R If the tire sealant comes into contact with
your eyes, immediately rinse them thor-
oughly with clean water.
R If tire sealant is swallowed, immediately
rinse your mouth out thoroughly and drink
plenty of water. Do not induce vomiting,
and seek medical attention immediately.
R Immediately change out of clothing which
has come into contact with tire sealant.
R If an allergic reaction occurs, seek medical
attention immediately.
296Flat tire
Roadside Assistance
Page 314 of 358
Useful information
iThis Operator's Manual describes all
models and all standard and optional equip- ment of your vehicle available at the time of
publication of the Operator's Manual.
Country-specific differences are possible.
Please note that your vehicle may not be
equipped with all features described. This
also applies to safety-related systems and
functions.
iRead the information on qualified special-
ist workshops ( Ypage 25).
Important safety notes
GWARNING
If wheels and tires of the wrong size are used,
the wheel brakes or suspension components
may be damaged. There is a risk of an acci-
dent.
Always replace wheels and tires with those
that fulfill the specifications of the originalpart.
When replacing wheels, make sure to use the
correct:
R designation
R model
When replacing tires, make sure to use the
correct:
R designation
R manufacturer
R model
GWARNING
A flat tire severely impairs the driving, steer-
ing and braking characteristics of the vehicle.
There is a risk of accident.
Tires without run-flat characteristics:
R do not drive with a flat tire.
R immediately replace the flat tire with your
emergency spare wheel or spare wheel, or
consult a qualified specialist workshop.
Tires with run-flat characteristics:
R pay attention to the information and warn-
ing notices on MOExtended tires (tires with
run-flat characteristics).
Accessories that are not approved for your
vehicle by Mercedes-Benz or are not being
used correctly can impair operating safety.
Before purchasing and using non-approved
accessories, visit a qualified specialist work-
shop and inquire about: R suitability
R legal stipulations
R factory recommendations
Information on the sizes and types of wheels
and tires for your vehicle can be found under "Wheel/tire combinations" ( Ypage 339).
Information on tire pressure can be found:
R on the vehicle's Tire and Loading Informa-
tion placard on the B-pillar ( Ypage 323)
R on the tire pressure label on the fuel filler
flap ( Ypage 159)
R in the "Tire pressure" section
Operation
Information on driving
Check the tire pressure when the vehicle is
heavily laden and adjust prior to a trip.
While driving, pay attention to vibrations,
noises and unusual handling characteristics,
e.g. pulling to one side. This may indicate that
the wheels or tires are damaged. If you sus-
pect that a tire is defective, reduce your
speed immediately. Stop the vehicle as soon
as possible to check the wheels and tires for
damage. Hidden tire damage could also be
causing the unusual handling characteristics. If you find no signs of damage, have the tires
and wheels checked at a qualified specialist
workshop.
When parking your vehicle, make sure that
the tires do not get deformed by the curb or
other obstacles. If it is necessary to drive over
312Operation
Wheels and tires