Page 344 of 358
Stowing the emergency spare wheel
! Only place the collapsible spare wheel in
the vehicle when it is dry. Otherwise, mois-
ture may get into the vehicle.
Take the following steps to stow a used col-
lapsible spare wheel. Otherwise, the collaps-
ible spare wheel will not fit in the trunk in the
intended manner. Mercedes-Benz recom-
mends that you have this work carried out at
a qualified specialist workshop.
X Unscrew the valve cap from the valve.
X If possible, unscrew the valve insert from
the valve and release the air.
i Fully deflating the tires can take a few
minutes.
X Screw the valve insert back into the valve.
X Screw the valve cap back on.
X Pull the protective sheet provided with the
spare wheel over the collapsible spare
wheel.
X Stow the collapsible spare wheel in the
emergency spare wheel well under the
trunk.
X Use the retaining screw to pierce the pro-
tective sheet and fasten the collapsible
spare wheel in place. Inflating the collapsible spare wheel
! Inflate the collapsible spare wheel using
the tire inflation compressor before lower-
ing the vehicle. The wheel rim could other-
wise be damaged.
! Do not operate the tire inflation compres-
sor for longer than ten minutes at a time
without a break. It may otherwise overheat.
The tire inflation compressor can be oper-
ated again once it has cooled down. X
Mount the collapsible spare wheel as
described (Y page 333).
The collapsible spare wheel must be moun-
ted before it is inflated.
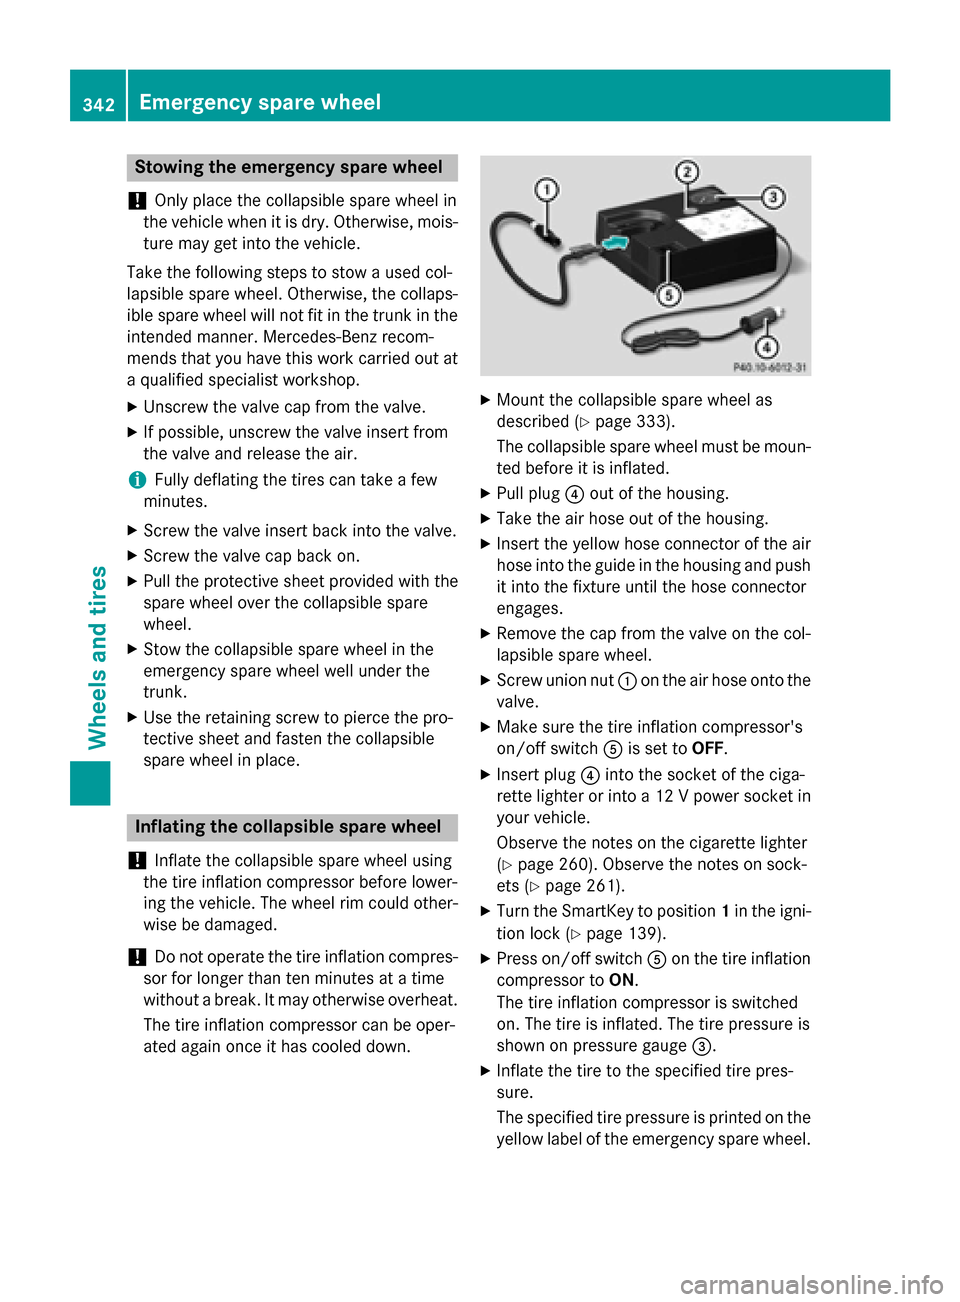
X Pull plug 0085out of the housing.
X Take the air hose out of the housing.
X Insert the yellow hose connector of the air
hose into the guide in the housing and push it into the fixture until the hose connector
engages.
X Remove the cap from the valve on the col-
lapsible spare wheel.
X Screw union nut 0043on the air hose onto the
valve.
X Make sure the tire inflation compressor's
on/off switch 0083is set to OFF.
X Insert plug 0085into the socket of the ciga-
rette lighter or into a 12 V power socket in your vehicle.
Observe the notes on the cigarette lighter
(Y page 260). Observe the notes on sock-
ets (Y page 261).
X Turn the SmartKey to position 1in the igni-
tion lock (Y page 139).
X Press on/off switch 0083on the tire inflation
compressor to ON.
The tire inflation compressor is switched
on. The tire is inflated. The tire pressure is
shown on pressure gauge 0087.
X Inflate the tire to the specified tire pres-
sure.
The specified tire pressure is printed on the
yellow label of the emergency spare wheel. 342
Emergency spare wheelWheels and tires
Page 345 of 358
X
When the specified tire pressure has been
reached, press on/off switch 0083toOFF, on
the tire inflation compressor.
The tire inflation compressor is switched
off.
X Turn the SmartKey to position 0in the igni-
tion lock.
X If the tire pressure is higher than the speci-
fied pressure, press pressure release but-
ton 0044until the correct tire pressure has
been reached.
X Unscrew union nut 0043on the air hose from
the valve.
X Screw the cap onto the valve of the col-
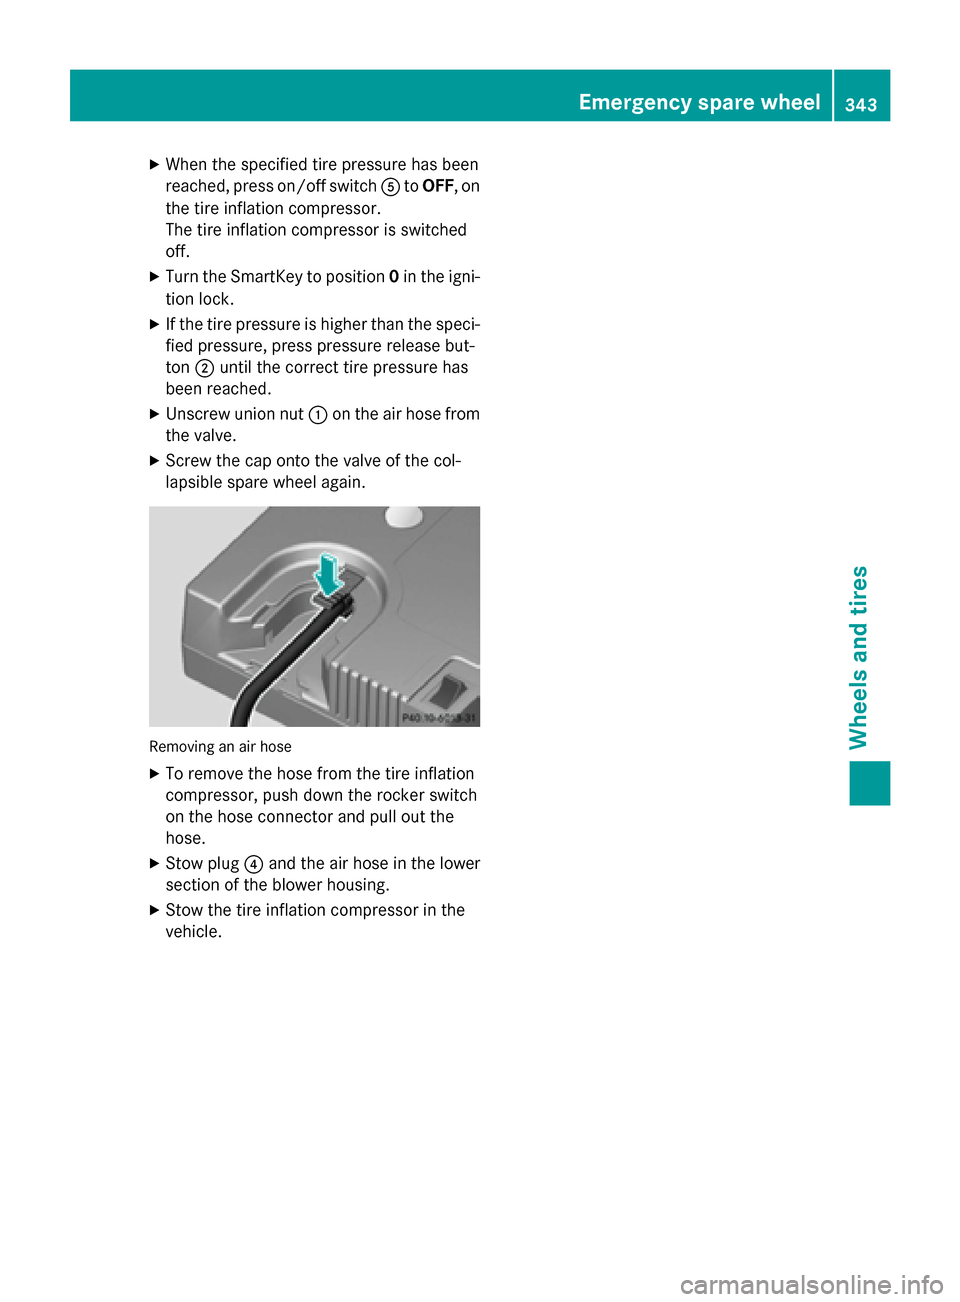
lapsible spare wheel again. Removing an air hose
X
To remove the hose from the tire inflation
compressor, push down the rocker switch
on the hose connector and pull out the
hose.
X Stow plug 0085and the air hose in the lower
section of the blower housing.
X Stow the tire inflation compressor in the
vehicle. Emergency spare wheel
343Wheels and tires Z
Page 346 of 358
Technical data
All models Collapsible spare wheel
6Tires Alloy wheels
145/70-17 92 P
Tire pressure: 350 kPa (3.5 bar/51 psi) 4.5 B x 17 H2
Wheel offset: 0.47 in (12 mm)
Depending on the country, the engine and the wheels mounted, your vehicle may be equipped
with TIREFIT or a collapsible spare wheel.
i The specified tire pressure is printed in yellow on the emergency spare wheel.
6 Use of snow chains is not permitted. Observe the notes in the section on snow chains. 344
Emergency spare
wheelWheels and tires