2015 MERCEDES-BENZ SLK-Class check engine light
[x] Cancel search: check engine lightPage 80 of 358
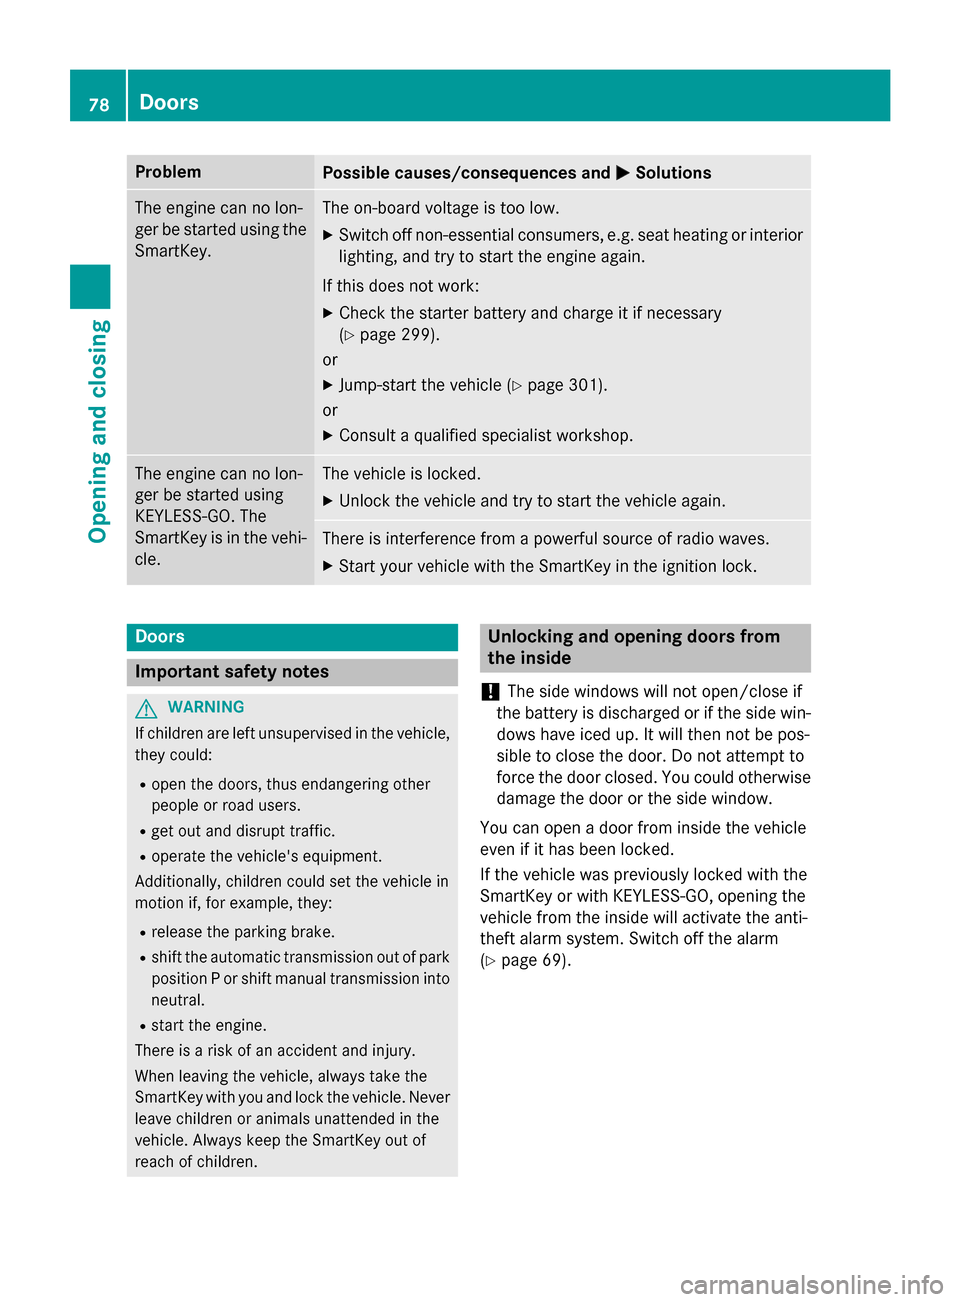
Problem
Possible causes/consequences and
0050
0050Solutions The engine can no lon-
ger be started using the SmartKey. The on-board voltage is too low.
X Switch off non-essential consumers, e.g. seat heating or interior
lighting, and try to start the engine again.
If this does not work:
X Check the starter battery and charge it if necessary
(Y page 299).
or
X Jump-start the vehicle (Y page 301).
or
X Consult a qualified specialist workshop. The engine can no lon-
ger be started using
KEYLESS-GO. The
SmartKey is in the vehi-
cle. The vehicle is locked.
X Unlock the vehicle and try to start the vehicle again. There is interference from a powerful source of radio waves.
X Start your vehicle with the SmartKey in the ignition lock. Doors
Important safety notes
G
WARNING
If children are left unsupervised in the vehicle, they could:
R open the doors, thus endangering other
people or road users.
R get out and disrupt traffic.
R operate the vehicle's equipment.
Additionally, children could set the vehicle in
motion if, for example, they:
R release the parking brake.
R shift the automatic transmission out of park
position P or shift manual transmission into
neutral.
R start the engine.
There is a risk of an accident and injury.
When leaving the vehicle, always take the
SmartKey with you and lock the vehicle. Never leave children or animals unattended in the
vehicle. Always keep the SmartKey out of
reach of children. Unlocking and opening doors from
the inside
! The side windows will not open/close if
the battery is discharged or if the side win- dows have iced up. It will then not be pos-
sible to close the door. Do not attempt to
force the door closed. You could otherwise
damage the door or the side window.
You can open a door from inside the vehicle
even if it has been locked.
If the vehicle was previously locked with the
SmartKey or with KEYLESS-GO, opening the
vehicle from the inside will activate the anti-
theft alarm system. Switch off the alarm
(Y page 69). 78
DoorsOpening and closing
Page 116 of 358
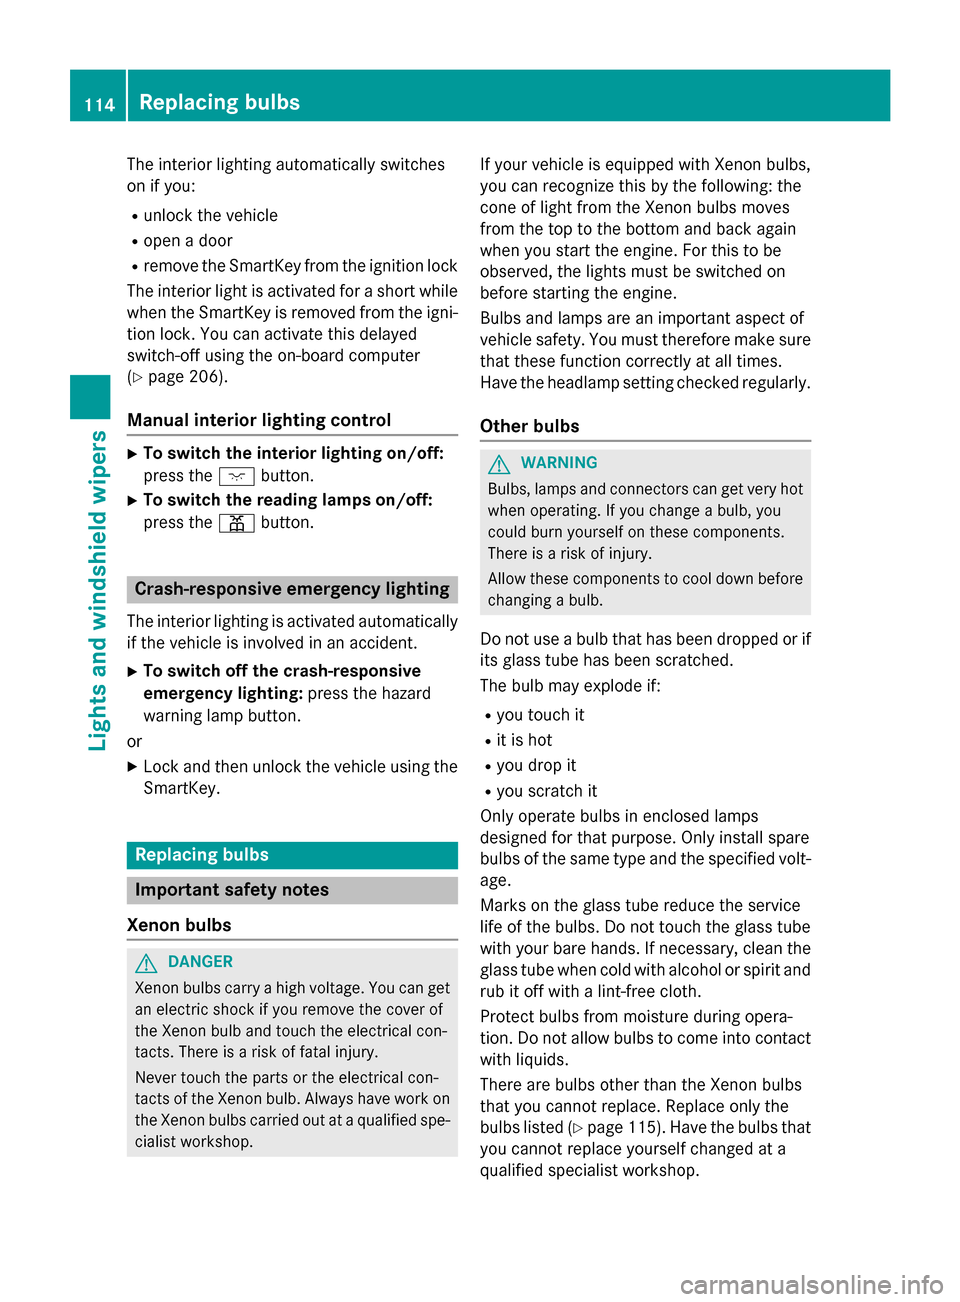
The interior lighting automatically switches
on if you:
R unlock the vehicle
R open a door
R remove the SmartKey from the ignition lock
The interior light is activated for a short while when the SmartKey is removed from the igni-
tion lock. You can activate this delayed
switch-off using the on-board computer
(Y page 206).
Manual interior lighting control X
To switch the interior lighting on/off:
press the 004Abutton.
X To switch the reading lamps on/off:
press the 003Dbutton. Crash-responsive emergency lighting
The interior lighting is activated automatically
if the vehicle is involved in an accident.
X To switch off the crash-responsive
emergency lighting: press the hazard
warning lamp button.
or X Lock and then unlock the vehicle using the
SmartKey. Replacing bulbs
Important safety notes
Xenon bulbs G
DANGER
Xenon bulbs carry a high voltage. You can get an electric shock if you remove the cover of
the Xenon bulb and touch the electrical con-
tacts. There is a risk of fatal injury.
Never touch the parts or the electrical con-
tacts of the Xenon bulb. Always have work on
the Xenon bulbs carried out at a qualified spe-
cialist workshop. If your vehicle is equipped with Xenon bulbs,
you can recognize this by the following: the
cone of light from the Xenon bulbs moves
from the top to the bottom and back again
when you start the engine. For this to be
observed, the lights must be switched on
before starting the engine.
Bulbs and lamps are an important aspect of
vehicle safety. You must therefore make sure that these function correctly at all times.
Have the headlamp setting checked regularly.
Other bulbs G
WARNING
Bulbs, lamps and connectors can get very hot when operating. If you change a bulb, you
could burn yourself on these components.
There is a risk of injury.
Allow these components to cool down before changing a bulb.
Do not use a bulb that has been dropped or if
its glass tube has been scratched.
The bulb may explode if:
R you touch it
R it is hot
R you drop it
R you scratch it
Only operate bulbs in enclosed lamps
designed for that purpose. Only install spare
bulbs of the same type and the specified volt- age.
Marks on the glass tube reduce the service
life of the bulbs. Do not touch the glass tube
with your bare hands. If necessary, clean the
glass tube when cold with alcohol or spirit and
rub it off with a lint-free cloth.
Protect bulbs from moisture during opera-
tion. Do not allow bulbs to come into contact
with liquids.
There are bulbs other than the Xenon bulbs
that you cannot replace. Replace only the
bulbs listed (Y page 115). Have the bulbs that
you cannot replace yourself changed at a
qualified specialist workshop. 114
Replacing bulbsLights and windshield wipers
Page 122 of 358
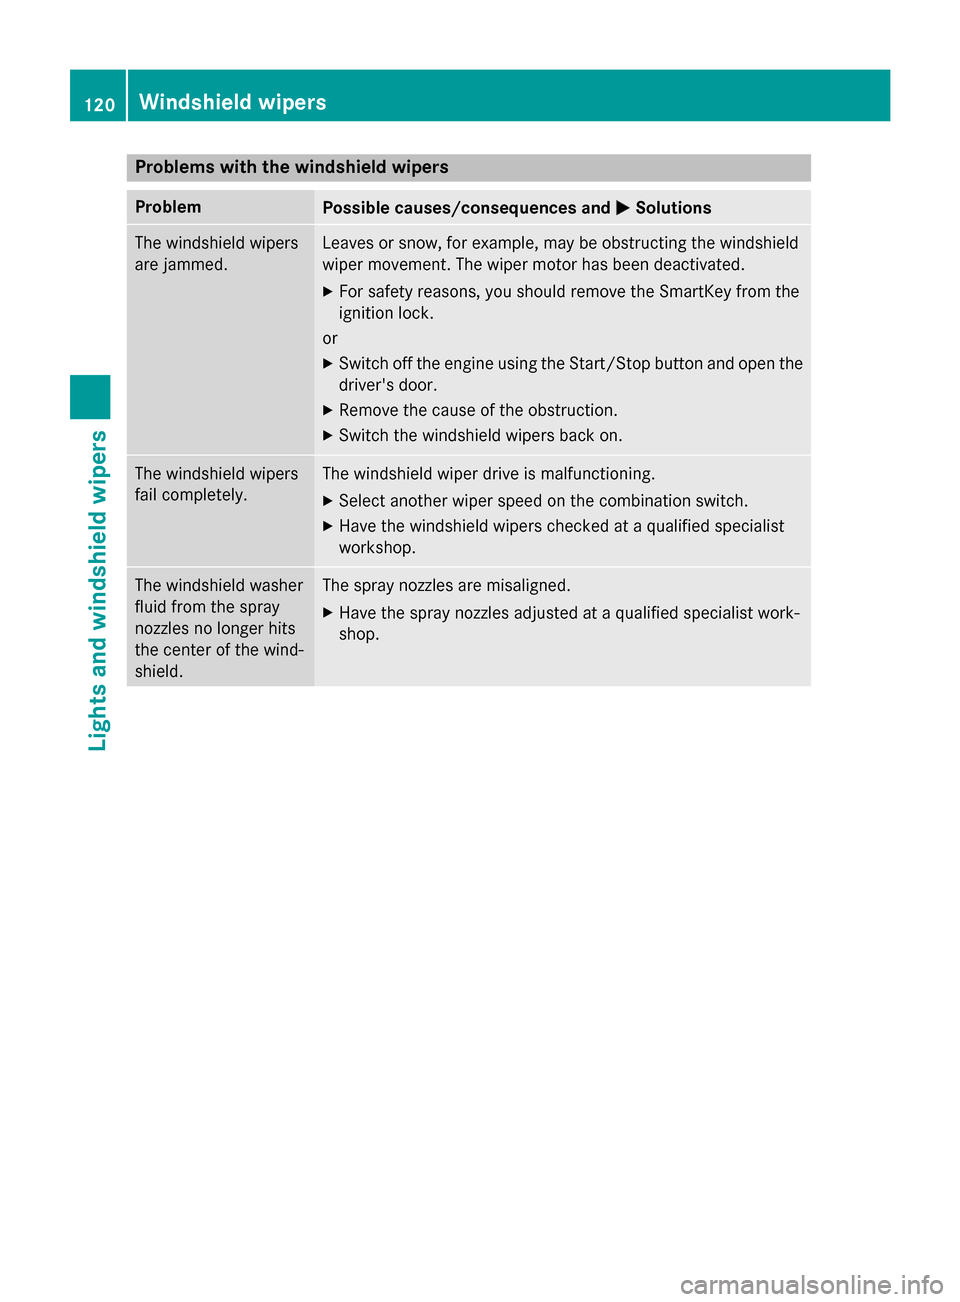
Problems with the windshield wipers
Problem
Possible causes/consequences and
0050
0050Solutions The windshield wipers
are jammed. Leaves or snow, for example, may be obstructing the windshield
wiper movement. The wiper motor has been deactivated.
X For safety reasons, you should remove the SmartKey from the
ignition lock.
or X Switch off the engine using the Start/Stop button and open the
driver's door.
X Remove the cause of the obstruction.
X Switch the windshield wipers back on. The windshield wipers
fail completely. The windshield wiper drive is malfunctioning.
X Select another wiper speed on the combination switch.
X Have the windshield wipers checked at a qualified specialist
workshop. The windshield washer
fluid from the spray
nozzles no longer hits
the center of the wind-
shield. The spray nozzles are misaligned.
X Have the spray nozzles adjusted at a qualified specialist work-
shop. 120
Windshield wipersLights and windshield wipers
Page 142 of 358
KEYLESS-GO
General notes
Vehicles with KEYLESS-GO are equipped with
a SmartKey featuring an integrated KEYLESS- GO start function and a detachable Start/
Stop button.
The Start/Stop button must be inserted in the
ignition lock and the SmartKey must be in the
vehicle.
When you insert the Start/Stop button into
the ignition lock, the system needs approx-
imately two seconds recognition time. You
can then use the Start/Stop button.
Pressing the Start/Stop button several times
in succession corresponds to the different
key positions in the ignition lock. This is only
the case if you are not depressing the brake
pedal.
If you depress the brake pedal and press the
Start/Stop button, the engine starts immedi-
ately.
A check which periodically establishes a radio connection between the vehicle and the
SmartKey determines whether a valid Smart-Key is in the vehicle. This occurs, for example,
when starting the engine.
To start the vehicle without actively using the
SmartKey:
R the Start/Stop button must be inserted in
the ignition lock.
R the SmartKey must be in the vehicle.
R the vehicle must not be locked with the
SmartKey or KEYLESS-GO (Y page 73).
Do not keep the SmartKey:
R with electronic devices, e.g. a mobile
phone or another SmartKey
R with metallic objects, e.g. coins or metal
foil
R inside metallic objects, e.g. a metal case
This can impair the functionality of the KEY-
LESS-GO key.
i The engine can be turned off while the
vehicle is in motion by pressing and holding the Start/Stop button for approximately
three seconds. This function operates inde-
pendently of the ECO start/stop automatic
engine switch-off function.
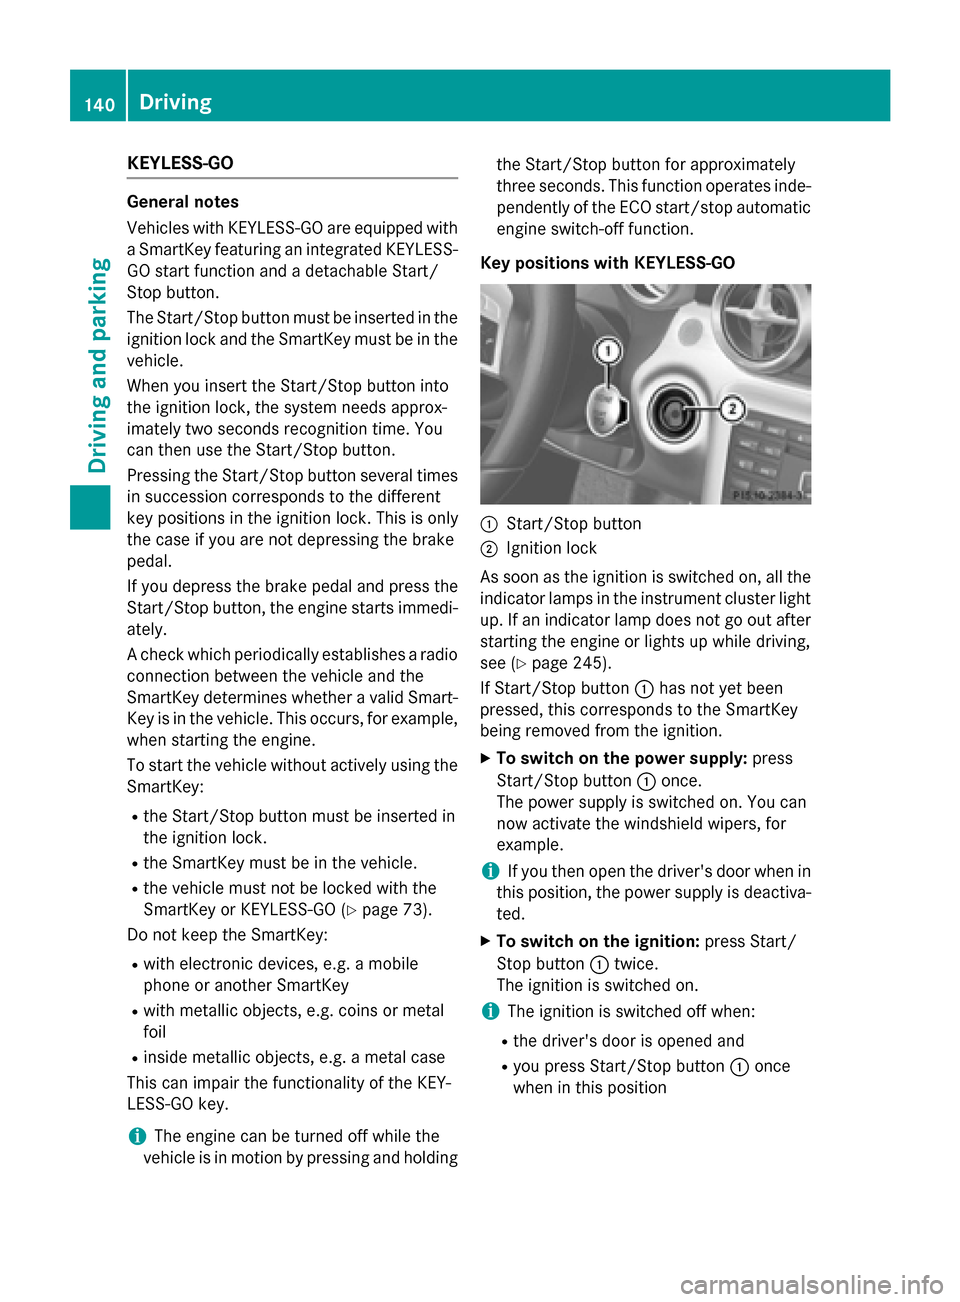
Key positions with KEYLESS-GO 0043
Start/Stop button
0044 Ignition lock
As soon as the ignition is switched on, all the
indicator lamps in the instrument cluster light up. If an indicator lamp does not go out afterstarting the engine or lights up while driving,
see (Y page 245).
If Start/Stop button 0043has not yet been
pressed, this corresponds to the SmartKey
being removed from the ignition.
X To switch on the power supply: press
Start/Stop button 0043once.
The power supply is switched on. You can
now activate the windshield wipers, for
example.
i If you then open the driver's door when in
this position, the power supply is deactiva-
ted.
X To switch on the ignition: press Start/
Stop button 0043twice.
The ignition is switched on.
i The ignition is switched off when:
R the driver's door is opened and
R you press Start/Stop button 0043once
when in this position 140
DrivingDriving and pa
rking
Page 162 of 358
X
Switch the engine off.
X Remove the SmartKey from the ignition
lock.
X Press the fuel filler flap in the direction of
arrow 0043.
The fuel filler flap swings up.
X Turn the fuel filler flap counter-clockwise
and remove it.
X Insert the fuel filler cap into the holder
bracket on the inside of fuel filler flap 0044.
X Completely insert the filler neck of the fuel
pump nozzle into the tank, hook in place
and refuel.
X Only fill the tank until the pump nozzle
switches off.
i Do not add any more fuel after the pump
stops filling for the first time. Otherwise,
fuel may leak out.
Closing the fuel filler flap X
Place fuel filler cap on the fuel filler neck
and turn clockwise until it engages.
X Close fuel filler flap 0043.
i Close the fuel filler flap before locking the
vehicle.
i If you are driving with the fuel filler cap
open, the 00B6reserve fuel warning lamp
flashes. The 00B9Check Engine warning
lamp may also light up. A message appears in the multifunction display (Y page 231).
For further information on warning and indi-
cator lamps in the instrument cluster, see
(Y page 251). 160
RefuelingDriving and parking
Page 169 of 358
Heavy and light loads
G
WARNING
If you rest your foot on the brake pedal while
driving, the braking system can overheat. This increases the stopping distance and can even
cause the braking system to fail. There is a
risk of an accident.
Never use the brake pedal as a footrest. Never
depress the brake pedal and the accelerator
pedal at the same time.
! Depressing the brake pedal constantly
results in excessive and premature wear to
the brake pads.
If the brakes have been subjected to a heavy load, do not stop the vehicle immediately, but
drive on for a short while. This allows the air- flow to cool the brakes more quickly.
Wet roads If you have driven for a long time in heavy rain
without braking, there may be a delayed reac- tion from the brakes when braking for the first
time. This may also occur after the vehicle has been washed or driven through deep water.
You then have to depress the brake pedal
more firmly. Maintain a greater distance from
the vehicle in front.
After driving on a wet road or having the vehi- cle washed, brake firmly while paying atten-
tion to the traffic conditions. This will warm upthe brake discs, thereby drying them more
quickly and protecting them against corro-
sion.
Limited braking performance on salt-
treated roads If you drive on salted roads, a layer of salt
residue may form on the brake discs and
brake pads. This can result in a significantly
longer braking distance. R
Brake occasionally to remove any possible
salt residue. Make sure that you do not
endanger other road users when doing so.
R Carefully depress the brake pedal and the
beginning and end of a journey.
R Maintain a greater distance to the vehicle
ahead.
Servicing the brakes !
If the red brake warning lamp lights up in
the instrument cluster and you hear a warn-
ing tone while the engine is running, the
brake fluid level may be too low. Observe
additional warning messages in the multi-
function display.
The brake fluid level may be too low due to brake pad wear or leaking brake lines.
Have the brake system checked immedi-
ately. This work should be carried out at a
qualified specialist workshop.
! As the ESP ®
system operates automati-
cally, the engine and the ignition must be
switched off (SmartKey in position 0or 1in
the ignition lock) if the electric parking
brake is being tested on a brake dynamom-
eter (maximum 10 seconds).
Braking triggered automatically by ESP ®
may seriously damage the brake system.
All checks and maintenance work on the
brake system must be carried out at a quali-
fied specialist workshop. Have this work car-
ried out at an authorized Mercedes-Benz Cen-
ter.
Have the brake pads replaced and the brake
fluid renewed at a qualified specialist work-
shop, e.g. an authorized Mercedes-Benz Cen- ter.
If the brake system has only been subject to
moderate loads, you should test the function- ality of your brakes at regular intervals. To doso, depress the brake pedal firmly when driv-
ing at a high speed. This improves the grip of
the brake pads.
A description of Brake Assist (BAS):
(Y page 62) Driving tips
167Driving and parking Z
Page 196 of 358
Useful information
i This Operator's manual describes all
models and all standard and optional equip- ment of your vehicle available at the time of
publication of the Operator's manual.
Country-specific differences are possible.
Please note that your vehicle may not be
equipped with all features described. This
also applies to safety-related systems and
functions.
i Read the information on qualified special-
ist workshops (Y page 26). Important safety notes
G
WARNING
If you operate information systems and com-
munication equipment integrated in the vehi- cle while driving, you will be distracted from
traffic conditions. You could also lose control of the vehicle. There is a risk of an accident.
Only operate the equipment when the traffic
situation permits. If you are not sure that this
is possible, park the vehicle paying attention
to traffic conditions and operate the equip-
ment when the vehicle is stationary.
You must observe the legal requirements for
the country in which you are currently driving when operating the on-board computer. G
WARNING
If the instrument cluster has failed or mal-
functioned, you may not recognize function
restrictions in systems relevant to safety. The operating safety of your vehicle may be
impaired. There is a risk of an accident.
Drive on carefully. Have the vehicle checked
at a qualified specialist workshop immedi-
ately.
The on-board computer only shows messages
or warnings from certain systems in the mul- tifunction display. You should therefore make
sure your vehicle is operating safely at all times. Otherwise, a vehicle that is not oper-
ating safely may cause an accident.
If the operating safety of your vehicle is
impaired, pull over as soon as it is safe to do
so. Contact a qualified specialist workshop.
For an overview, see the instrument panel
illustration (Y
page 31). Displays and operation
Instrument cluster lighting
The lighting in the instrument cluster, in the
displays and the controls in the vehicle inte-
rior can be adjusted using the brightness con-
trol knob.
The brightness control knob is on the bottom left of the instrument cluster (Y page 31).
X Turn the brightness control knob counter-
clockwise or clockwise.
If the light switch is set to 0058,0060or
0058, the brightness is dependent upon
the brightness of the ambient light.
i The light sensor in the instrument cluster
automatically controls the brightness of
the multifunction display.
In daylight, the displays in the instrument
cluster are not lit. Coolant temperature display
G
WARNING
Opening the hood when the engine is over-
heated or when there is a fire in the engine
compartment could expose you to hot gases
or other service products. There is a risk of
injury.
Let an overheated engine cool down before
opening the hood. If there is a fire in the
engine compartment, keep the hood closed
and contact the fire department.
! A display message is shown if the coolant
temperature is too high. 194
Displays and operationOn-board computer and displays
Page 222 of 358
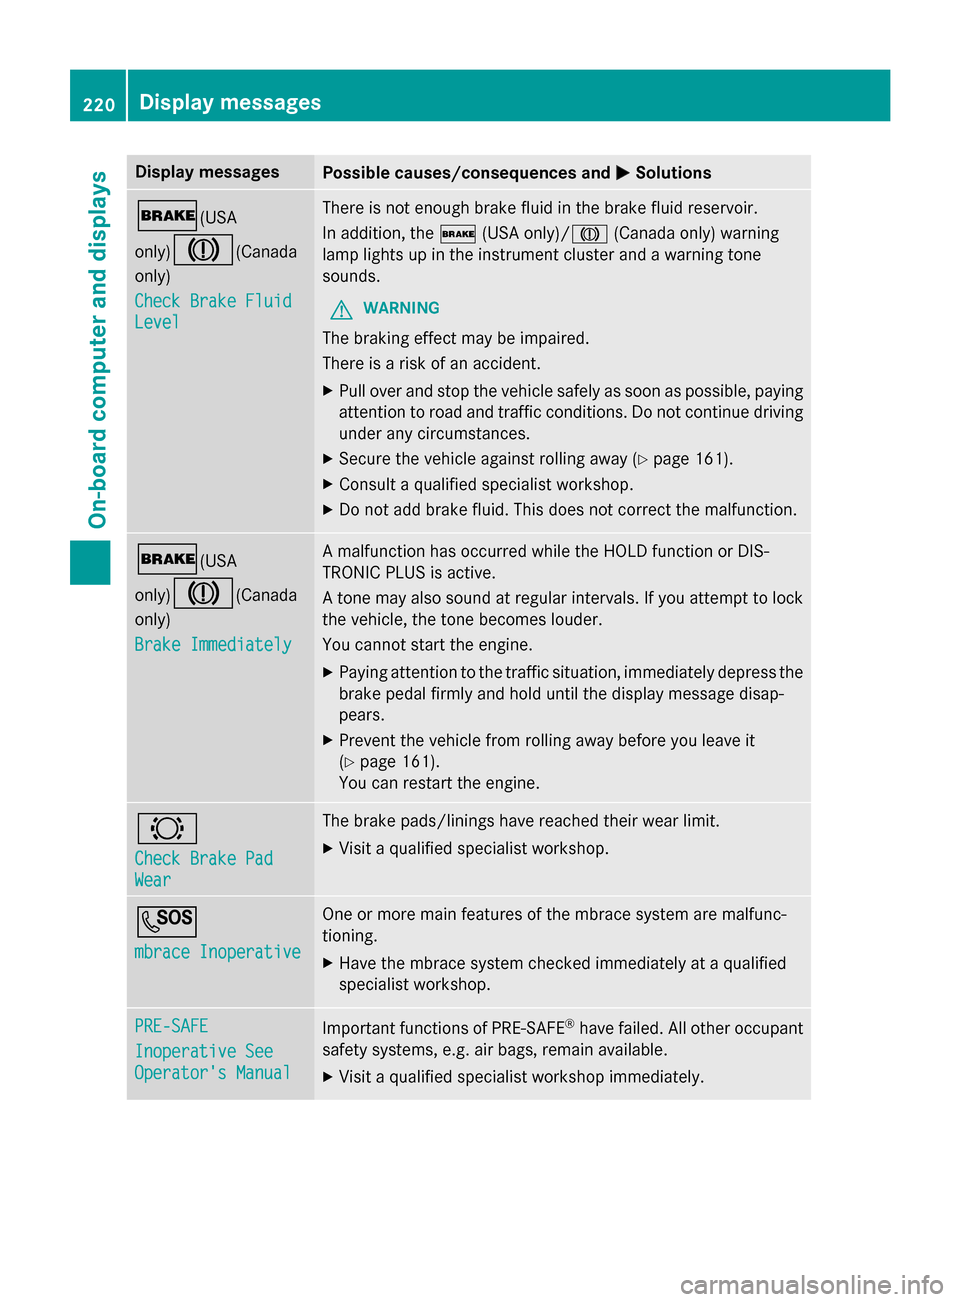
Display messages
Possible causes/consequences and
0050
0050Solutions 0027(USA
only)004D
(Canada
only)
Check Brake Fluid Check Brake Fluid
Level Level There is not enough brake fluid in the brake fluid reservoir.
In addition, the
0027(USA only)/ 004D(Canada only) warning
lamp lights up in the instrument cluster and a warning tone
sounds.
G WARNING
The braking effect may be impaired.
There is a risk of an accident. X Pull over and stop the vehicle safely as soon as possible, paying
attention to road and traffic conditions. Do not continue driving
under any circumstances.
X Secure the vehicle against rolling away (Y page 161).
X Consult a qualified specialist workshop.
X Do not add brake fluid. This does not correct the malfunction. 0027(USA
only)004D
(Canada
only)
Brake Immediately Brake Immediately A malfunction has occurred while the HOLD function or DIS-
TRONIC PLUS is active.
A tone may also sound at regular intervals. If you attempt to lock
the vehicle, the tone becomes louder.
You cannot start the engine.
X Paying attention to the traffic situation, immediately depress the
brake pedal firmly and hold until the display message disap-
pears.
X Prevent the vehicle from rolling away before you leave it
(Y page 161).
You can restart the engine. 0026
Check Brake Pad Check Brake Pad
Wear Wear The brake pads/linings have reached their wear limit.
X Visit a qualified specialist workshop. 0053
mbrace Inoperative mbrace Inoperative One or more main features of the mbrace system are malfunc-
tioning.
X Have the mbrace system checked immediately at a qualified
specialist workshop. PRE-SAFE PRE-SAFE
Inoperative See Inoperative See
Operator's Manual Operator's Manual
Important functions of PRE-SAFE
®
have failed. All other occupant
safety systems, e.g. air bags, remain available.
X Visit a qualified specialist workshop immediately. 220
Display
messagesOn-board computer and displays