2015 MERCEDES-BENZ S-Class brake light
[x] Cancel search: brake lightPage 324 of 502

Display messages
Possible causes/consequences and
M
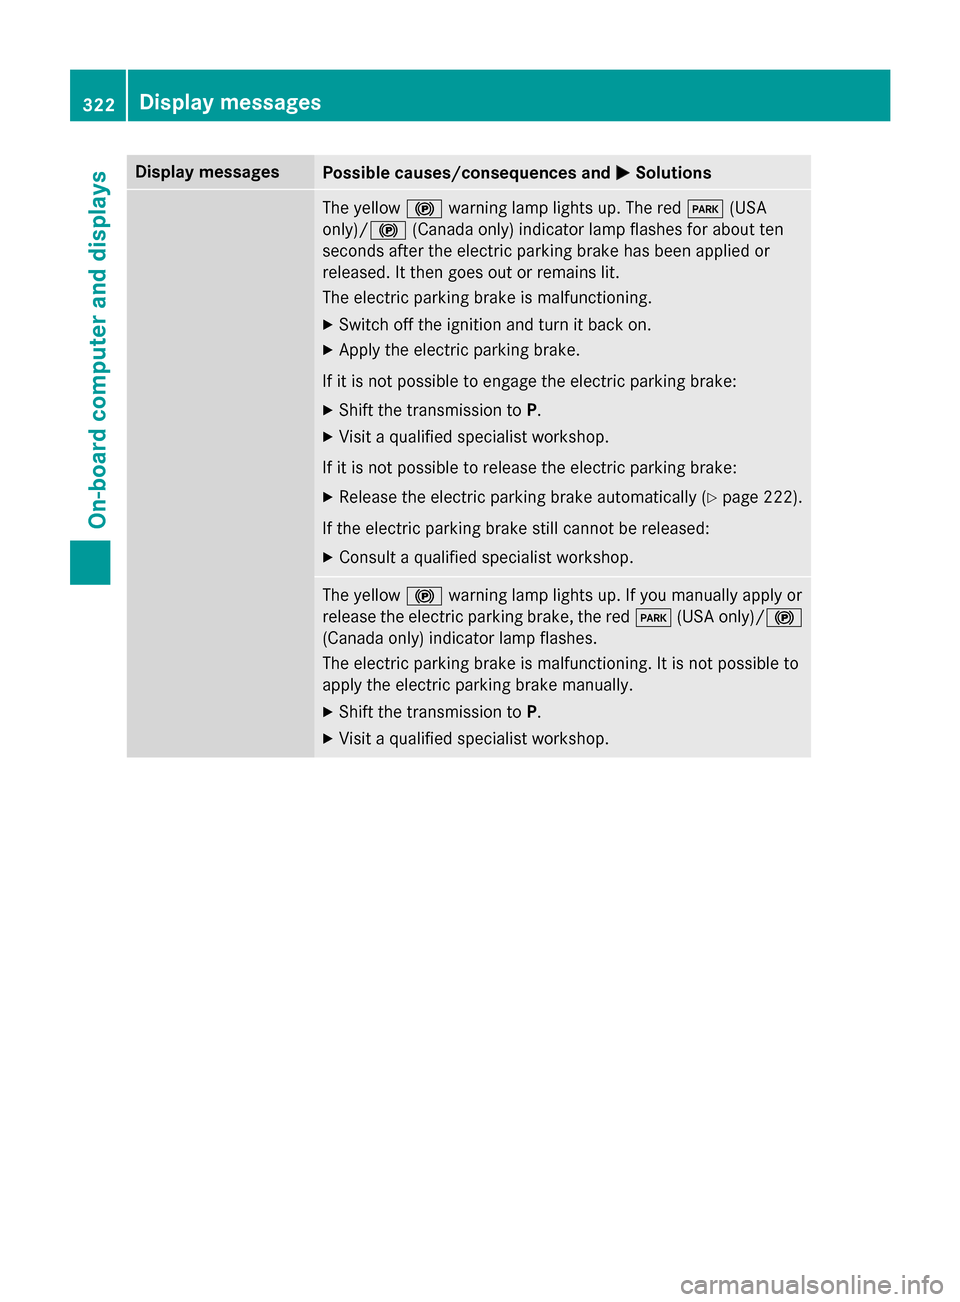
MSolutions The yellow
!warning lamp lights up. The red F(USA
only)/ !(Canada only) indicator lamp flashes for about ten
seconds after the electric parking brake has been applied or
released. It then goes out or remains lit.
The electric parking brake is malfunctioning.
X Switch off the ignition and turn it back on.
X Apply the electric parking brake.
If it is not possible to engage the electric parking brake:
X Shift the transmission to P.
X Visit a qualified specialist workshop.
If it is not possible to release the electric parking brake:
X Release the electric parking brake automatically (Y page 222).
If the electric parking brake still cannot be released: X Consult a qualified specialist workshop. The yellow
!warning lamp lights up. If you manually apply or
release the electric parking brake, the red F(USA only)/ !
(Canada only) indicator lamp flashes.
The electric parking brake is malfunctioning. It is not possible to
apply the electric parking brake manually.
X Shift the transmission to P.
X Visit a qualified specialist workshop. 322
Display
messagesOn-board computer and displays
Page 325 of 502

Display messages
Possible causes/consequences and
M
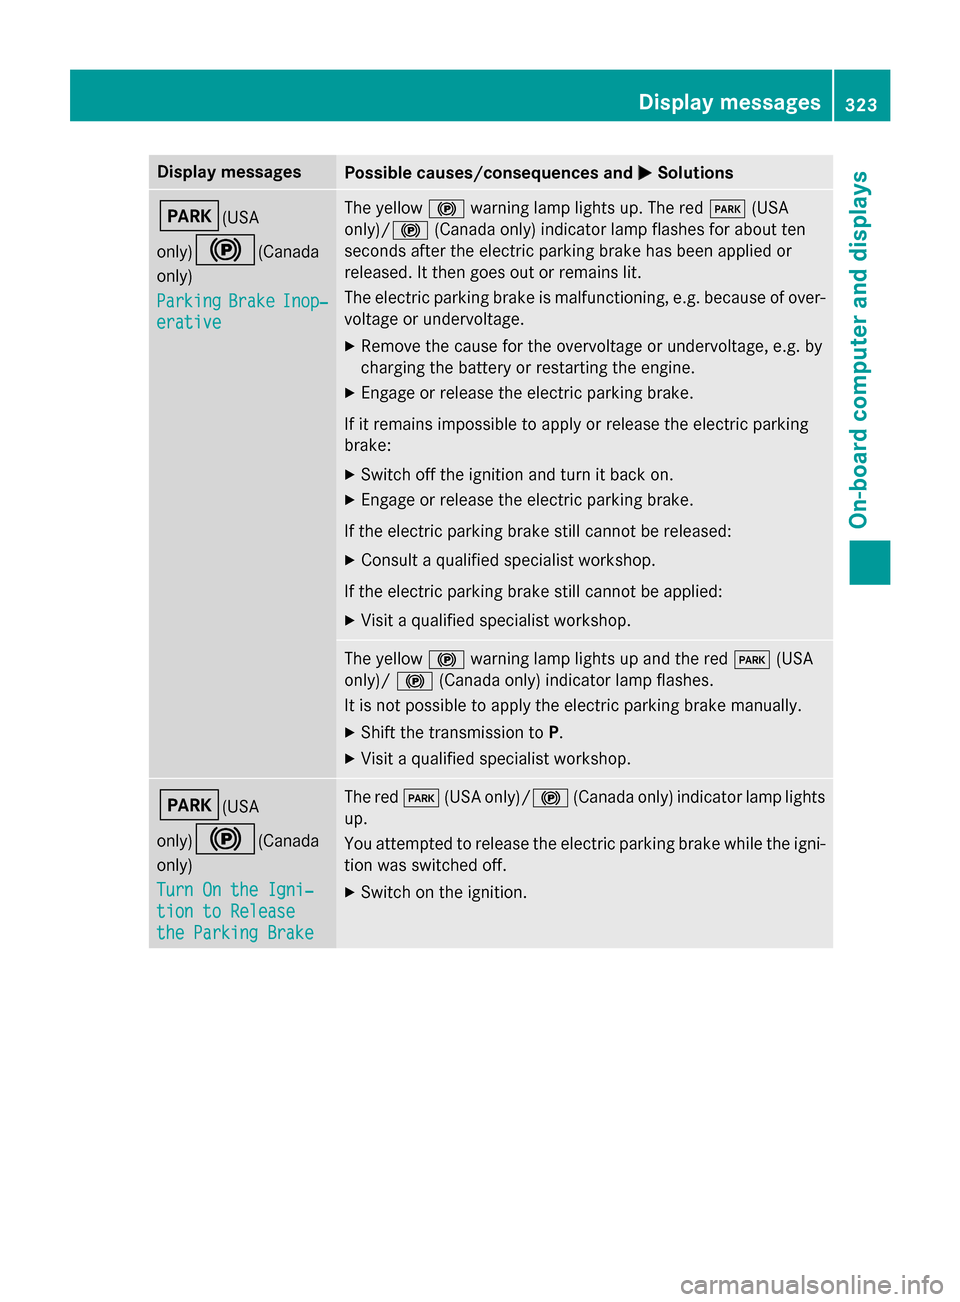
MSolutions F(USA
only)!
(Canada
only)
Parking Parking Brake
BrakeInop‐
Inop‐
erative
erative The yellow
!warning lamp lights up. The red F(USA
only)/ !(Canada only) indicator lamp flashes for about ten
seconds after the electric parking brake has been applied or
released. It then goes out or remains lit.
The electric parking brake is malfunctioning, e.g. because of over-
voltage or undervoltage.
X Remove the cause for the overvoltage or undervoltage, e.g. by
charging the battery or restarting the engine.
X Engage or release the electric parking brake.
If it remains impossible to apply or release the electric parking
brake:
X Switch off the ignition and turn it back on.
X Engage or release the electric parking brake.
If the electric parking brake still cannot be released: X Consult a qualified specialist workshop.
If the electric parking brake still cannot be applied: X Visit a qualified specialist workshop. The yellow
!warning lamp lights up and the red F(USA
only)/ !(Canada only) indicator lamp flashes.
It is not possible to apply the electric parking brake manually.
X Shift the transmission to P.
X Visit a qualified specialist workshop. F(USA
only)!
(Canada
only)
Turn On the Igni‐ Turn On the Igni‐
tion to Release tion to Release
the Parking Brake the Parking Brake The red
F(USA only)/! (Canada only) indicator lamp lights
up.
You attempted to release the electric parking brake while the igni-
tion was switched off.
X Switch on the ignition. Display
messages
323On-board computer and displays Z
Page 326 of 502

Display messages
Possible causes/consequences and
M
MSolutions $(USA
only)J
(Canada
only)
Check Brake Fluid Check Brake Fluid
Level Level There is not enough brake fluid in the brake fluid reservoir.
In addition, the
$(USA only)/ J(Canada only) warning
lamp lights up in the instrument cluster and a warning tone
sounds.
G WARNING
The braking effect may be impaired.
There is a risk of an accident. X Pull over and stop the vehicle safely as soon as possible, paying
attention to road and traffic conditions. Do not continue driving
under any circumstances.
X Secure the vehicle against rolling away (Y page 220).
X Consult a qualified specialist workshop.
X Do not add brake fluid. This does not correct the malfunction. #
Check Brake Pad Check Brake Pad
Wear Wear The brake pads/linings have reached their wear limit.
USA only: the red
$brake system warning lamp also lights up
while the engine is running.
X Visit a qualified specialist workshop. G
Inoperative Inoperative One or more main features of the mbrace system are malfunc-
tioning.
X Have the mbrace system checked immediately at a qualified
specialist workshop. PRE-SAFE Inopera‐ PRE-SAFE Inopera‐
tive See Opera‐ tive See Opera‐
tor's Manual tor's Manual
Important functions of PRE-SAFE
®
have failed. All other occupant
safety systems, e.g. air bags, remain available.
X Visit a qualified specialist workshop immediately. 324
Display
messagesOn-board computer and displays
Page 369 of 502

Warning/
indicator
lamp
N N
Signal type
Possible causes/consequences and M
MSolutions $
N
The red brake system warning lamp is on. A warning tone also sounds.
G Risk of accident
RBS is malfunctioning. Pedal travel may be longer than usual and braking
performance may be affected.
X Pull over and stop the vehicle safely as soon as possible, paying attention to
road and traffic conditions. Do not continue driving under any circumstan-
ces.
X Consult a qualified specialist workshop immediately.
X Observe the additional display messages in the multifunction display. Driving systems
Warning/
indicator
lamp
N N
Signal type
Possible causes/consequences and M
MSolutions ·
N
The red distance warning lamp lights up while the vehicle is in motion. A
warning tone also sounds.
You are approaching a vehicle or a stationary obstacle in your line of travel at too high a speed.
X Be prepared to brake immediately.
X Pay careful attention to the traffic situation. You may have to brake or take
evasive action.
Further information on PRE ‑SAFE®
Brake (Y page 84).
For further information about the distance warning function of COLLISION
PREVENTION ASSIST PLUS, see (Y page 80). Warning and indicator lamps in the instrument cluster
367On-board computer and displays Z
Page 416 of 502

repaired. In such cases, visit a qualified spe-
cialist workshop.
X Remove dirt immediately, where possible,
while avoiding rubbing too hard.
X Soak insect remains with insect remover
and rinse off the treated areas afterwards.
X Soak bird droppings with water and rinse
off the treated areas afterwards.
X Remove coolant, brake fluid, tree resin,
oils, fuels and greases by rubbing gently
with a cloth soaked in petroleum ether or
lighter fluid.
X Use tar remover to remove tar stains.
X Use silicone remover to remove wax.
If water no longer forms "beads" on the paint
surface, use the paint care products recom-
mended and approved by Mercedes-Benz.
This is the case approximately every three to
five months, depending on the climate con-
ditions and the care product used.
If dirt has penetrated the paint surface or if
the paint has become dull, the paint cleaner
recommended and approved by Mercedes-
Benz should be used.
Do not use these care products in the sun or
on the hood while the hood is hot.
X Use a suitable touch-up stick, e.g. MB
Touch-Up Stick, to repair slight damage to
the paintwork quickly and provisionally.
Matte finish care !
Never polish the vehicle or the light alloy
wheels. Polishing causes the finish to
shine.
! The following may cause the paint to
become shiny and thus reduce the matte
effect:
R Vigorous rubbing with unsuitable mate-
rials.
R Frequent use of car washes.
R Washing the vehicle in direct sunlight.
! Never use paint cleaner, buffing or pol-
ishing products, or gloss preserver, e.g. wax. These products are only suitable for
high-gloss surfaces. Their use on vehicles
with matte finish leads to considerable sur- face damage (shiny, spotted areas).
Always have paintwork repairs carried out
at a qualified specialist workshop.
! Do not use wash programs with a hot wax
treatment under any circumstances.
Observe these notes if your vehicle has a
clear matte finish. This will help you to avoid
damage to the paintwork due to incorrect
treatment.
These notes also apply to light alloy wheels
with a clear matte finish.
The vehicle should preferably be washed by
hand using a soft sponge, car shampoo and
plenty of water.
Use only insect remover and car shampoo
from the range of approved Mercedes-Benz
care products. Cleaning the vehicle parts
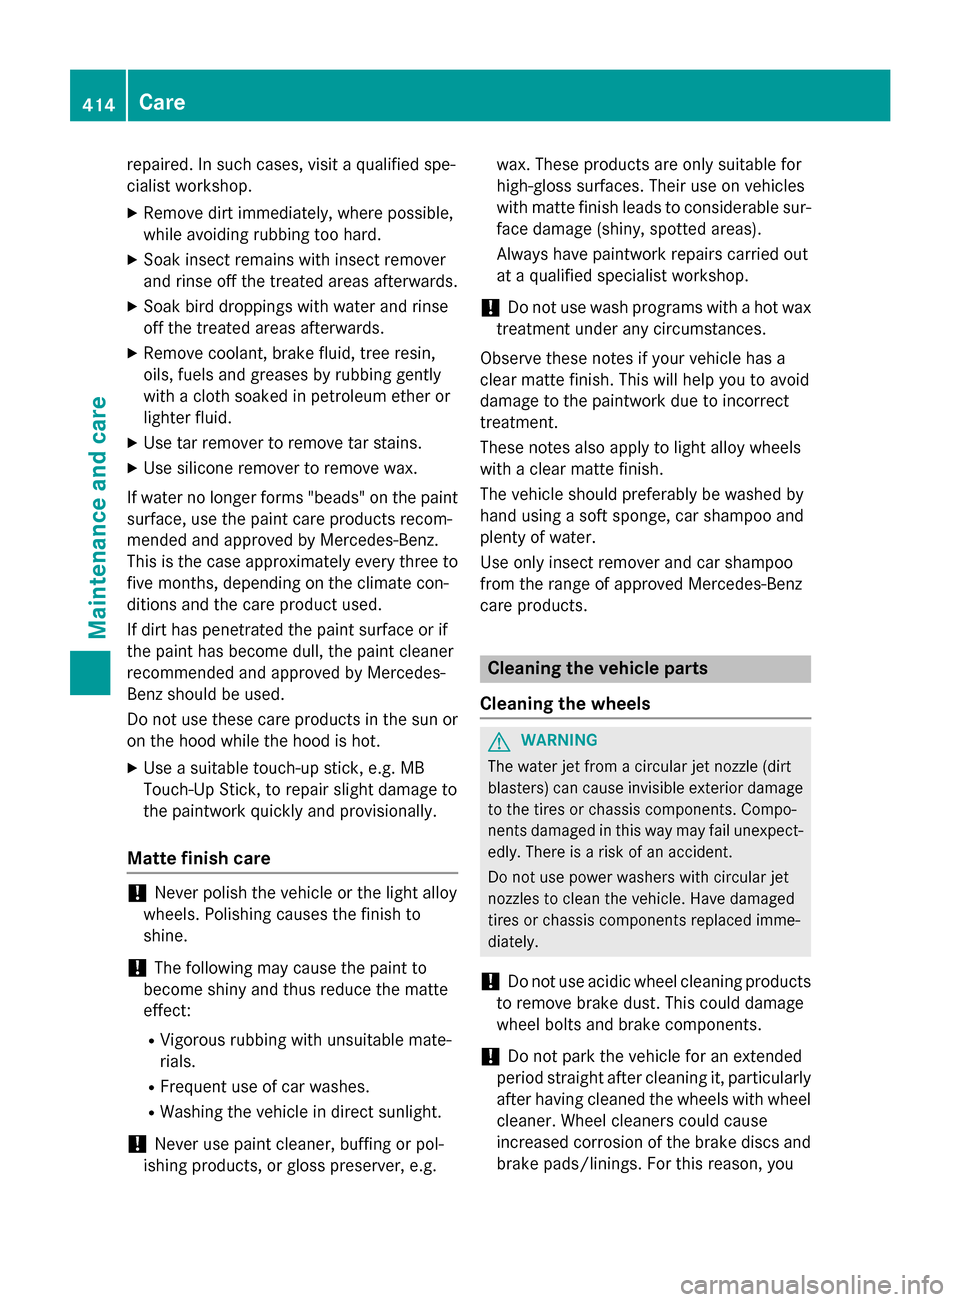
Cleaning the wheels G
WARNING
The water jet from a circular jet nozzle (dirt
blasters) can cause invisible exterior damage to the tires or chassis components. Compo-
nents damaged in this way may fail unexpect-edly. There is a risk of an accident.
Do not use power washers with circular jet
nozzles to clean the vehicle. Have damaged
tires or chassis components replaced imme-
diately.
! Do not use acidic wheel cleaning products
to remove brake dust. This could damage
wheel bolts and brake components.
! Do not park the vehicle for an extended
period straight after cleaning it, particularly
after having cleaned the wheels with wheel cleaner. Wheel cleaners could cause
increased corrosion of the brake discs and
brake pads/linings. For this reason, you 414
CareMaintenance and care
Page 417 of 502

should drive for a few minutes after clean-
ing. Braking heats the brake discs and the
brake pads/linings, thus drying them. The
vehicle can then be parked.
Cleaning the windows G
WARNING
You could become trapped by the windshield wipers if they start moving while cleaning the
windshield or wiper blades. There is a risk of
injury.
Always switch off the windshield wipers and
the ignition before cleaning the windshield or
wiper blades.
! Do not use dry cloths, abrasive products,
solvents or cleaning agents containing sol- vents to clean the inside of the windows. Do
not touch the insides of the windows with
hard objects, e.g. an ice scraper or ring.
There is otherwise a risk of damaging the
windows.
! Clean the water drainage channels of the
windshield and the rear window at regular
intervals. Deposits such as leaves, petals
and pollen may under certain circumstan-
ces prevent water from draining away. This
can lead to corrosion damage and damage to electronic components.
X Clean the inside and outside of the win-
dows with a damp cloth and a cleaning
product that is recommended and
approved by Mercedes-Benz.
Cleaning wiper blades G
WARNING
You could become trapped by the windshield wipers if they start moving while cleaning the
windshield or wiper blades. There is a risk of
injury.
Always switch off the windshield wipers and
the ignition before cleaning the windshield or
wiper blades. !
Do not pull the wiper blade. Otherwise,
the wiper blade could be damaged.
! Do not clean wiper blades too often and
do not rub them too hard. Otherwise, the
graphite coating could be damaged. This
could cause wiper noise.
! Hold the wiper arm securely when folding
back. The windshield could be damaged if
the wiper arm smacks against it suddenly.
X Fold the windshield wiper arms away from
the windshield (Y page 158).
X Carefully clean the wiper blades with a
damp cloth.
X Fold the windshield wiper arms back again
before switching on the ignition.
Cleaning the exterior lighting !
Only use cleaning agents or cleaning
cloths which are suitable for plastic light
lenses. Unsuitable cleaning agents or
cleaning cloths could scratch or damage
the plastic light lenses.
X Clean the plastic lenses of the exterior
lights with a wet sponge and a mild cleaning
agent, e.g. Mercedes-Benz car shampoo or cleaning cloths.
Mirror turn signals !
Only use cleaning agents or cleaning
cloths that are suitable for plastic lenses.
Unsuitable cleaning agents or cleaning
cloths could scratch or damage the plastic lenses of the mirror turn signals.
X Clean the plastic lenses of the mirror turn
signals in the exterior mirror housing using
a wet sponge and mild cleaning agent, e.g.
Mercedes-Benz car shampoo or cleaning
cloths.
Cleaning the sensors !
If you clean the sensors with a power
washer, make sure that you keep a dis-
tance of at least 11.8 in (30 cm) between Care
415Maintenance and care Z
Page 435 of 502

Do not start the vehicle using a rapid charging device. If your vehicle's battery is discharged,
the engine can be jump-started from another vehicle or from a second battery using jumper
cables. Observe the following points:
R The battery is not accessible in all vehicles. If the other vehicle's battery is not accessible,
jump-start the vehicle using a second battery or a jump-starting device.
R You may only jump-start the vehicle when the engine and exhaust system are cold.
R Keep away from fire and open flames.
R Do not start the engine if the battery is frozen. Let the battery thaw first.
R All vehicles except AMG vehicles: do not start the engine if the battery is frozen. Let the
battery thaw first.
R Only jump-start from batteries with a 12 V voltage rating.
R Only use jumper cables which have a sufficient cross-section and insulated terminal clamps.
R Do not lean over the battery.
R If the battery is fully discharged, leave the battery that is being used to jump-start connected
for a few minutes before attempting to start. This charges the battery slightly.
R Make sure that the two vehicles do not touch.
Make sure that:
R the jumper cables are not damaged.
R when the jumper cables are connected to the battery, uninsulated sections of the terminal
clamp do not come into contact with other metal sections.
R the jumper cables cannot come into contact with parts which can move when the engine is
running, such as the V-belt pulley or the fan.
X Secure the vehicle by applying the electric parking brake.
X Shift the transmission to position P.
X Make sure that the ignition is switched off (Y page 189). All indicator lamps in the instrument
cluster must be off. When using the SmartKey, turn the SmartKey to position 0in the ignition
lock and remove it (Y page 189).
X Switch off all electrical consumers, e.g. rear window defroster, lighting, etc.
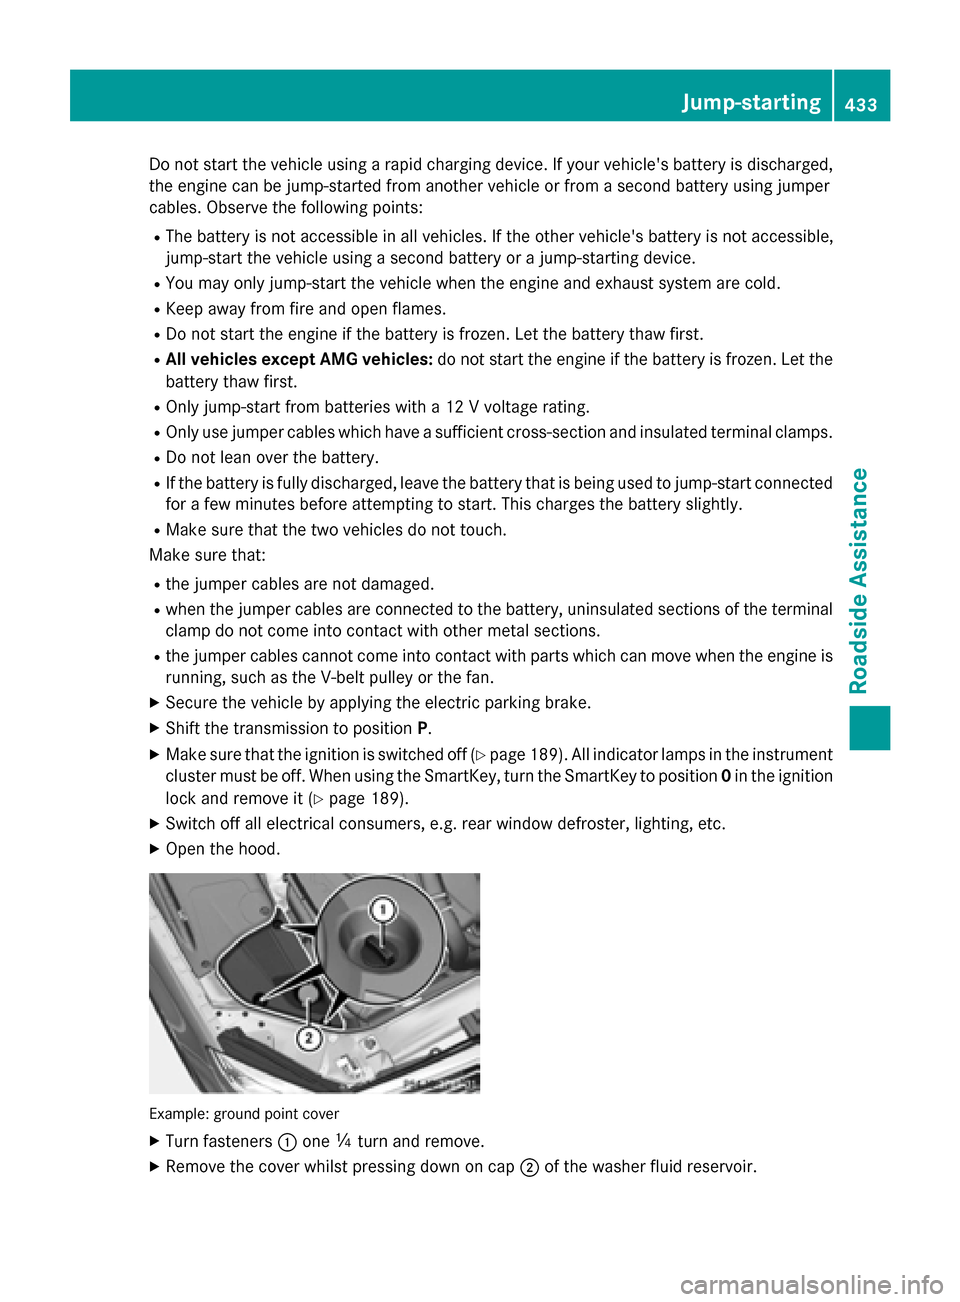
X Open the hood. Example: ground point cover
X Turn fasteners :one Õturn and remove.
X Remove the cover whilst pressing down on cap ;of the washer fluid reservoir. Jump-starting
433RoadsideAssistance Z
Page 469 of 502

X
On level ground: place chocks or other
suitable items under the front and rear of
the wheel that is diagonally opposite the
wheel you wish to change. X
On light downhill gradients: place
chocks or other suitable items in front of
the wheels of the front and rear axle.
Raising the vehicle G
WARNING
If you do not position the jack correctly at the appropriate jacking point of the vehicle, the
jack could tip over with the vehicle raised.
There is a risk of injury.
Only position the jack at the appropriate jack-
ing point of the vehicle. The base of the jack
must be positioned vertically, directly under
the jacking point of the vehicle.
! The jack is designed exclusively for jack-
ing up the vehicle at the jacking points.
Otherwise, your vehicle could be damaged. Observe the following when raising the
vehicle:
R To raise the vehicle, only use the vehicle-
specific jack that has been tested and
approved by Mercedes-Benz. If used incor-
rectly, the jack could tip over with the vehi- cle raised.
R The jack is designed only to raise and hold
the vehicle for a short time while a wheel
is being changed. It is not suited for per-
forming maintenance work under the vehi- cle.
R Avoid changing the wheel on uphill and
downhill slopes.
R Before raising the vehicle, secure it from
rolling away by applying the parking brake
and inserting wheel chocks. Do not disen-
gage the parking brake while the vehicle is
raised.
R The jack must be placed on a firm, flat and
non-slip surface. On a loose surface, a
large, flat, load-bearing underlay must be
used. On a slippery surface, a non-slip
underlay must be used, e.g. rubber mats.
R Do not use wooden blocks or similar
objects as a jack underlay. Otherwise, the
jack will not be able to achieve its load-
bearing capacity due to the restricted
height.
R Make sure that the distance between the
underside of the tires and the ground does
not exceed 1.2 in (3 cm).
R Never place your hands and feet under the
raised vehicle.
R Do not lie under the vehicle.
R Do not start the engine when the vehicle is
raised.
R Do not open or close a door or the trunk lid
when the vehicle is raised.
R Make sure that no persons are present in
the vehicle when the vehicle is raised.
Vehicles with AMG wheels and hub caps:
the hub cap covers the wheel bolts. Before
you can unscrew the wheel bolts, you must Changing a wheel
467Wheels and tires Z