2015 MERCEDES-BENZ S-CLASS COUPE light
[x] Cancel search: lightPage 222 of 417
vehicle parallel to the direction of travel using
Active Parking Assist.
i If PARKTRONIC detects obstacles, Active
Parking Assist brakes automatically whilst
the vehicle exits the parking space. You are
responsible for braking in good time.
X Start the engine.
X Release the electric parking brake.
X Switch on the turn signal in the direction
you are pulling away.
X Shift the transmission to position Dor R.
The Start Park Assist? Yes: OK No: Start Park Assist? Yes: OK No:
message appears in the multifunction dis-
play %.
X To cancel the procedure: press the%
button on the multifunction steering wheel
or pull away.
or X To exit a parking space using Active
Parking Assist: press theabutton on
the multifunction steering wheel.
The Park Assist active Accelerate
Park Assist active Accelerate
and and brake
brake Observe
Observe surroundings
surroundings mes-
sage appears in the multifunction display.
X Release the multifunction steering wheel.
X Pull away, being ready to brake at all times.
Do not exceed a maximum speed of
approximately 10 km/h when exiting a
parking space. Otherwise, Active Parking
Assist will be cancelled.
X Shift the transmission to position Dor Ras
required or according to the message while
the vehicle is stationary.
Active Parking Assist immediately steers in
the other direction. The Park Assist
Park Assist
active Accelerate and brake active Accelerate and brake
Observe Observe surroundings
surroundings message appears
in the multifunction display.
i You will achieve the best results by wait-
ing for the steering procedure to complete before pulling away. If you reverse after activation, the steering
wheel is moved to the straight-ahead posi- tion.
X Drive forwards and reverse as prompted by
the PARKTRONIC warning displays, several
times if necessary.
Once you have exited the parking space com- pletely, the steering wheel is moved to the
straight-ahead position. You hear a tone and
the Park Assist switched off Park Assist switched off message
appears in the multifunction display. You will
then have to steer and merge into traffic on
your own. PARKTRONIC is still available. You
can take over the steering before the vehicle has exited the parking space completely. This
is useful, for example when you recognise
that it is already possible to pull out of the
parking space.
Cancelling Active Parking Assist X
Stop the movement of the multifunction
steering wheel or steer yourself.
Active Parking Assist will be cancelled at
once. The Park Assist cancelled Park Assist cancelled mes-
sage appears in the multifunction display.
or
X Press the PARKTRONIC button
(Y page 214).
PARKTRONIC is switched off and Active
Parking Assist is immediately cancelled.
The Park Assist cancelled Park Assist cancelled message
appears in the multifunction display.
Active Parking Assist is cancelled automati-
cally if:
R the electric parking brake is applied
R transmission position Pis selected
R parking using Active Parking Assist is no
longer possible
R you are driving faster than 10 km/h
R a wheel spins and ESP ®
intervenes or fails.
The ÷ warning lamp lights up in the
instrument cluster.
A warning tone sounds. The parking symbol
disappears and the multifunction display Driving systems
219Driving and parking Z
Page 223 of 417
shows the
Park Assist cancelled
Park Assist cancelled mes-
sage.
When Active Parking Assist is cancelled, you
must steer and brake again yourself.
If a system malfunction occurs, the vehicle is braked to a standstill. To drive on, depress the
accelerator pedal again. Reversing camera
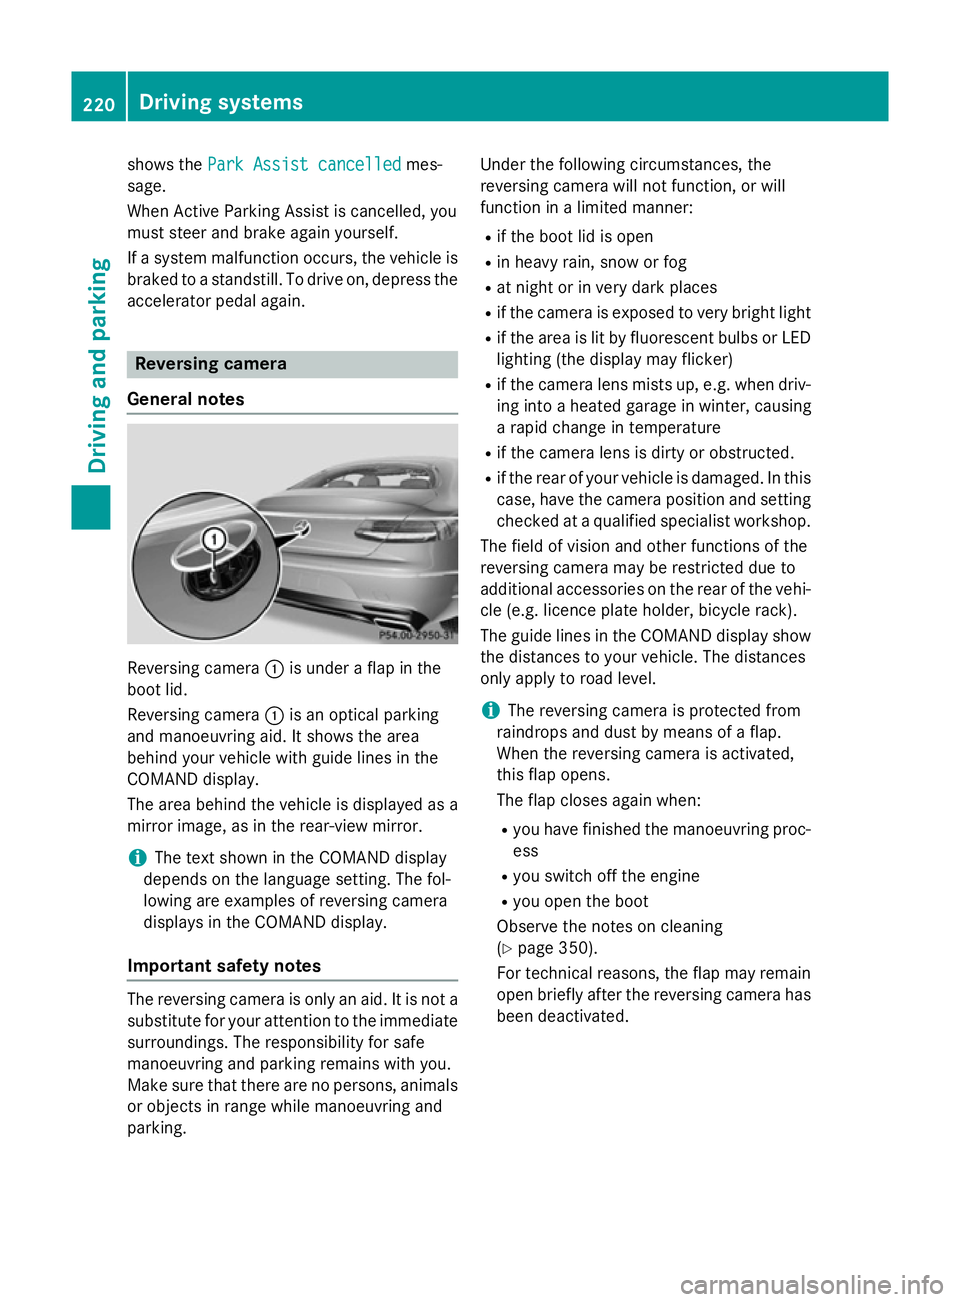
General notes Reversing camera
:is under a flap in the
boot lid.
Reversing camera :is an optical parking
and manoeuvring aid. It shows the area
behind your vehicle with guide lines in the
COMAND display.
The area behind the vehicle is displayed as a
mirror image, as in the rear-view mirror.
i The text shown in the COMAND display
depends on the language setting. The fol-
lowing are examples of reversing camera
displays in the COMAND display.
Important safety notes The reversing camera is only an aid. It is not a
substitute for your attention to the immediate
surroundings. The responsibility for safe
manoeuvring and parking remains with you.
Make sure that there are no persons, animals
or objects in range while manoeuvring and
parking. Under the following circumstances, the
reversing camera will not function, or will
function in a limited manner:
R if the boot lid is open
R in heavy rain, snow or fog
R at night or in very dark places
R if the camera is exposed to very bright light
R if the area is lit by fluorescent bulbs or LED
lighting (the display may flicker)
R if the camera lens mists up, e.g. when driv-
ing into a heated garage in winter, causing
a rapid change in temperature
R if the camera lens is dirty or obstructed.
R if the rear of your vehicle is damaged. In this
case, have the camera position and setting checked at a qualified specialist workshop.
The field of vision and other functions of the
reversing camera may be restricted due to
additional accessories on the rear of the vehi-
cle (e.g. licence plate holder, bicycle rack).
The guide lines in the COMAND display show the distances to your vehicle. The distances
only apply to road level.
i The reversing camera is protected from
raindrops and dust by means of a flap.
When the reversing camera is activated,
this flap opens.
The flap closes again when:
R you have finished the manoeuvring proc-
ess
R you switch off the engine
R you open the boot
Observe the notes on cleaning
(Y page 350).
For technical reasons, the flap may remain
open briefly after the reversing camera has been deactivated. 220
Driving systemsDriving and parking
Page 225 of 417
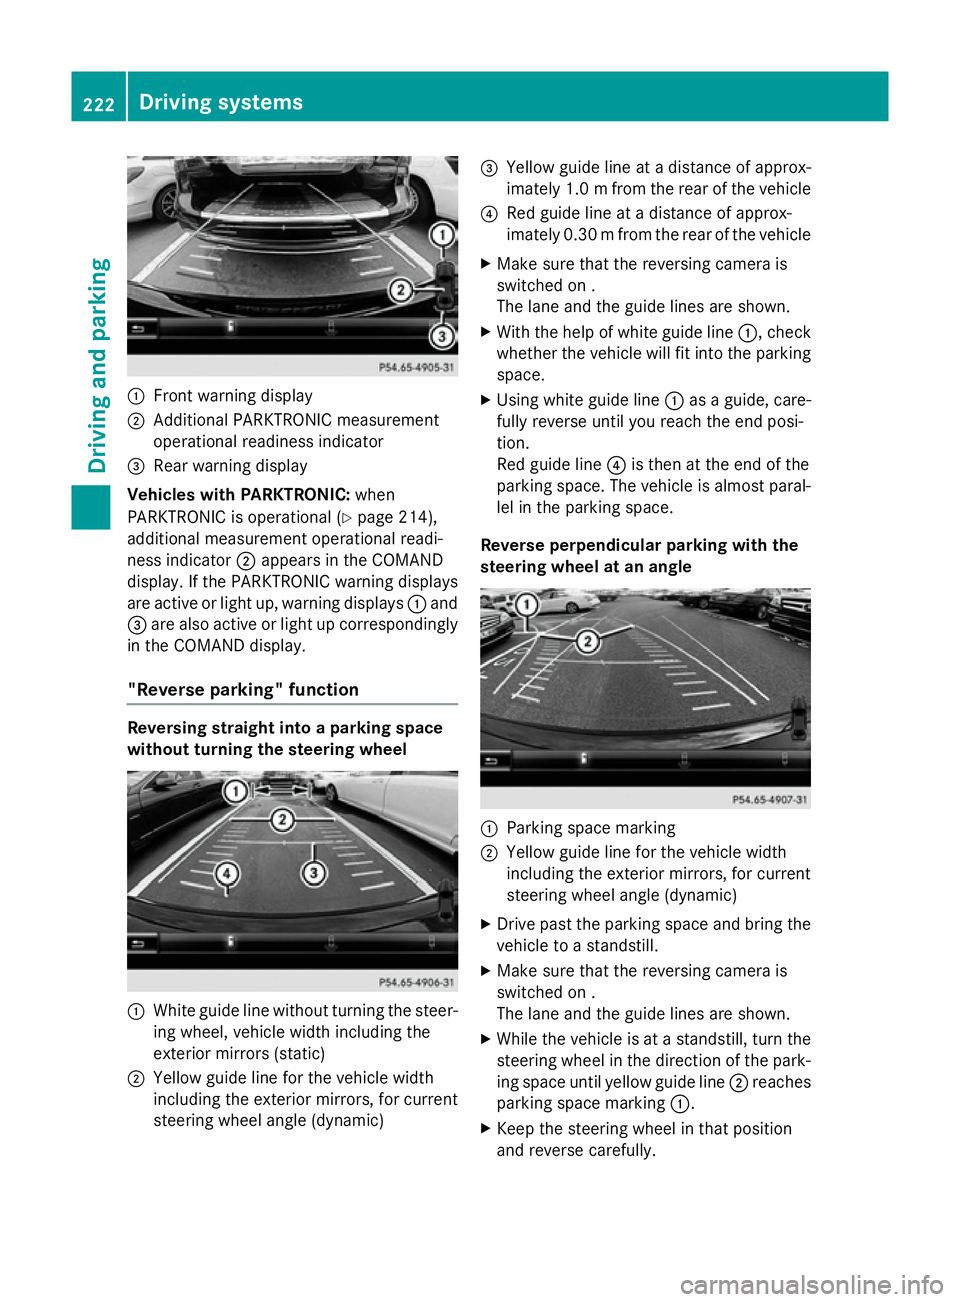
:
Front warning display
; Additional PARKTRONIC measurement
operational readiness indicator
= Rear warning display
Vehicles with PARKTRONIC: when
PARKTRONIC is operational (Y page 214),
additional measurement operational readi-
ness indicator ;appears in the COMAND
display. If the PARKTRONIC warning displays
are active or light up, warning displays :and
= are also active or light up correspondingly
in the COMAND display.
"Reverse parking" function Reversing straight into a parking space
without turning the steering wheel :
White guide line without turning the steer-
ing wheel, vehicle width including the
exterior mirrors (static)
; Yellow guide line for the vehicle width
including the exterior mirrors, for current
steering wheel angle (dynamic) =
Yellow guide line at a distance of approx-
imately 1.0 mfrom the rear of the vehicle
? Red guide line at a distance of approx-
imately 0.30 mfrom the rear of the vehicle
X Make sure that the reversing camera is
switched on .
The lane and the guide lines are shown.
X With the help of white guide line :, check
whether the vehicle will fit into the parking
space.
X Using white guide line :as a guide, care-
fully reverse until you reach the end posi-
tion.
Red guide line ?is then at the end of the
parking space. The vehicle is almost paral-
lel in the parking space.
Reverse perpendicular parking with the
steering wheel at an angle :
Parking space marking
; Yellow guide line for the vehicle width
including the exterior mirrors, for current
steering wheel angle (dynamic)
X Drive past the parking space and bring the
vehicle to a standstill.
X Make sure that the reversing camera is
switched on .
The lane and the guide lines are shown.
X While the vehicle is at a standstill, turn the
steering wheel in the direction of the park-ing space until yellow guide line ;reaches
parking space marking :.
X Keep the steering wheel in that position
and reverse carefully. 222
Driving systemsDriving and parking
Page 226 of 417
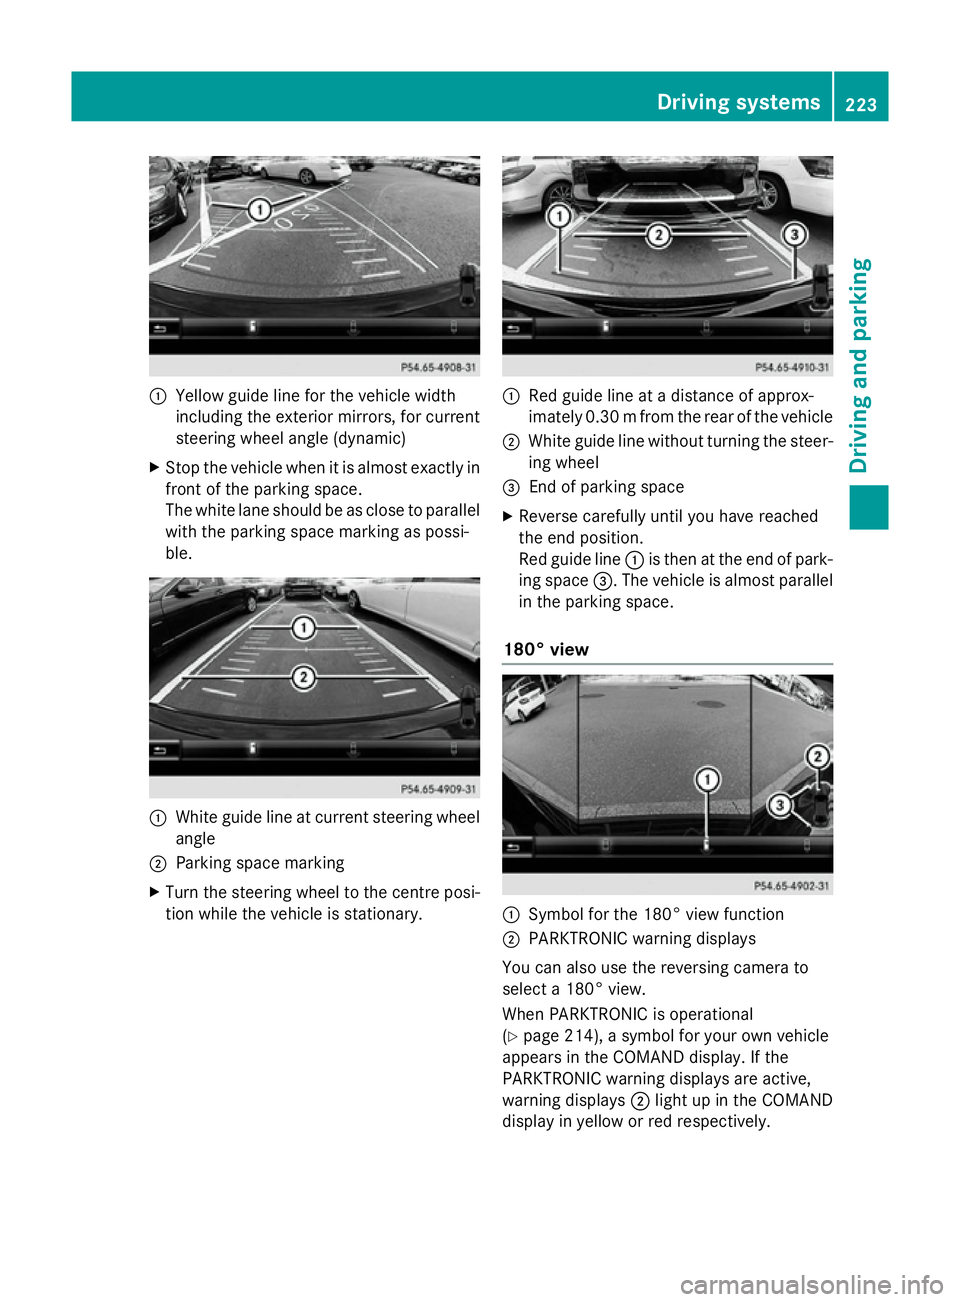
:
Yellow guide line for the vehicle width
including the exterior mirrors, for current
steering wheel angle (dynamic)
X Stop the vehicle when it is almost exactly in
front of the parking space.
The white lane should be as close to parallel
with the parking space marking as possi-
ble. :
White guide line at current steering wheel
angle
; Parking space marking
X Turn the steering wheel to the centre posi-
tion while the vehicle is stationary. :
Red guide line at a distance of approx-
imately 0.30 mfrom the rear of the vehicle
; White guide line without turning the steer-
ing wheel
= End of parking space
X Reverse carefully until you have reached
the end position.
Red guide line :is then at the end of park-
ing space =. The vehicle is almost parallel
in the parking space.
180° view :
Symbol for the 180° view function
; PARKTRONIC warning displays
You can also use the reversing camera to
select a 180° view.
When PARKTRONIC is operational
(Y page 214), a symbol for your own vehicle
appears in the COMAND display. If the
PARKTRONIC warning displays are active,
warning displays ;light up in the COMAND
display in yellow or red respectively. Driving systems
223Driving and parking Z
Page 228 of 417
The 360° camera will not function or will
function only in a limited manner:
R if the doors are open
R if the exterior mirrors are folded in
R if the boot lid is open
R in heavy rain, snow or fog
R at night or in very dark places
R if the cameras are exposed to very bright
light
R if the area is lit by fluorescent bulbs or LED
lighting (the display may flicker)
R if the camera lenses mist up, e.g. when
driving into a heated garage in winter, caus-
ing a rapid change in temperature
R if the camera lenses are dirty or covered.
Observe the notes on cleaning
(Y page 350)
R if the vehicle components in which the
cameras are fitted are damaged. In this
event, have the camera position and setting
checked at a qualified specialist workshop.
Do not use the 360° under such circumstan-
ces. You could otherwise injure others or
damage objects when parking the vehicle.
The guide lines in the COMAND display show
the distances to your vehicle. The distances
only apply to road level.
i The camera in the rear area is protected
from raindrops and dust by means of a flap.
This flap opens when the 360° camera is
activated.
The flap closes again when:
R you have finished the manoeuvring proc-
ess
R you switch off the engine
R you open the boot
See the notes on cleaning (Y page 350).
For technical reasons, the flap may remain
open briefly after the 360° camera has
been deactivated. On vehicles with height-adjustable chassis,
depending on technical conditions, leaving
the standard height can result in:
R inaccuracies in the guide lines
R inaccuracies in the display of generated
images (top view)
Activation conditions The 360° camera image can be displayed if:
R COMAND Online is switched on (see the
separate operating instructions)
R the 360° camera 360° camera function is switched on
i If the 360° camera is activated at speeds
above approximately 30 km/h, a warning
message appears.
The warning message disappears if:
R the vehicle's speed falls below approx-
imately 30 km/h. The 360° camera is
then activated.
R the message is confirmed with the %
button.
Switching the 360° camera on/off
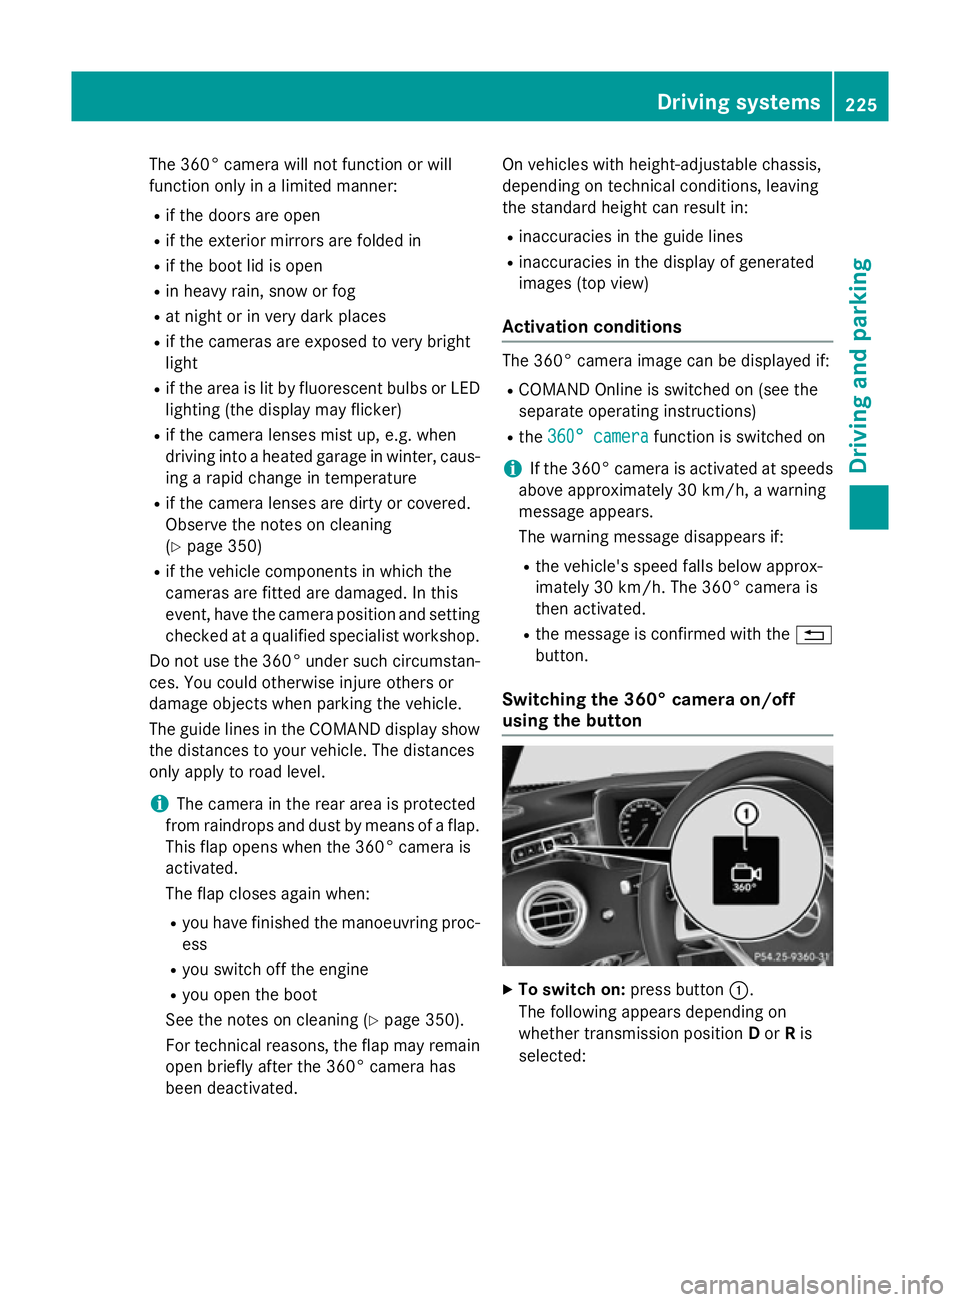
using the button X
To switch on: press button:.
The following appears depending on
whether transmission position Dor Ris
selected: Driving systems
225Driving and parking Z
Page 235 of 417
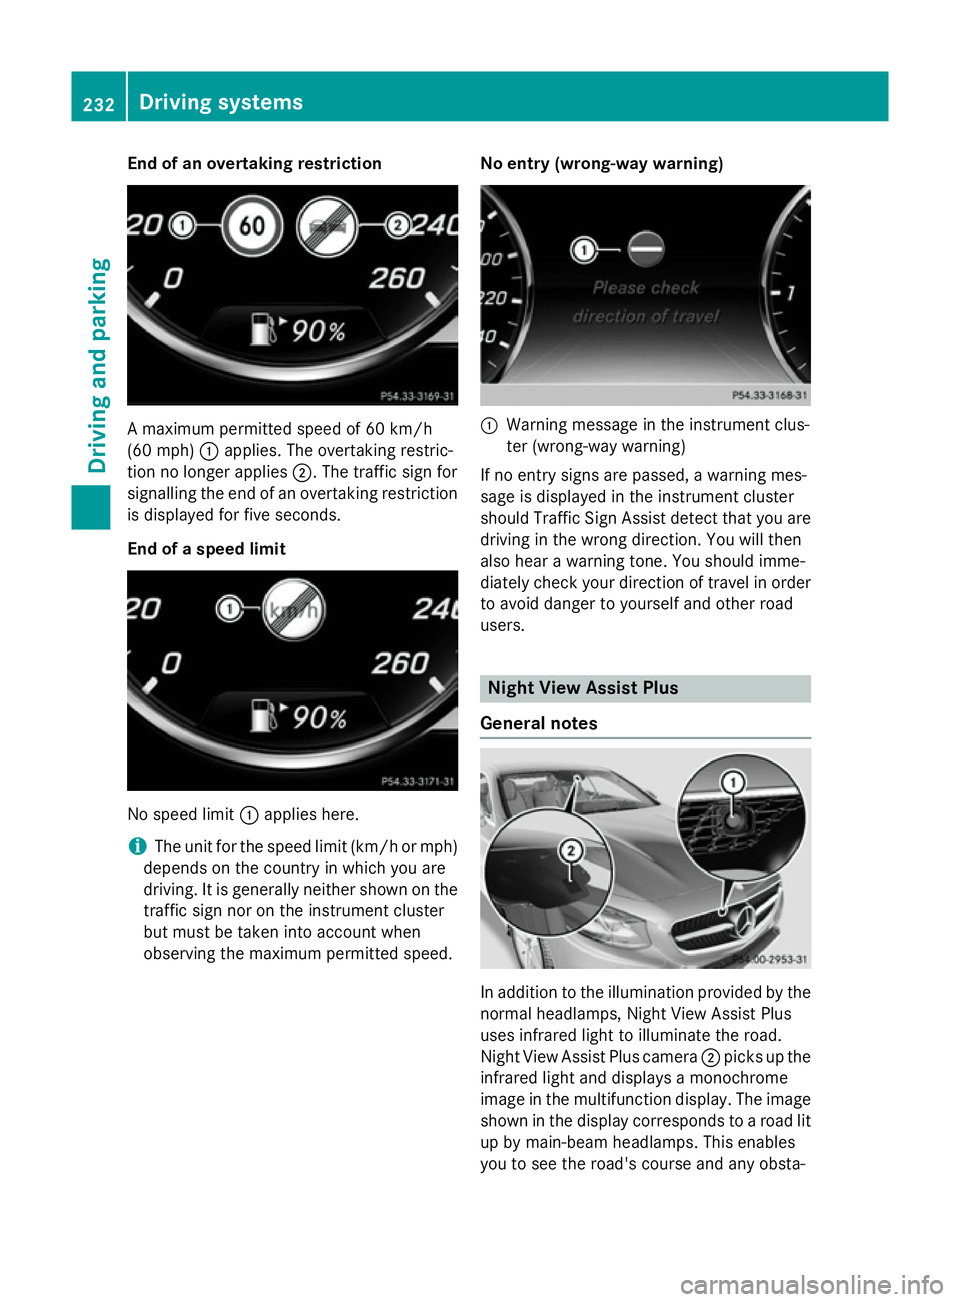
End of an overtaking restriction
A maximum permitted speed of 60 km/h
(60 mph) :applies. The overtaking restric-
tion no longer applies ;. The traffic sign for
signalling the end of an overtaking restriction
is displayed for five seconds.
End of a speed limit No speed limit
:applies here.
i The unit for the speed limit (km/h or mph)
depends on the country in which you are
driving. It is generally neither shown on the
traffic sign nor on the instrument cluster
but must be taken into account when
observing the maximum permitted speed. No entry (wrong-way warning) :
Warning message in the instrument clus-
ter (wrong-way warning)
If no entry signs are passed, a warning mes-
sage is displayed in the instrument cluster
should Traffic Sign Assist detect that you are
driving in the wrong direction. You will then
also hear a warning tone. You should imme-
diately check your direction of travel in order to avoid danger to yourself and other road
users. Night View Assist Plus
General notes In addition to the illumination provided by the
normal headlamps, Night View Assist Plus
uses infrared light to illuminate the road.
Night View Assist Plus camera ;picks up the
infrared light and displays a monochrome
image in the multifunction display. The image
shown in the display corresponds to a road lit
up by main-beam headlamps. This enables
you to see the road's course and any obsta- 232
Driving systemsDriving and parking
Page 236 of 417
cles in good time. When pedestrian recogni-
tion is active, pedestrians recognised by the
system are visually highlighted in colour in the
Night View Assist Plus display with small
frame corners.
In addition, an infrared camera is integrated
into the radiator trim :. The camera helps
detect pedestrians and animals. Observe the notes on cleaning the infrared camera
(Y page 351).
i Infrared light is not visible to the human
eye and therefore does not dazzle. Night
View Assist Plus can therefore remain
switched on even if there is oncoming traf- fic.
Important safety notes Night View Assist Plus is only an aid and is not
a substitute for attentive driving. Do not rely
on the Night View Assist Plus display. You are responsible for the distance to the vehicle in
front, for vehicle speed and for braking in
good time. Drive carefully and always adapt
your driving style to suit the prevailing road
and traffic conditions.
The system may be impaired or may not func-
tion:
R if there is poor visibility, e.g. due to snow,
rain, fog or spray
R if the windscreen is dirty, misted up or cov-
ered, for instance by a sticker, in the vicinity of the camera
R if the thermal imaging camera in the radia-
tor grille is dirty, misted up or covered
R on bends, hilltops or downhill gradients
R at high outside temperatures
Night View Assist Plus cannot display objects
directly in front of or beside the vehicle.
It may be the case that other objects are
marked or highlighted as well as pedestrians
and animals. Pedestrian and animal recognition General notes
Pedestrian or animal recognition may be
impaired or inoperative if:
R pedestrians or animals are partially or
entirely obscured by other objects, e.g.
parked vehicles
R the silhouette of the pedestrian or of the
animal in the Night View Assist Plus display
is incomplete or interrupted, e.g. by pow-
erful light reflections
R pedestrians or animals do not contrast with
the surroundings
R the camera system no longer recognises
pedestrians as persons due to special
clothing or other objects
R pedestrians are not in an upright position,
e.g. sitting, squatting or lying
R animals are not recognised by the system,
e.g. because of their size or shape
Pedestrian and animal recognition is deacti-
vated at temperatures above 32 †. The spot- light function and automatic activation are
then no longer active.
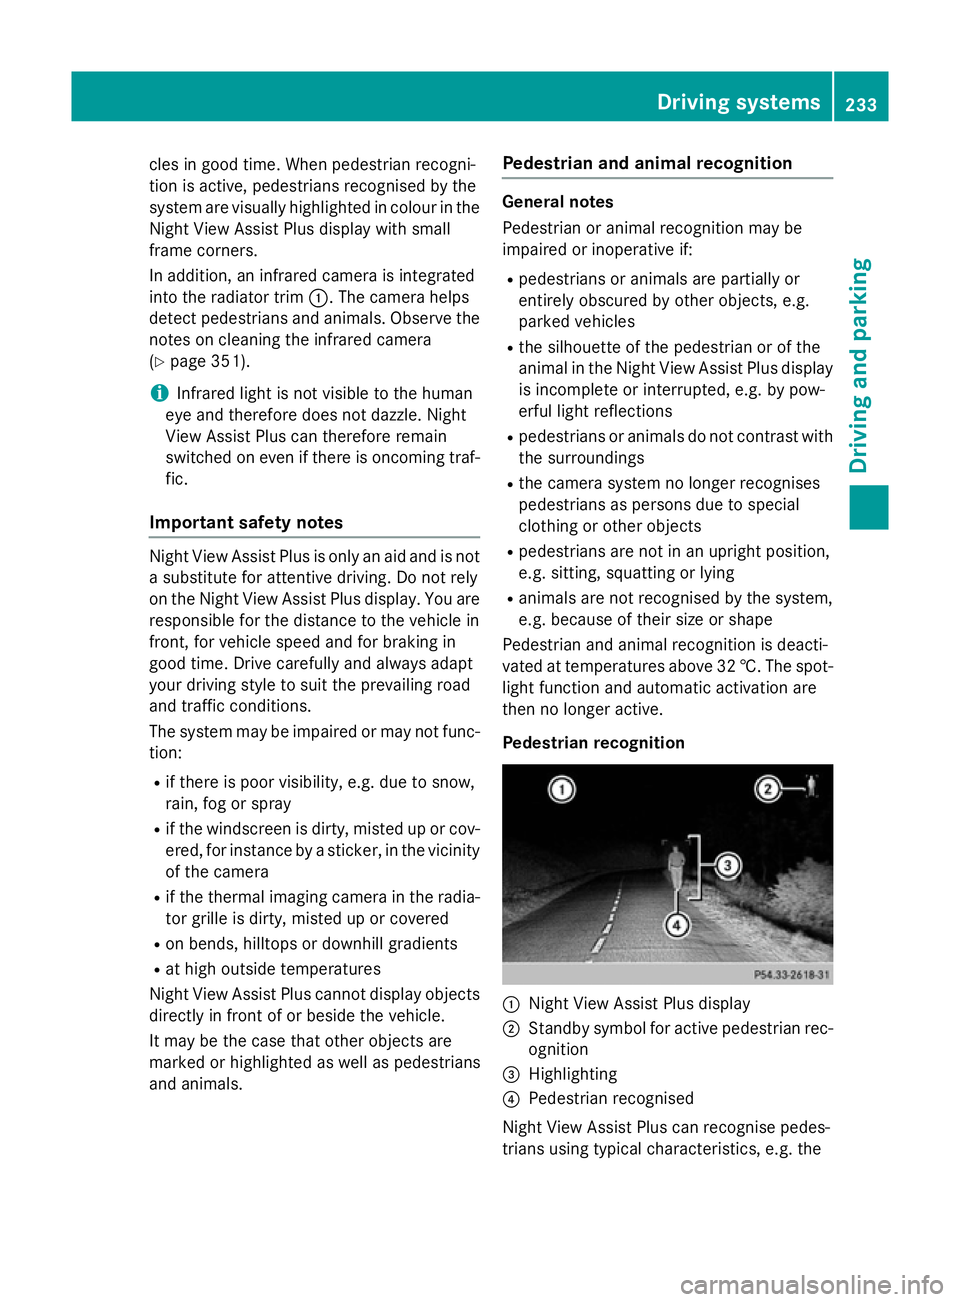
Pedestrian recognition :
Night View Assist Plus display
; Standby symbol for active pedestrian rec-
ognition
= Highlighting
? Pedestrian recognised
Night View Assist Plus can recognise pedes-
trians using typical characteristics, e.g. the Driving systems
233Driving and parking Z
Page 237 of 417
body contours and posture of a person stand-
ing upright.
Pedestrian recognition is then switched on
automatically if:
R Night View Assist Plus is activated
R you are driving faster than approximately
10 km/h
R it is dark
If pedestrian recognition is active, readiness
symbol ;appears. Persons who are detec-
ted are highlighted by framing =. If the
pedestrian recognition system has brought a
pedestrian to your attention, look through the
windscreen to evaluate the situation. The
actual distance to objects and pedestrians
cannot be gauged accurately by looking at a
screen.
Animal recognition
Animals can be recognised in the following
situations:
R darkness
R outside built-up areas
R below an outside temperature of 32 †
Night View Assist Plus can recognise larger
animals such as deer, cows or horses using
typical characteristics.
The system does not detect:
R smaller animals, e.g. dogs and cats
R animals whose silhouette is not clearly rec-
ognisable
When detected, animals are marked with
small coloured frame corners. In contrast to
pedestrian recognition, there is no separate
readiness symbol in the multifunction dis-
play. Activating/deactivating Night View
Assist Plus Activation conditions
You can only activate Night View Assist if all of
the following conditions have been fulfilled:
R the ignition is switched on (Y page 161) or
the engine has been started.
R the light switch is in the ÃorL posi-
tion.
R reverse gear has not been engaged.
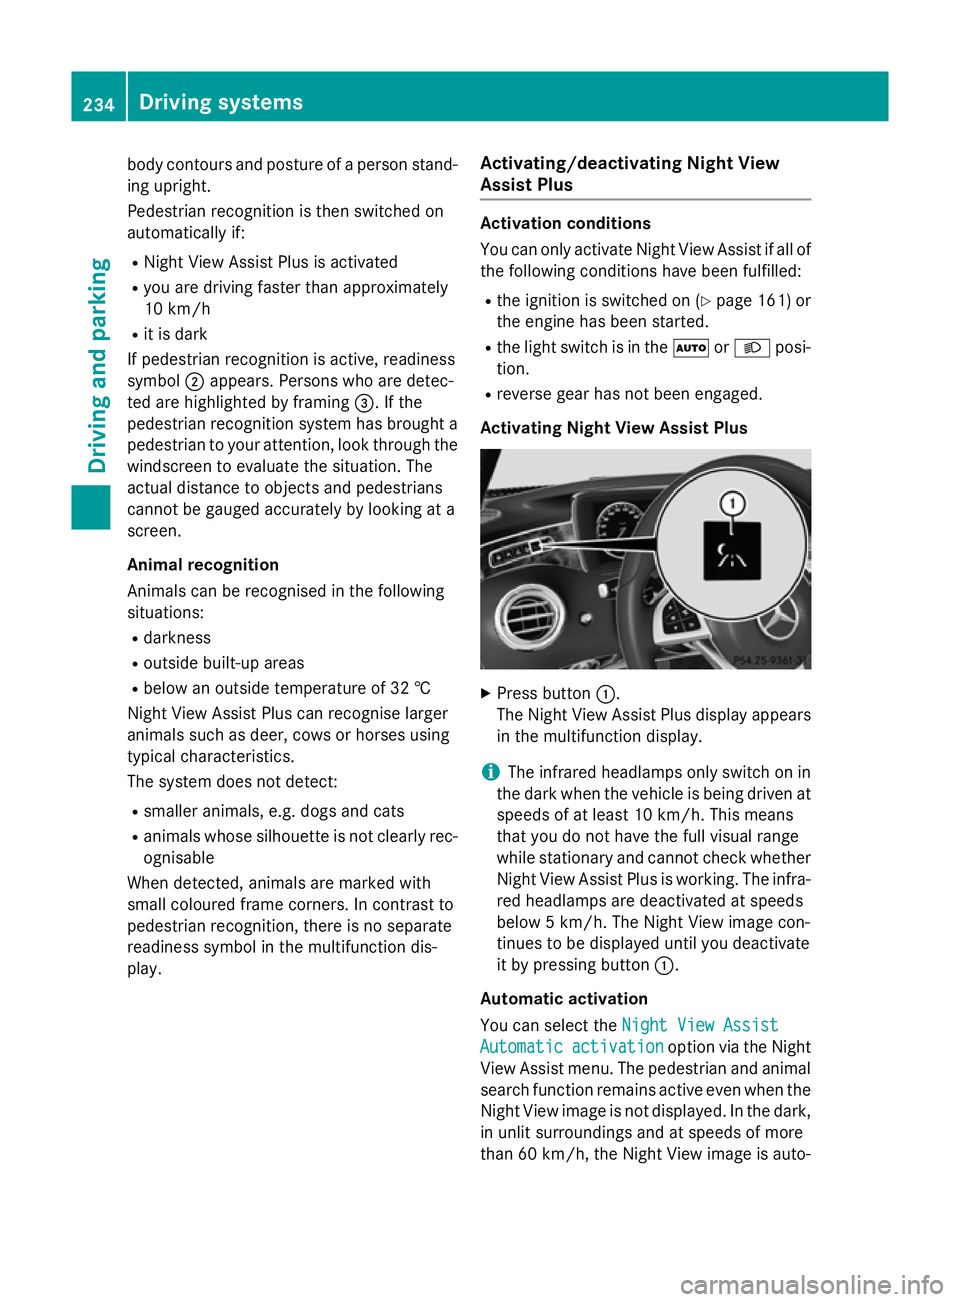
Activating Night View Assist Plus X
Press button :.
The Night View Assist Plus display appears in the multifunction display.
i The infrared headlamps only switch on in
the dark when the vehicle is being driven at speeds of at least 10 km/h. This means
that you do not have the full visual range
while stationary and cannot check whether
Night View Assist Plus is working. The infra- red headlamps are deactivated at speeds
below 5 km/h. The Night View image con-
tinues to be displayed until you deactivate
it by pressing button :.
Automatic activation
You can select the Night View Assist Night View Assist
Automatic Automatic activation
activation option via the Night
View Assist menu. The pedestrian and animal
search function remains active even when the
Night View image is not displayed. In the dark, in unlit surroundings and at speeds of more
than 60 km/ h,the Night View image is auto- 234
Driving systemsDriving an
d parking