2015 MERCEDES-BENZ GLK-CLASS SUV flat tire
[x] Cancel search: flat tirePage 336 of 386
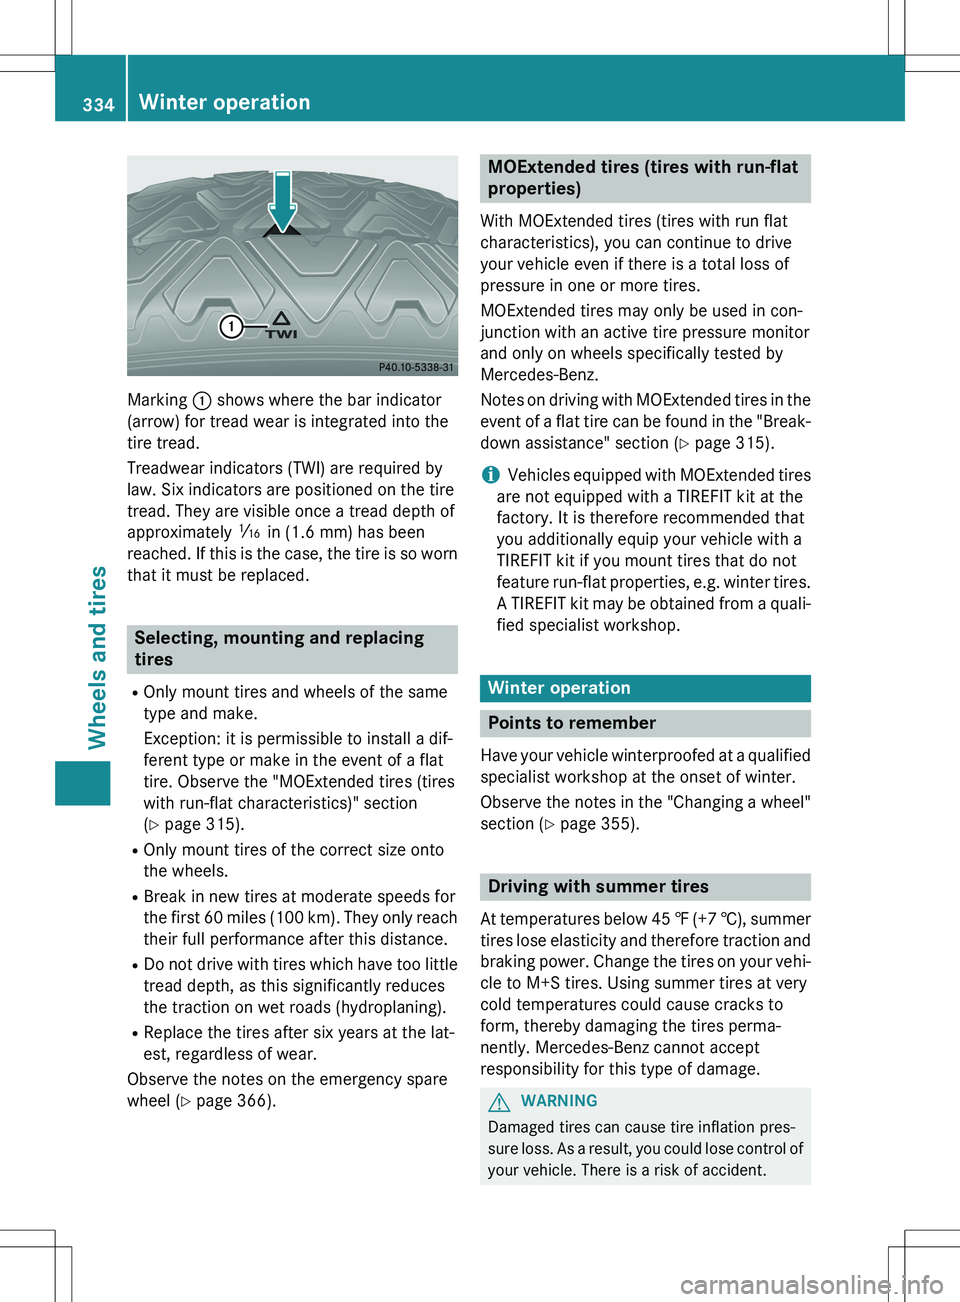
Marking : shows where the bar indicator
(arrow) for tread wear is integrated into the
tire tread.
Treadwear indicators (TWI) are required by
law. Six indicators are positioned on the tire
tread. They are visible once a tread depth of
approximately á in (1.6 mm) has been
reached. If this is the case, the tire is so worn that it must be replaced.
Selecting, mounting and replacing
tires
R Only mount tires and wheels of the same
type and make.
Exception: it is permissible to install a dif-
ferent type or make in the event of a flat
tire. Observe the "MOExtended tires (tires
with run-flat characteristics)" section
(Y page 315).
R Only mount tires of the correct size onto
the wheels.
R Break in new tires at moderate speeds for
the first 60 miles (100 km). They only reach
their full performance after this distance.
R Do not drive with tires which have too little
tread depth, as this significantly reduces
the traction on wet roads (hydroplaning).
R Replace the tires after six years at the lat-
est, regardless of wear.
Observe the notes on the emergency spare
wheel ( Y page 366).
MOExtended tires (tires with run-flat
properties)
With MOExtended tires (tires with run flat
characteristics), you can continue to drive
your vehicle even if there is a total loss of
pressure in one or more tires.
MOExtended tires may only be used in con-
junction with an active tire pressure monitor
and only on wheels specifically tested by
Mercedes-Benz.
Notes on driving with MOExtended tires in the
event of a flat tire can be found in the "Break-
down assistance" section ( Y page 315).
iVehicles equipped with MOExtended tires
are not equipped with a TIREFIT kit at the
factory. It is therefore recommended that
you additionally equip your vehicle with a
TIREFIT kit if you mount tires that do not
feature run-flat properties, e.g. winter tires. A TIREFIT kit may be obtained from a quali- fied specialist workshop.
Winter operation
Points to remember
Have your vehicle winterproofed at a qualifiedspecialist workshop at the onset of winter.
Observe the notes in the "Changing a wheel"
section ( Y page 355).
Driving with summer tires
At temperatures below 45 ‡ (+7 †), summer
tires lose elasticity and therefore traction and
braking power. Change the tires on your vehi-cle to M+S tires. Using summer tires at very
cold temperatures could cause cracks to
form, thereby damaging the tires perma-
nently. Mercedes-Benz cannot accept
responsibility for this type of damage.
GWARNING
Damaged tires can cause tire inflation pres-
sure loss. As a result, you could lose control ofyour vehicle. There is a risk of accident.
334Winter operation
Wheels and tires
Page 338 of 386
ieving an increased driving force (cutting
action).
For more information on driving with the
emergency spare wheel, see ( Y page 366).
Tire pressure
Tire pressure specifications
Operation with a trailer: the applicable
value for the rear tires is the maximum tire
pressure value stated in the table inside the
fuel filler flap.
Use a suitable pressure gauge to check the
tire pressure. The outer appearance of a tire
does not permit any reliable conclusion about the tire pressure. You can also check the tire
pressure using the on-board computer.
GWARNING
Underinflated or overinflated tires pose the
following risks:
R the tires may burst, especially as the load
and vehicle speed increase.
R the tires may wear excessively and/or
unevenly, which may greatly impair tire
traction.
R the driving characteristics, as well as steer-
ing and braking, may be greatly impaired.
There is a risk of an accident.
Follow recommended tire inflation pressures
and check the pressure of all the tires includ-
ing the spare wheel:
R monthly, at least
R if the load changes
R before beginning a long journey
R under different operating conditions, e.g.
off-road driving
If necessary, correct the tire pressure.
The recommended tire pressures for the tires
mounted at the factory can be found on the
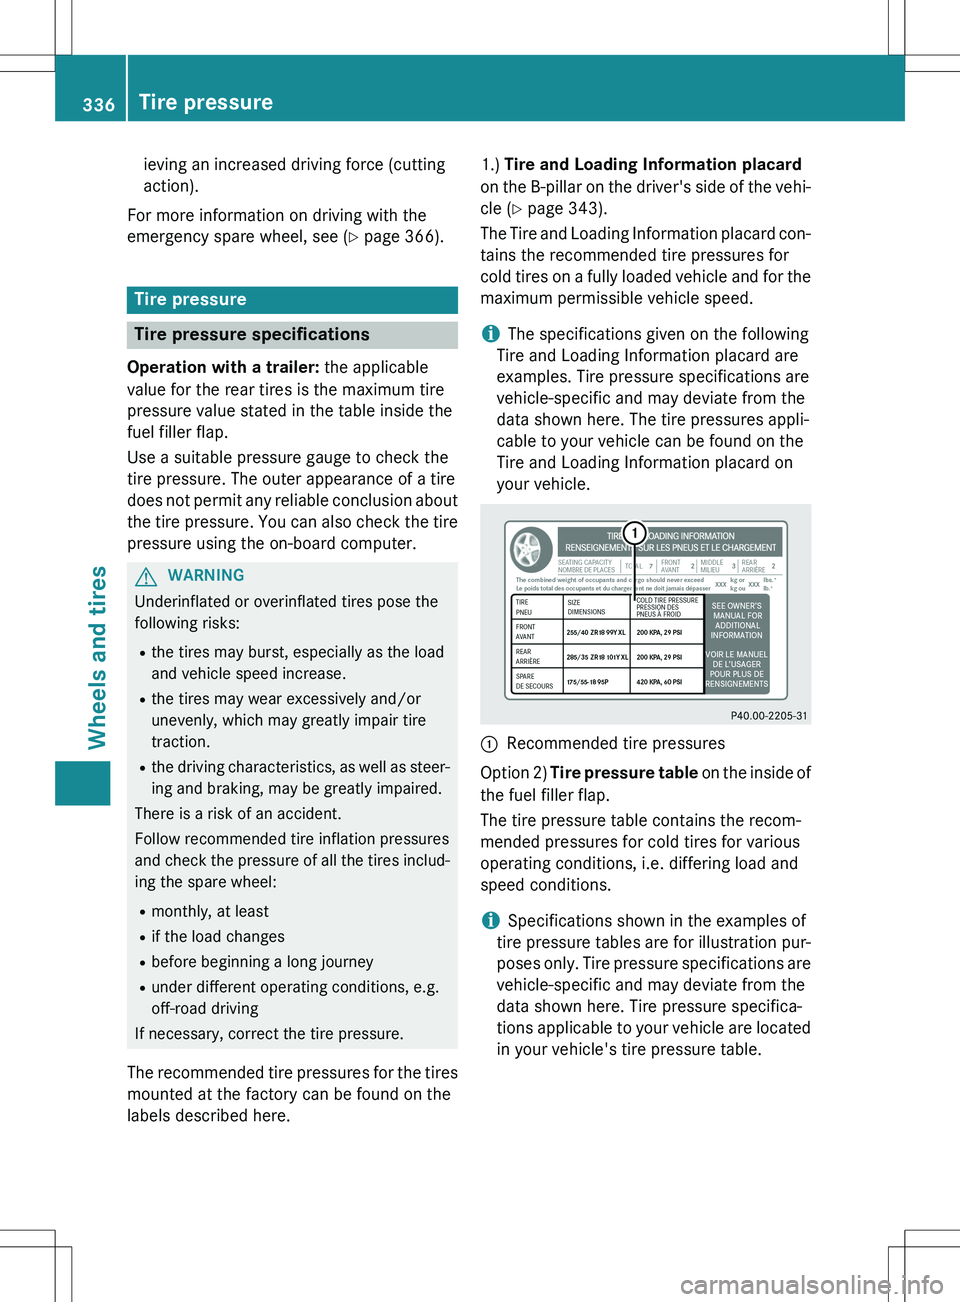
labels described here. 1.)
Tire and Loading Information placard
on the B-pillar on the driver's side of the vehi-
cle ( Y page 343).
The Tire and Loading Information placard con- tains the recommended tire pressures for
cold tires on a fully loaded vehicle and for the
maximum permissible vehicle speed.
iThe specifications given on the following
Tire and Loading Information placard are
examples. Tire pressure specifications are
vehicle-specific and may deviate from the
data shown here. The tire pressures appli-
cable to your vehicle can be found on the
Tire and Loading Information placard on
your vehicle.
:Recommended tire pressures
Option 2) Tire pressure table on the inside of
the fuel filler flap.
The tire pressure table contains the recom-
mended pressures for cold tires for various
operating conditions, i.e. differing load and
speed conditions.
iSpecifications shown in the examples of
tire pressure tables are for illustration pur-
poses only. Tire pressure specifications are
vehicle-specific and may deviate from the
data shown here. Tire pressure specifica-
tions applicable to your vehicle are located in your vehicle's tire pressure table.
336Tire pressure
Wheels and tires
Page 340 of 386
Important notes on tire pressure
GWARNING
If the tire pressure drops repeatedly, the
wheel, valve or tire may be damaged. Tire
pressure that is too low may result in a tire
blow-out. There is a risk of an accident.R Check the tire for foreign objects.
R Check whether the wheel is losing air or the
valve is leaking.
If you are unable to rectify the damage, con-
tact a qualified specialist workshop.
GWARNING
If you fit unsuitable accessories onto tire
valves, the tire valves may be overloaded and malfunction, which can cause tire pressure
loss. Due to their design, retrofitted tire pres- sure monitors keep the tire valve open. This
can also result in tire pressure loss. There is a
risk of an accident.
Only screw the standard valve cap or other
valve caps approved by Mercedes-Benz for
your vehicle onto the tire valve.
To test tire pressure, use a suitable tire pres- sure gauge. The outer appearance of a tire
does not permit any reliable conclusion about
the tire pressure. On vehicles equipped with
the electronic tire pressure monitor, the tire
pressure can be checked in the on-board
computer.
The tire temperature and pressure increase
when the vehicle is in motion. This is depend- ent on the driving speed and the load.
Therefore, you should only correct tire pres-
sures when the tires are cold.
The tires are cold:
R if the vehicle has been parked without
direct sunlight on the tires for at least three
hours and
R if the vehicle has not been driven further
than 1 mile (1.6 km)
The tire temperature changes depending on
the outside temperature, the vehicle speed
and the tire load. If the tire temperature changes by 18 ‡ (10 †), the tire pressure
changes by approximately 10 kPa (0.1 bar/
1.5 psi). Take this into account when check-
ing the pressure of warm tires. Only correct
the tire pressure if it is too low for the current
operating conditions. If you check the tire
pressure when the tires are warm, the result-ing value will be higher than if the tires were
cold. This is normal. Do not reduce the tire
pressure to the value specified for cold tires.
The tire pressure would otherwise be too low.
Observe the recommended tire pressures for
cold tires:
R on the Tire and Loading Information placard
on the B-pillar on the driver's side
R in the tire pressure table on the inside of the
fuel filler flap
R printed in yellow on the rim of the emer-
gency/collapsible spare wheel (depending
on vehicle equipment)
Underinflated or overinflated tires
Underinflation
GWARNING
Tires with pressure that is too low can over-
heat and burst as a consequence. In addition, they also suffer from excessive and/or irreg-
ular wear, which can severely impair the brak-
ing properties and the driving characteristics.There is a risk of an accident.
Avoid tire pressures that are too low in all the
tires, including the spare wheel.
Underinflated tires may:
R wear quickly and unevenly
R have an adverse effect on fuel consumption
R overheat, leading to tire defects
R have an adverse effect on handling charac-
teristics
338Tire pressure
Wheels and tires
Page 341 of 386

Overinflation
GWARNING
Tires with excessively high pressure can burst
because they are damaged more easily by
road debris, potholes etc. In addition, they
also suffer from irregular wear, which can
severely impair the braking properties and thedriving characteristics. There is a risk of an
accident.
Avoid tire pressures that are too high in all the
tires, including the spare wheel.
Overinflated tires may: R have an adverse effect on handling charac-
teristics
R wear quickly and unevenly
R be more susceptible to damage
R have an adverse effect on ride comfort
R increase the braking distance
Maximum tire pressures
Never exceed the maximum permissible tire
inflation pressure. Always observe the rec-
ommended tire pressure for your vehicle
when adjusting the tire pressure
(Y page 336).
:Example: maximum permissible tire pres-
sure
iThe actual values for tires are vehicle-
specific and may deviate from the values in
the illustration.
Checking the tire pressures
Important safety notes
Observe the "tire pressure information" sec-
tion ( Y page 336).
Information on air pressure for the tires on
your vehicle can be found:
R on the vehicle's Tire and Loading Informa-
tion placard on the B-pillar
R on the tire pressure label on the fuel filler
flap
R in the "Tire pressure information" section
Checking tire pressures manually
To determine and set the correct tire pres-
sure, proceed as follows: XRemove the valve cap of the tire that is to
be checked.
X Press the tire pressure gauge securely onto
the valve.
X Read the tire pressure and compare with
the recommended values of the Tire and
Loading Information placard on the B-pillar
of the driver's side of your vehicle.
X If necessary, increase the tire pressure to
attain the recommended value
(Y page 336).
X If the tire pressure is too high, let out air. Do
so by pressing down the metal pin in the
valve. Then check the tire pressure again
using the tire pressure checker.
X Screw the valve cap onto the valve.
X Repeat these steps for the other tires.
Tire pressure monitor
General notes
If a tire pressure monitor is installed, the vehi-
cle's wheels have sensors that monitor the
tire pressures in all four tires. The tire pres-
sure monitor warns you if the pressure drops
in one or more of the tires. The tire pressure
Tire pressure339
Wheels and tires
Z
Page 342 of 386

monitor only functions if the corresponding
sensors are installed on all wheels.
Information on tire pressures is displayed in
the multifunction display. After a few minutesof driving, the current tire pressure of each
tire is shown in the
Service menu of the mul-
tifunction display.
Example: current tire pressure display
For information on the message display, refer to the "Checking the tire pressure electroni-
cally" section ( Y page 341).
Important safety notes
GWARNING
Each tire, including the spare (if provided),
should be checked at least once a month
when cold and inflated to the pressure rec-
ommended by the vehicle manufacturer on
the Tire and Loading Information placard on
the driver's door B-pillar or the tire pressure
label on the inside of the fuel filler flap. If your
vehicle has tires of a different size than the
size indicated on the Tire and Loading Infor-
mation placard or the tire pressure label, you should determine the proper tire pressure for
those tires.
As an added safety feature, your vehicle has
been equipped with a tire pressure monitoring
system (TPMS) that illuminates a low tire pres-
sure telltale when one or more of your tires
are significantly underinflated. Accordingly,
when the low tire pressure telltale illuminates,
you should stop and check your tires as soon
as possible, and inflate them to the proper
pressure. Driving on a significantly underin-
flated tire causes the tire to overheat and can lead to tire failure. Underinflation also
reduces fuel efficiency and tire tread life, and
may affect the vehicle's handling and stop-
ping ability.
Please note that the TPMS is not a substitutefor proper tire maintenance, and it is the driv-
er's responsibility to maintain correct tire
pressure, even if underinflation has not
reached the level to trigger illumination of the
TPMS low tire pressure telltale.
Your vehicle has also been equipped with a
TPMS malfunction indicator to indicate if the
system is not operating properly. The TPMS
malfunction indicator is combined with the
low tire pressure telltale. When the system
detects a malfunction, the warning lamp will
flash for approximately a minute and then
remain continuously illuminated. This
sequence will be repeated every time the vehi- cle is started as long as the malfunction
exists.
When the malfunction indicator is illuminated,
the system may not be able to detect or signal low tire pressure as intended. TPMS malfunc-
tions may occur for a variety of reasons,
including the installation of incompatible
replacement or alternate tires or wheels on
the vehicle that prevent the TPMS from func-
tioning properly. Always check the TPMS mal-
function telltale after replacing one or more
tires or wheels on your vehicle to ensure that
the replacement or alternate tires and wheels allow the TPMS to continue to function prop-
erly.
It is the driver's responsibility to set the tire
pressure to that recommended for cold tires
which is suitable for the operating situation
( Y page 336). Note that the correct tire pres-
sure for the current operating situation must
first be taught-in to the tire pressure monitor. If there is a substantial loss of pressure, the
warning threshold for the warning message isaligned to the reference values taught-in.
Restart the tire pressure monitor after adjust-
ing the pressure of the cold tires
( Y page 342). The current pressures are
saved as new reference values. As a result, a
340Tire pressure
Wheels and tires
Page 350 of 386
ered with ice or snow. Take appropriate care
when driving.
! Avoid wheelspin. This can lead to damage
to the drive train.
Temperature
GWARNING
The temperature grade for this tire is estab-
lished for a tire that is properly inflated and
not overloaded. Excessive speed, underinfla-
tion, or excessive loading, either separately or
in combination, can cause excessive heat
build-up and possible tire failure.
The temperature grades are A (the highest), B,
and C. These represent the tire's resistance
to the generation of heat and its ability to dis- sipate heat when tested under controlled
conditions on a specified indoor laboratory
test wheel. Sustained high temperature can
cause the material of the tire to degenerate
and reduce tire life, and excessive tempera-
ture can lead to sudden tire failure. The grade
C corresponds to a level of performance
which all passenger car tires must meet under the Federal Motor Vehicle Safety Standard
No. 109. Grades B and A represent higher
levels of performance on the laboratory test
wheel than the minimum required by law.
Tire labeling
Overview
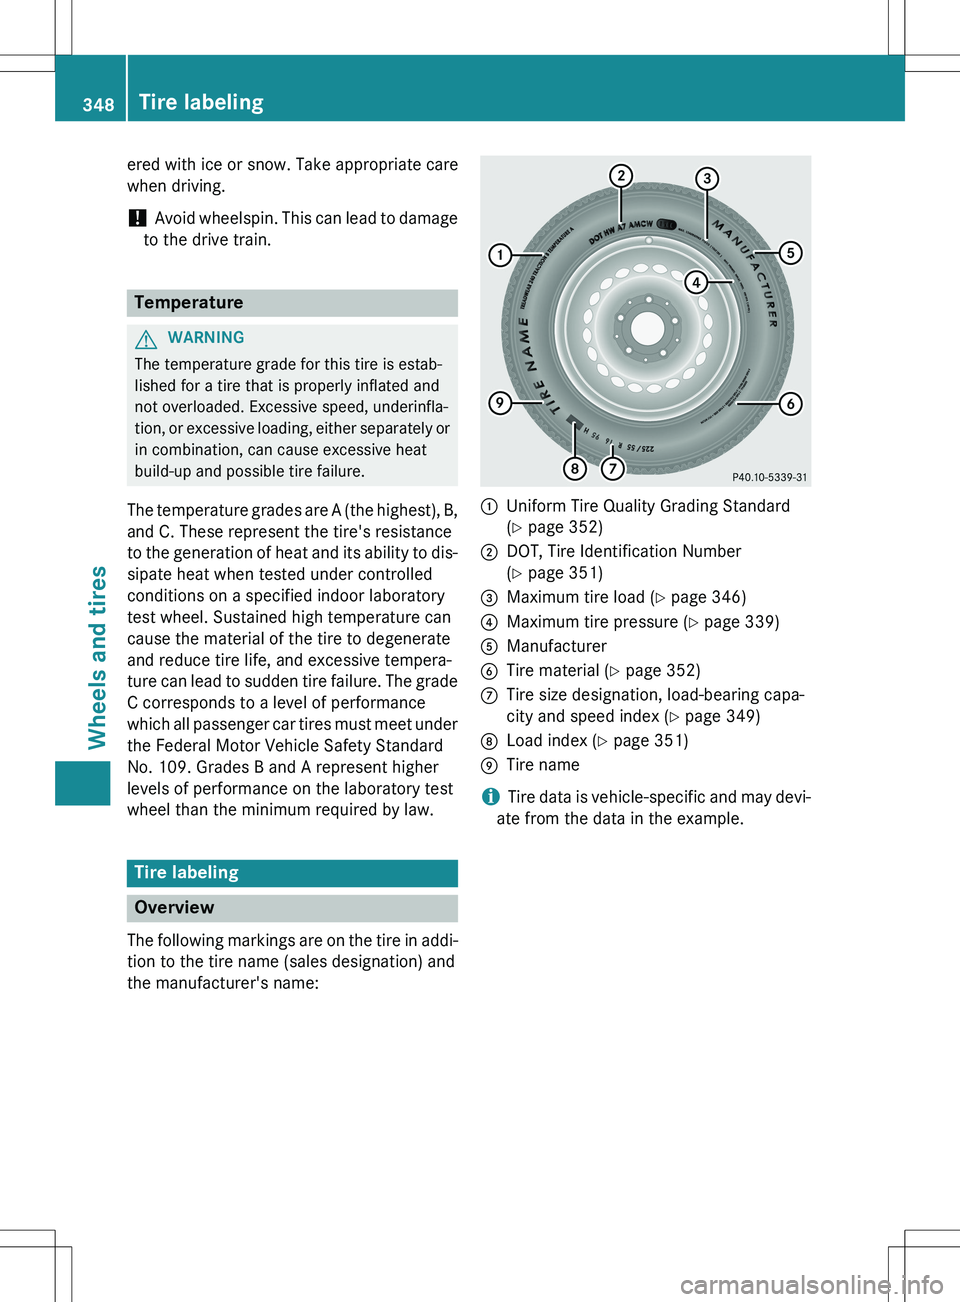
The following markings are on the tire in addi-tion to the tire name (sales designation) and
the manufacturer's name:
:Uniform Tire Quality Grading Standard
( Y page 352)
;DOT, Tire Identification Number
(Y page 351)
=Maximum tire load ( Y page 346)
?Maximum tire pressure ( Y page 339)
AManufacturer
BTire material ( Y page 352)
CTire size designation, load-bearing capa-
city and speed index ( Y page 349)
DLoad index ( Y page 351)
ETire name
iTire data is vehicle-specific and may devi-
ate from the data in the example.
348Tire labeling
Wheels and tires
Page 357 of 386
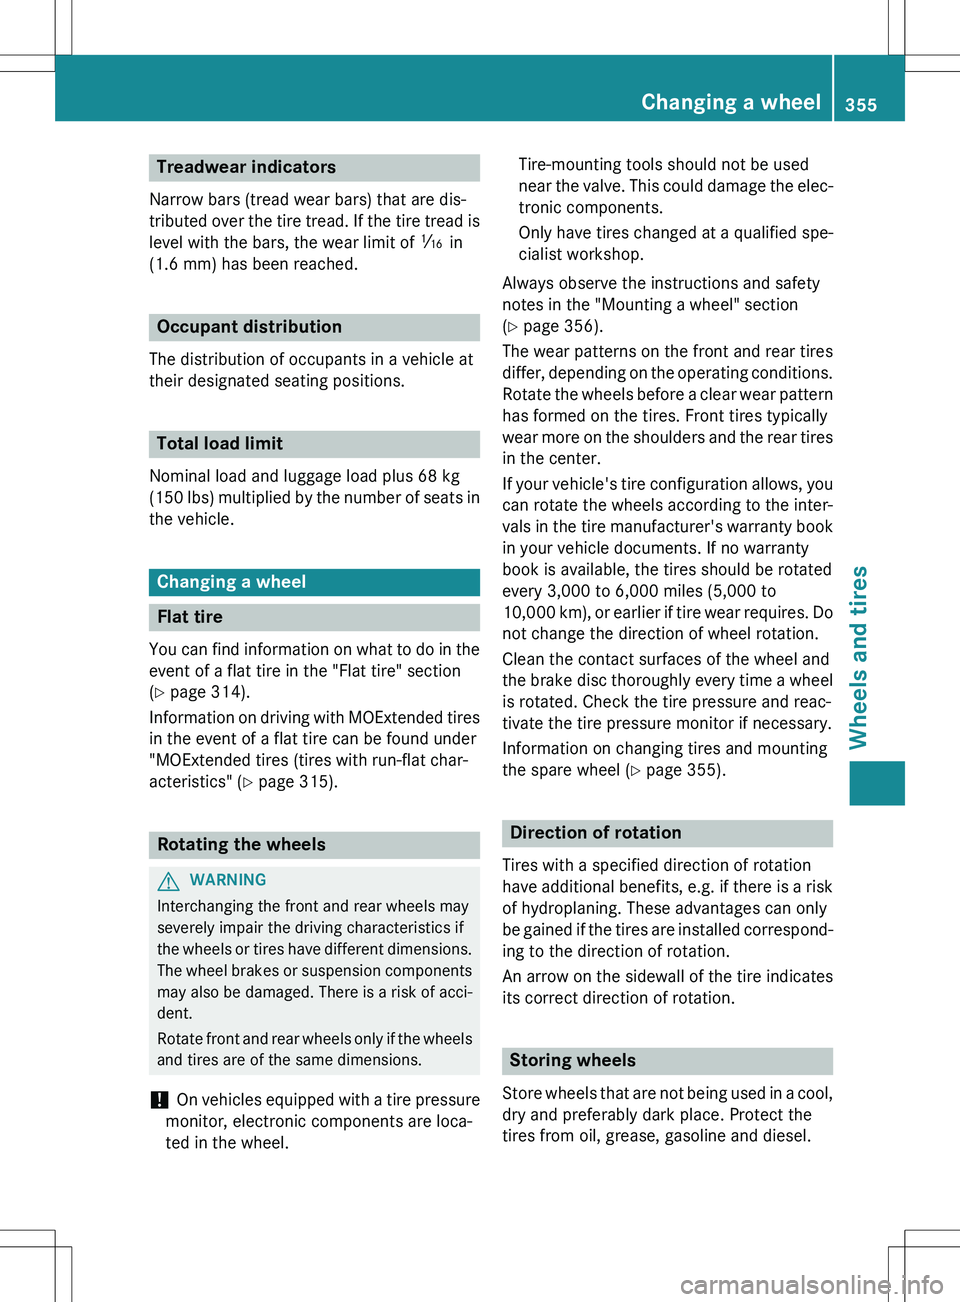
Treadwear indicators
Narrow bars (tread wear bars) that are dis-
tributed over the tire tread. If the tire tread islevel with the bars, the wear limit of á in
(1.6 mm) has been reached.
Occupant distribution
The distribution of occupants in a vehicle at
their designated seating positions.
Total load limit
Nominal load and luggage load plus 68 kg
(150 lbs) multiplied by the number of seats in the vehicle.
Changing a wheel
Flat tire
You can find information on what to do in theevent of a flat tire in the "Flat tire" section
( Y page 314).
Information on driving with MOExtended tires
in the event of a flat tire can be found under
"MOExtended tires (tires with run-flat char-
acteristics" ( Y page 315).
Rotating the wheels
GWARNING
Interchanging the front and rear wheels may
severely impair the driving characteristics if
the wheels or tires have different dimensions.
The wheel brakes or suspension components
may also be damaged. There is a risk of acci-
dent.
Rotate front and rear wheels only if the wheels and tires are of the same dimensions.
! On vehicles equipped with a tire pressure
monitor, electronic components are loca-
ted in the wheel. Tire-mounting tools should not be used
near the valve. This could damage the elec-
tronic components.
Only have tires changed at a qualified spe-cialist workshop.
Always observe the instructions and safety
notes in the "Mounting a wheel" section
( Y page 356).
The wear patterns on the front and rear tires
differ, depending on the operating conditions.
Rotate the wheels before a clear wear pattern has formed on the tires. Front tires typically
wear more on the shoulders and the rear tires in the center.
If your vehicle's tire configuration allows, you can rotate the wheels according to the inter-
vals in the tire manufacturer's warranty book
in your vehicle documents. If no warranty
book is available, the tires should be rotated
every 3,000 to 6,000 miles (5,000 to
10,000 km), or earlier if tire wear requires. Do
not change the direction of wheel rotation.
Clean the contact surfaces of the wheel and
the brake disc thoroughly every time a wheel
is rotated. Check the tire pressure and reac-
tivate the tire pressure monitor if necessary.
Information on changing tires and mounting
the spare wheel ( Y page 355).
Direction of rotation
Tires with a specified direction of rotation
have additional benefits, e.g. if there is a risk
of hydroplaning. These advantages can only
be gained if the tires are installed correspond- ing to the direction of rotation.
An arrow on the sidewall of the tire indicates
its correct direction of rotation.
Storing wheels
Store wheels that are not being used in a cool,
dry and preferably dark place. Protect the
tires from oil, grease, gasoline and diesel.
Changing a wheel355
Wheels and tires
Z
Page 359 of 386

Raising the vehicle
GWARNING
If you do not position the jack correctly at theappropriate jacking point of the vehicle, the
jack could tip over with the vehicle raised.
There is a risk of injury.
Only position the jack at the appropriate jack-
ing point of the vehicle. The base of the jack
must be positioned vertically, directly under
the jacking point of the vehicle.
Observe the following when raising the vehi-
cle: R To raise the vehicle, only use the vehicle-
specific jack that has been tested and
approved by Mercedes-Benz. If used incor-
rectly, the jack could tip over with the vehi-
cle raised.
R The jack is designed only to raise and hold
the vehicle for a short time while a wheel
is being changed. It is not suited for per-
forming maintenance work under the vehi-
cle.
R Avoid changing the wheel on uphill and
downhill slopes.
R Before raising the vehicle, secure it from
rolling away by applying the parking brake
and inserting wheel chocks. Do not disen-
gage the parking brake while the vehicle is
raised.
R The jack must be placed on a firm, flat and
non-slip surface. On a loose surface, a
large, flat, load-bearing underlay must be
used. On a slippery surface, a non-slip
underlay must be used, e.g. rubber mats.
R Do not use wooden blocks or similar
objects as a jack underlay. Otherwise, the
jack will not be able to achieve its load-
bearing capacity due to the restricted
height.
R Make sure that the distance between the
underside of the tires and the ground does
not exceed 1.2 in (3 cm).
R Never place your hands and feet under the
raised vehicle. R
Do not lie under the vehicle.
R Do not start the engine when the vehicle is
raised.
R Never open or close a door or the tailgate
when the vehicle is raised.
R Make sure that no persons are present in
the vehicle when the vehicle is raised.
! The jack is designed exclusively for jack-
ing up the vehicle at the jacking points.
Otherwise, your vehicle could be damaged.
X Using lug wrench :, loosen the bolts on
the wheel you wish to change by about one full turn. Do not unscrew the bolts com-
pletely.
The jacking points are located just behind the
front wheel housings and just in front of the
rear wheel housings (arrows).
X Take the ratchet wrench out of the vehicle
tool kit and place it on the hexagon nut of
the jack so that the letters AUF are visible.
Mounting a wheel357
Wheels and tires
Z