2015 MERCEDES-BENZ GLE SUV remote control
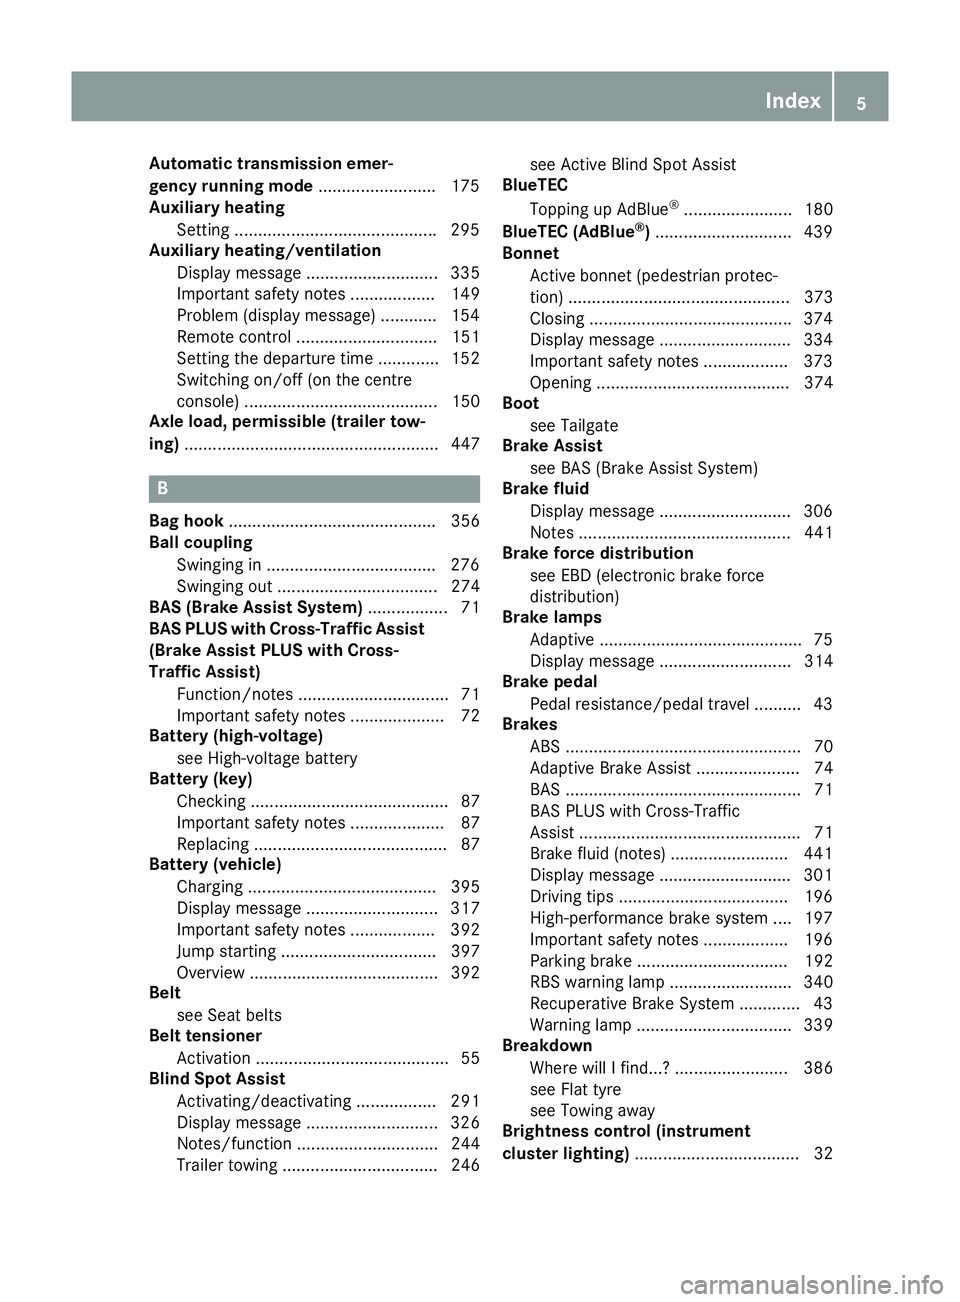
[x] Cancel search: remote controlPage 8 of 453
Automatic transmission emer-
gency running mode
.........................175
Auxiliary heating
Setting .......................................... .295
Auxiliary heating/ventilation
Display message ............................ 335
Important safety notes .................. 149
Problem (display message) ............ 154
Remote control .............................. 151
Setting the departure time ............. 152
Switching on/off (on the centre
console) ......................................... 150
Axle load, permissible (trailer tow-
ing) ...................................................... 447 B
Bag hook ............................................ 356
Ball coupling
Swinging in ................................... .276
Swinging out .................................. 274
BAS (Brake Assist System) ................. 71
BAS PLUS with Cross-Traffic Assist (Brake Assist PLUS with Cross-
Traffic Assist)
Function/notes ................................ 71
Important safety notes .................... 72
Battery (high-voltage)
see High-voltage battery
Battery (key)
Checking .......................................... 87
Important safety notes .................... 87
Replacing ......................................... 87
Battery (vehicle)
Charging ........................................ 395
Display message ............................ 317
Important safety notes .................. 392
Jump starting ................................. 397
Overview ........................................ 392
Belt
see Seat belts
Belt tensioner
Activation ......................................... 55
Blind Spot Assist
Activating/deactivating ................. 291
Display message ............................ 326
Notes/function .............................. 244
Trailer towing ................................. 246 see Active Blind Spot Assist
BlueTEC
Topping up AdBlue ®
....................... 180
BlueTEC (AdBlue ®
) ............................ .439
Bonnet
Active bonnet (pedestrian protec-tion) ............................................... 373
Closing .......................................... .374
Display message ............................ 334
Important safety notes .................. 373
Opening ......................................... 374
Boot
see Tailgate
Brake Assist
see BAS (Brake Assist System)
Brake fluid
Display message ............................ 306
Notes ............................................. 441
Brake force distribution
see EBD (electronic brake force
distribution)
Brake lamps
Adaptive .......................................... .75
Display message ............................ 314
Brake pedal
Pedal resistance/pedal travel .......... 43
Brakes
ABS .................................................. 70
Adaptive Brake Assist ...................... 74
BAS .................................................. 71
BAS PLUS with Cross-Traffic
Assist ............................................... 71
Brake fluid (notes) ........................ .441
Display message ............................ 301
Driving tips ................................... .196
High-performance brake system .... 197
Important safety notes .................. 196
Parking brake ................................ 192
RBS warning lamp .......................... 340
Recuperative Brake System ............. 43
Warning lamp ................................. 339
Breakdown
Where will I find...? ........................ 386
see Flat tyre
see Towing away
Brightness control (instrument
cluster lighting) ................................... 32 Index
5
Page 21 of 453
Pulling away
General notes ................................ 161
Trailer ............................................ 161
Pulling away (automatic transmis-
sion) ....................................................1 61Q
QR code Mercedes-Benz Guide App ................. 1
Rescue card ..................................... 28
Qualified specialist workshop ........... 28R
RACETIMER (on-board computer) .... 298
Radiator cover ................................... 374
Radio
Selecting a station ......................... 287
see separate operating instructions
Radio-based vehicle components
Declaration of conformity ................ 27
Rain closing feature
Sliding sunroof ............................... 102
Rain closing feature (panorama
sliding sunroof) ................................. 103
RBS (Recuperative Brake System)
Warning lamp ................................. 340
Reading lamp ..................................... 127
Rear bench seat
Folding the bench seat forwards/back ............................................... 355
Rear compartment
Setting the air vents ..................... .155
Setting the temperature ................ 141
Rear foglamp
Display message ............................ 314
Switching on/off ........................... 122
Rear seat
Adjusting ....................................... 111
Rear window heating
Problem (fault) ............................... 145
Switching on/off ........................... 144
Rear window wiper
Replacing the wiper blade .............. 133
Switching on/off ........................... 131
Rear-compartment seat belt sta-
tus indicator ........................................ 48 Rear-view mirror
Anti-dazzle mode (automatic) ....... .118
Dipping (manual) ........................... 117
Recuperative Brake System
Driving safety systems ..................... 43
Important safety notes .................... 43
Refuelling
Fuel gauge ....................................... 32
Important safety notes .................. 175
Notes for Mercedes‑ AMG vehi-
cles ................................................ 437
Refuelling (PLUG-IN HYBRID vehi-
cles) ............................................... 176
Refuelling process ......................... 176
see Fuel
Remote control
Auxiliary heating/ventilation .......... 151
Changing the batteries (auxiliary
heating) ......................................... 152
Garage door opener ....................... 367
Programming (garage door
opener) .......................................... 367
Replacing bulbs
General notes ................................ 128
Important safety notes .................. 128
Overview of bulb type s.................. 128
Removing/replacing the cover
(front wheel arch) .......................... 129
Replacing the battery (auxiliary
heating remote control) .................... 152
Rescue card ......................................... 28
Reserve (fuel tank)
see Fuel
Reserve fuel
Display message ............................ 318
Warning lamp ................................. 347
Residual heat (climate control) ........ 146
Restraint system
Display message ............................ 309
Introduction ..................................... 43
Warning lamp ................................. 346
Warning lamp (function) ................... 44
Rev counter ........................................ 281
Reversing camera
Cleaning instructions ..................... 383
Display in the multimedia system .. 233
Function/note s............................. 232 18
Index
Page 87 of 453
Useful information
i This Owner's Manual describes all models,
series and optional equipment for your vehi-
cle that were available at the time of going to
press. National variations are possible. Note
that your vehicle may not be equipped with all
of the functions described. This is also the
case for systems and functions relevant to
safety.
i Read the information on qualified specialist
workshops: (Y page 28). Key
Important safety notes
United Kingdom only: G
WARNING
When the double locks are activated, the
doors can no longer be opened from the
inside. People in the vehicle can no longer get out, e.g. in hazardous situations. There is a
risk of injury.
Therefore, do not leave any people unsuper-
vised in the vehicle, particularly children, eld-
erly people or people in need of special assis-
tance. Do not activate the double lock when
people are in the vehicle.
All countries: G
WARNING
If children are left unsupervised in the vehicle, they can:
R open doors and endanger other persons or
road users
R climb out and be injured by the traffic
R operate vehicle equipment and, for exam-
ple, trap themselves.
Children could also set the vehicle in motion, for example by:
R releasing the parking brake
R shifting the automatic transmission out of
park position P
R starting the engine. There is a risk of an accident and injury.
When leaving the vehicle, always take the key
with you and lock the vehicle. Never leave
children unattended in the vehicle. Always
keep the key out of reach of children. G
WARNING
If you attach heavy or large objects to the key, the key could be unintentionally turned in the
ignition lock. This could cause the engine to
be switched off. There is a risk of an accident.
Do not attach any heavy or large objects to the
key. Remove any bulky keyrings before insert-
ing the key into the ignition lock.
! Keep the key away from strong magnetic
fields. Otherwise, the remote control function could be affected.
Strong magnetic fields can occur in the vicin-
ity of powerful electrical installations.
Do not keep the key: R with electronic devices, e.g. a mobile phone
or another key
R with metallic objects, e.g. coins or metal film
R inside metallic objects, e.g. a metal case
This can affect the key's functionality.
Do not keep the KEYLESS-GO or KEYLESS-GO
Start function key in the temperature-controlled
cup holder. Otherwise, the KEYLESS-GO or KEY- LESS-GO Start function key will not be detected.
Vehicles with KEYLESS-GO start function: do
not keep the key in the luggage compartment.
Otherwise, the key may not be detected, e.g.
when starting the engine using the Start/Stop
button.
Only for the United Kingdom: if the vehicle
has been locked with the key from the outside,
the double lock function is activated as stand-
ard. It is then not possible to open the doors
from inside the vehicle. 84
KeyOpening and closing
Page 92 of 453
Problems with the key
Problem
Possible causes/consequences and
M
MSolutions You can no longer lock or
unlock the vehicle using
the key. The key battery is discharged or nearly discharged.
X Check the key battery (Y page 87) and replace if necessary
(Y page 87).
If this does not work: X Unlock (Y page 92) or lock (Y page 93) the vehicle using the
emergency key element. There is interference from a powerful source of radio waves.
X Unlock (Y page 92) or lock (Y page 93) the vehicle using the
emergency key element. The key is faulty.
X Unlock (Y page 92) or lock (Y page 93) the vehicle using the
emergency key element.
X Have the key checked at a qualified specialist workshop. You can no longer lock or
unlock the vehicle using
KEYLESS-GO. KEYLESS-GO was deactivated.
X Reactivate KEYLESS-GO (Y page 85). The key battery is discharged or nearly discharged.
X Check the key battery (Y page 87) and replace if necessary
(Y page 87).
If this does not work: X Unlock (Y page 92) or lock (Y page 93) the vehicle using the
emergency key element. There is interference from a powerful source of radio waves.
X Unlock (Y page 92) or lock (Y page 93) the vehicle using the
emergency key element. There is a fault with KEYLESS-GO.
X Lock/unlock the vehicle using the remote control function of the
key.
X Have the vehicle and key checked at a qualified specialist work-
shop.
If the vehicle can also not be locked/unlocked using the remote con-
trol function:
X Unlock (Y page 92) or lock (Y page 93) the vehicle using the
emergency key element.
X Have the vehicle and key checked at a qualified specialist work-
shop. Key
89Opening and closing Z
Page 100 of 453
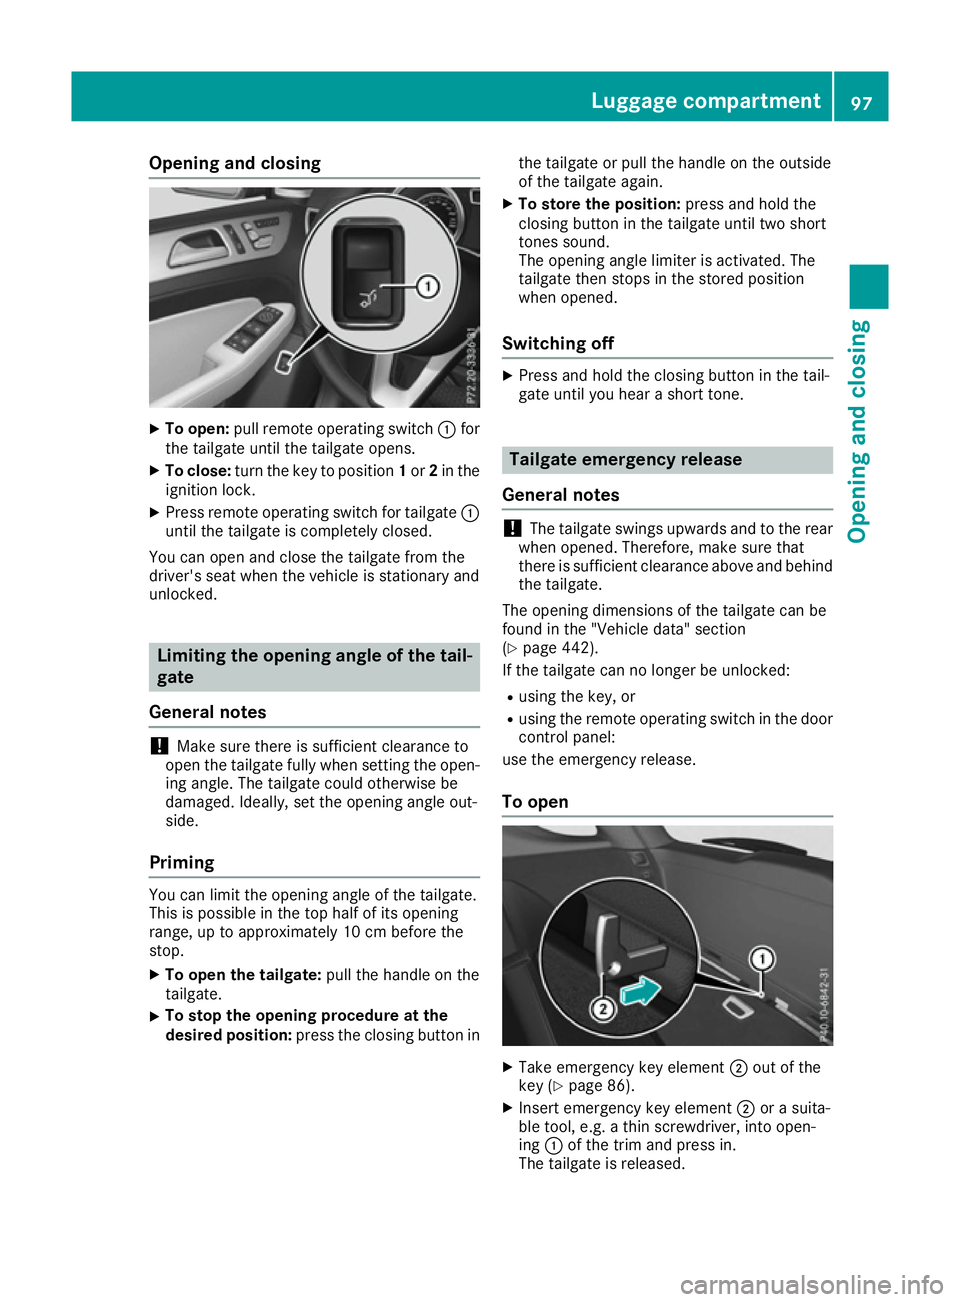
Opening and closing
X
To open: pull remote operating switch :for
the tailgate until the tailgate opens.
X To close: turn the key to position 1or 2in the
ignition lock.
X Press remote operating switch for tailgate :
until the tailgate is completely closed.
You can open and close the tailgate from the
driver's seat when the vehicle is stationary and
unlocked. Limiting the opening angle of the tail-
gate
General notes !
Make sure there is sufficient clearance to
open the tailgate fully when setting the open- ing angle. The tailgate could otherwise be
damaged. Ideally, set the opening angle out-
side.
Priming You can limit the opening angle of the tailgate.
This is possible in the top half of its opening
range, up to approximately 10 cm before the
stop.
X To open the tailgate: pull the handle on the
tailgate.
X To stop the opening procedure at the
desired position:
press the closing button in the tailgate or pull the handle on the outside
of the tailgate again.
X To store the position: press and hold the
closing button in the tailgate until two short
tones sound.
The opening angle limiter is activated. The
tailgate then stops in the stored position
when opened.
Switching off X
Press and hold the closing button in the tail-
gate until you hear a short tone. Tailgate emergency release
General notes !
The tailgate swings upwards and to the rear
when opened. Therefore, make sure that
there is sufficient clearance above and behind
the tailgate.
The opening dimensions of the tailgate can be
found in the "Vehicle data" section
(Y page 442).
If the tailgate can no longer be unlocked:
R using the key, or
R using the remote operating switch in the door
control panel:
use the emergency release.
To open X
Take emergency key element ;out of the
key (Y page 86).
X Insert emergency key element ;or a suita-
ble tool, e.g. a thin screwdriver, into open-
ing :of the trim and press in.
The tailgate is released. Luggage compartment
97Opening and closing Z
Page 153 of 453
Flammable materials such as leaves, grass or
twigs may ignite if they come into contact
with:
R hot parts of the exhaust system
R the exhaust gas itself
There is a risk of fire.
When the auxiliary heating is switched on,
make sure that:
R no flammable materials come into contact
with hot vehicle components
R the exhaust gas can escape from the
exhaust pipe unhindered
R the exhaust gas does not come into contact
with flammable materials.
The auxiliary heating is fitted under the front
wing on the left-hand side of the vehicle. The
emissions outlet is found behind the left front
wheel. ! Operating the auxiliary heating/ventilation
draws on the vehicle battery. After you have
heated or ventilated the vehicle a maximum of two times, drive for a longer distance.
Switch the auxiliary heating on regularly once a month for about ten minutes.
The auxiliary heating heats the air in the vehicle
interior to the set temperature. This occurs with- out using the heat of the running engine. The
auxiliary heating is operated directly using the
vehicle's fuel. For this reason, the tank content
must be at least at reserve fuel level to ensure
that the auxiliary heating functions.
The auxiliary heating or auxiliary ventilation
automatically adjusts to changes in tempera-
ture and weather conditions. For this reason,
the auxiliary heating could switch from ventila-
tion mode to heating mode or from heating
mode to ventilation mode.
The auxiliary heating switches off when the
engine is switched off. The auxiliary ventilation
switches off when you turn the key to position 2
(Y page 158).
The auxiliary heating switches off automatically after 50 minutes. This time limit can be altered.
To do this, visit a qualified specialist workshop.
You cannot use the auxiliary ventilation to cool
the vehicle interior to a temperature lower than
the outside temperature. Before switching on X
Turn the key to position 2in the ignition lock
(Y page 158).
X Set the desired temperature.
The auxiliary heating/ventilation can be activa-
ted even when climate control is set to manual.
Optimum comfort can be attained when the sys-
tem is set to automatic mode. Set the temper-
ature to 22 †.
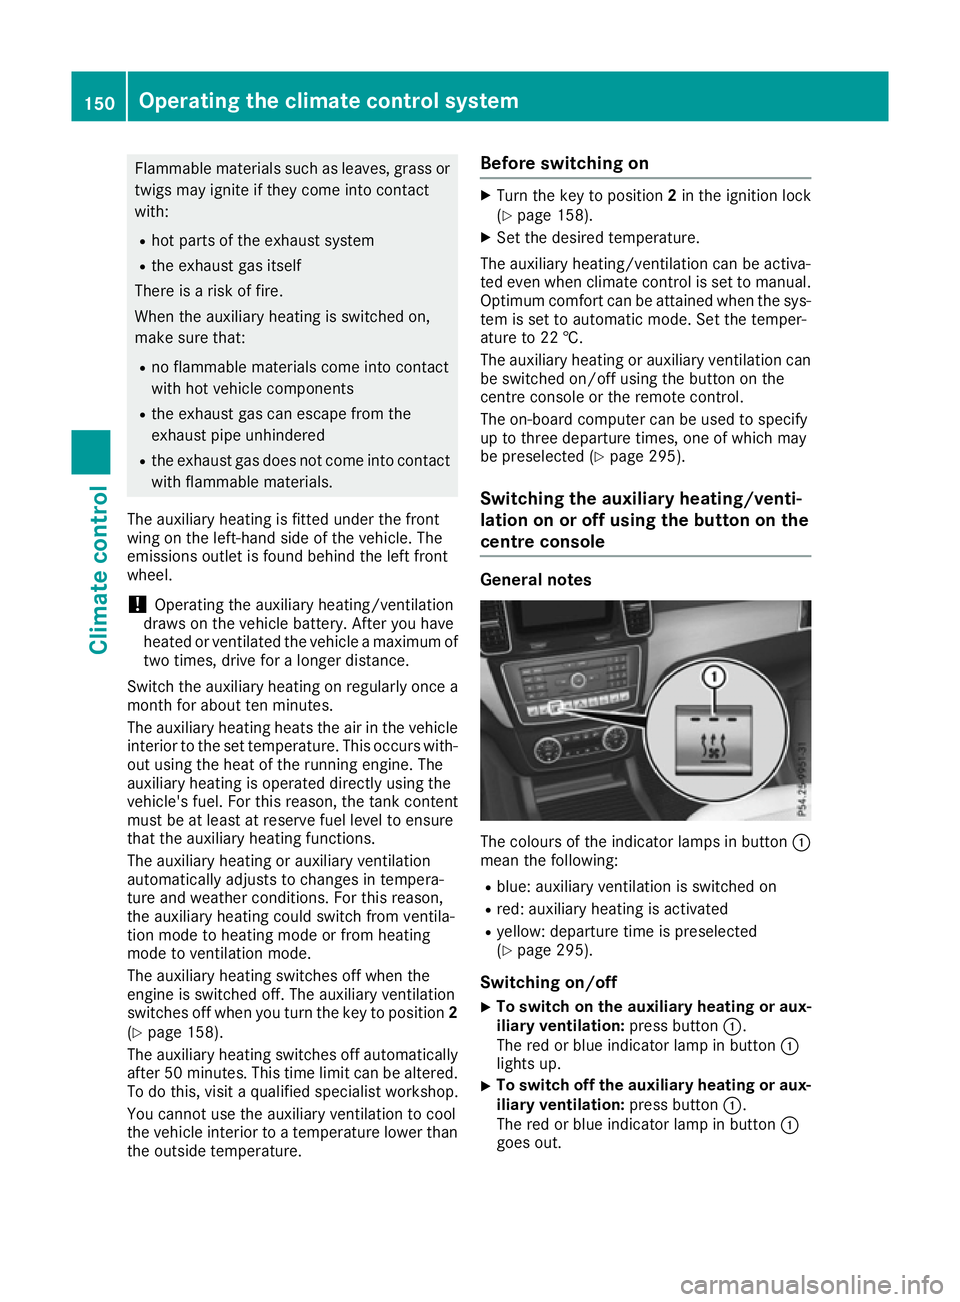
The auxiliary heating or auxiliary ventilation can
be switched on/off using the button on the
centre console or the remote control.
The on-board computer can be used to specify
up to three departure times, one of which may
be preselected (Y page 295).
Switching the auxiliary heating/venti-
lation on or off using the button on the
centre console General notes
The colours of the indicator lamps in button
:
mean the following:
R blue: auxiliary ventilation is switched on
R red: auxiliary heating is activated
R yellow: departure time is preselected
(Y page 295).
Switching on/off X To switch on the auxiliary heating or aux-
iliary ventilation:
press button:.
The red or blue indicator lamp in button :
lights up.
X To switch off the auxiliary heating or aux-
iliary ventilation: press button:.
The red or blue indicator lamp in button :
goes out. 150
Operating the climate control systemClimate control
Page 154 of 453
Switching the auxiliary heating/venti-
lation on or off using the remote control
General notes
Your vehicle comes with one remote control.
You may use two additional remote controls for
your vehicle. For more information, please con-
tact a qualified specialist workshop.
Store the remote control for the auxiliary heat-
ing so that the auxiliary heating cannot be
switched on unintentionally. In particular,
ensure that the remote control for the auxiliary
heating is kept out of the reach of children.
The remote control has a range of approximately
300 metres. This range is reduced by:
R sources of radio interference
R solid objects between the remote control and
the vehicle
R the remote control being in an unfavourable
position in relation to the vehicle
R transmitting from an enclosed space
If the remote control battery is low, the battery
symbol on the left of the display is shown as
empty. Replace the remote control battery and
observe the important safety notes when doing so (Y page 152).
Activating and deactivating the auxiliary
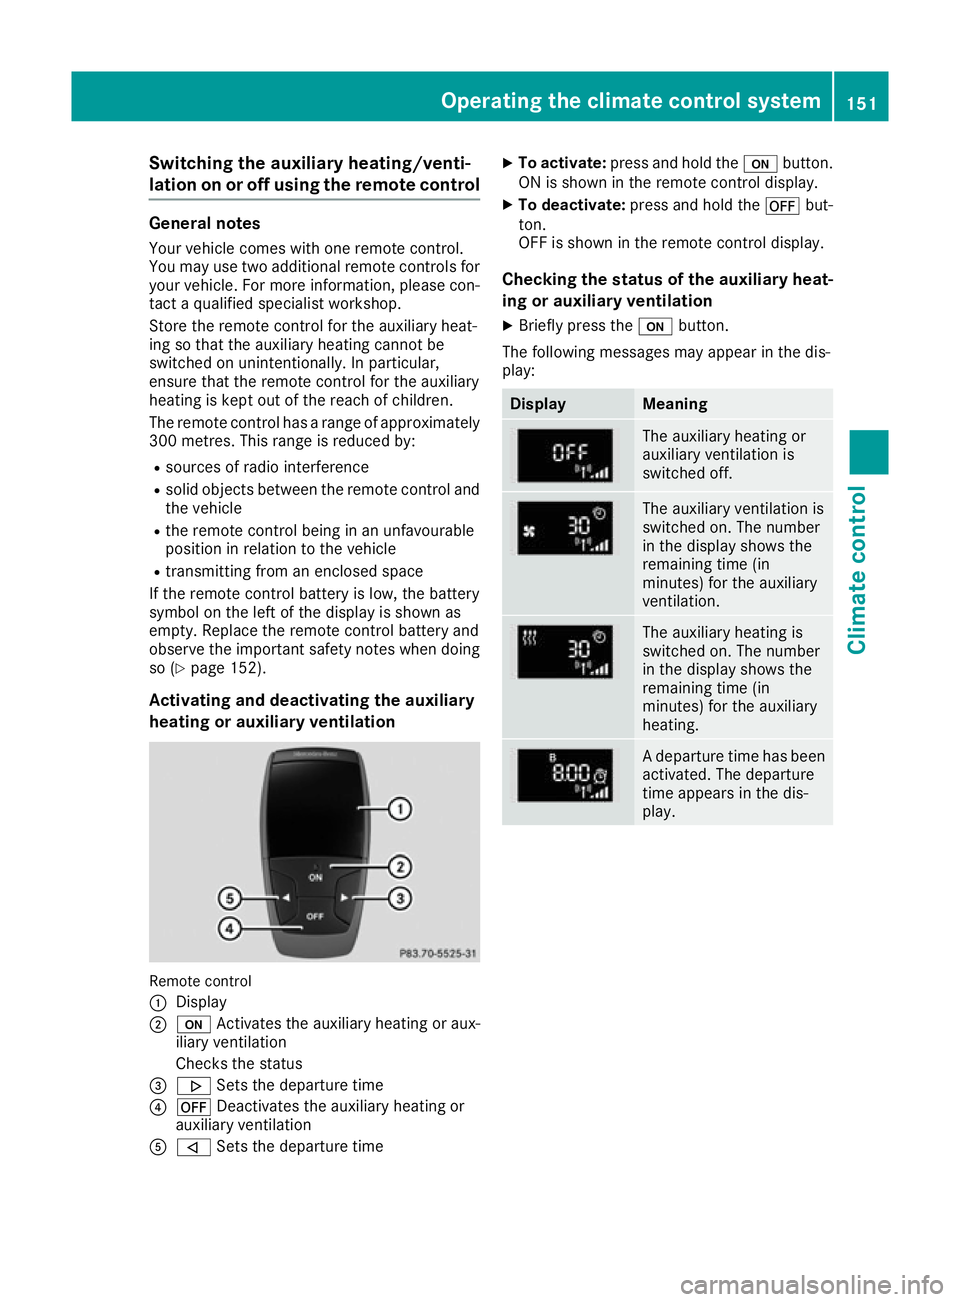
heating or auxiliary ventilation Remote control
:
Display
; u Activates the auxiliary heating or aux-
iliary ventilation
Checks the status
= . Sets the departure time
? ^ Deactivates the auxiliary heating or
auxiliary ventilation
A , Sets the departure time X
To activate: press and hold the ubutton.
ON is shown in the remote control display.
X To deactivate: press and hold the ^but-
ton.
OFF is shown in the remote control display.
Checking the status of the auxiliary heat-
ing or auxiliary ventilation
X Briefly press the ubutton.
The following messages may appear in the dis-
play: Display Meaning
The auxiliary heating or
auxiliary ventilation is
switched off.
The auxiliary ventilation is
switched on. The number
in the display shows the
remaining time (in
minutes) for the auxiliary
ventilation.
The auxiliary heating is
switched on. The number
in the display shows the
remaining time (in
minutes) for the auxiliary
heating.
A departure time has been
activated. The departure
time appears in the dis-
play. Operating the climate control system
151Climate control Z
Page 155 of 453
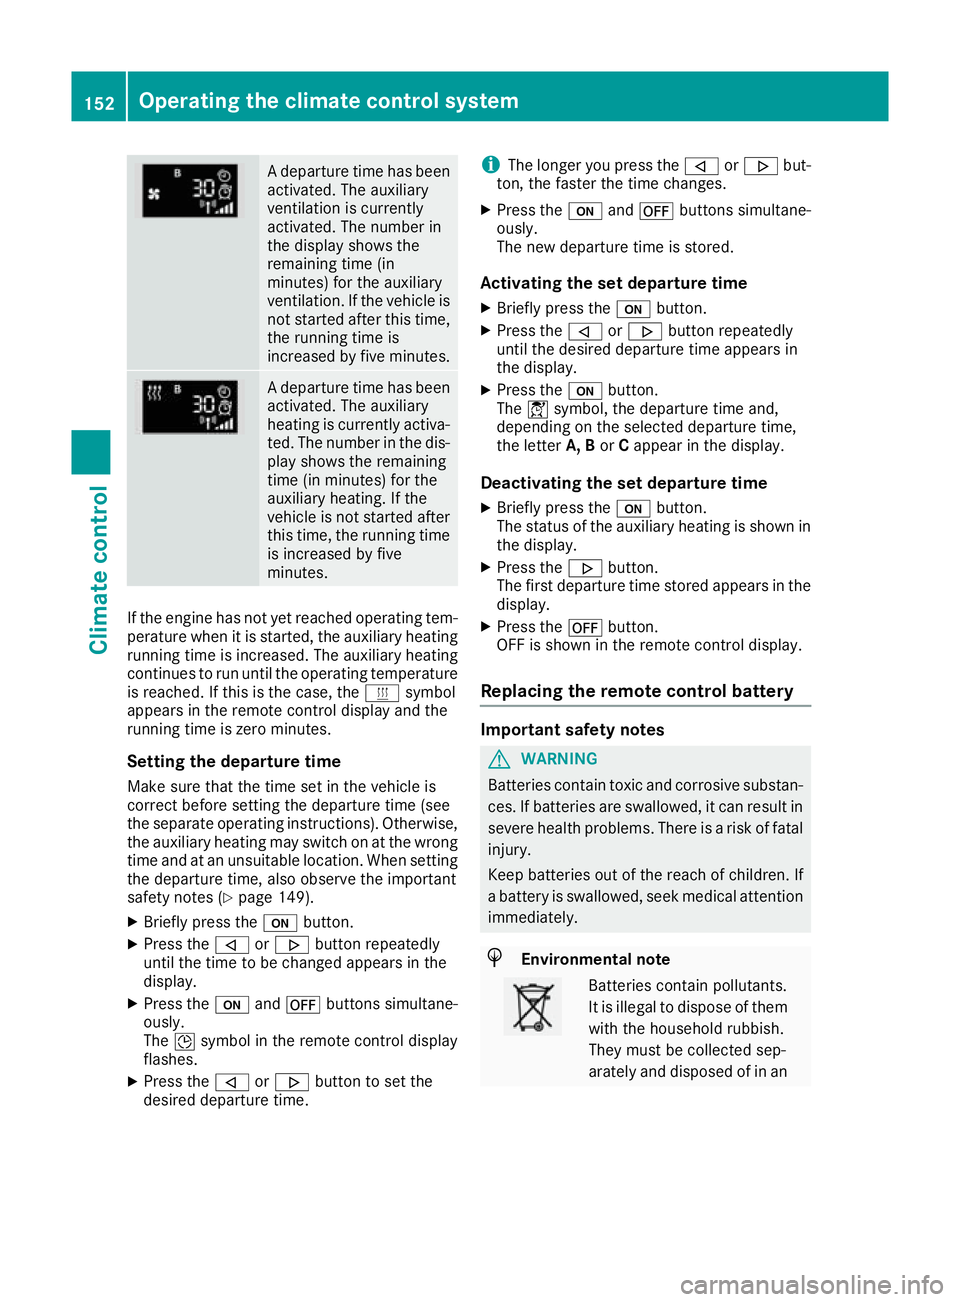
A departure time has been
activated. The auxiliary
ventilation is currently
activated. The number in
the display shows the
remaining time (in
minutes) for the auxiliary
ventilation. If the vehicle is
not started after this time, the running time is
increased by five minutes. A departure time has been
activated. The auxiliary
heating is currently activa-
ted. The number in the dis- play shows the remaining
time (in minutes) for the
auxiliary heating. If the
vehicle is not started after
this time, the running time is increased by five
minutes. If the engine has not yet reached operating tem-
perature when it is started, the auxiliary heating running time is increased. The auxiliary heating
continues to run until the operating temperature
is reached. If this is the case, the ysymbol
appears in the remote control display and the
running time is zero minutes.
Setting the departure time
Make sure that the time set in the vehicle is
correct before setting the departure time (see
the separate operating instructions). Otherwise, the auxiliary heating may switch on at the wrong
time and at an unsuitable location. When setting the departure time, also observe the important
safety notes (Y page 149).
X Briefly press the ubutton.
X Press the ,or. button repeatedly
until the time to be changed appears in the
display.
X Press the uand^ buttons simultane-
ously.
The Îsymbol in the remote control display
flashes.
X Press the ,or. button to set the
desired departure time. i
The longer you press the
,or. but-
ton, the faster the time changes.
X Press the uand^ buttons simultane-
ously.
The new departure time is stored.
Activating the set departure time
X Briefly press the ubutton.
X Press the ,or. button repeatedly
until the desired departure time appears in
the display.
X Press the ubutton.
The Ísymbol, the departure time and,
depending on the selected departure time,
the letter A, BorCappear in the display.
Deactivating the set departure time
X Briefly press the ubutton.
The status of the auxiliary heating is shown in the display.
X Press the .button.
The first departure time stored appears in the
display.
X Press the ^button.
OFF is shown in the remote control display.
Replacing the remote control battery Important safety notes
G
WARNING
Batteries contain toxic and corrosive substan- ces. If batteries are swallowed, it can result in
severe health problems. There is a risk of fatal injury.
Keep batteries out of the reach of children. If
a battery is swallowed, seek medical attention immediately. H
Environmental note Batteries contain pollutants.
It is illegal to dispose of them
with the household rubbish.
They must be collected sep-
arately and disposed of in an 152
Operating the climate control systemClimate control