2015 MERCEDES-BENZ GLE SUV boot
[x] Cancel search: bootPage 8 of 453
Automatic transmission emer-
gency running mode
.........................175
Auxiliary heating
Setting .......................................... .295
Auxiliary heating/ventilation
Display message ............................ 335
Important safety notes .................. 149
Problem (display message) ............ 154
Remote control .............................. 151
Setting the departure time ............. 152
Switching on/off (on the centre
console) ......................................... 150
Axle load, permissible (trailer tow-
ing) ...................................................... 447 B
Bag hook ............................................ 356
Ball coupling
Swinging in ................................... .276
Swinging out .................................. 274
BAS (Brake Assist System) ................. 71
BAS PLUS with Cross-Traffic Assist (Brake Assist PLUS with Cross-
Traffic Assist)
Function/notes ................................ 71
Important safety notes .................... 72
Battery (high-voltage)
see High-voltage battery
Battery (key)
Checking .......................................... 87
Important safety notes .................... 87
Replacing ......................................... 87
Battery (vehicle)
Charging ........................................ 395
Display message ............................ 317
Important safety notes .................. 392
Jump starting ................................. 397
Overview ........................................ 392
Belt
see Seat belts
Belt tensioner
Activation ......................................... 55
Blind Spot Assist
Activating/deactivating ................. 291
Display message ............................ 326
Notes/function .............................. 244
Trailer towing ................................. 246 see Active Blind Spot Assist
BlueTEC
Topping up AdBlue ®
....................... 180
BlueTEC (AdBlue ®
) ............................ .439
Bonnet
Active bonnet (pedestrian protec-tion) ............................................... 373
Closing .......................................... .374
Display message ............................ 334
Important safety notes .................. 373
Opening ......................................... 374
Boot
see Tailgate
Brake Assist
see BAS (Brake Assist System)
Brake fluid
Display message ............................ 306
Notes ............................................. 441
Brake force distribution
see EBD (electronic brake force
distribution)
Brake lamps
Adaptive .......................................... .75
Display message ............................ 314
Brake pedal
Pedal resistance/pedal travel .......... 43
Brakes
ABS .................................................. 70
Adaptive Brake Assist ...................... 74
BAS .................................................. 71
BAS PLUS with Cross-Traffic
Assist ............................................... 71
Brake fluid (notes) ........................ .441
Display message ............................ 301
Driving tips ................................... .196
High-performance brake system .... 197
Important safety notes .................. 196
Parking brake ................................ 192
RBS warning lamp .......................... 340
Recuperative Brake System ............. 43
Warning lamp ................................. 339
Breakdown
Where will I find...? ........................ 386
see Flat tyre
see Towing away
Brightness control (instrument
cluster lighting) ................................... 32 Index
5
Page 196 of 453
engine is switched off. Noises that occur are
normal.
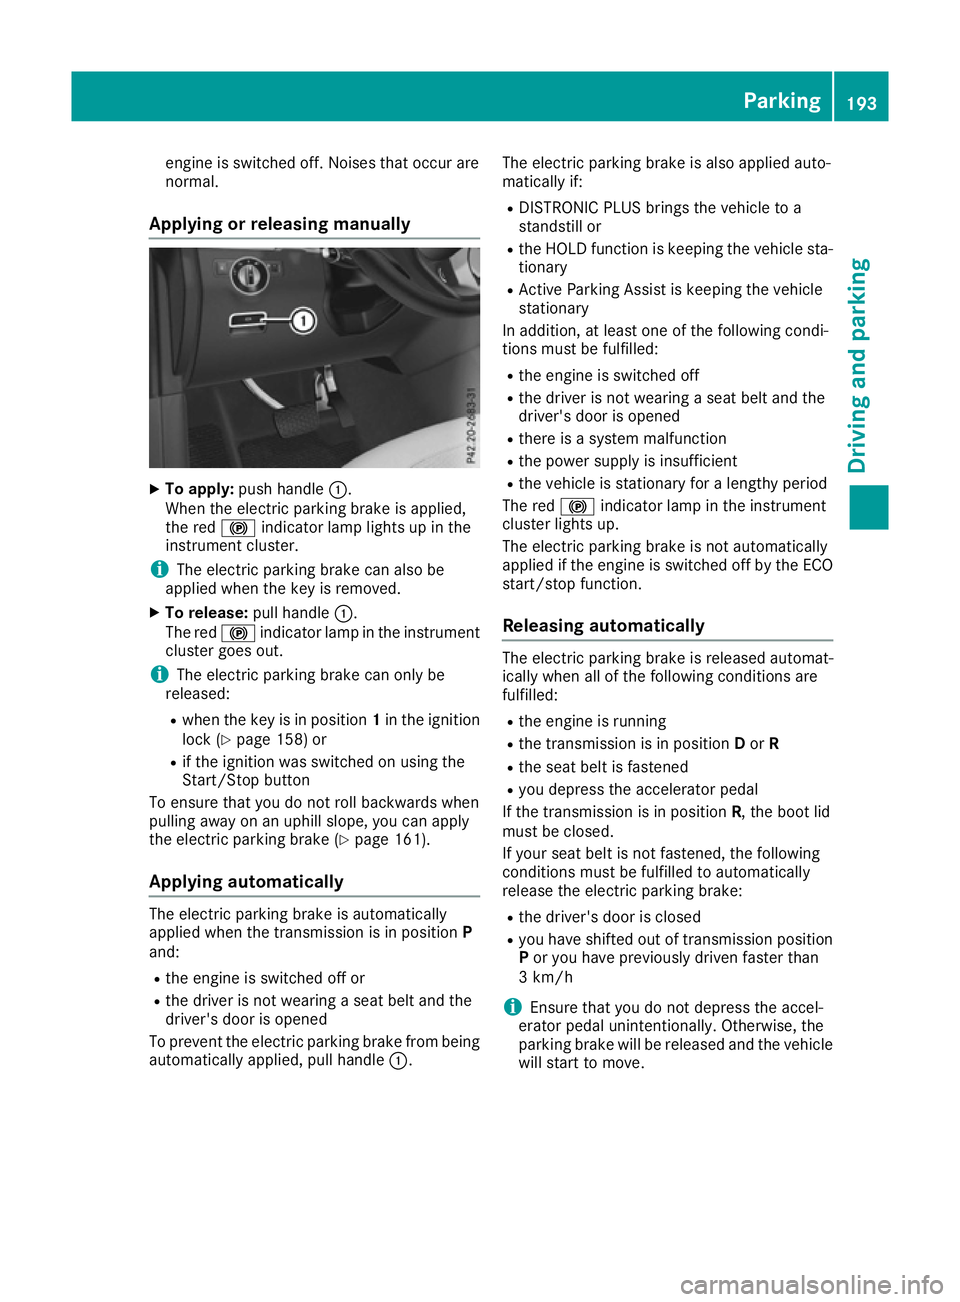
Applying or releasing manually X
To apply: push handle :.
When the electric parking brake is applied,
the red !indicator lamp lights up in the
instrument cluster.
i The electric parking brake can also be
applied when the key is removed.
X To release: pull handle:.
The red !indicator lamp in the instrument
cluster goes out.
i The electric parking brake can only be
released:
R when the key is in position 1in the ignition
lock (Y page 158) or
R if the ignition was switched on using the
Start/Stop button
To ensure that you do not roll backwards when
pulling away on an uphill slope, you can apply
the electric parking brake (Y page 161).
Applying automatically The electric parking brake is automatically
applied when the transmission is in position
P
and:
R the engine is switched off or
R the driver is not wearing a seat belt and the
driver's door is opened
To prevent the electric parking brake from being
automatically applied, pull handle :.The electric parking brake is also applied auto-
matically if:
R
DISTRONIC PLUS brings the vehicle to a
standstill or
R the HOLD function is keeping the vehicle sta-
tionary
R Active Parking Assist is keeping the vehicle
stationary
In addition, at least one of the following condi-
tions must be fulfilled:
R the engine is switched off
R the driver is not wearing a seat belt and the
driver's door is opened
R there is a system malfunction
R the power supply is insufficient
R the vehicle is stationary for a lengthy period
The red !indicator lamp in the instrument
cluster lights up.
The electric parking brake is not automatically
applied if the engine is switched off by the ECO
start/stop function.
Releasing automatically The electric parking brake is released automat-
ically when all of the following conditions are
fulfilled:
R
the engine is running
R the transmission is in position Dor R
R the seat belt is fastened
R you depress the accelerator pedal
If the transmission is in position R, the boot lid
must be closed.
If your seat belt is not fastened, the following
conditions must be fulfilled to automatically
release the electric parking brake:
R the driver's door is closed
R you have shifted out of transmission position
P or you have previously driven faster than
3 km/h
i Ensure that you do not depress the accel-
erator pedal unintentionally. Otherwise, the
parking brake will be released and the vehicle will start to move. Parking
193Driving and parking Z
Page 235 of 453
Cancelling Active Parking Assist
X
Stop the movement of the multifunction
steering wheel or steer yourself.
Active Parking Assist will be cancelled at
once. The Park Assist cancelled
Park Assist cancelled mes-
sage appears in the multifunction display.
or X Press the PARKTRONIC button (Y page 227).
PARKTRONIC is switched off and Active Park-
ing Assist is immediately cancelled. The
Park Assist cancelled Park Assist cancelled message appears
in the multifunction display.
Active Parking Assist is cancelled automatically if:
R the electric parking brake is applied
R transmission position Pis selected
R parking using Active Parking Assist is no lon-
ger possible
R you are driving faster than 10 km/h
R a wheel spins and ESP ®
intervenes or fails.
The ÷ warning lamp lights up in the instru-
ment cluster.
A warning tone sounds. The parking symbol dis-
appears and the multifunction display shows the
Park Assist cancelled
Park Assist cancelled message.
When Active Parking Assist is cancelled, you
must steer and brake again yourself.
If a system malfunction occurs, the vehicle is
braked to a standstill. To drive on, depress the
accelerator pedal again. Reversing camera
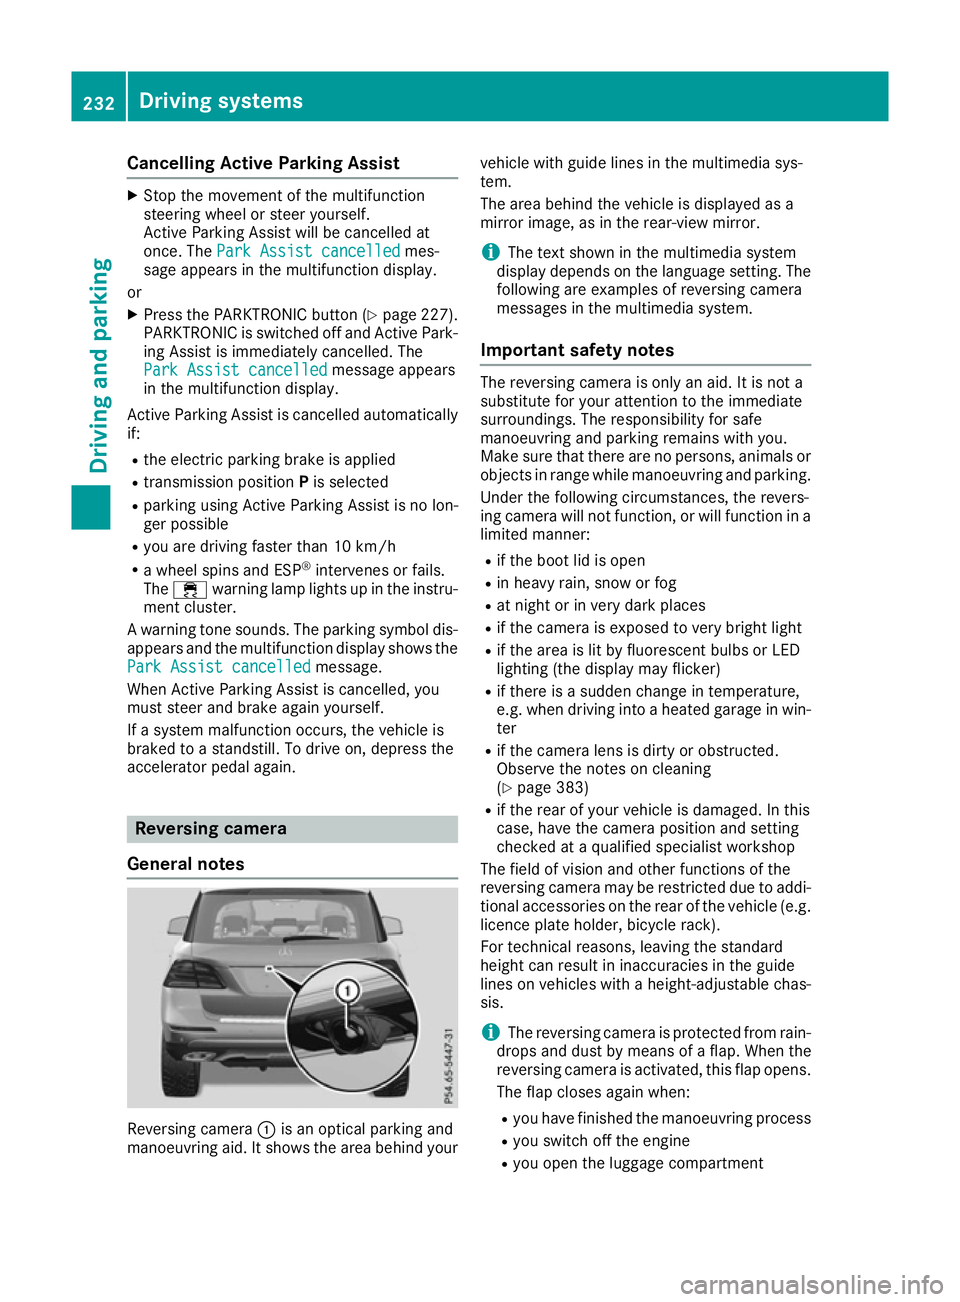
General notes Reversing camera
:is an optical parking and
manoeuvring aid. It shows the area behind your vehicle with guide lines in the multimedia sys-
tem.
The area behind the vehicle is displayed as a
mirror image, as in the rear-view mirror.
i The text shown in the multimedia system
display depends on the language setting. The
following are examples of reversing camera
messages in the multimedia system.
Important safety notes The reversing camera is only an aid. It is not a
substitute for your attention to the immediate
surroundings. The responsibility for safe
manoeuvring and parking remains with you.
Make sure that there are no persons, animals or
objects in range while manoeuvring and parking.
Under the following circumstances, the revers-
ing camera will not function, or will function in a limited manner:
R if the boot lid is open
R in heavy rain, snow or fog
R at night or in very dark places
R if the camera is exposed to very bright light
R if the area is lit by fluorescent bulbs or LED
lighting (the display may flicker)
R if there is a sudden change in temperature,
e.g. when driving into a heated garage in win-
ter
R if the camera lens is dirty or obstructed.
Observe the notes on cleaning
(Y page 383)
R if the rear of your vehicle is damaged. In this
case, have the camera position and setting
checked at a qualified specialist workshop
The field of vision and other functions of the
reversing camera may be restricted due to addi-
tional accessories on the rear of the vehicle (e.g. licence plate holder, bicycle rack).
For technical reasons, leaving the standard
height can result in inaccuracies in the guide
lines on vehicles with a height-adjustable chas-
sis.
i The reversing camera is protected from rain-
drops and dust by means of a flap. When the
reversing camera is activated, this flap opens.
The flap closes again when:
R you have finished the manoeuvring process
R you switch off the engine
R you open the luggage compartment 232
Driving systemsDriving and parking
Page 357 of 453
Through-loading facility in the rear
compartment
If objects or loads are not secured when being
transported in the through-loading facility, they
could slip or be thrown around and thereby hit
vehicle occupants.
Observe the loading guidelines (Y page 351)
and the safety notes regarding stowage spaces
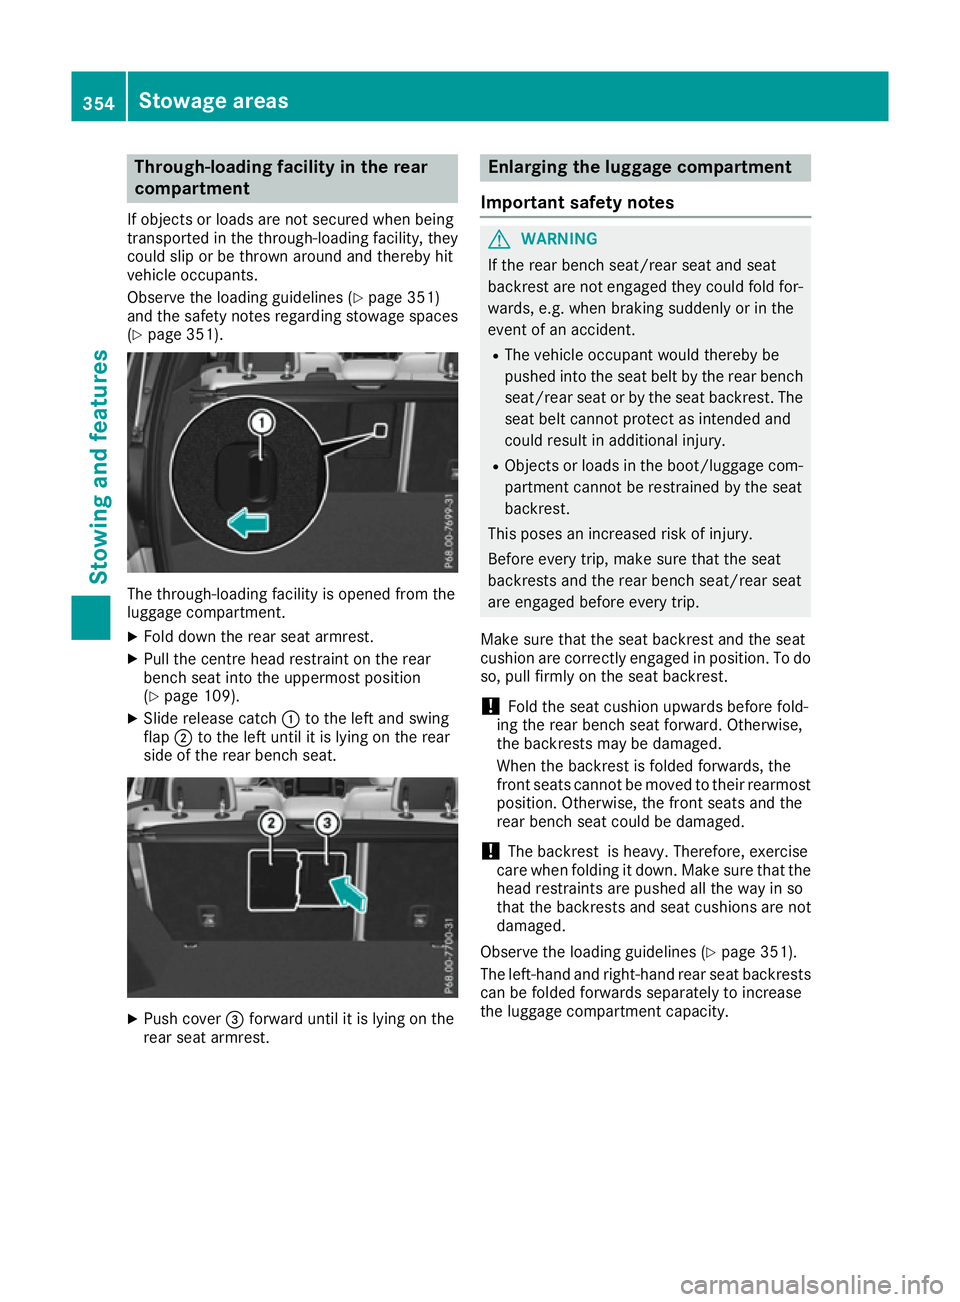
(Y page 351). The through-loading facility is opened from the
luggage compartment.
X Fold down the rear seat armrest.
X Pull the centre head restraint on the rear
bench seat into the uppermost position
(Y page 109).
X Slide release catch :to the left and swing
flap ;to the left until it is lying on the rear
side of the rear bench seat. X
Push cover =forward until it is lying on the
rear seat armrest. Enlarging the luggage compartment
Important safety notes G
WARNING
If the rear bench seat/rear seat and seat
backrest are not engaged they could fold for- wards, e.g. when braking suddenly or in the
event of an accident.
R The vehicle occupant would thereby be
pushed into the seat belt by the rear bench
seat/rear seat or by the seat backrest. The
seat belt cannot protect as intended and
could result in additional injury.
R Objects or loads in the boot/luggage com-
partment cannot be restrained by the seat
backrest.
This poses an increased risk of injury.
Before every trip, make sure that the seat
backrests and the rear bench seat/rear seat
are engaged before every trip.
Make sure that the seat backrest and the seat
cushion are correctly engaged in position. To do
so, pull firmly on the seat backrest.
! Fold the seat cushion upwards before fold-
ing the rear bench seat forward. Otherwise,
the backrests may be damaged.
When the backrest is folded forwards, the
front seats cannot be moved to their rearmost
position. Otherwise, the front seats and the
rear bench seat could be damaged.
! The backrest is heavy. Therefore, exercise
care when folding it down. Make sure that the
head restraints are pushed all the way in so
that the backrests and seat cushions are not
damaged.
Observe the loading guidelines (Y page 351).
The left-hand and right-hand rear seat backrests can be folded forwards separately to increase
the luggage compartment capacity. 354
Sto
wage areasStowing an d features
Page 420 of 453
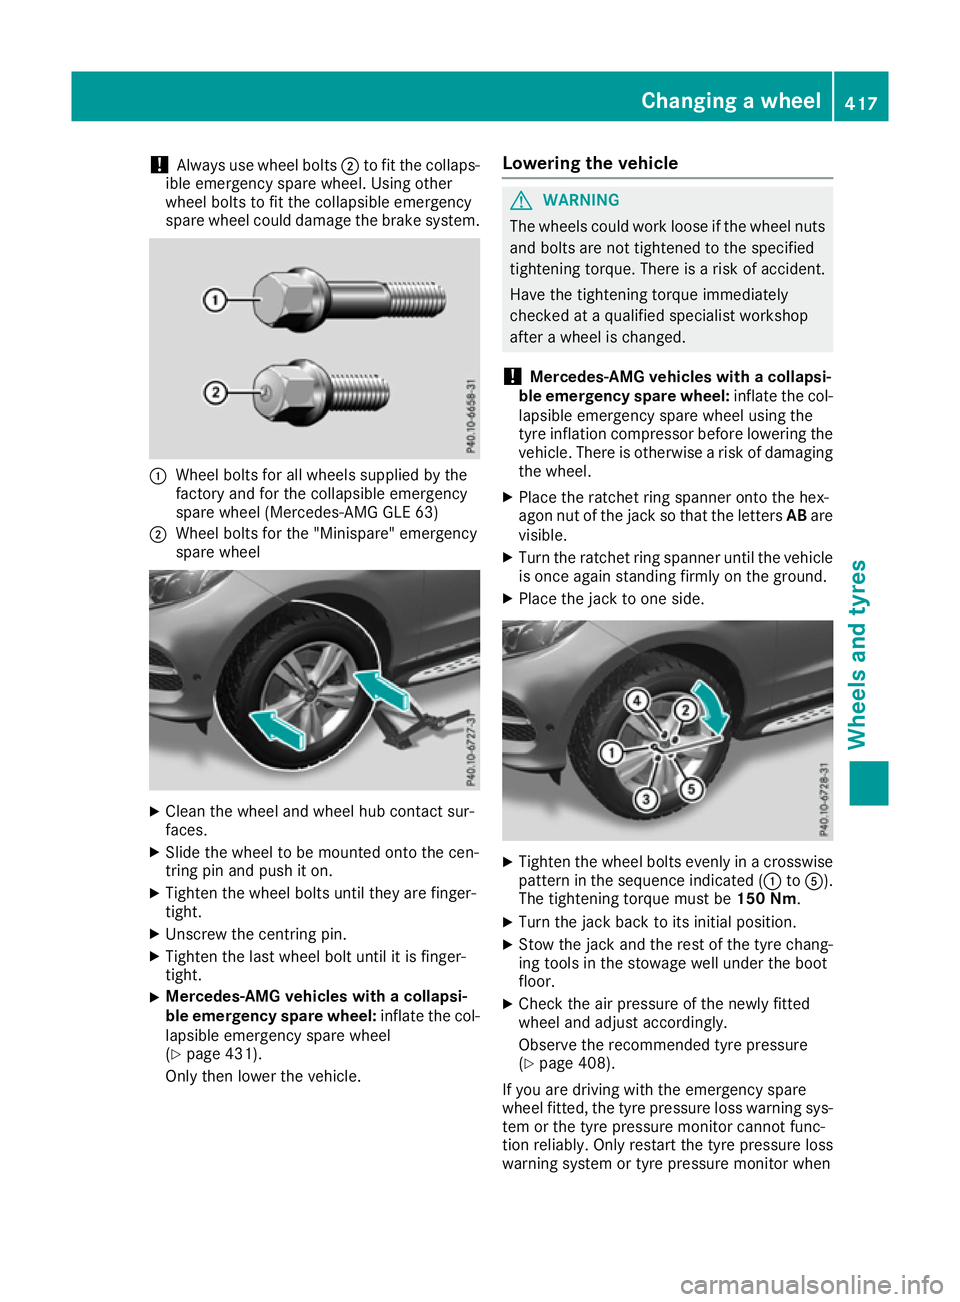
!
Always use wheel bolts
;to fit the collaps-
ible emergency spare wheel. Using other
wheel bolts to fit the collapsible emergency
spare wheel could damage the brake system. :
Wheel bolts for all wheels supplied by the
factory and for the collapsible emergency
spare wheel (Mercedes-AMG GLE 63)
; Wheel bolts for the "Minispare" emergency
spare wheel X
Clean the wheel and wheel hub contact sur-
faces.
X Slide the wheel to be mounted onto the cen-
tring pin and push it on.
X Tighten the wheel bolts until they are finger-
tight.
X Unscrew the centring pin.
X Tighten the last wheel bolt until it is finger-
tight.
X Mercedes-AMG vehicles with a collapsi-
ble emergency spare wheel:
inflate the col-
lapsible emergency spare wheel
(Y page 431).
Only then lower the vehicle. Lowering the vehicle G
WARNING
The wheels could work loose if the wheel nuts and bolts are not tightened to the specified
tightening torque. There is a risk of accident.
Have the tightening torque immediately
checked at a qualified specialist workshop
after a wheel is changed.
! Mercedes-AMG vehicles with a collapsi-
ble emergency spare wheel: inflate the col-
lapsible emergency spare wheel using the
tyre inflation compressor before lowering the vehicle. There is otherwise a risk of damaging
the wheel.
X Place the ratchet ring spanner onto the hex-
agon nut of the jack so that the letters ABare
visible.
X Turn the ratchet ring spanner until the vehicle
is once again standing firmly on the ground.
X Place the jack to one side. X
Tighten the wheel bolts evenly in a crosswise
pattern in the sequence indicated (: toA).
The tightening torque must be 150 Nm.
X Turn the jack back to its initial position.
X Stow the jack and the rest of the tyre chang-
ing tools in the stowage well under the boot
floor.
X Check the air pressure of the newly fitted
wheel and adjust accordingly.
Observe the recommended tyre pressure
(Y page 408).
If you are driving with the emergency spare
wheel fitted, the tyre pressure loss warning sys-
tem or the tyre pressure monitor cannot func-
tion reliably. Only restart the tyre pressure loss
warning system or tyre pressure monitor when Changing a wheel
417Wheels and tyres Z