2015 MERCEDES-BENZ GLE COUPE air condition
[x] Cancel search: air conditionPage 336 of 393
?
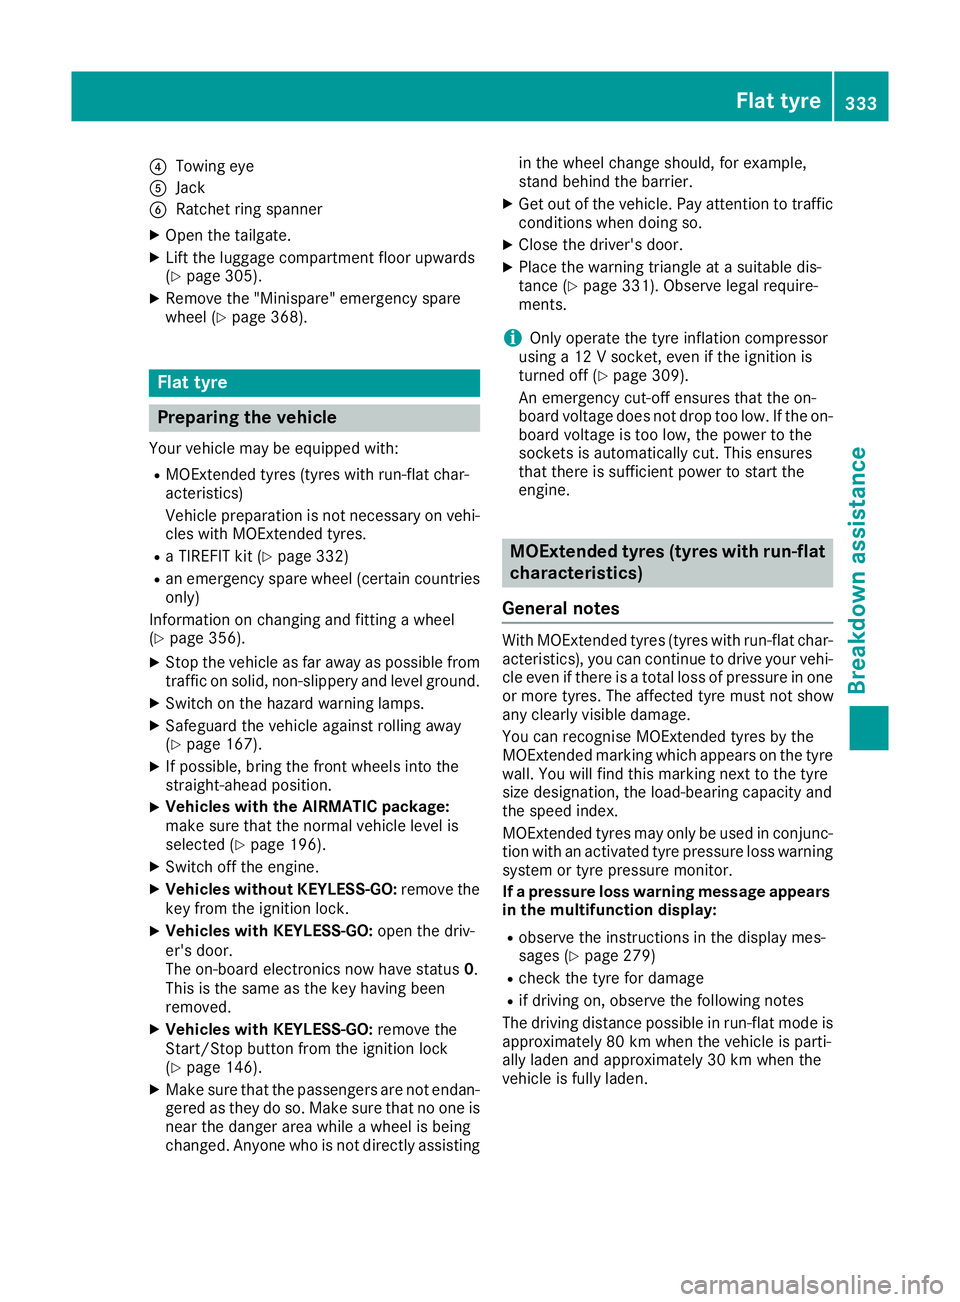
Towing eye
A Jack
B Ratchet ring spanner
X Open the tailgate.
X Lift the luggage compartment floor upwards
(Y page 305).
X Remove the "Minispare" emergency spare
wheel (Y page 368). Flat tyre
Preparing the vehicle
Your vehicle may be equipped with: R MOExtended tyres (tyres with run-flat char-
acteristics)
Vehicle preparation is not necessary on vehi- cles with MOExtended tyres.
R a TIREFIT kit (Y page 332)
R an emergency spare wheel (certain countries
only)
Information on changing and fitting a wheel
(Y page 356).
X Stop the vehicle as far away as possible from
traffic on solid, non-slippery and level ground.
X Switch on the hazard warning lamps.
X Safeguard the vehicle against rolling away
(Y page 167).
X If possible, bring the front wheels into the
straight-ahead position.
X Vehicles with the AIRMATIC package:
make sure that the normal vehicle level is
selected (Y page 196).
X Switch off the engine.
X Vehicles without KEYLESS-GO: remove the
key from the ignition lock.
X Vehicles with KEYLESS-GO: open the driv-
er's door.
The on-board electronics now have status 0.
This is the same as the key having been
removed.
X Vehicles with KEYLESS-GO: remove the
Start/Stop button from the ignition lock
(Y page 146).
X Make sure that the passengers are not endan-
gered as they do so. Make sure that no one is
near the danger area while a wheel is being
changed. Anyone who is not directly assisting in the wheel change should, for example,
stand behind the barrier.
X Get out of the vehicle. Pay attention to traffic
conditions when doing so.
X Close the driver's door.
X Place the warning triangle at a suitable dis-
tance (Y page 331). Observe legal require-
ments.
i Only operate the tyre inflation compressor
using a 12 V socket, even if the ignition is
turned off (Y page 309).
An emergency cut-off ensures that the on-
board voltage does not drop too low. If the on-
board voltage is too low, the power to the
sockets is automatically cut. This ensures
that there is sufficient power to start the
engine. MOExtended tyres (tyres with run-flat
characteristics)
General notes With MOExtended tyres (tyres with run-flat char-
acteristics), you can continue to drive your vehi-
cle even if there is a total loss of pressure in one or more tyres. The affected tyre must not show
any clearly visible damage.
You can recognise MOExtended tyres by the
MOExtended marking which appears on the tyre
wall. You will find this marking next to the tyre
size designation, the load-bearing capacity and
the speed index.
MOExtended tyres may only be used in conjunc- tion with an activated tyre pressure loss warning
system or tyre pressure monitor.
If a pressure loss warning message appears in the multifunction display:
R observe the instructions in the display mes-
sages (Y page 279)
R check the tyre for damage
R if driving on, observe the following notes
The driving distance possible in run-flat mode is approximately 80 km when the vehicle is parti-
ally laden and approximately 30 km when the
vehicle is fully laden. Flat tyre
333Breakdown assistance
Page 340 of 393
G
WARNING
If the required tyre pressure is not reached
after driving for a short period, the tyre is too badly damaged. The tyre sealant cannot
repair the tyre in this instance. Damaged tyres and a tyre pressure that is too low can signif-
icantly impair the vehicle's braking and driv-
ing characteristics. There is a risk of accident.
Do not continue driving. Contact a qualified
specialist workshop.
i In your vehicle, you will find a sticker with
the Mercedes-Benz Service24h telephone
number, e.g. on the B-pillar on the driver's
side.
X Correct the tyre pressure if it is still at least
130 kPa (1.3 bar/19 psi). See the tyre pres-
sure table on the fuel filler flap for values.
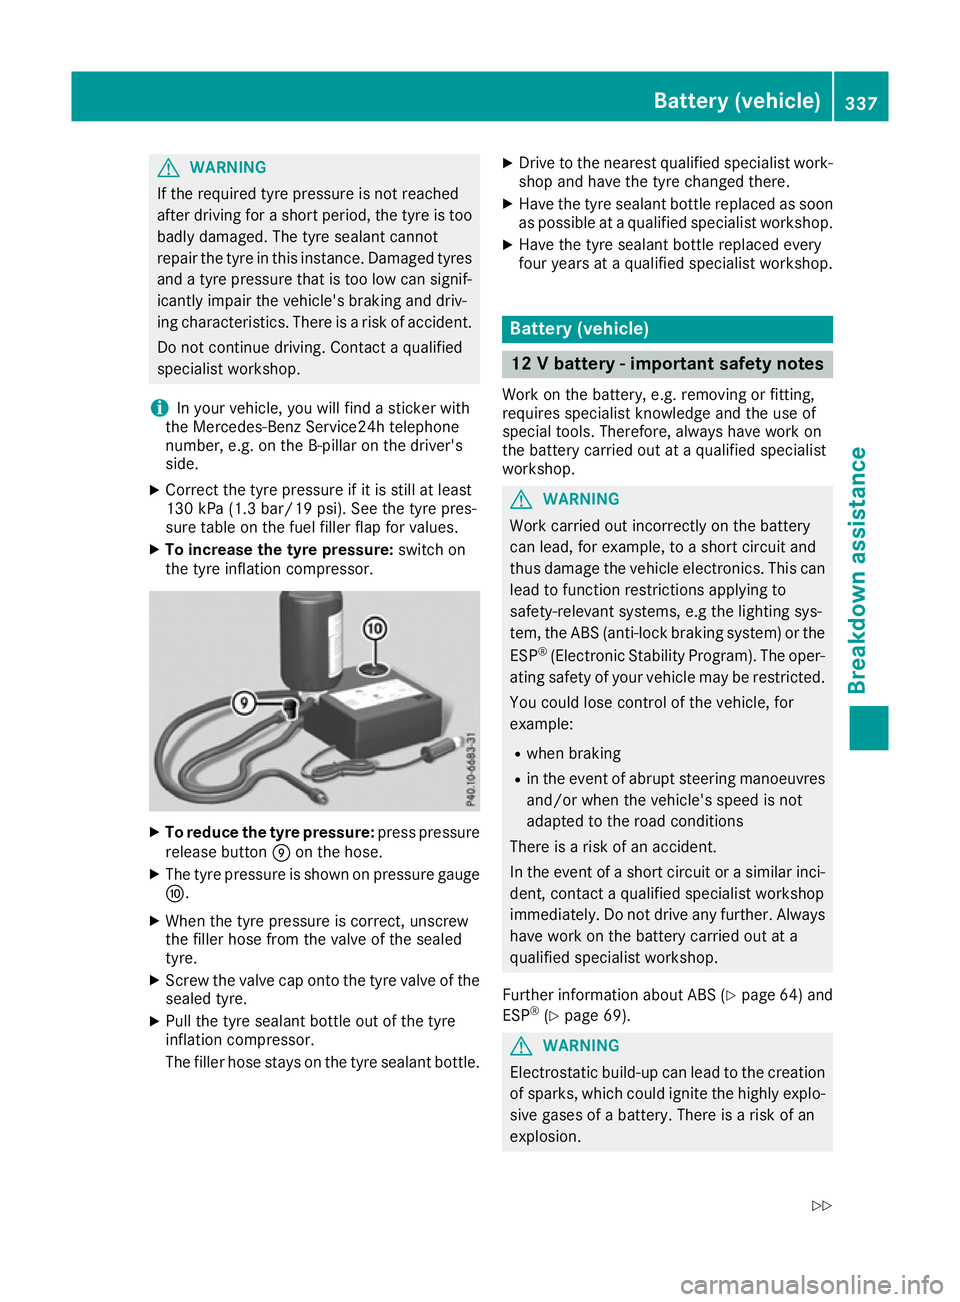
X To increase the tyre pressure: switch on
the tyre inflation compressor. X
To reduce the tyre pressure: press pressure
release button Eon the hose.
X The tyre pressure is shown on pressure gauge
F.
X When the tyre pressure is correct, unscrew
the filler hose from the valve of the sealed
tyre.
X Screw the valve cap onto the tyre valve of the
sealed tyre.
X Pull the tyre sealant bottle out of the tyre
inflation compressor.
The filler hose stays on the tyre sealant bottle. X
Drive to the nearest qualified specialist work-
shop and have the tyre changed there.
X Have the tyre sealant bottle replaced as soon
as possible at a qualified specialist workshop.
X Have the tyre sealant bottle replaced every
four years at a qualified specialist workshop. Battery (vehicle)
12 V battery - important safety notes
Work on the battery, e.g. removing or fitting,
requires specialist knowledge and the use of
special tools. Therefore, always have work on
the battery carried out at a qualified specialist
workshop. G
WARNING
Work carried out incorrectly on the battery
can lead, for example, to a short circuit and
thus damage the vehicle electronics. This can lead to function restrictions applying to
safety-relevant systems, e.g the lighting sys-
tem, the ABS (anti-lock braking system) or the
ESP ®
(Electronic Stability Program). The oper-
ating safety of your vehicle may be restricted.
You could lose control of the vehicle, for
example:
R when braking
R in the event of abrupt steering manoeuvres
and/or when the vehicle's speed is not
adapted to the road conditions
There is a risk of an accident.
In the event of a short circuit or a similar inci- dent, contact a qualified specialist workshop
immediately. Do not drive any further. Alwayshave work on the battery carried out at a
qualified specialist workshop.
Further information about ABS (Y page 64) and
ESP ®
(Y page 69). G
WARNING
Electrostatic build-up can lead to the creation of sparks, which could ignite the highly explo-
sive gases of a battery. There is a risk of an
explosion. Battery (vehicle)
337Breakdown assistance
Z
Page 354 of 393
Under these circumstances, you should also
restrict the maximum design speed of the vehi- cle using permanent SPEEDTRONIC so that it
does not exceed the maximum permissible
speed for the M+S tyres (Y page 182).
When you have fitted the M+S tyres:
X Check the tyre pressures (Y page 351).
X Restart the tyre pressure monitor
(Y page 355).
X Restart the tyre pressure loss warning system
(Y page 353).
Information about driving with an emergency
spare wheel (Y page 367). Snow chains
G
WARNING
If you have fitted snow chains to the front
wheels, they may scrape against the vehicle
body or chassis components. This could
cause damage to the vehicle or the tyres.
There is a risk of an accident.
To avoid hazardous situations:
R never fit snow chains on the front wheels
R fit snow chains to the rear wheels in pairs.
! You must drive at raised vehicle level if snow
chains have been fitted. The vehicle could
otherwise be damaged. Observe the informa-
tion in the "AIRMATIC package" section.
! When driving with snow chains fitted, do not
use the ADS sport mode (Adaptive Damping
System). The vehicle could otherwise be dam- aged.
For safety reasons, Mercedes-Benz recom-
mends that you only use snow chains that have been specifically approved for your vehicle by
Mercedes-Benz, or that are of a corresponding
standard of quality. For more information,
please contact a qualified specialist workshop.
If you intend to fit snow chains, please bear the
following points in mind:
R snow chains cannot be fitted to all wheel-tyre
combinations. Permissible wheel-tyre combi-
nations (Y page 361).
R only use snow chains if the road surface is
completely snow-covered. Remove the snow chains as soon as possible when you come to
a road that is not snow-covered.
R local regulations may restrict the use of snow
chains. Observe the appropriate regulations if you wish to fit snow chains.
R do not exceed the maximum permissible
speed of 50 km/h.
You may wish to deactivate ESP ®
when pulling
away with snow chains fitted (Y page 70). This
way you can allow the wheels to spin in a con-
trolled manner, achieving increased driving
force (cutting action).
Information about driving with an emergency
spare wheel (Y page 367). Tyre pressure
Tyre pressure specifications
G
WARNING
Underinflated or overinflated tyres pose the
following risks:
R the tyres may burst, especially as the load
and vehicle speed increase.
R the tyres may wear excessively and/or
unevenly, which may greatly impair tyre
traction.
R the driving characteristics, as well as steer-
ing and braking, may be greatly impaired.
There is a risk of an accident.
Observe the recommended tyre pressure and check the tyre pressure of all the tyres includ-
ing the spare wheel:
R at least every two weeks
R when the load changes
R before embarking on a longer journey
R for changed operating conditions, e.g. off-
road driving
If necessary, correct the tyre pressure. G
WARNING
If you fit unsuitable accessories onto tyre
valves, the tyre valves may be overloaded and malfunction, which can cause tyre pressure
loss. Due to their design, retrofitted tyre pres-
sure monitors keep the tyre valve open. This Tyre pressure
351Wheels and tyres
Z
Page 355 of 393
can also result in tyre pressure loss. There is a
risk of accident.
Only screw standard valve caps or valve caps
specifically provided by Mercedes-Benz for
your vehicle onto the tyre valve. G
WARNING
If the tyre pressure drops repeatedly, the
wheel, valve or tyre may be damaged. Tyre
pressure that is too low may result in a tyre
blow-out. There is a risk of accident.
R Check the tyre for foreign objects.
R Check whether the wheel is losing air or the
valve is leaking.
If you are unable to rectify the damage, con-
tact a qualified specialist workshop. H
Environmental note
Check the tyre pressure regularly, at least
every 14 days.
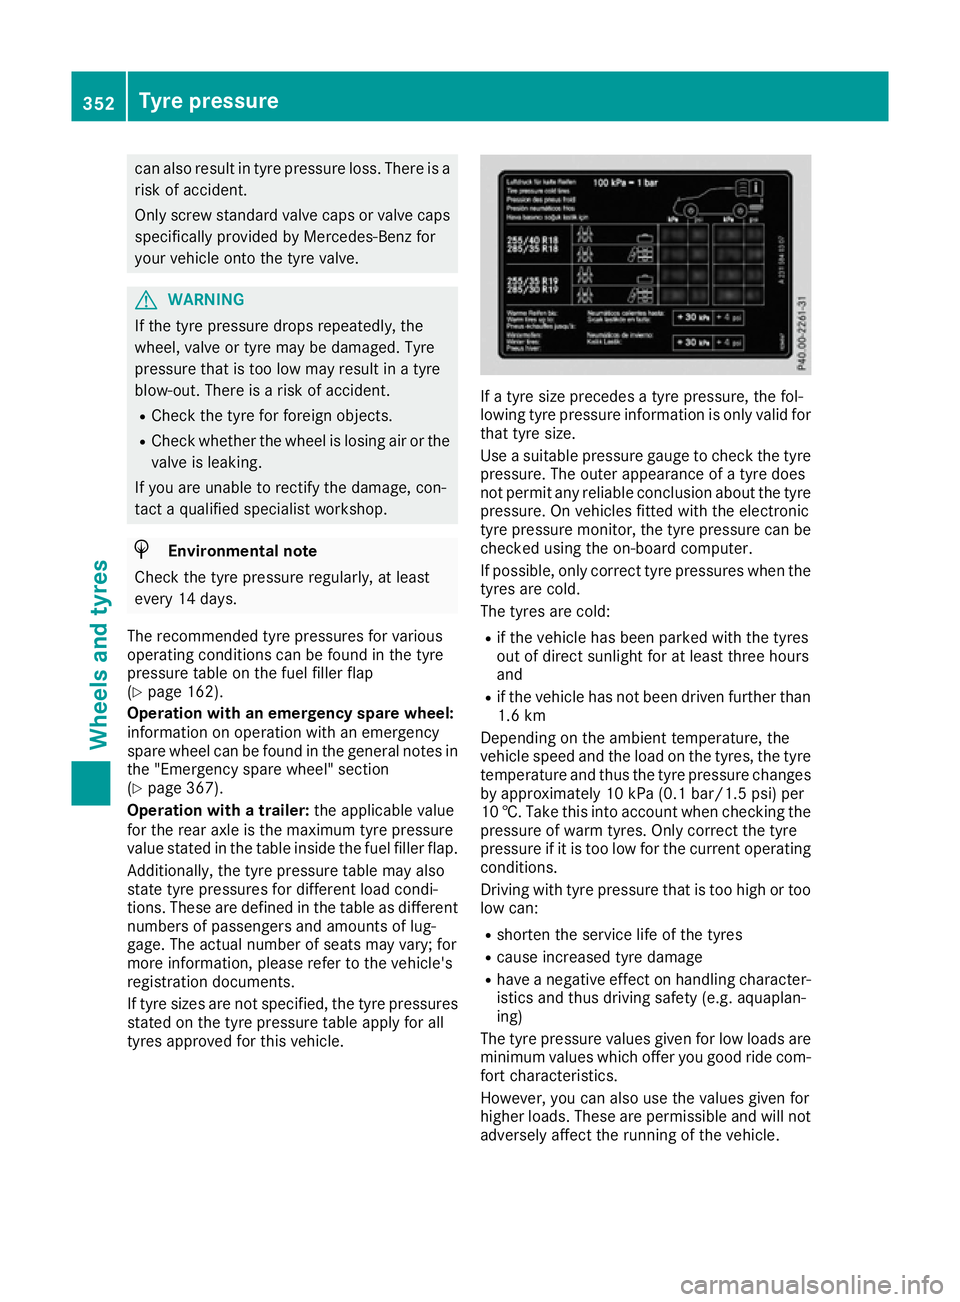
The recommended tyre pressures for various
operating conditions can be found in the tyre
pressure table on the fuel filler flap
(Y page 162).
Operation with an emergency spare wheel:
information on operation with an emergency
spare wheel can be found in the general notes in the "Emergency spare wheel" section
(Y page 367).
Operation with a trailer: the applicable value
for the rear axle is the maximum tyre pressure
value stated in the table inside the fuel filler flap.
Additionally, the tyre pressure table may also
state tyre pressures for different load condi-
tions. These are defined in the table as different numbers of passengers and amounts of lug-
gage. The actual number of seats may vary; for
more information, please refer to the vehicle's
registration documents.
If tyre sizes are not specified, the tyre pressures
stated on the tyre pressure table apply for all
tyres approved for this vehicle. If a tyre size precedes a tyre pressure, the fol-
lowing tyre pressure information is only valid for that tyre size.
Use a suitable pressure gauge to check the tyre
pressure. The outer appearance of a tyre does
not permit any reliable conclusion about the tyre
pressure. On vehicles fitted with the electronic
tyre pressure monitor, the tyre pressure can be checked using the on-board computer.
If possible, only correct tyre pressures when the
tyres are cold.
The tyres are cold:
R if the vehicle has been parked with the tyres
out of direct sunlight for at least three hours
and
R if the vehicle has not been driven further than
1.6 km
Depending on the ambient temperature, the
vehicle speed and the load on the tyres, the tyre temperature and thus the tyre pressure changes
by approximately 10 kPa (0.1 ba r/1.5 psi) per
10 †. Ta ke this into account when checking the
pressure of warm tyres. Only correct the tyre
pressure if it is too low for the current operating conditions.
Driving with tyre pressure that is too high or too
low can:
R shorten the service life of the tyres
R cause increased tyre damage
R have a negative effect on handling character-
istics and thus driving safety (e.g. aquaplan-
ing)
The tyre pressure values given for low loads are minimum values which offer you good ride com-
fort characteristics.
However, you can also use the values given for
higher loads. These are permissible and will not adversely affect the running of the vehicle. 352
Tyre pressureWheels and tyres
Page 360 of 393
The wear patterns on the front and rear tyres
differ depending on the operating conditions.
Interchange the wheels before a clear wear pat-
tern has formed on the tyres. Front tyres typi-
cally wear more on the shoulders and the rear
tyres in the centre.
On vehicles that have the same size front and
rear wheels, you can interchange the wheels
every 5,000 to 10,000 km depending on the
degree of tyre wear. Ensure that the direction of
rotation is maintained.
Clean the contact surfaces of the wheel and the
brake disc thoroughly every time a wheel is
interchanged. Check the tyre pressure and, if
necessary, restart the tyre pressure loss warn-
ing system or the tyre pressure monitor. Direction of rotation
Tyres with a specified direction of rotation have additional benefits, e.g. if there is a risk of aqua- planing. These advantages can only be gained if
the tyres are fitted corresponding to the direc-
tion of rotation.
An arrow on the sidewall of the tyre indicates its correct direction of rotation. Storing wheels
Store wheels that are not being used in a cool,
dry and preferably dark place. Protect the tyres
against oil, grease, petrol and diesel. Fitting a wheel
Preparing the vehicle X
Vehicles with an emergency spare wheel:
when fitting the emergency spare wheel in the
event of a flat tyre, observe the additional
notes on vehicle preparation under "Flat tyre"
(Y page 333).
X Stop the vehicle on solid, non-slippery and
level ground.
X Apply the electric parking brake manually.
X Unload heavy luggage.
X Move the front wheels to the straight-ahead
position.
X Shift the transmission to position P.X
Vehicles with the AIRMATIC package:
make sure that the normal vehicle level is
selected (Y
page 196).
X Switch off the engine.
X Vehicles without KEYLESS-GO: remove the
key from the ignition lock.
X Vehicles with KEYLESS-GO: open the driv-
er's door.
The on-board electronics now have status 0.
This is the same as the key having been
removed.
X Vehicles with KEYLESS-GO: remove the
Start/Stop button from the ignition lock
(Y page 146).
X If included in the vehicle equipment, remove
the tyre-change tool kit from the vehicle.
X Safeguard the vehicle against rolling away.
i Apart from certain country-specific varia-
tions, vehicles are not equipped with a tyre-
change tool kit. For information on which
tools are required to perform a wheel change
on your vehicle, consult a Mercedes-Benz
Service Centre.
Necessary tyre-changing tools may include,
for example:
R Jack
R Wheel chock
R Wheel wrench
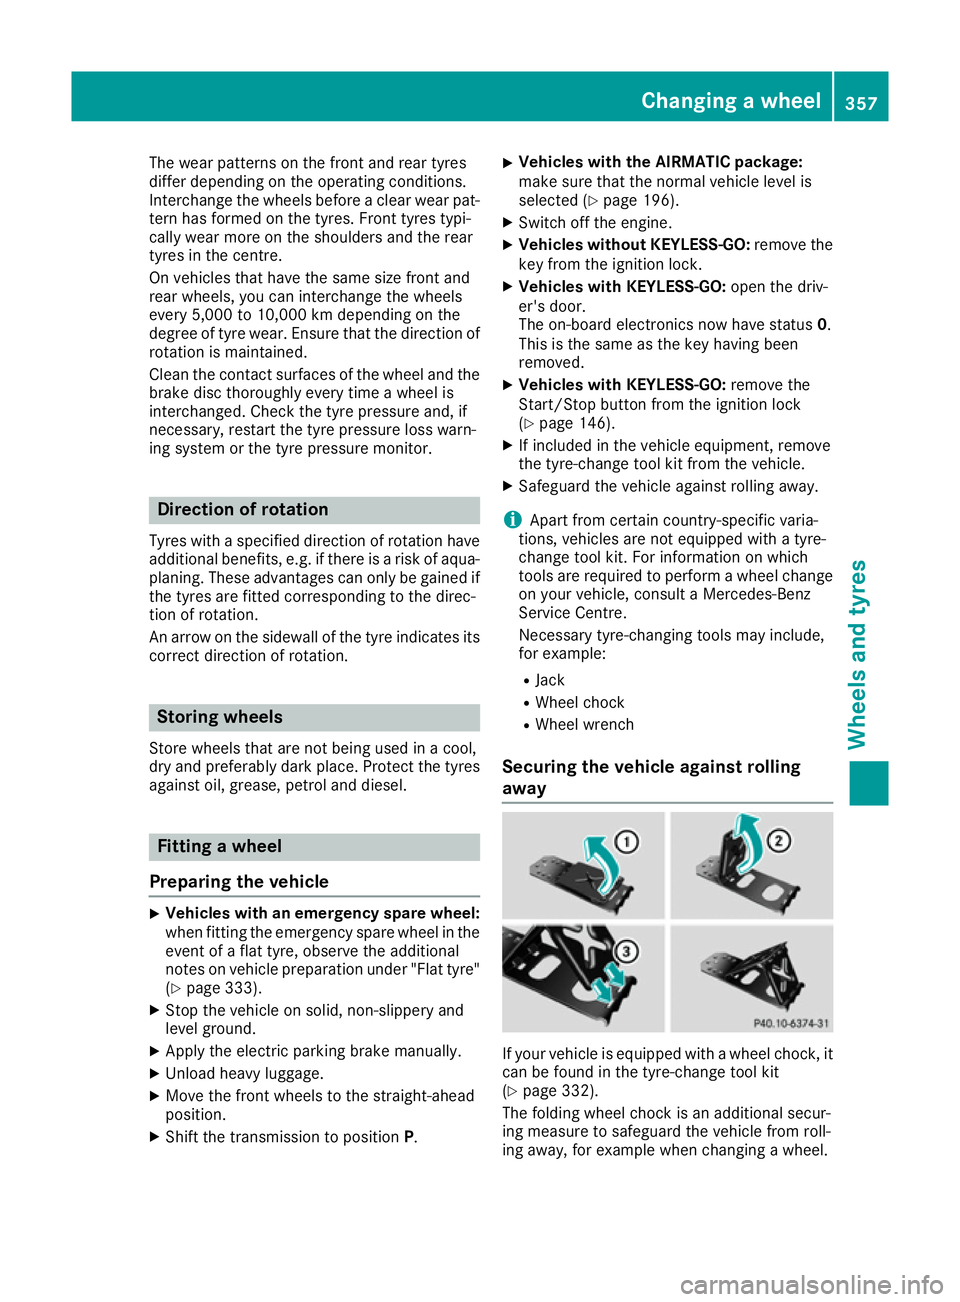
Securing the vehicle against rolling
away If your vehicle is equipped with a wheel chock, it
can be found in the tyre-change tool kit
(Y page 332).
The folding wheel chock is an additional secur-
ing measure to safeguard the vehicle from roll-
ing away, for example when changing a wheel. Changing a wheel
357Wheels and tyres Z
Page 386 of 393
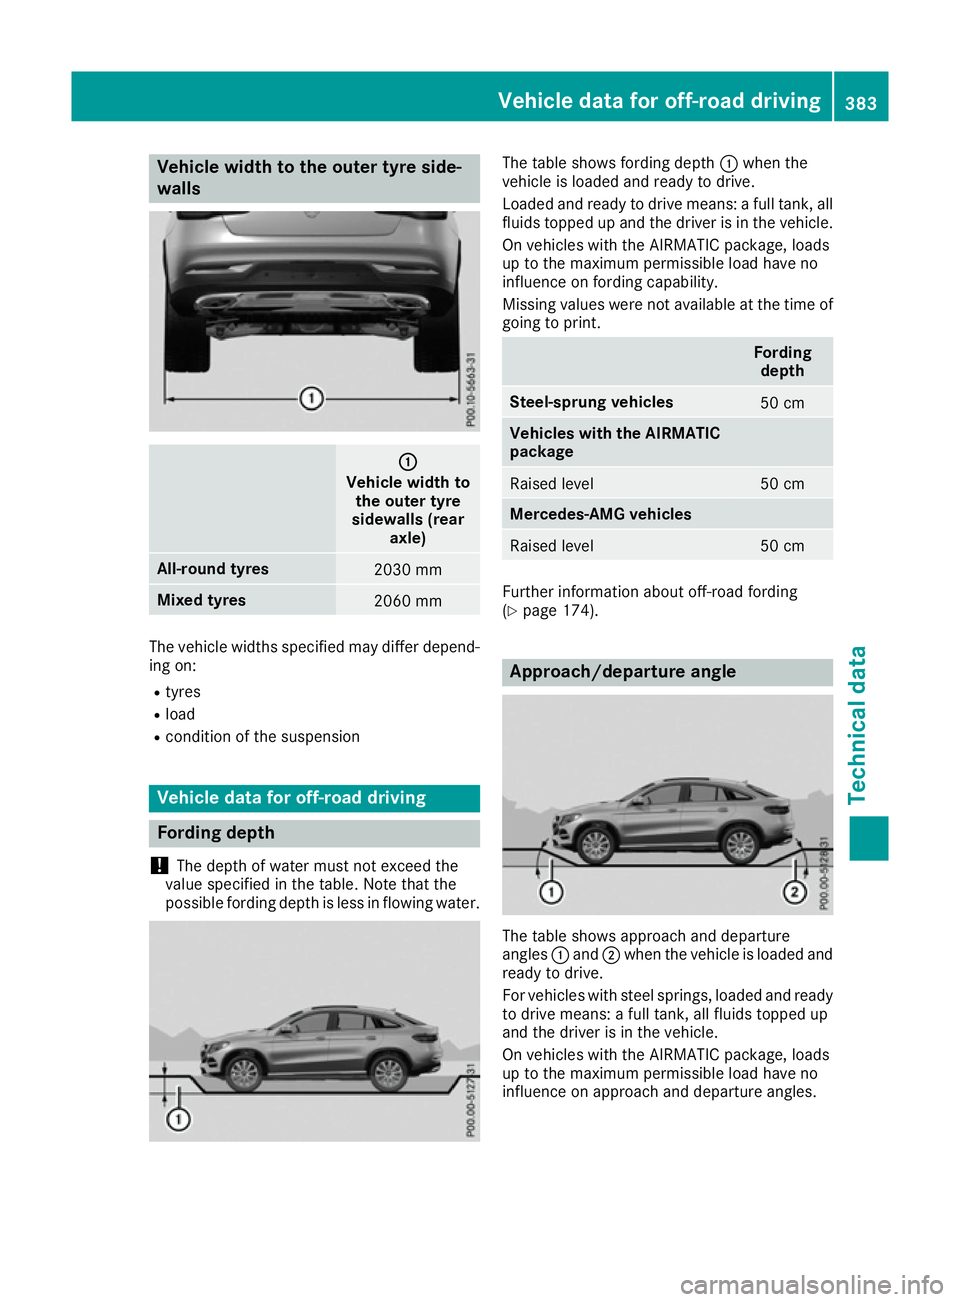
Vehicle width to the outer tyre side-
walls :
:
Vehicle width to the outer tyre
sidewalls (rear axle) All-round tyres
2030 mm
Mixed tyres
2060 mm
The vehicle widths specified may differ depend-
ing on:
R tyres
R load
R condition of the suspension Vehicle data for off-road driving
Fording depth
! The depth of water must not exceed the
value specified in the table. Note that the
possible fording depth is less in flowing water. The table shows fording depth
:when the
vehicle is loaded and ready to drive.
Loaded and ready to drive means: a full tank, all fluids topped up and the driver is in the vehicle.
On vehicles with the AIRMATIC package, loads
up to the maximum permissible load have no
influence on fording capability.
Missing values were not available at the time of
going to print. Fording
depth Steel-sprung vehicles
50 cm
Vehicles with the AIRMATIC
package Raised level 50 cm
Mercedes-AMG vehicles
Raised level 50 cm
Further information about off-road fording
(Y
page 174). Approach/departure angle
The table shows approach and departure
angles
:and ;when the vehicle is loaded and
ready to drive.
For vehicles with steel springs, loaded and ready
to drive means: a full tank, all fluids topped up
and the driver is in the vehicle.
On vehicles with the AIRMATIC package, loads
up to the maximum permissible load have no
influence on approach and departure angles. Vehicle data for off-road driving
383Technical data Z
Page 387 of 393
All vehicles (except vehicles with AMG body-
styling) :
: ;
;
Steel-sprung vehi-
cles
22° 24°
Vehicles with the
AIRMATIC package Normal level 22° 24°
Raised level 26° 27°
Mercedes-AMG
vehicles
Raised level 22° 24°
Vehicles with AMG bodystyling
: : ;
;
Steel-sprung vehi-
cles
23° 24°
Vehicles with the
AIRMATIC package
Normal level 23° 24°
Raised level 26° 27°
For further information about approach/depar-
ture angles, see (Y
page 177).Maximum gradient-climbing capabil-
ity
Note that the vehicle's gradient-climbing capa-
bility depends on the off-road conditions and the road surface conditions.
The maximum gradient climbing ability is 80 %.
Carefully depress the accelerator pedal and
make sure that the wheels do not spin when
driving on steep terrain.
i If the load on the front axle is reduced when
pulling away on a steep uphill slope, the front
wheels have a tendency to spin. 4ETS recog-
nises this and brakes the wheels accordingly. The rear wheel torque is increased and it is
easier to pull away.
For further information about maximum gradi-
ent-climbing capability, see (Y page 178). Trailer tow hitch
Mounting dimensions
! If you have a trailer tow hitch retrofitted,
changes to the cooling system and drive train
may be necessary, depending on the vehicle
type.
If you have a trailer tow hitch retrofitted,
observe the anchorage points on the chassis
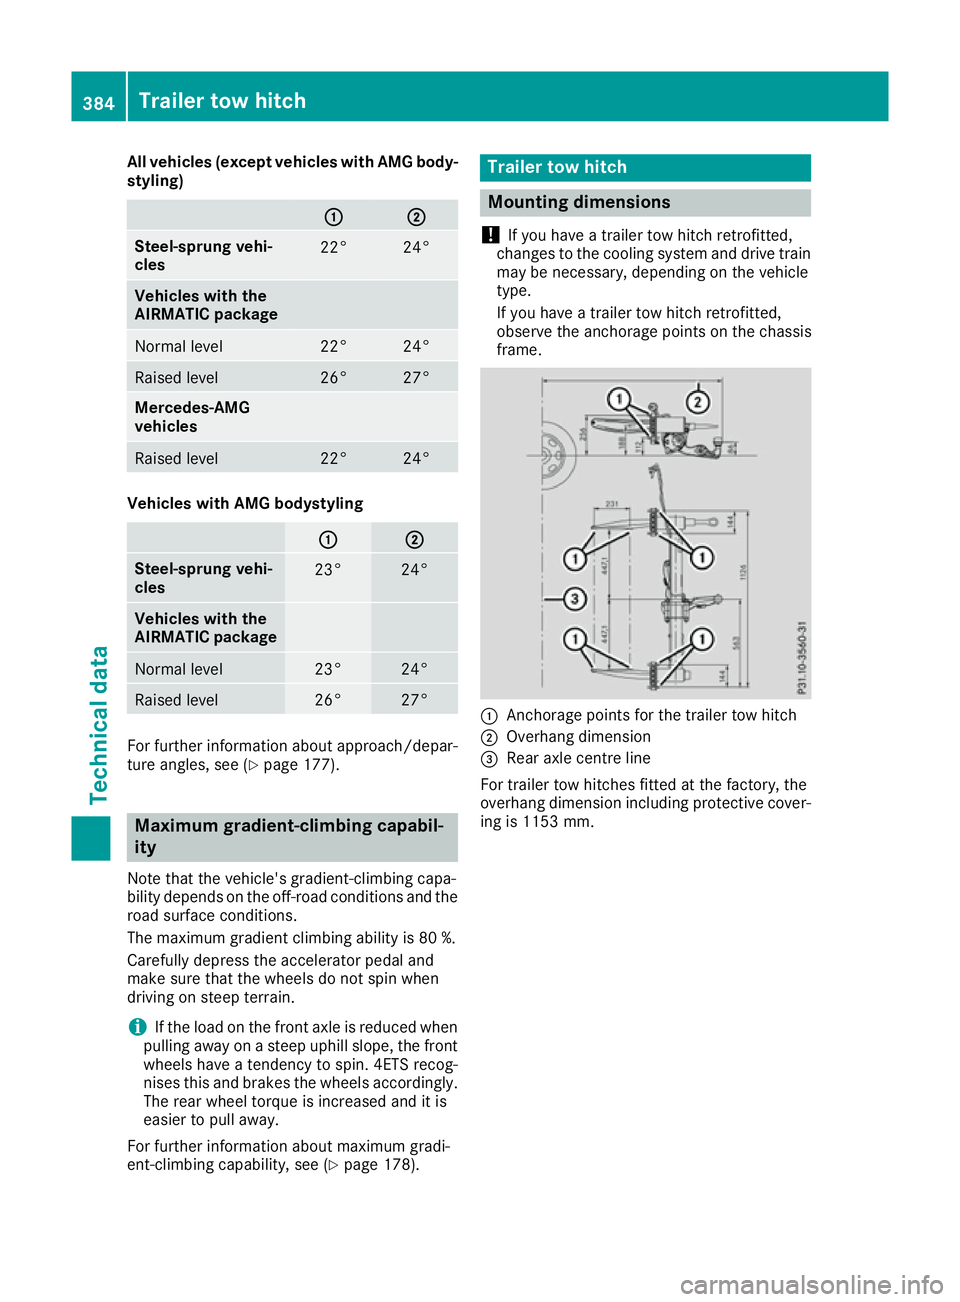
frame. :
Anchorage points for the trailer tow hitch
; Overhang dimension
= Rear axle centre line
For trailer tow hitches fitted at the factory, the
overhang dimension including protective cover- ing is 1153 mm. 384
Trailer tow hitchTechnical data