2015 MERCEDES-BENZ GLE COUPE automatic transmission
[x] Cancel search: automatic transmissionPage 195 of 393
Important safety notes
G
WARNING
When leaving the vehicle, it can still roll away despite being braked by the HOLD function if:
R there is a malfunction in the system or in
the voltage supply
R the HOLD function is deactivated by the
accelerator pedal being depressed, e.g. by
a vehicle occupant
R the electrical system in the engine com-
partment, the battery or the fuses are tam-
pered with
R the battery is disconnected
There is a risk of an accident.
Before leaving the vehicle, always deactivate
the HOLD function and secure the vehicle
from rolling away.
! When DISTRONIC PLUS or the HOLD func-
tion is activated, the vehicle brakes automat- ically in certain situations.
To avoid damage to the vehicle, deactivate
DISTRONIC PLUS and the HOLD function in
the following or similar situations:
R when towing away
R in a car wash
Deactivating the HOLD function (Y page 192).
Activation conditions You can activate the HOLD function if:
R the vehicle is stationary
R the engine is running or if it has been auto-
matically switched off by the ECO start/stop
function
R the driver's door is closed or if your seat belt
is fastened
R the electric parking brake is released
R the transmission is in position D,Ror N
R DISTRONIC PLUS is deactivated Activating the HOLD function X
Make sure that the activation conditions are
met.
X Depress the brake pedal.
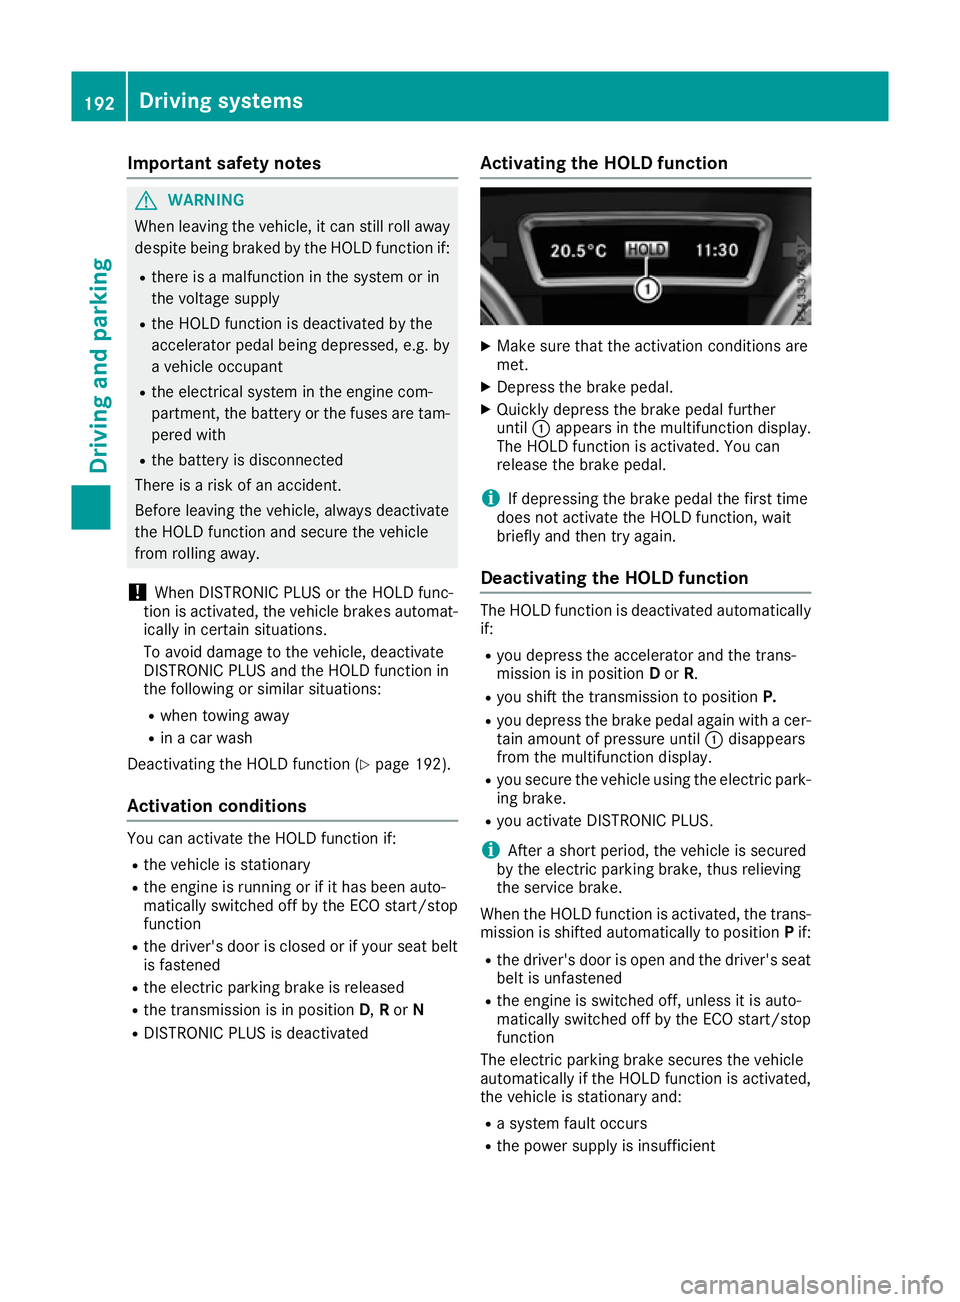
X Quickly depress the brake pedal further
until :appears in the multifunction display.
The HOLD function is activated. You can
release the brake pedal.
i If depressing the brake pedal the first time
does not activate the HOLD function, wait
briefly and then try again.
Deactivating the HOLD function The HOLD function is deactivated automatically
if:
R you depress the accelerator and the trans-
mission is in position Dor R.
R you shift the transmission to position P.
R you depress the brake pedal again with a cer-
tain amount of pressure until :disappears
from the multifunction display.
R you secure the vehicle using the electric park-
ing brake.
R you activate DISTRONIC PLUS.
i After a short period, the vehicle is secured
by the electric parking brake, thus relieving
the service brake.
When the HOLD function is activated, the trans-
mission is shifted automatically to position Pif:
R the driver's door is open and the driver's seat
belt is unfastened
R the engine is switched off, unless it is auto-
matically switched off by the ECO start/stop
function
The electric parking brake secures the vehicle
automatically if the HOLD function is activated,
the vehicle is stationary and:
R a system fault occurs
R the power supply is insufficient 192
Driving systemsDriving and pa
rking
Page 196 of 393
On steep uphill or downhill inclines or if there is
a malfunction, the transmission may also be
automatically shifted into position P.4MATIC
4MATIC ensures that all four wheels are perma-
nently driven. Together with ESP ®
and 4ETS, it
improves the traction of your vehicle whenever
a drive wheel spins due to insufficient grip.
If you fail to adapt your driving style, 4MATIC can
neither reduce the risk of an accident nor over-
ride the laws of physics. 4MATIC cannot take
account of road, weather and traffic conditions. 4MATIC is only an aid. You are responsible for
the distance to the vehicle in front, for vehicle
speed, for braking in good time and for staying in
lane.
! Never tow the vehicle with one axle raised.
This may damage the transfer case. Damage
of this sort is not covered by the Mercedes-
Benz implied warranty. All wheels must
remain either on the ground or be fully raised.
Observe the instructions for towing the vehi-
cle with all wheels in full contact with the
ground.
! A function or performance test should only
be carried out on a twin-axle dynamometer.
Before you operate the vehicle on such a
dynamometer, please consult a qualified
workshop. You could otherwise damage the
drive train or the brake system.
i In wintry driving conditions, the maximum
effect of 4MATIC can only be achieved if you
use winter tyres (M+S tyres), with snow
chains if necessary. DSR (Downhill Speed Regulation)
General notes DSR is an aid to assist you when driving down-
hill. It keeps the speed of travel at the speed
selected on the on-board computer. The steeper
the downhill gradient, the greater the DSR brak-
ing effect on the vehicle. When driving on flat
stretches of road or on an uphill gradient, the
DSR braking effect is minimal or non-existent.
DSR controls the vehicle’s speed when it is acti- vated and the transmission is in position D,Ror
N. By accelerating or braking, you can always drive at a higher or a lower speed than that set
on the on-board computer.
Important safety notes G
WARNING
If the speed driven and the set speed deviate and you activate DSR on a slippery road sur-
face, the wheels may lose traction. This
increases the risk of skidding and having an
accident.
Before switching DSR on, please take into
consideration the road surface and the differ-
ence between driving speed and the set
speed.
If you fail to adapt your driving style, DSR can
neither reduce the risk of accident nor override the laws of physics. DSR cannot take account ofroad, weather and traffic conditions. DSR is only
an aid. You are responsible for the distance to
the vehicle in front, for vehicle speed, for brak-
ing in good time and for staying in lane.
You are always responsible for keeping control
of the vehicle and for assessing whether the
downhill gradient can be managed. DSR may not
always be able to keep to the set speed, depend-
ing on road surface and tyre conditions. Select a set speed suitable for the prevailing conditions
and when necessary, apply the brakes manually.
Activating DSR X
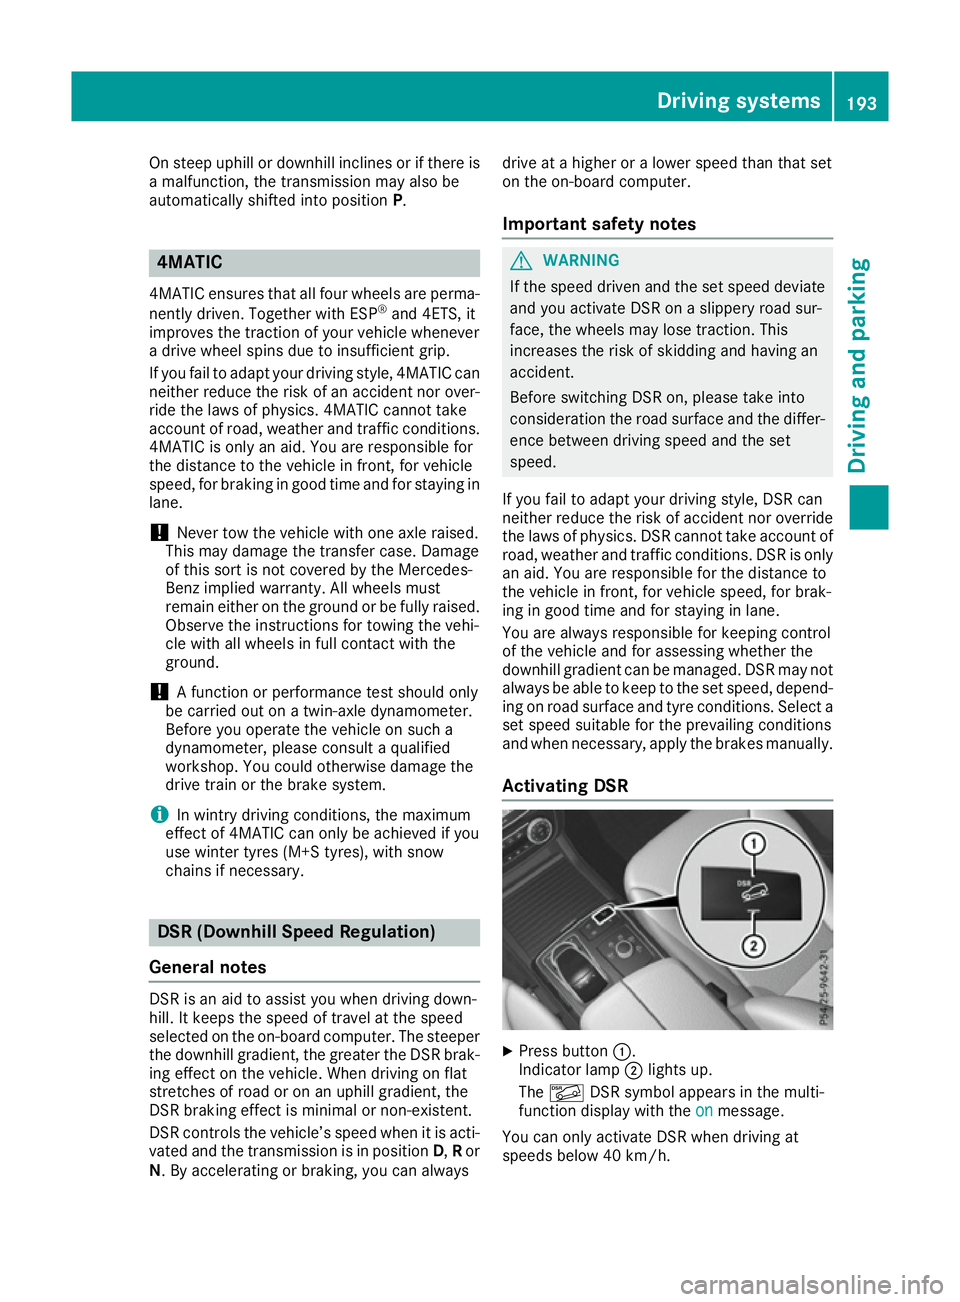
Press button :.
Indicator lamp ;lights up.
The à DSR symbol appears in the multi-
function display with the on onmessage.
You can only activate DSR when driving at
speeds below 40 km/h. Driving systems
193Driving and parking Z
Page 202 of 393
Comfort mode
In Comfort mode, the driving characteristics of
your vehicle are more comfortable. Select this
mode if you prefer a more comfortable driving
style, but also when driving fast on straight
roads, e.g. motorways.
X Press button :repeatedly until indicator
lamps ;and =go out.
You have selected Comfort mode.
The AMG Ride Control COMFORT
AMG Ride Control COMFORT message
appears in the multifunction display. PARKTRONIC
Important safety notes PARKTRONIC is an electronic parking aid with
ultrasonic sensors. It monitors the area around
your vehicle using six sensors in the front
bumper and six sensors in the rear bumper.
PARKTRONIC indicates visually and audibly the
distance between your vehicle and an object.
PARKTRONIC is only an aid. It is not a substitute
for your attention to the immediate surround-
ings. The responsibility for safe manoeuvring
and parking remains with you. Make sure that
there are no persons, animals or objects in
range while manoeuvring and parking.
! When parking, pay particular attention to
objects above or below the sensors, such as
flower pots or trailer drawbars. PARKTRONIC does not detect such objects when they are in
the immediate vicinity of the vehicle. You
could damage the vehicle or the objects.
The sensors may not detect snow and objects which absorb ultrasonic sources.
Ultrasonic sources, such as an automatic car
wash, a lorry's compressed-air brakes or a
pneumatic drill, could cause PARKTRONIC to
malfunction.
PARKTRONIC may not function correctly on
uneven terrain.
! Fold in the ball coupling if the trailer tow
hitch is not required. PARKTRONIC measures the minimum detection range to an obstacle
from the bumper, not the ball coupling.
PARKTRONIC is deactivated for the rear area
when you establish an electrical connection
between your vehicle and a trailer. PARKTRONIC is activated automatically when
you:
R switch on the ignition
R shift the transmission to position D,Ror N
R release the electric parking brake
PARKTRONIC is deactivated at speeds above
18 km/h. It is reactivated at lower speeds.
Range of the sensors General notes
PARKTRONIC does not take into account obsta-
cles located:
R below the detection range, e.g. persons, ani-
mals or objects
R above the detection range, e.g. overhanging
loads, tail sections or loading ramps of goods
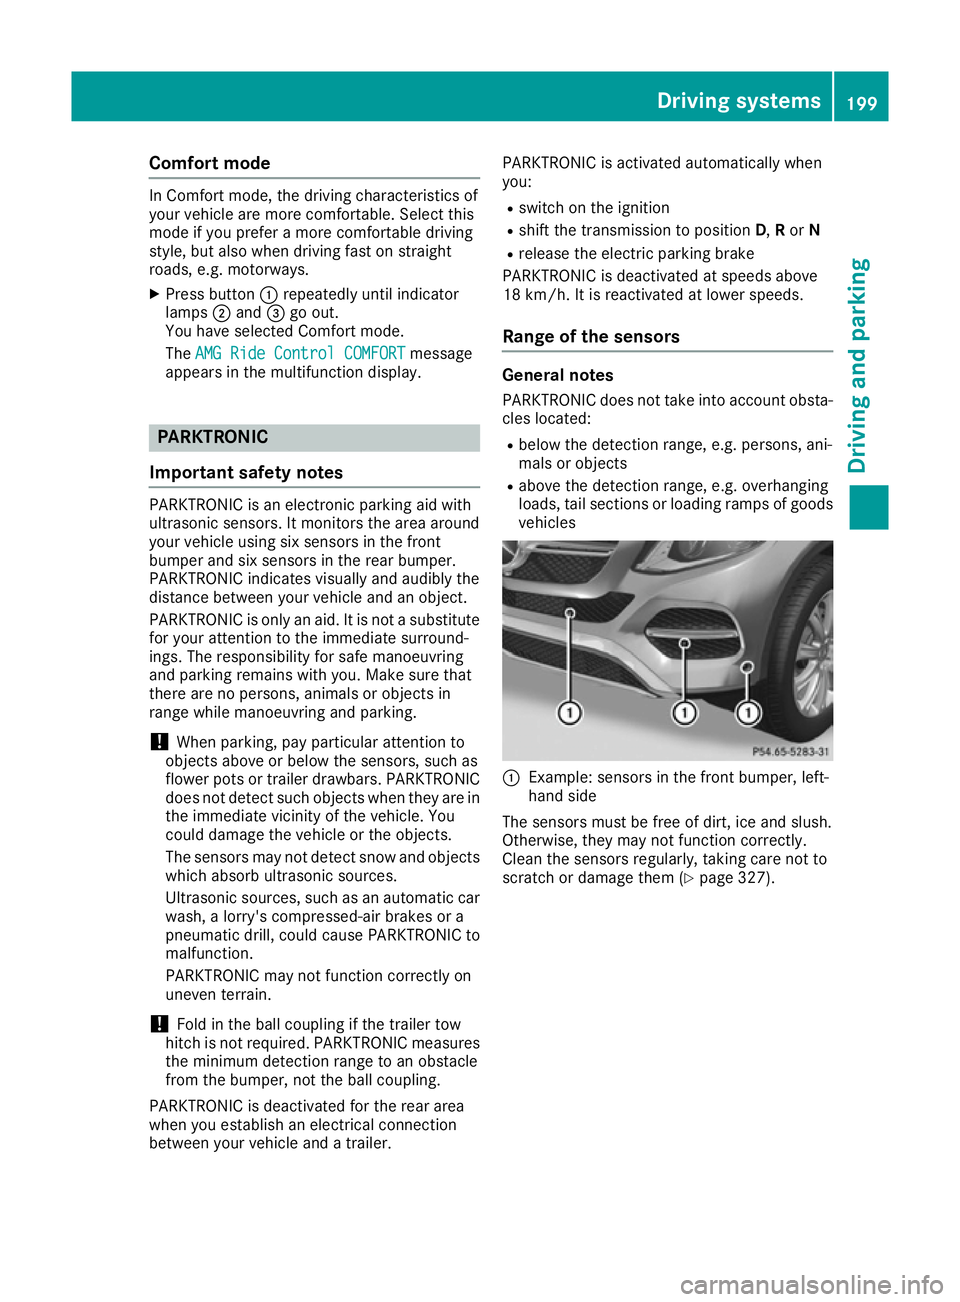
vehicles :
Example: sensors in the front bumper, left-
hand side
The sensors must be free of dirt, ice and slush.
Otherwise, they may not function correctly.
Clean the sensors regularly, taking care not to
scratch or damage them (Y page 327). Driving systems
199Driving and parking Z
Page 207 of 393
need to judge whether your vehicle will fit in
the parking space.
When driving at speeds below 30 km/h, you will
see parking symbol ;as a status indicator in
the instrument cluster. When a parking space
has been detected, an arrow towards the right or the left also appears. Active Parking Assist only
displays parking spaces on the front-passenger side as standard. Parking spaces on the driver's
side are displayed as soon as the turn signal on the driver's side is activated. When parking on
the driver's side, this must remain activated
until you confirm the use of Active Parking Assist by pressing the abutton on the multifunc-
tion steering wheel. The system automatically
determines whether the parking space is paral-
lel or at right angles to the direction of travel.
A parking space is displayed while you are driv-
ing past it, and until you are approximately 15 m away from it.
Parking G
WARNING
If you leave the vehicle when it is only being
braked by Active Parking Assist it could roll
away if:
R there is a malfunction in the system or in
the voltage supply.
R the electrical system in the engine com-
partment, the battery or the fuses are tam-
pered with.
R the battery is disconnected.
R the vehicle is accelerated, e.g. by a vehicle
occupant.
There is a risk of an accident.
Before leaving the vehicle, always secure it
against rolling away.
i When PARKTRONIC detects obstacles,
Active Parking Assist brakes automatically
during the parking process. You are respon-
sible for braking in good time. X
Stop the vehicle when the parking symbol
shows the desired parking space in the instru-
ment cluster.
X Shift the transmission to position R.
The Start Park Assist? Yes: OK No:
Start Park Assist? Yes: OK No:
% message appears in the multifunction
display.
X To cancel the procedure: press the%
button on the multifunction steering wheel or
pull away.
or X To park using Active Parking Assist: press
the a button on the multifunction steering
wheel.
The Park Assist active Accelerate
Park Assist active Accelerate
and brake Observe surroundings and brake Observe surroundings mes-
sage appears in the multifunction display.
X Release the multifunction steering wheel.
X Reverse the vehicle, being ready to brake at
all times. When reversing, drive at a speed
below 10 km/h. Otherwise, Active Parking
Assist will be cancelled.
Active Parking Assist brakes the vehicle to a
standstill when the vehicle approaches the
rear border of the parking space.
Manoeuvring may be required in tight parking spaces.
The Park Assist active Select D Park Assist active Select D
Observe surroundings
Observe surroundings message appears in
the multifunction display.
X Shift the transmission to position Dwhile the
vehicle is stationary.
Active Parking Assist immediately steers in
the other direction.
The Park Assist active Accelerate Park Assist active Accelerate
and brake Observe surroundings and brake Observe surroundings mes-
sage appears in the multifunction display.
i You will achieve the best results by waiting
for the steering procedure to complete before
pulling away.
X Drive forwards and be ready to brake at all
times.
Active Parking Assist brakes the vehicle to a
standstill.
The Park Assist active Select R Park Assist active Select R
Observe surroundings
Observe surroundings message appears in
the multifunction display.
As soon as the parking procedure is complete,
the Park Assist switched off
Park Assist switched off message
appears in the multifunction display and a warn- ing tone sounds. The vehicle is now parked. The 204
Driving systemsDriving an
d parking
Page 208 of 393
vehicle is kept stationary without the driver hav-
ing to depress the brake pedal. The braking
effect is cancelled when you depress the accel-
erator pedal.
Active Parking Assist no longer supports you
with steering interventions and brake applica-
tions. When Active Parking Assist is finished,
you must steer and brake again yourself.
PARKTRONIC is still available.
Parking tips:
R The way your vehicle is positioned in the park-
ing space after parking is dependent on vari-
ous factors. These include the position and
shape of the vehicles parked in front and
behind it and the conditions of the location. It
may be the case that Active Parking Assist
guides you too far into a parking space, or not
far enough into it. In some cases, it may also
lead you across or onto the kerb. If necessary, you should cancel the parking procedure with
Active Parking Assist.
R You can also preselect transmission position
D. The vehicle redirects and does not drive as
far into the parking space. Should the trans-
mission change take place too early, the park-
ing procedure will be cancelled. A sensible
parking position can no longer be achieved
from this position.
Exiting a parking space In order that Active Parking Assist can support
you when exiting the parking space:
R the border of the parking space must be high
enough at the front and the rear. A kerb stone
is too small, for example.
R the border of the parking space must not be
too wide, as the position of the vehicle must
not exceed an angle of 45° to the starting
position as it is manoeuvred into the parking
space.
R a manoeuvring distance of at least 1.0 mmust
be available.
Active Parking Assist can only assist you with
exiting a parking space if you have parked the
vehicle parallel to the direction of travel using
Active Parking Assist.
i If PARKTRONIC detects obstacles, Active
Parking Assist brakes automatically whilst the vehicle exits the parking space. You are
responsible for braking in good time. X
Start the engine.
X Release the electric parking brake.
X Switch on the turn signal in the direction you
will drive out of the parking space.
X Shift the transmission to position Dor R.
The Start Park Assist? Yes: OK No:
Start Park Assist? Yes: OK No:
message appears in the multifunction display
%.
X To cancel the procedure: press the%
button on the multifunction steering wheel or
pull away.
or X To exit a parking space using Active Park-
ing Assist: press theabutton on the mul-
tifunction steering wheel.
The Park Assist active Accelerate
Park Assist active Accelerate
and brake Observe surroundings and brake Observe surroundings mes-
sage appears in the multifunction display.
X Release the multifunction steering wheel.
X Pull away, being ready to brake at all times. Do
not exceed a maximum speed of approx-
imately 10 km/h when exiting a parking
space. Otherwise, Active Parking Assist will
be cancelled.
X Shift the transmission to position Dor Ras
required or according to the message while
the vehicle is stationary.
Active Parking Assist immediately steers in
the other direction. The Park Assist
Park Assist
active active Accelerate
Accelerate and
andbrake
brake Observe
Observe
surroundings
surroundings message appears in the mul-
tifunction display.
i You will achieve the best results by waiting
for the steering procedure to complete before
pulling away.
If you reverse after activation, the steering
wheel is moved to the straight-ahead posi-
tion.
X Drive forwards and reverse as prompted by
the PARKTRONIC warning displays, several
times if necessary.
Once you have exited the parking space com-
pletely, the steering wheel is moved to the
straight-ahead position. You hear a tone and the
Park Park Assist
Assist switched
switched off
offmessage appears
in the multifunction display. You will then have
to steer and merge into traffic on your own.
PARKTRONIC is still available. You can take over the steering before the vehicle has exited the
parking space completely. This is useful, for
example, when you recognise that it is already
possible to pull out of the parking space. Driving systems
205Driving and parking Z
Page 209 of 393
Cancelling Active Parking Assist
X
Stop the movement of the multifunction
steering wheel or steer yourself.
Active Parking Assist will be cancelled at
once. The Park Assist cancelled
Park Assist cancelled mes-
sage appears in the multifunction display.
or X Press the PARKTRONIC button (Y page 201).
PARKTRONIC is switched off and Active Park-
ing Assist is immediately cancelled. The
Park Assist cancelled Park Assist cancelled message appears
in the multifunction display.
Active Parking Assist is cancelled automatically if:
R the electric parking brake is applied
R transmission position Pis selected
R parking using Active Parking Assist is no lon-
ger possible
R you are driving faster than 10 km/h
R a wheel spins and ESP ®
intervenes or fails.
The ÷ warning lamp lights up in the instru-
ment cluster.
A warning tone sounds. The parking symbol dis-
appears and the multifunction display shows the
Park Assist cancelled
Park Assist cancelled message.
When Active Parking Assist is cancelled, you
must steer and brake again yourself.
If a system malfunction occurs, the vehicle is
braked to a standstill. To drive on, depress the
accelerator pedal again. Reversing camera
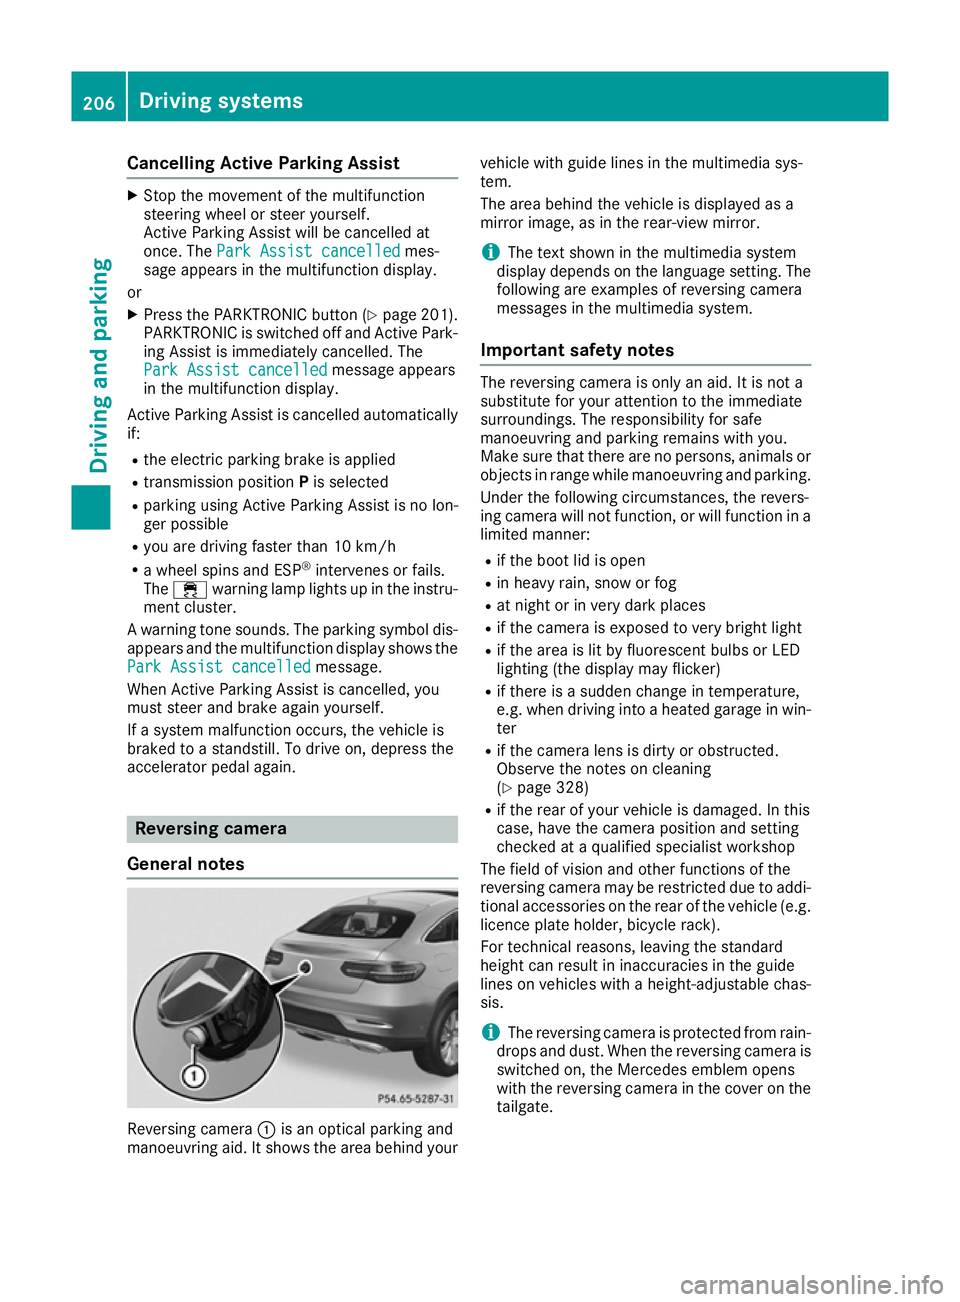
General notes Reversing camera
:is an optical parking and
manoeuvring aid. It shows the area behind your vehicle with guide lines in the multimedia sys-
tem.
The area behind the vehicle is displayed as a
mirror image, as in the rear-view mirror.
i The text shown in the multimedia system
display depends on the language setting. The
following are examples of reversing camera
messages in the multimedia system.
Important safety notes The reversing camera is only an aid. It is not a
substitute for your attention to the immediate
surroundings. The responsibility for safe
manoeuvring and parking remains with you.
Make sure that there are no persons, animals or
objects in range while manoeuvring and parking.
Under the following circumstances, the revers-
ing camera will not function, or will function in a limited manner:
R if the boot lid is open
R in heavy rain, snow or fog
R at night or in very dark places
R if the camera is exposed to very bright light
R if the area is lit by fluorescent bulbs or LED
lighting (the display may flicker)
R if there is a sudden change in temperature,
e.g. when driving into a heated garage in win-
ter
R if the camera lens is dirty or obstructed.
Observe the notes on cleaning
(Y page 328)
R if the rear of your vehicle is damaged. In this
case, have the camera position and setting
checked at a qualified specialist workshop
The field of vision and other functions of the
reversing camera may be restricted due to addi-
tional accessories on the rear of the vehicle (e.g. licence plate holder, bicycle rack).
For technical reasons, leaving the standard
height can result in inaccuracies in the guide
lines on vehicles with a height-adjustable chas-
sis.
i The reversing camera is protected from rain-
drops and dust. When the reversing camera is switched on, the Mercedes emblem opens
with the reversing camera in the cover on the
tailgate. 206
Driving systemsDriving and parking
Page 215 of 393
Do not use the 360° camera under such cir-
cumstances. You could otherwise injure others
or damage objects when parking the vehicle.
Guide lines are always shown at road level. In
trailer mode, the guide lines are shown at the
level of the trailer coupling.
The field of vision and other functions of the
camera system may be restricted due to addi-
tional accessories on the rear of the vehicle (e.g.
licence plate holder, bicycle rack).
On vehicles with height-adjustable suspension,
due to the technical conditions, leaving the
standard height can result in:
R inaccuracies in the guide lines
R inaccuracies in the display of generated
images (top view)
Activation conditions The 360° camera image can be displayed if:
R your vehicle is equipped with a 360° camera
R the key is in position 2in the ignition lock
R the multimedia system is switched on
Activating the 360° camera X
Press the Øbutton in the centre console
for longer than two seconds.
The following appears depending on whether transmission position Dor Ris selected:
R a split-screen with top view and the image
from the front camera or
R a split-screen with top view and the image
from the reversing camera
or
X Press the Øbutton in the centre console.
The vehicle menu appears.
X Select 360°
360° camera camera and press 7to confirm.
The following appears depending on whether transmission position Dor Ris selected:
R a split-screen with top view and the image
from the front camera or
R a split-screen with top view and the image
from the reversing camera
Switching on the 360° camera using
reverse gear You can show images from the 360° camera
automatically by engaging reverse gear. X
Make sure that the key is in position 2in the
ignition lock.
X Make sure that the Activation by R gear
Activation by R gear
function is selected in the multimedia system (see the separate operating instructions).
X To show the 360° camera image: engage
reverse gear.
The multimedia system shows the area
behind the vehicle in split-screen mode. You
see the top view of the vehicle and the image from the reversing camera.
Selecting the split-screens or 180° view Selecting split-screen view
X To switch to the line with the vehicle icons:
slide 5the controller.
X To select one of the vehicle icons: turn 3
the controller.
X To switch to 180° view
180° view :turn 3 the con-
troller to select 180° view
180° view and press7to
confirm.
i The
180° 180° view
viewoption is only available in the
following views:
R Top view with image from the reversing
camera
R Top view with image from the front camera
Displays in the multimedia system Important safety notes
The camera system may show a distorted view
of obstacles or show them incorrectly or not at
all. Obstacles are not shown by the system in the
following locations:
R under the front and rear bumpers
R very close to the front and rear bumpers
R in the area immediately above the tailgate
handle
R very close to the exterior mirrors
R in the transitional areas between the various
cameras in the virtual top view
! Objects not at ground level may appear to
be further away than they actually are, e.g.:
R the bumper of a parked vehicle
R the drawbar of a trailer
R the ball coupling of a trailer tow hitch 212
Driving systemsDriving an
d parking
Page 233 of 393
Vehicles with the AIRMATIC package
!
Before beginning the journey, make sure
that the trailer support wheel is completely
raised. Otherwise, the trailer or the vehicle
could be damaged by the lowered trailer sup- port wheel during the journey.
X Shift the transmission to position P.
X Apply the electric parking brake.
X Start the engine.
X Select the Comfortdrive program using the
DYNAMIC SELECT controller (Y page 195).
X Switch off the engine.
X Close the doors and tailgate.
X Position the trailer horizontally behind the
vehicle.
X Couple up the trailer.
X Establish the electrical connection between
the vehicle and the trailer.
X Check that the trailer lighting system is work-
ing.
X Push the combination switch upwards and
downwards and check whether the corre-
sponding turn signal on the trailer is flashing.
A connected trailer is only detected when the
electrical connection is established correctly
and when the lighting system is working prop-
erly. The function of other systems also depends on this, for example:
R ESP ®
R PARKTRONIC
R Active Parking Assist
R Active Blind Spot Assist
R Active Lane Keeping Assist
i Vehicles with the AIRMATIC package:
if
you couple up a trailer, the vehicle initially
remains at the selected level of the drive pro- gram set. Observe the following when cou-
pling up a trailer:
R If the normal level was not selected previ-
ously, the vehicle automatically adopts the
normal level starting from a speed of
30 km/h. Even at higher speeds, it does not drop below the normal level.
R Vehicle levels below the normal level are
not available.
R The raised level is available up to a speed of
30 km/h. R
This also applies when using accessories
that are plugged into the socket of the
trailer tow hitch (e.g. a bicycle rack).
R Before driving with a trailer, please observe
the information on the trailer support
wheel. Uncoupling a trailer
Important safety notes G
WARNING
If you uncouple a trailer with an engaged over- run brake, you could trap your hand between
the vehicle and the trailer drawbar. This poses a risk of injury.
Do not uncouple a trailer with an engaged
overrun brake. G
WARNING
Vehicles with level control:
If you disconnect the trailer cable, the vehicle is lowered. This can cause you or others to
become trapped between the vehicle body
and tyres, or underneath the vehicle. This
poses a risk of injury.
Make sure that no-one is in the immediate
vicinity of the wheel arch or underneath the
vehicle when disconnecting the trailer cable.
! Do not disconnect a trailer with an engaged
overrun brake. Otherwise, your vehicle could
be damaged by the rebounding of the overrun
brake.
! Remove the adapter cable before folding in
the ball coupling. You could otherwise dam-
age the rear bumper and the adapter cable.
Steel-sprung vehicles X
Shift the transmission to position P.
X Apply the electric parking brake.
X Secure the trailer against rolling away.
X Remove the trailer cable and decouple the
trailer. 230
Towing a trailerDriving an
d parking