2015 MERCEDES-BENZ GLE COUPE change time
[x] Cancel search: change timePage 135 of 393
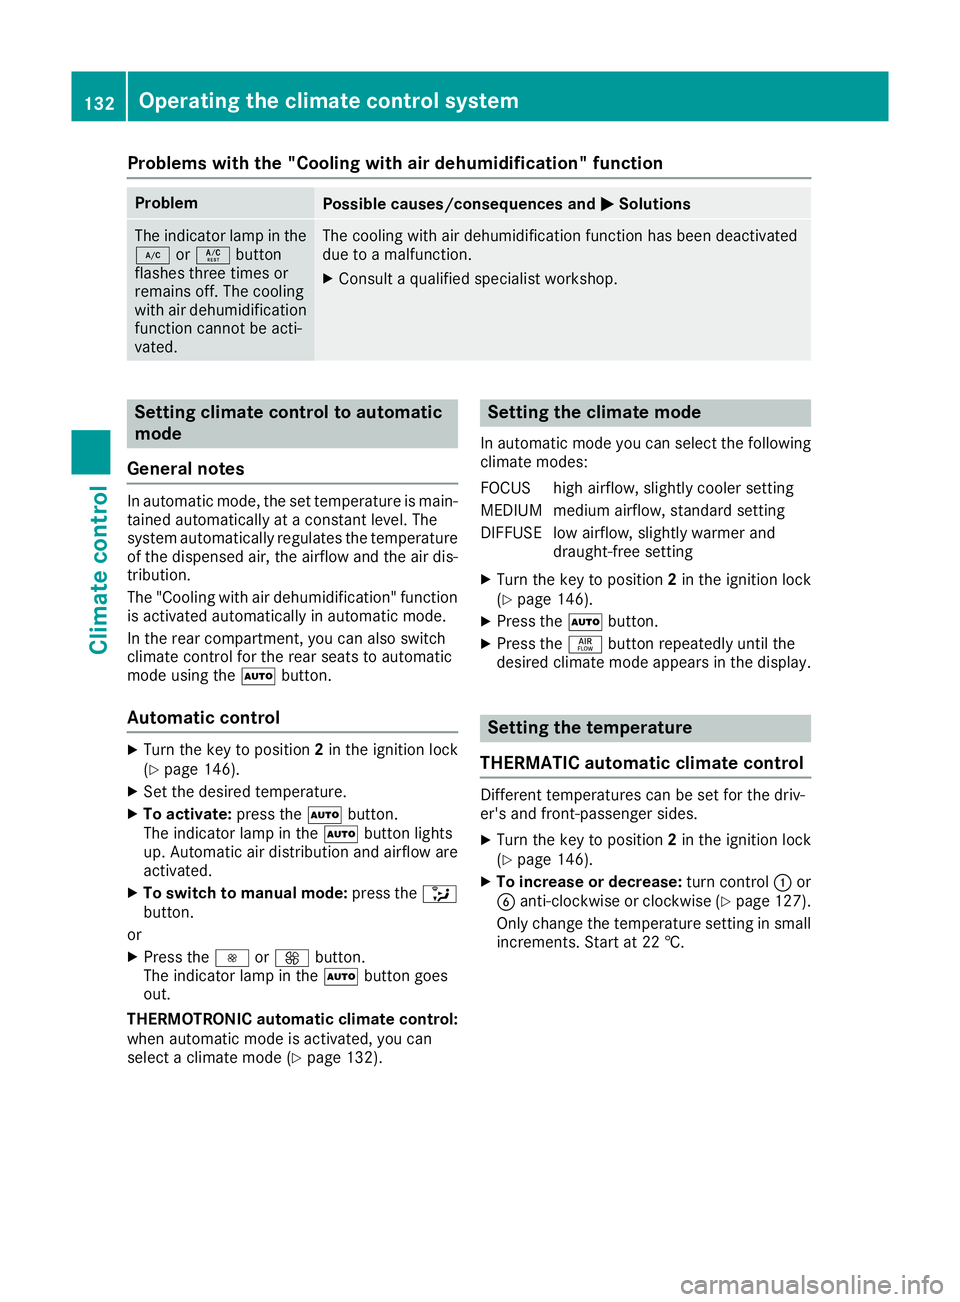
Problems with the "Cooling with air dehumidification" function
Problem
Possible causes/consequences and
M
MSolutions The indicator lamp in the
¿ orÁ button
flashes three times or
remains off. The cooling
with air dehumidification
function cannot be acti-
vated. The cooling with air dehumidification function has been deactivated
due to a malfunction.
X Consult a qualified specialist workshop. Setting climate control to automatic
mode
General notes In automatic mode, the set temperature is main-
tained automatically at a constant level. The
system automatically regulates the temperature of the dispensed air, the airflow and the air dis- tribution.
The "Cooling with air dehumidification" function
is activated automatically in automatic mode.
In the rear compartment, you can also switch
climate control for the rear seats to automatic
mode using the Ãbutton.
Automatic control X
Turn the key to position 2in the ignition lock
(Y page 146).
X Set the desired temperature.
X To activate: press theÃbutton.
The indicator lamp in the Ãbutton lights
up. Automatic air distribution and airflow are
activated.
X To switch to manual mode: press the_
button.
or X Press the IorK button.
The indicator lamp in the Ãbutton goes
out.
THERMOTRONIC automatic climate control:
when automatic mode is activated, you can
select a climate mode (Y page 132). Setting the climate mode
In automatic mode you can select the following
climate modes:
FOCUS high airflow, slightly cooler setting
MEDIUM medium airflow, standard setting
DIFFUSE low airflow, slightly warmer and draught-free setting
X Turn the key to position 2in the ignition lock
(Y page 146).
X Press the Ãbutton.
X Press the ñbutton repeatedly until the
desired climate mode appears in the display. Setting the temperature
THERMATIC automatic climate control Different temperatures can be set for the driv-
er's and front-passenger sides.
X Turn the key to position 2in the ignition lock
(Y page 146).
X To increase or decrease: turn control:or
B anti-clockwise or clockwise (Y page 127).
Only change the temperature setting in small increments. Start at 22 †. 132
Operating the climate control systemClimate control
Page 141 of 393
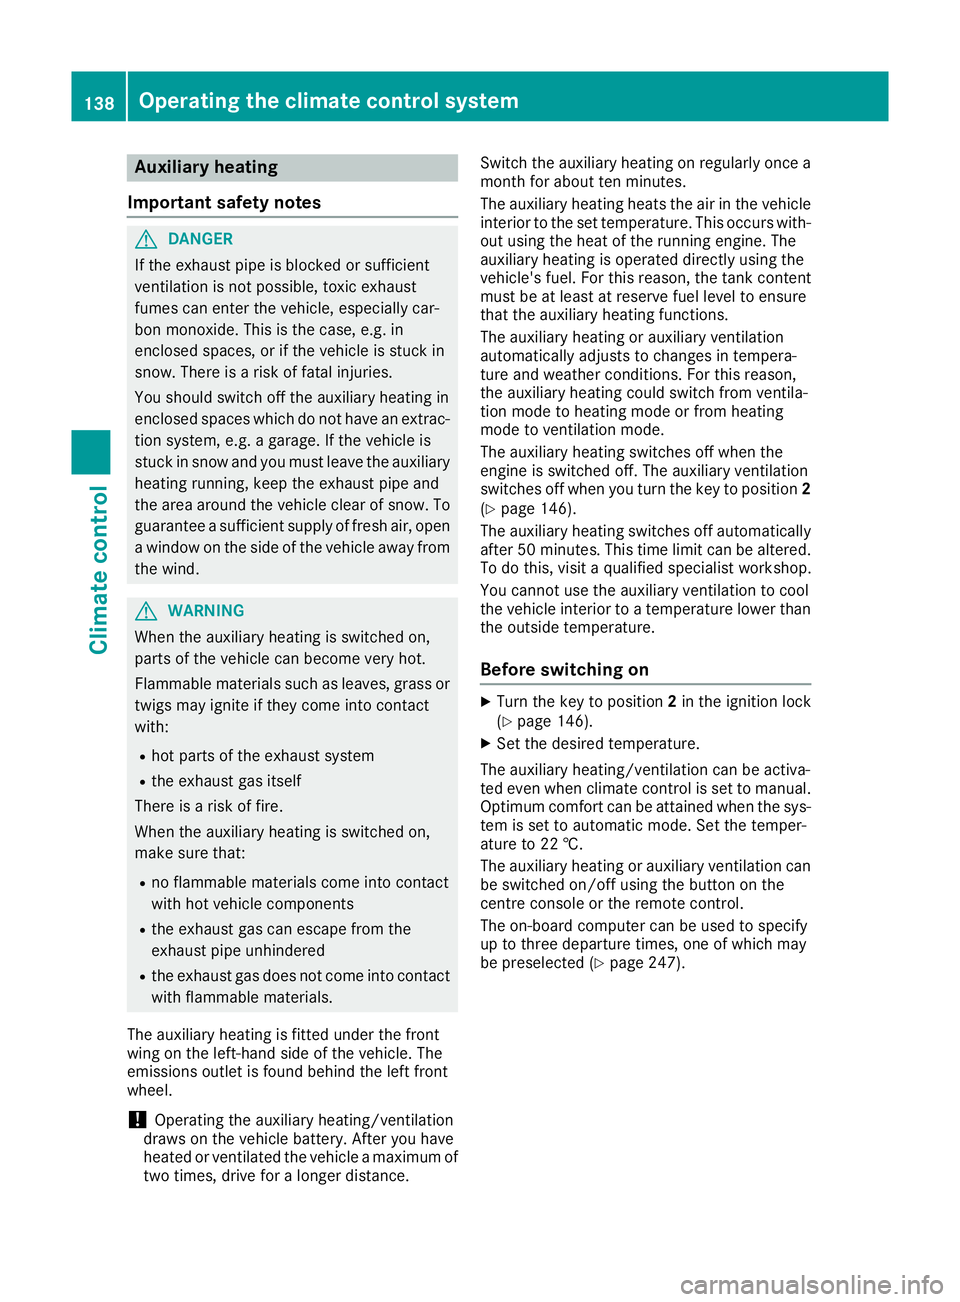
Auxiliary heating
Important safety notes G
DANGER
If the exhaust pipe is blocked or sufficient
ventilation is not possible, toxic exhaust
fumes can enter the vehicle, especially car-
bon monoxide. This is the case, e.g. in
enclosed spaces, or if the vehicle is stuck in
snow. There is a risk of fatal injuries.
You should switch off the auxiliary heating in
enclosed spaces which do not have an extrac- tion system, e.g. a garage. If the vehicle is
stuck in snow and you must leave the auxiliary
heating running, keep the exhaust pipe and
the area around the vehicle clear of snow. To guarantee a sufficient supply of fresh air, open
a window on the side of the vehicle away from the wind. G
WARNING
When the auxiliary heating is switched on,
parts of the vehicle can become very hot.
Flammable materials such as leaves, grass or twigs may ignite if they come into contact
with:
R hot parts of the exhaust system
R the exhaust gas itself
There is a risk of fire.
When the auxiliary heating is switched on,
make sure that:
R no flammable materials come into contact
with hot vehicle components
R the exhaust gas can escape from the
exhaust pipe unhindered
R the exhaust gas does not come into contact
with flammable materials.
The auxiliary heating is fitted under the front
wing on the left-hand side of the vehicle. The
emissions outlet is found behind the left front
wheel.
! Operating the auxiliary heating/ventilation
draws on the vehicle battery. After you have
heated or ventilated the vehicle a maximum of two times, drive for a longer distance. Switch the auxiliary heating on regularly once a
month for about ten minutes.
The auxiliary heating heats the air in the vehicle
interior to the set temperature. This occurs with- out using the heat of the running engine. The
auxiliary heating is operated directly using the
vehicle's fuel. For this reason, the tank content
must be at least at reserve fuel level to ensure
that the auxiliary heating functions.
The auxiliary heating or auxiliary ventilation
automatically adjusts to changes in tempera-
ture and weather conditions. For this reason,
the auxiliary heating could switch from ventila-
tion mode to heating mode or from heating
mode to ventilation mode.
The auxiliary heating switches off when the
engine is switched off. The auxiliary ventilation
switches off when you turn the key to position 2
(Y page 146).
The auxiliary heating switches off automatically after 50 minute s.This time limit can be altered.
To do this, visit a qualified specialist workshop.
You cannot use the auxiliary ventilation to cool
the vehicle interior to a temperature lower than
the outside temperature.
Before switching on X
Turn the key to position 2in the ignition lock
(Y page 146).
X Set the desired temperature.
The auxiliary heating/ventilation can be activa-
ted even when climate control is set to manual.
Optimum comfort can be attained when the sys-
tem is set to automatic mode. Set the temper-
ature to 22 †.
The auxiliary heating or auxiliary ventilation can
be switched on/off using the button on the
centre console or the remote control.
The on-board computer can be used to specify
up to three departure times, one of which may
be preselected (Y page 247).138
Operating the climate control systemClimate control
Page 143 of 393
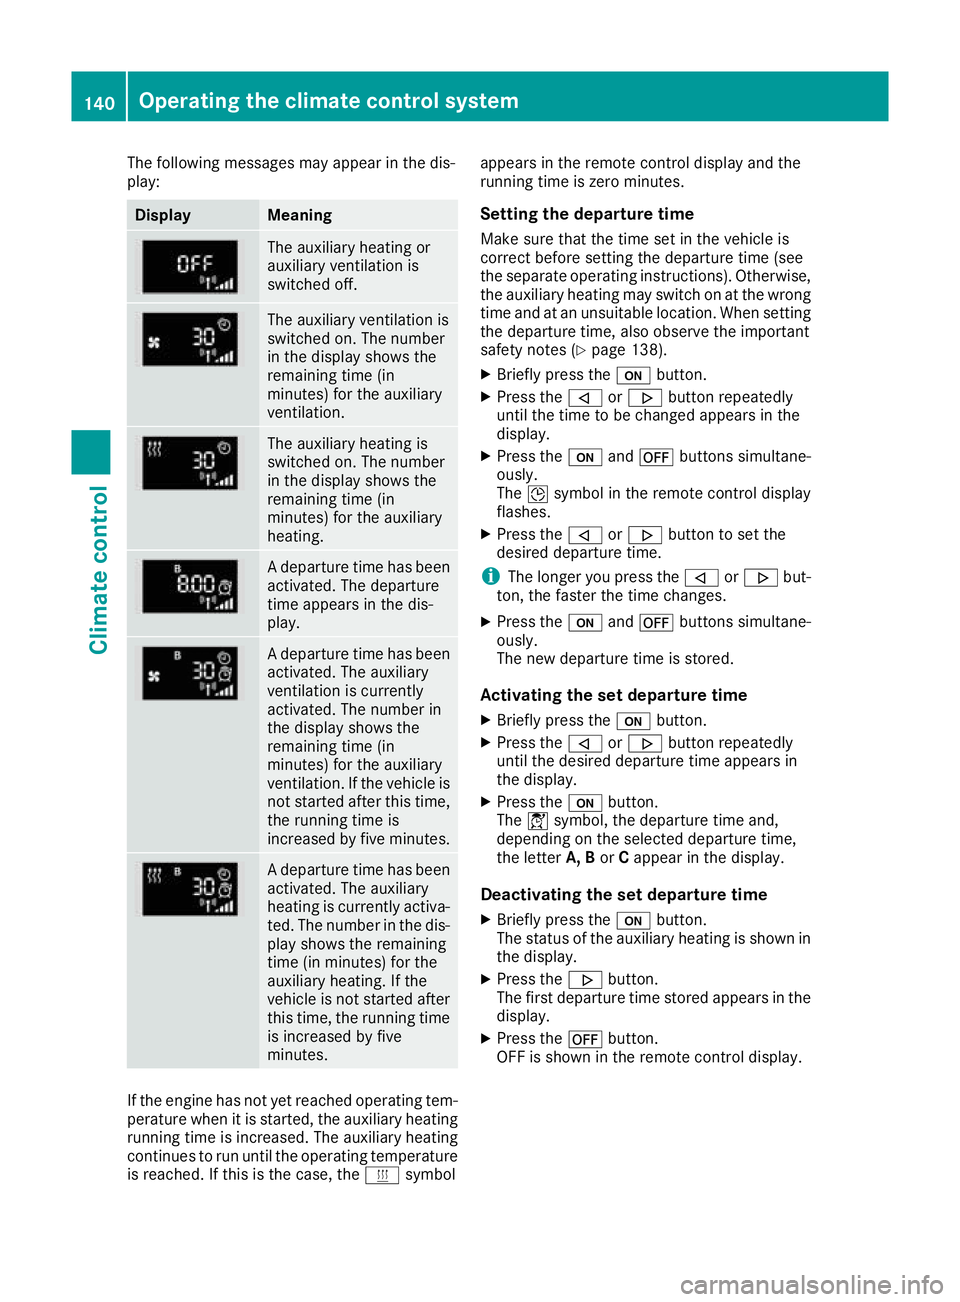
The following messages may appear in the dis-
play: Display Meaning
The auxiliary heating or
auxiliary ventilation is
switched off.
The auxiliary ventilation is
switched on. The number
in the display shows the
remaining time (in
minutes) for the auxiliary
ventilation.
The auxiliary heating is
switched on. The number
in the display shows the
remaining time (in
minutes) for the auxiliary
heating.
A departure time has been
activated. The departure
time appears in the dis-
play. A departure time has been
activated. The auxiliary
ventilation is currently
activated. The number in
the display shows the
remaining time (in
minutes) for the auxiliary
ventilation. If the vehicle is
not started after this time, the running time is
increased by five minutes. A departure time has been
activated. The auxiliary
heating is currently activa-
ted. The number in the dis- play shows the remaining
time (in minutes) for the
auxiliary heating. If the
vehicle is not started after
this time, the running time is increased by five
minutes. If the engine has not yet reached operating tem-
perature when it is started, the auxiliary heating running time is increased. The auxiliary heating
continues to run until the operating temperature
is reached. If this is the case, the ysymbol appears in the remote control display and the
running time is zero minutes.
Setting the departure time
Make sure that the time set in the vehicle is
correct before setting the departure time (see
the separate operating instructions). Otherwise, the auxiliary heating may switch on at the wrong
time and at an unsuitable location. When setting the departure time, also observe the important
safety notes (Y page 138).
X Briefly press the ubutton.
X Press the ,or. button repeatedly
until the time to be changed appears in the
display.
X Press the uand^ buttons simultane-
ously.
The Îsymbol in the remote control display
flashes.
X Press the ,or. button to set the
desired departure time.
i The longer you press the
,or. but-
ton, the faster the time changes.
X Press the uand^ buttons simultane-
ously.
The new departure time is stored.
Activating the set departure time
X Briefly press the ubutton.
X Press the ,or. button repeatedly
until the desired departure time appears in
the display.
X Press the ubutton.
The Ísymbol, the departure time and,
depending on the selected departure time,
the letter A, BorCappear in the display.
Deactivating the set departure time
X Briefly press the ubutton.
The status of the auxiliary heating is shown in the display.
X Press the .button.
The first departure time stored appears in the
display.
X Press the ^button.
OFF is shown in the remote control display. 140
Operating the climate control systemClimate control
Page 148 of 393
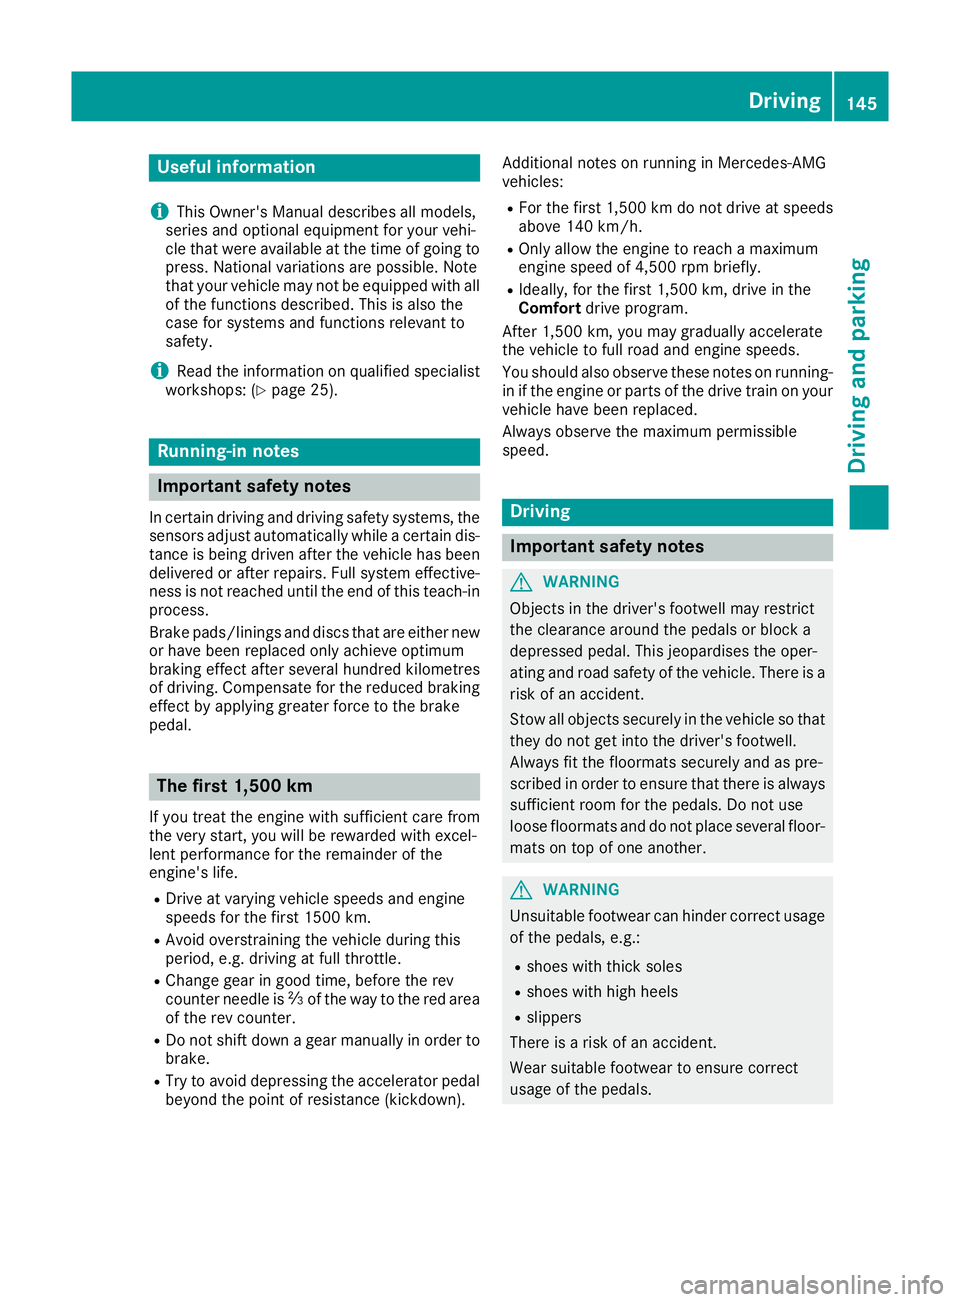
Useful information
i This Owner's Manual describes all models,
series and optional equipment for your vehi-
cle that were available at the time of going to
press. National variations are possible. Note
that your vehicle may not be equipped with all
of the functions described. This is also the
case for systems and functions relevant to
safety.
i Read the information on qualified specialist
workshops: (Y page 25). Running-in notes
Important safety notes
In certain driving and driving safety systems, the
sensors adjust automatically while a certain dis- tance is being driven after the vehicle has beendelivered or after repairs. Full system effective-
ness is not reached until the end of this teach-in process.
Brake pads/linings and discs that are either new
or have been replaced only achieve optimum
braking effect after several hundred kilometres
of driving. Compensate for the reduced braking
effect by applying greater force to the brake
pedal. The first 1,500 km
If you treat the engine with sufficient care from
the very start, you will be rewarded with excel-
lent performance for the remainder of the
engine's life.
R Drive at varying vehicle speeds and engine
speeds for the first 1500 km.
R Avoid overstraining the vehicle during this
period, e.g. driving at full throttle.
R Change gear in good time, before the rev
counter needle is Ôof the way to the red area
of the rev counter.
R Do not shift down a gear manually in order to
brake.
R Try to avoid depressing the accelerator pedal
beyond the point of resistance (kickdown). Additional notes on running in Mercedes-AMG
vehicles:
R For the first 1,500 km do not drive at speeds
above 140 km/ h.
R Only allow the engine to reach a maximum
engine speed of 4,500 rpm briefly.
R Ideally, for the first 1,500 km, drive in the
Comfort drive program.
After 1,500 km, you may gradually accelerate
the vehicle to full road and engine speeds.
You should also observe these notes on running-
in if the engine or parts of the drive train on your vehicle have been replaced.
Always observe the maximum permissible
speed. Driving
Important safety notes
G
WARNING
Objects in the driver's footwell may restrict
the clearance around the pedals or block a
depressed pedal. This jeopardises the oper-
ating and road safety of the vehicle. There is a risk of an accident.
Stow all objects securely in the vehicle so that
they do not get into the driver's footwell.
Always fit the floormats securely and as pre-
scribed in order to ensure that there is always sufficient room for the pedals. Do not use
loose floormats and do not place several floor- mats on top of one another. G
WARNING
Unsuitable footwear can hinder correct usage of the pedals, e.g.:
R shoes with thick soles
R shoes with high heels
R slippers
There is a risk of an accident.
Wear suitable footwear to ensure correct
usage of the pedals. Driving
145Driving and parking Z
Page 151 of 393
Starting the vehicle
Important safety notes G
WARNING
If children are left unsupervised in the vehicle, they can:
R open doors and endanger other persons or
road users
R climb out and be injured by the traffic
R operate vehicle equipment and, for exam-
ple, trap themselves.
Children could also set the vehicle in motion, for example by:
R releasing the parking brake
R shifting the automatic transmission out of
park position P
R starting the engine.
There is a risk of an accident and injury.
When leaving the vehicle, always take the key
with you and lock the vehicle. Never leave
children unattended in the vehicle. Always
keep the key out of reach of children. G
WARNING
Combustion engines emit poisonous exhaust
gases such as carbon monoxide. Inhaling
these exhaust gases leads to poisoning. There is a risk of fatal injury. Therefore never leave
the engine running in enclosed spaces with-
out sufficient ventilation. G
WARNING
Flammable materials introduced through
environmental influence or by animals can
ignite if in contact with the exhaust system or parts of the engine that heat up. There is a risk
of fire.
Carry out regular checks to make sure that
there are no flammable foreign materials in
the engine compartment or in the exhaust
system.
! Do not depress the accelerator when start-
ing the engine. General notes Vehicles with a petrol engine:
the catalytic
converter is preheated for up to 30 seconds
after a cold start. The sound of the engine may
change during this time.
Automatic transmission X
Shift the transmission to position P
(Y page 154).
The transmission position indicator in the
multifunction display shows P(Y page 154).
i You can start the engine in transmission
position Pand N.
Starting procedure with the key X
To start a diesel engine: turn the key to
position 2in the ignition lock (Y page 146).
The % preglow indicator lamp in the instru-
ment cluster lights up.
X Turn the key to position 3in the ignition lock
(Y page 146) and release it as soon as the
engine is running.
i Vehicles with a diesel engine:
you can
start the engine without preglow if the engine
is warm.
Using KEYLESS-GO to start the engine The Start/Stop button can be used to start the
vehicle without inserting the key into the ignition
lock. The key must be in the vehicle and the
Start/Stop button must be inserted in the igni-
tion lock. This mode for starting the engine oper-
ates independently of the ECO start/stop auto- matic engine start function.
X Depress the brake pedal and keep it
depressed.
X Press the Start/Stop button once
(Y page 146).
Vehicles with a petrol engine: the engine
starts.
Vehicles with a diesel engine: preglow is
activated and the engine starts. 148
DrivingDriving and parking
Page 156 of 393
Problem
Possible causes/consequences and
M
MSolutions The coolant temperature
display is showing more
than 120 †. The coolant warning lamp may also
be on and a warning tone
may sound. The coolant level is too low. The coolant is too hot and the engine is no
longer being cooled sufficiently.
X Stop as soon as possible and allow the engine and the coolant to
cool down.
X Check the coolant level (Y page 321). Observe the warning notes
as you do so and top up the coolant if necessary. If the coolant level is correct, the radiator fan may be faulty. The cool-
ant is too hot and the engine is no longer being cooled sufficiently.
X If the coolant temperature is below 120 †, you can continue driving
to the nearest qualified specialist workshop.
X Avoid heavy loads on the engine as you do so, e.g. driving in moun-
tainous terrain and stop-start traffic. DYNAMIC SELECT controller
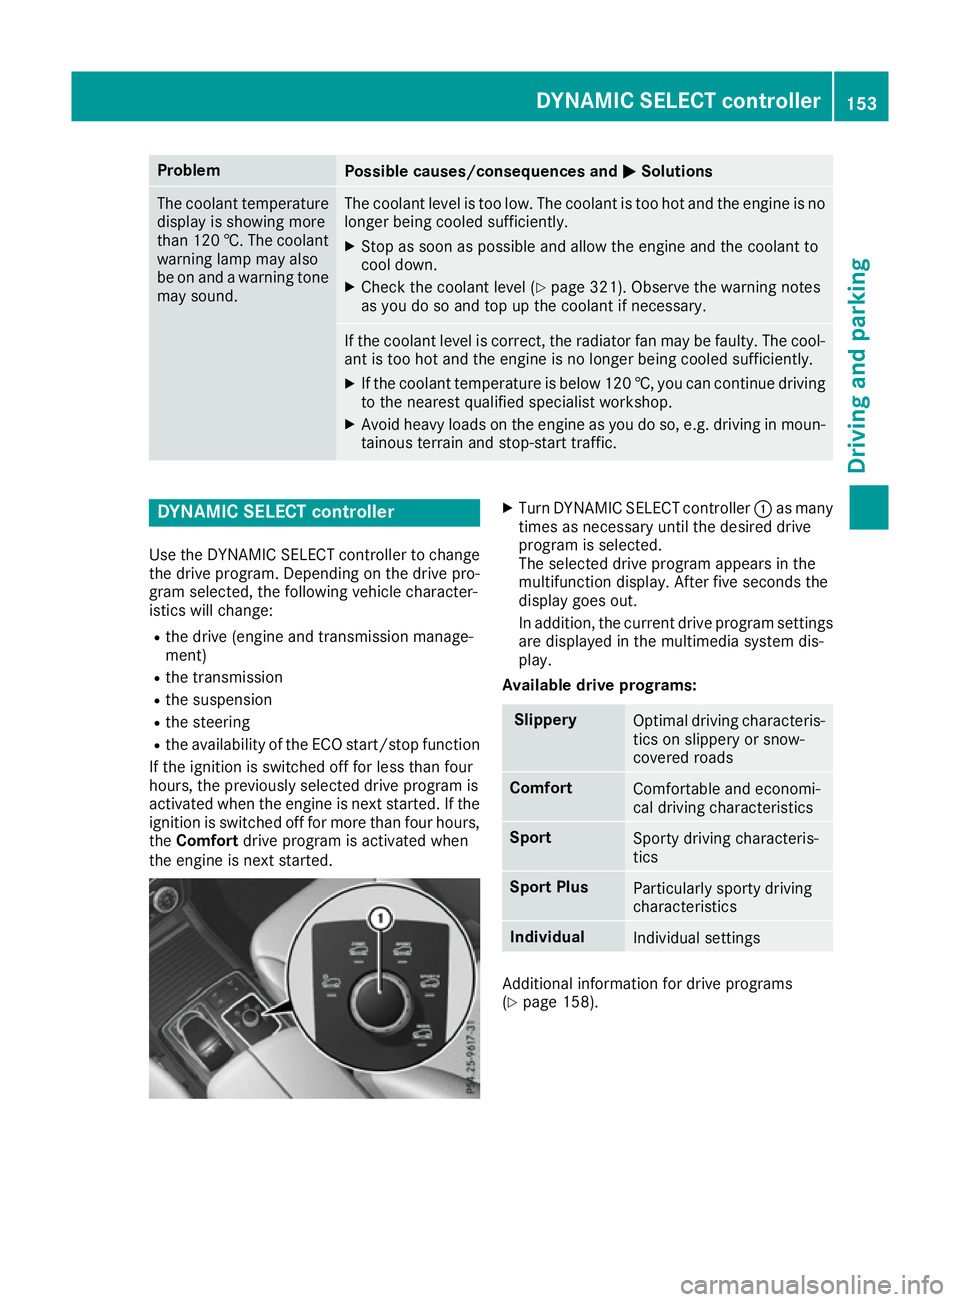
Use the DYNAMIC SELECT controller to change the drive program. Depending on the drive pro-
gram selected, the following vehicle character-
istics will change:
R the drive (engine and transmission manage-
ment)
R the transmission
R the suspension
R the steering
R the availability of the ECO start/stop function
If the ignition is switched off for less than four
hours, the previously selected drive program is
activated when the engine is next started. If the
ignition is switched off for more than four hours,
the Comfort drive program is activated when
the engine is next started. X
Turn DYNAMIC SELECT controller :as many
times as necessary until the desired drive
program is selected.
The selected drive program appears in the
multifunction display. After five seconds the
display goes out.
In addition, the current drive program settings
are displayed in the multimedia system dis-
play.
Available drive programs: Slippery
Optimal driving characteris-
tics on slippery or snow-
covered roads Comfort
Comfortable and economi-
cal driving characteristics
Sport
Sporty driving characteris-
tics
Sport Plus
Particularly sporty driving
characteristics
Individual
Individual settings
Additional information for drive programs
(Y
page 158). DYNAMIC SELECT controller
153Driving and parking Z
Page 161 of 393

Drive programs
Slippery drive program The
Slippery drive program has the following
characteristics:
R reduced engine and transmission settings for
optimum propulsion on slippery or snow-cov-
ered roads.
R optimised ESP ®
stability control on slippery
or snow-covered roads.
R the vehicle has improved driving stability on
slippery or snow-covered roads, for example.
Comfort drive program The
Comfort drive program has the following
characteristics:
R comfort-orientated engine and transmission
settings.
R optimal fuel consumption resulting from the
automatic transmission shifting up sooner.
R the vehicle pulling away more gently in
forward and reverse gears unless the accel-
erator pedal is depressed fully.
R the automatic transmission shifting up
sooner. This results in the vehicle being driven
at lower engine speeds and the wheels being less likely to spin.
Sport drive program The
Sport drive program has the following char-
acteristics:
R sporty engine and transmission settings.
R the automatic transmission shifting up later.
As a result of the later automatic transmission
shift points, the fuel consumption possibly
being higher.
R the suspension exhibits sporty damping (vehi-
cles with AIRMATIC).
Sport Plus drive program The
Sport Plus drive program has the following
characteristics:
R the vehicle exhibits particularly sporty driving
characteristics.
R the vehicle pulling away in first gear.
R the automatic transmission shifting up later.
As a result of the later automatic transmission shift points, the fuel consumption possibly
being higher.
R the suspension exhibits particularly firm
springing and damping settings (vehicles with
AIRMATIC).
R the ECO start/stop function is deactivated, it
can, however, be activated again using the
ECO button (Y page 151).
Individual drive program In the
Individual drive program, the following
properties of the drive program can be selected:
R the drive (engine and transmission manage-
ment)
R the transmission
R the suspension
R all vehicles (except Mercedes-AMG vehicles):
the steering
R all vehicles (except Mercedes-AMG vehicles):
availability of the ECO start/stop function
To select the gears in the Individualdrive pro-
gram permanently using the steering wheel pad- dles, select the permanent manual gearshift
program.
Information about configuring the Individual
drive program with the multimedia system can
be found in the Digital Owner's Manual. Manual gearshifting
General notes You can change gear yourself using the steering
wheel gearshift paddles. The transmission must be in position D.
Depending on which gearshift paddle is pulled,
the automatic transmission immediately shifts
into the next gear up or down, if permitted.
To use manual shifting, you have two options:
R temporary setting
R permanent setting
If you activate manual gearshifting, the multi-
function display will show the current gear
instead of transmission position D.
If manual gearshifting is deactivated, the gears
will be selected automatically. 158
Automatic transmissionDriving and pa
rking
Page 162 of 393
Temporary setting
X
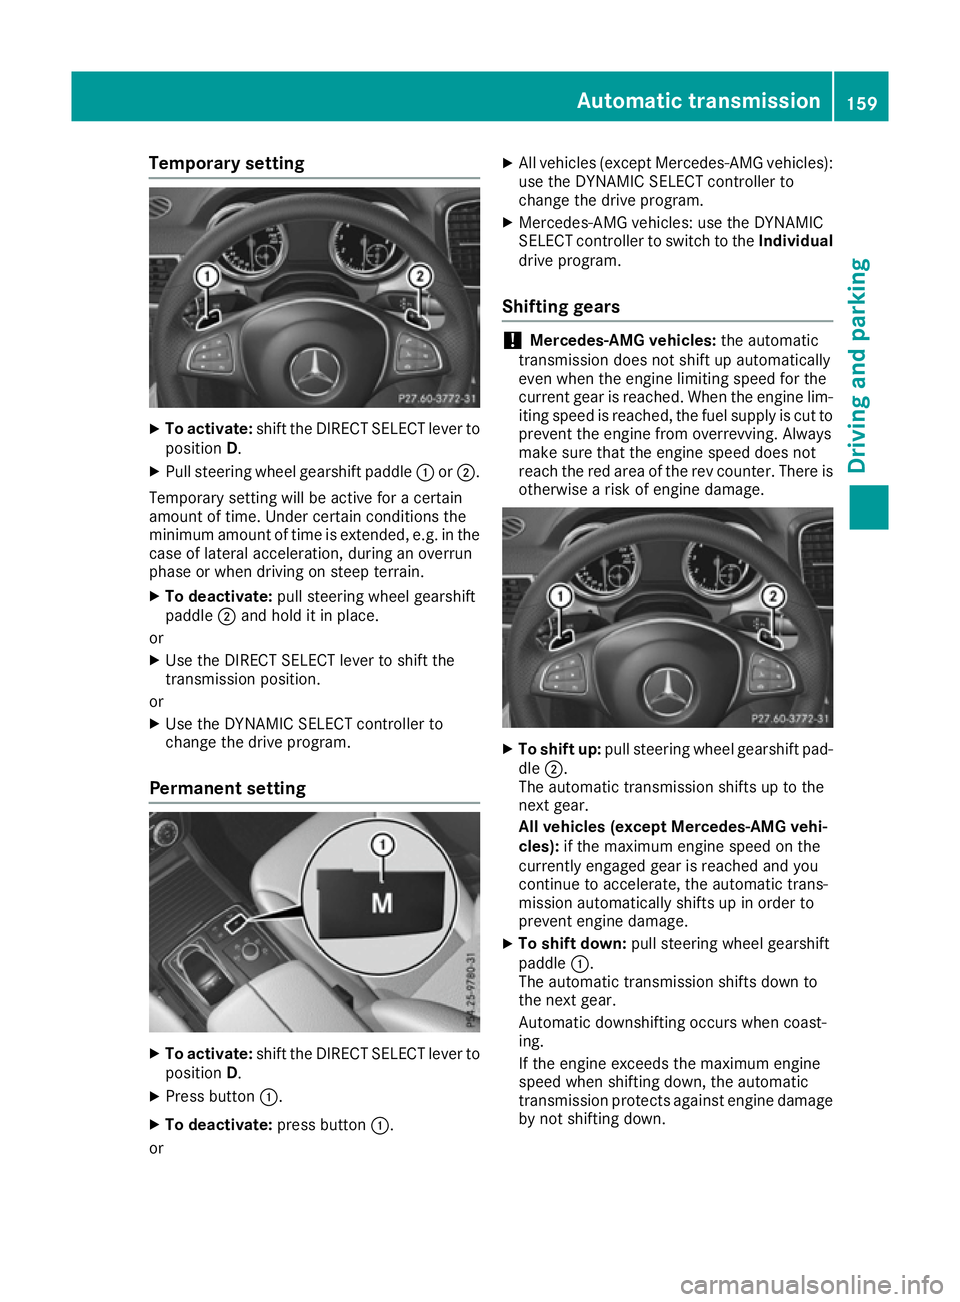
To activate: shift the DIRECT SELECT lever to
position D.
X Pull steering wheel gearshift paddle :or;.
Temporary setting will be active for a certain
amount of time. Under certain conditions the
minimum amount of time is extended, e.g. in the
case of lateral acceleration, during an overrun
phase or when driving on steep terrain.
X To deactivate: pull steering wheel gearshift
paddle ;and hold it in place.
or X Use the DIRECT SELECT lever to shift the
transmission position.
or X Use the DYNAMIC SELECT controller to
change the drive program.
Permanent setting X
To activate: shift the DIRECT SELECT lever to
position D.
X Press button :.
X To deactivate: press button:.
or X
All vehicles (except Mercedes-AMG vehicles):
use the DYNAMIC SELECT controller to
change the drive program.
X Mercedes-AMG vehicles: use the DYNAMIC
SELECT controller to switch to the Individual
drive program.
Shifting gears !
Mercedes-AMG vehicles:
the automatic
transmission does not shift up automatically
even when the engine limiting speed for the
current gear is reached. When the engine lim- iting speed is reached, the fuel supply is cut to
prevent the engine from overrevving. Always
make sure that the engine speed does not
reach the red area of the rev counter. There is
otherwise a risk of engine damage. X
To shift up: pull steering wheel gearshift pad-
dle ;.
The automatic transmission shifts up to the
next gear.
All vehicles (except Mercedes-AMG vehi-
cles): if the maximum engine speed on the
currently engaged gear is reached and you
continue to accelerate, the automatic trans-
mission automatically shifts up in order to
prevent engine damage.
X To shift down: pull steering wheel gearshift
paddle :.
The automatic transmission shifts down to
the next gear.
Automatic downshifting occurs when coast-
ing.
If the engine exceeds the maximum engine
speed when shifting down, the automatic
transmission protects against engine damage
by not shifting down. Automatic transmission
159Driving and parking Z