2015 MERCEDES-BENZ G-CLASS SUV change key battery
[x] Cancel search: change key batteryPage 76 of 274

Checking the battery
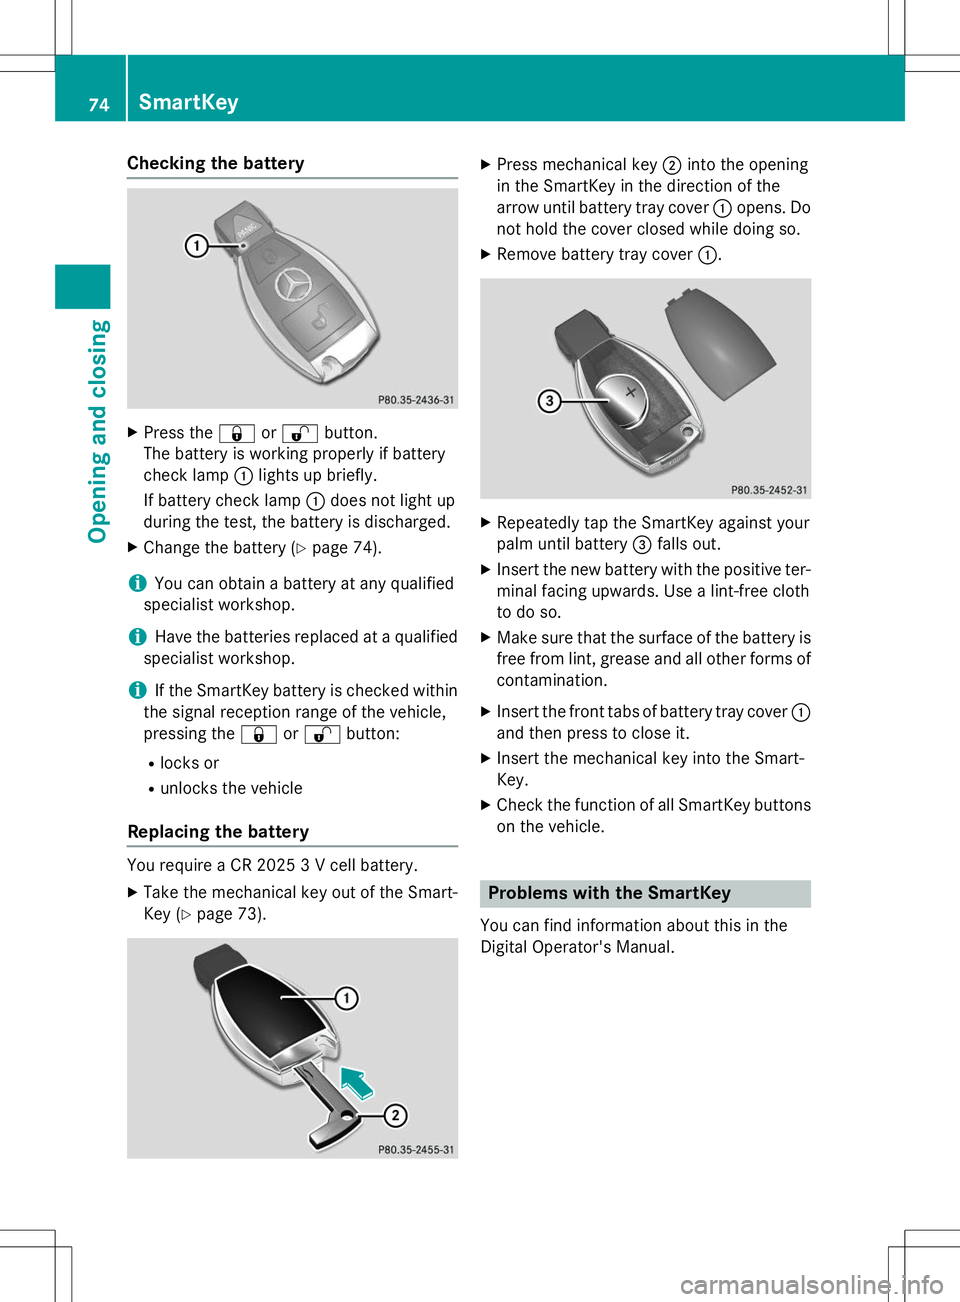
XPress the &or% button.
The battery is working properly if battery
check lamp :lights up briefly.
If battery check lamp :does not light up
during the test, the battery is discharged.
X Change the battery ( Ypage 74).
iYou can obtain a battery at any qualified
specialist workshop.
iHave the batteries replaced at a qualified
specialist workshop.
iIf the SmartKey battery is checked within
the signal reception range of the vehicle,
pressing the &or% button:
R locks or
R unlocks the vehicle
Replacing the battery
You require a CR 2025 3 V cell battery.
X Take the mechanical key out of the Smart-
Key ( Ypage 73).
X
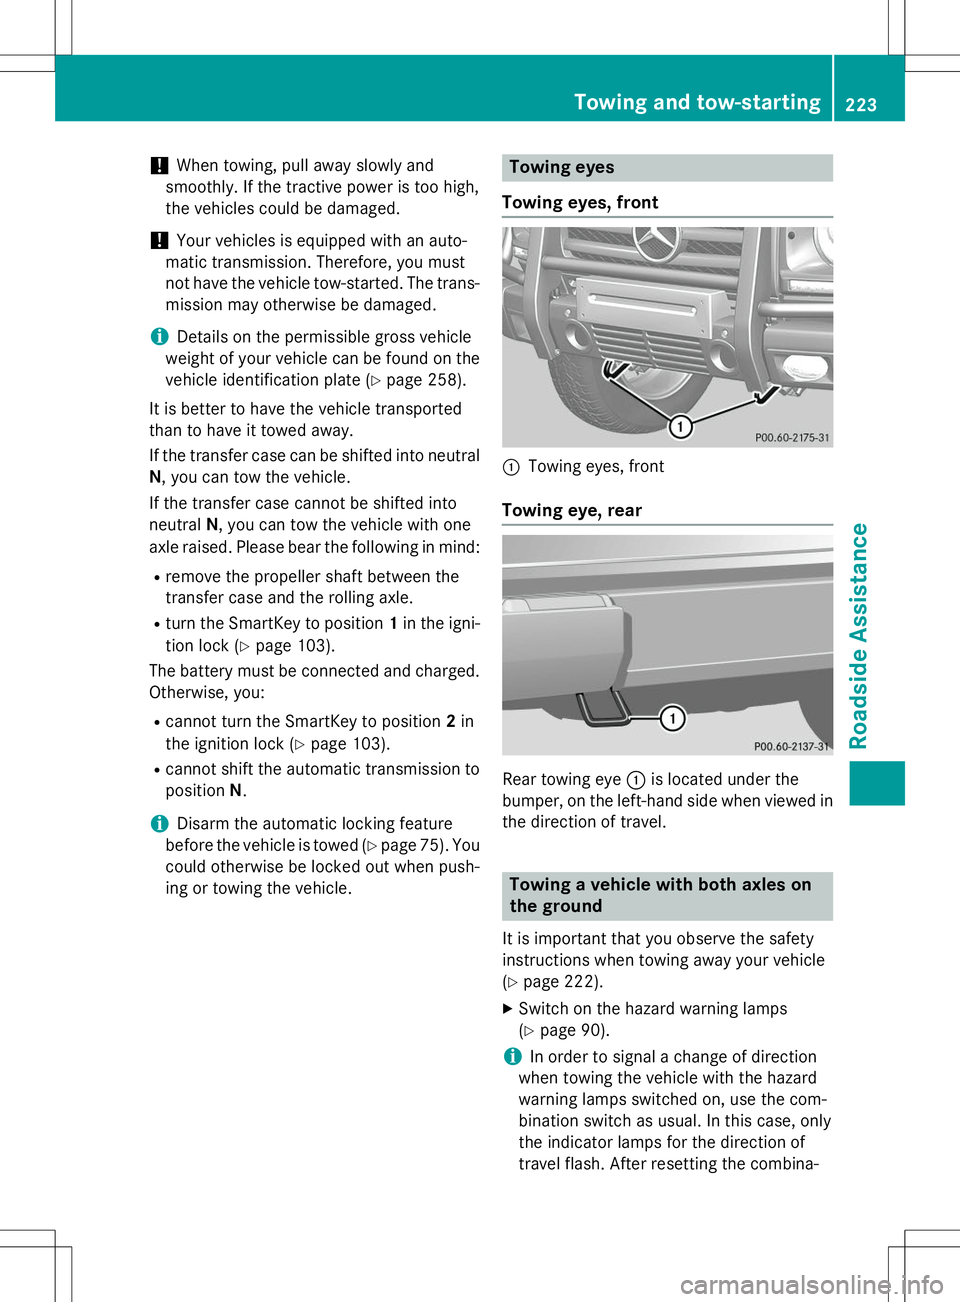
Press mechanical key ;into the opening
in the SmartKey in the direction of the
arrow until battery tray cover :opens. Do
not hold the cover closed while doing so.
X Remove battery tray cover :.
X
Repeatedly tap the SmartKey against your
palm until battery =falls out.
X Insert the new battery with the positive ter-
minal facing upwards. Use a lint-free cloth
to do so.
X Make sure that the surface of the battery is
free from lint, grease and all other forms of
contamination.
X Insert the front tabs of battery tray cover :
and then press to close it.
X Insert the mechanical key into the Smart-Key.
X Check the function of all SmartKey buttons
on the vehicle.
Problems with the SmartKey
You can find information about this in the
Digital Operator's Manual.
74SmartKey
Opening and closing
Page 218 of 274

iWhen re-installing trim panel?, make
sure that retainer Aengages in recess B.
Removing the spare wheel
The spare wheel is heavy. Take particular note
of this when removing the spare wheel.
X Remove wheel nuts :.
X Remove the spare wheel.
Mounting the wheel
After changing a wheel:
X Repair or replace the damaged wheel as
soon as possible and secure the spare
wheel in place again.
X Secure the damaged wheel on the spare
wheel bracket with wheel nuts :. When
doing so, make sure that the wheel cannot
come loose.
X When re-installing trim panel ?, make sure
that retainer Bengages in recess A
( Y page 215). X
Make sure that tab ;is below when re-
installing cover ring :(Y page 215).
X For safety reasons, regularly check to
ensure that the wheel is securely fastened.
Flat tire
Preparing the vehicle
XStop the vehicle on solid, non-slippery and
level ground, as far away as possible from
traffic.
X Switch on the hazard warning lamps(Y page 90).
X Apply the parking brake.
X Bring the front wheels into the straight-
ahead position.
X Move the selector lever to position P.
X Switch off the engine.
X Remove the SmartKey from the ignitionlock.
The steering wheel lock stays active for as
long as the SmartKey is removed.
X All occupants must get out of the vehicle.
Make sure that they are not endangered as
they do so.
X Make sure that no one is near the danger
area while a wheel is being changed. Any-
one who is not directly assisting in the
wheel change should, for example, stand
behind the barrier.
X Get out of the vehicle. Pay attention to traf-
fic conditions when doing so.
X Close the driver's door.
Battery (vehicle)
Important safety notes
Special tools and expert knowledge are
required when working on the battery, e.g.
removal and installation. You should there-
fore have all work involving the battery car-
ried out at a qualified specialist workshop.
216Battery (vehicle)
Roadside Assistance
Page 225 of 274

!When towing, pull away slowly and
smoothly. If the tractive power is too high,
the vehicles could be damaged.
!Your vehicles is equipped with an auto-
matic transmission. Therefore, you must
not have the vehicle tow-started. The trans-
mission may otherwise be damaged.
iDetails on the permissible gross vehicle
weight of your vehicle can be found on the
vehicle identification plate ( Ypage 258).
It is better to have the vehicle transported
than to have it towed away.
If the transfer case can be shifted into neutral N , you can tow the vehicle.
If the transfer case cannot be shifted into neutral N, you can tow the vehicle with one
axle raised. Please bear the following in mind:
R remove the propeller shaft between the
transfer case and the rolling axle.
R turn the SmartKey to position 1in the igni-
tion lock ( Ypage 103).
The battery must be connected and charged.
Otherwise, you:
R cannot turn the SmartKey to position 2in
the ignition lock ( Ypage 103).
R cannot shift the automatic transmission to
position N.
iDisarm the automatic locking feature
before the vehicle is towed ( Ypage 75). You
could otherwise be locked out when push-
ing or towing the vehicle.
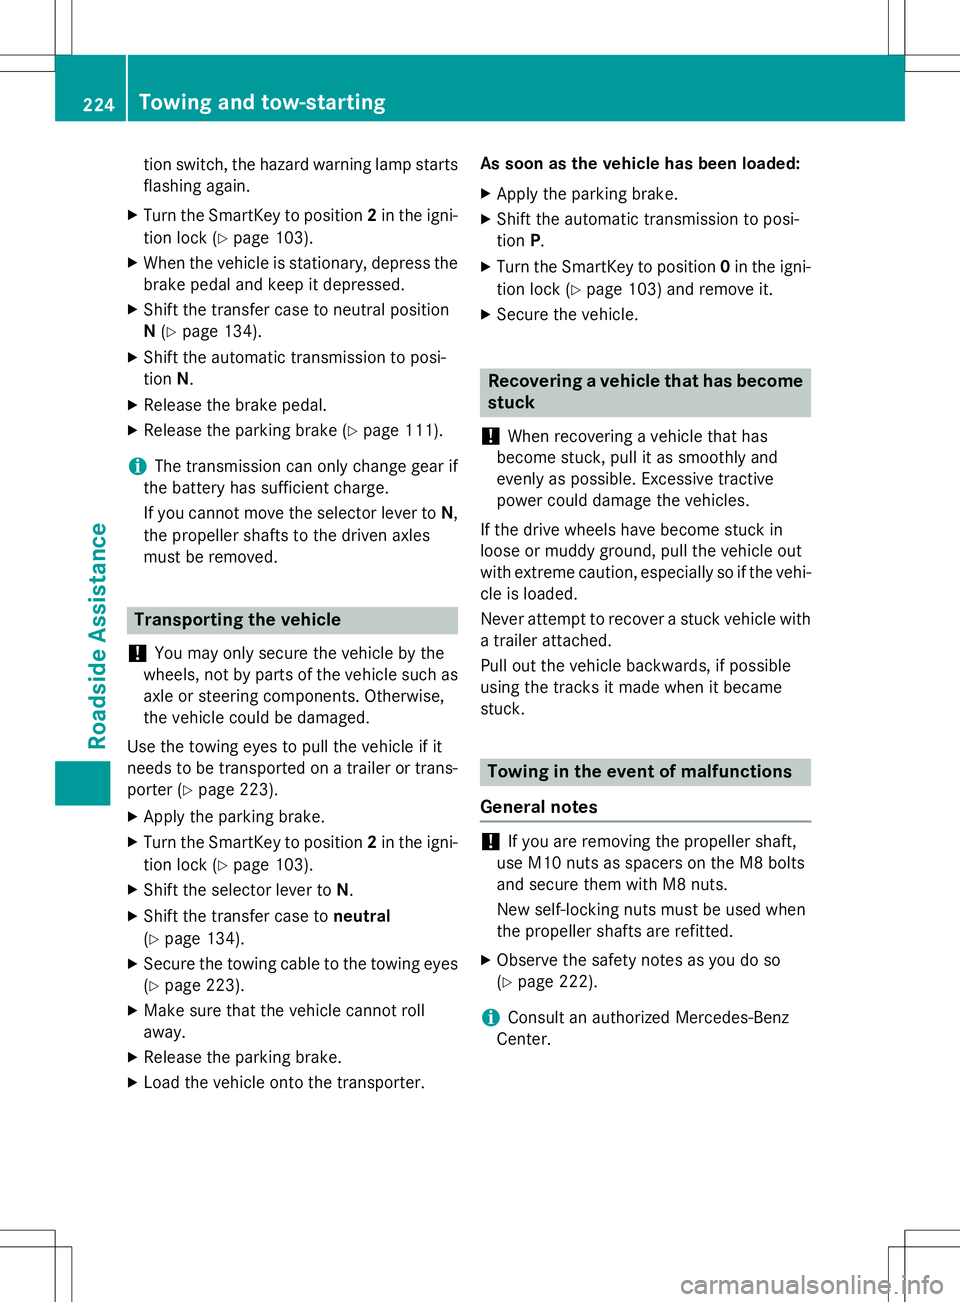
Towing eyes
Towing eyes, front
:Towing eyes, front
Towing eye, rear
Rear towing eye :is located under the
bumper, on the left-hand side when viewed in
the direction of travel.
Towing a vehicle with both axles on
the ground
It is important that you observe the safety
instructions when towing away your vehicle( Y page 222).
X Switch on the hazard warning lamps(Y page 90).
iIn order to signal a change of direction
when towing the vehicle with the hazard
warning lamps switched on, use the com-
bination switch as usual. In this case, only
the indicator lamps for the direction of
travel flash. After resetting the combina-
Towing and tow-starting223
Roadside Assistance
Z
Page 226 of 274

tion switch, the hazard warning lamp starts
flashing again.
X Turn the SmartKey to position 2in the igni-
tion lock ( Ypage 103).
X When the vehicle is stationary, depress the
brake pedal and keep it depressed.
X Shift the transfer case to neutral positionN (Y page 134).
X Shift the automatic transmission to posi-
tion N.
X Release the brake pedal.
X Release the parking brake ( Ypage 111).
iThe transmission can only change gear if
the battery has sufficient charge.
If you cannot move the selector lever to N,
the propeller shafts to the driven axles
must be removed.
Transporting the vehicle
!
You may only secure the vehicle by the
wheels, not by parts of the vehicle such as
axle or steering components. Otherwise,
the vehicle could be damaged.
Use the towing eyes to pull the vehicle if it
needs to be transported on a trailer or trans-
porter ( Ypage 223).
X Apply the parking brake.
X Turn the SmartKey to position 2in the igni-
tion lock ( Ypage 103).
X Shift the selector lever to N.
X Shift the transfer case to neutral
( Y page 134).
X Secure the towing cable to the towing eyes
( Y page 223).
X Make sure that the vehicle cannot roll
away.
X Release the parking brake.
X Load the vehicle onto the transporter. As soon as the vehicle has been loaded: X
Apply the parking brake.
X Shift the automatic transmission to posi-
tion P.
X Turn the SmartKey to position 0in the igni-
tion lock ( Ypage 103) and remove it.
X Secure the vehicle.
Recovering a vehicle that has become
stuck
!
When recovering a vehicle that has
become stuck, pull it as smoothly and
evenly as possible. Excessive tractive
power could damage the vehicles.
If the drive wheels have become stuck in
loose or muddy ground, pull the vehicle out
with extreme caution, especially so if the vehi-
cle is loaded.
Never attempt to recover a stuck vehicle with
a trailer attached.
Pull out the vehicle backwards, if possible
using the tracks it made when it became
stuck.
Towing in the event of malfunctions
General notes
!If you are removing the propeller shaft,
use M10 nuts as spacers on the M8 bolts
and secure them with M8 nuts.
New self-locking nuts must be used when
the propeller shafts are refitted.
X Observe the safety notes as you do so(Y page 222).
iConsult an authorized Mercedes-Benz
Center.
224Towing and tow-starting
Roadside Assistance