2015 MERCEDES-BENZ G-CLASS SUV trailer
[x] Cancel search: trailerPage 213 of 274

XVisit a qualified specialist workshop as
soon as possible.
Care
General notes
GWARNING
Many cleaning products can be hazardous.
Some are poisonous, others are flammable.
Always follow the instructions on the particu-
lar container. Always open your vehicle's
doors or windows when cleaning the inside.
Never use fluids or solvents that are not
designed for cleaning your vehicle.
Always lock away cleaning products and keep
them out of reach of children.
!For cleaning your vehicle, do not use any
of the following:
R dry, rough or hard cloths
R abrasive cleaning agents
R solvents
R cleaning agents containing solvents
Do not scrub.
Do not touch the surfaces or protective
films with hard objects, e.g. a ring or ice
scraper. You could otherwise scratch or
damage the surfaces and protective film.
!Do not park the vehicle for an extended
period straight after cleaning it, particularly
after having cleaned the wheels with wheel
cleaner. Wheel cleaners could cause
increased corrosion of the brake discs and
brake pads/linings. For this reason, you
should drive for a few minutes after clean-
ing. Braking heats the brake discs and the
brake pads/linings, thus drying them. The
vehicle can then be parked.
HEnvironmental note
Dispose of empty packaging and cleaning
cloths in an environmentally responsible man-
ner. Regular care of your vehicle is a condition for
retaining the quality in the long term.
Use care products and cleaning agents rec-
ommended and approved by Mercedes-Benz.
Exterior care
Information in the Digital Operator's Manual
In the Digital Operator's Manual you will find
information on the following topics: R Washing by hand
R Power washers
R Cleaning the wheels
R Cleaning the paintwork
R Matte finish care
R Cleaning the windows
R Cleaning wiper blades
R Cleaning the headlamps
R Cleaning the sensors
R Cleaning the rear view camera
R Cleaning the exhaust pipes
R Cleaning chrome parts
R Cleaning the trailer tow hitch
Automatic car wash
GWARNING
Braking efficiency is reduced after washing
the vehicle. There is a risk of an accident.
After the vehicle has been washed, brake
carefully while paying attention to the traffic
conditions until full braking power is restored.
!Never clean your vehicle in a Touchless
Automatic Car Wash as these use special
cleaning agents. These cleaning agents can damage the paintwork or plastic parts.
!Make sure that the automatic car wash is
suitable for the size of the vehicle. Fold in
the exterior mirrors before the vehicle is
washed. The exterior mirrors could other-
wise be damaged.
Care211
Maintenance and care
Z
Page 224 of 274

The jump-starting connection point consists of poles;and =.
X Lift up cover :of positive terminal ;in the direction of the arrow.
X Connect positive terminal ;on your vehicle to positive terminal ?of donor battery B
using the jumper cable. beginning with your own battery.
X Start the engine of the donor vehicle and run it at idling speed.
X Connect negative terminal Aof donor battery Bto ground point =of your vehicle using
the jumper cable, connecting the jumper cable to donor battery Bfirst.
X Start the engine.
X First, remove the jumper cables from ground point =and negative terminal A, then from
positive clamp ;and positive terminal ?. Each time beginning with your vehicle's battery.
X Have the battery checked at a qualified specialist workshop.
iJump-starting is not considered to be a normal operating condition.
iJumper cables and further information regarding jump-starting can be obtained at any
qualified specialist workshop.
Towing and tow-starting
Important safety notes
GWARNING
Functions relevant to safety are restricted or
no longer available if:
R the engine is not running.
R the brake system or the power steering is
malfunctioning.
R there is a malfunction in the voltage supply
or the vehicle's electrical system.
If your vehicle is being towed, much more
force may be necessary to steer or brake.
There is a risk of an accident.
In such cases, use a tow bar. Before towing,
make sure that the steering moves freely.
GWARNING
When towing or tow-starting another vehicle
and its weight is greater than the permissible gross weight of your vehicle, the:
R the towing eye could detach itself
R the vehicle/trailer combination could roll-over.
There is a risk of an accident.
When towing or tow-starting another vehicle,
its weight should not be greater than the per- missible gross weight of your vehicle.
!If DISTRONIC PLUS or the HOLD function
is activated, the vehicle brakes automati-
cally in certain situations. To prevent dam-
age to the vehicle, deactivate DISTRONIC
PLUS and the HOLD function in the follow- ing or other similar situations:
R when towing the vehicle
R in the car wash
!The vehicle can be towed a maximum of
30 miles (50km). The towing speed of
30 mph (50 km/h) must not be exceeded.
If the vehicle has to be towed more than
30 miles (50km), the entire vehicle must be
raised and transported.
!Only secure the tow cable or tow bar to
the towing eyes. You could otherwise dam-
age the vehicle.
!Do not tow with sling-type equipment.
This could damage the vehicle.
!Do not use the towing eyes for recovery
purposes as this could damage the vehicle.
If in doubt, recover the vehicle with a crane.
222Towing and tow-starting
Roadside Assistance
Page 226 of 274

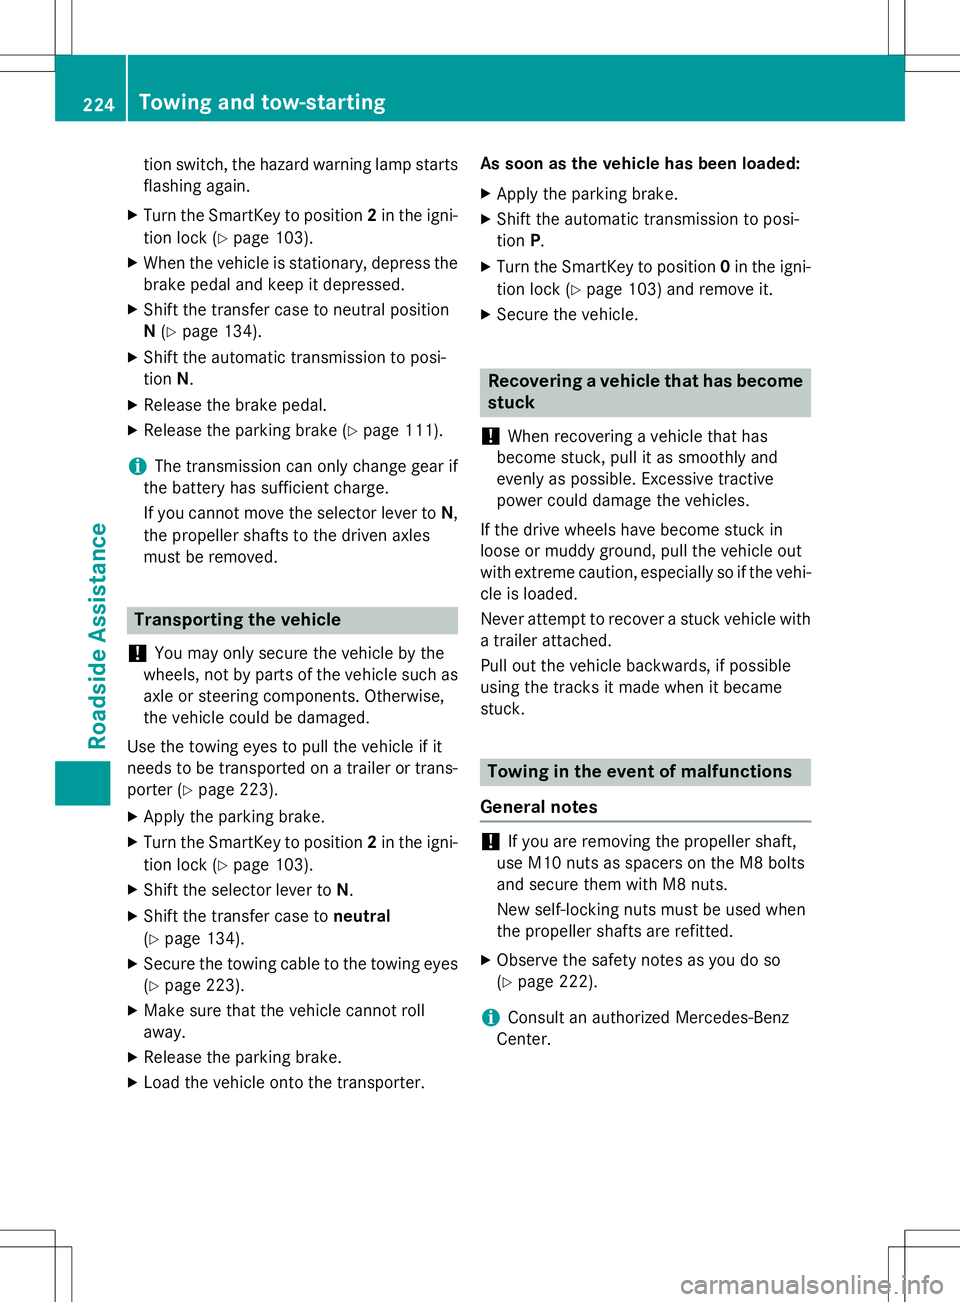
tion switch, the hazard warning lamp starts
flashing again.
X Turn the SmartKey to position 2in the igni-
tion lock ( Ypage 103).
X When the vehicle is stationary, depress the
brake pedal and keep it depressed.
X Shift the transfer case to neutral positionN (Y page 134).
X Shift the automatic transmission to posi-
tion N.
X Release the brake pedal.
X Release the parking brake ( Ypage 111).
iThe transmission can only change gear if
the battery has sufficient charge.
If you cannot move the selector lever to N,
the propeller shafts to the driven axles
must be removed.
Transporting the vehicle
!
You may only secure the vehicle by the
wheels, not by parts of the vehicle such as
axle or steering components. Otherwise,
the vehicle could be damaged.
Use the towing eyes to pull the vehicle if it
needs to be transported on a trailer or trans-
porter ( Ypage 223).
X Apply the parking brake.
X Turn the SmartKey to position 2in the igni-
tion lock ( Ypage 103).
X Shift the selector lever to N.
X Shift the transfer case to neutral
( Y page 134).
X Secure the towing cable to the towing eyes
( Y page 223).
X Make sure that the vehicle cannot roll
away.
X Release the parking brake.
X Load the vehicle onto the transporter. As soon as the vehicle has been loaded: X
Apply the parking brake.
X Shift the automatic transmission to posi-
tion P.
X Turn the SmartKey to position 0in the igni-
tion lock ( Ypage 103) and remove it.
X Secure the vehicle.
Recovering a vehicle that has become
stuck
!
When recovering a vehicle that has
become stuck, pull it as smoothly and
evenly as possible. Excessive tractive
power could damage the vehicles.
If the drive wheels have become stuck in
loose or muddy ground, pull the vehicle out
with extreme caution, especially so if the vehi-
cle is loaded.
Never attempt to recover a stuck vehicle with
a trailer attached.
Pull out the vehicle backwards, if possible
using the tracks it made when it became
stuck.
Towing in the event of malfunctions
General notes
!If you are removing the propeller shaft,
use M10 nuts as spacers on the M8 bolts
and secure them with M8 nuts.
New self-locking nuts must be used when
the propeller shafts are refitted.
X Observe the safety notes as you do so(Y page 222).
iConsult an authorized Mercedes-Benz
Center.
224Towing and tow-starting
Roadside Assistance
Page 234 of 274

Selecting, mounting and replacing tires
ROnly mount tires and wheels of the same
type and make.
R Only mount approved tires of the correct
size onto the wheels.
R Tires are supplied with a protective layer
from the factory. Break in new tires at mod-
erate speeds for the first 60 miles
(100 km). They only reach their full per-
formance after this distance.
R Do not drive with tires which have too little
tread depth, as this significantly reduces
the traction on wet roads (hydroplaning).
R Replace the tires after six years at the lat-
est, regardless of wear. This also applies to
the spare wheel.
Winter operation
You can find information about this in the
Digital Operator's Manual.
Tire pressure
Tire pressure specifications
Important safety notes
GWARNING
Underinflated or overinflated tires pose the
following risks: R the tires may burst, especially as the load
and vehicle speed increase.
R the tires may wear excessively and/or
unevenly, which may greatly impair tire
traction.
R the driving characteristics, as well as steer-
ing and braking, may be greatly impaired.
There is a risk of an accident.
Follow recommended tire inflation pressures
and check the pressure of all the tires includ-
ing the spare wheel:
R monthly, at least
R if the load changes
R before beginning a long journey
R under different operating conditions, e.g.
off-road driving
If necessary, correct the tire pressure.
iThe specifications on the sample Tire and
Loading Information placard and tire pres-
sure tables are examples. Tire pressure
specifications are vehicle-specific and may
deviate from the data shown here. The tire pressure specifications that are valid for
your vehicle can be found on the Tire and
Loading Information placard and tire pres-
sure table on the vehicle.
General notes
The recommended tire pressures for the tires
mounted at the factory can be found on the
labels described here.
Operation with a trailer: the applicable
value for the rear tires is the maximum tire
pressure value stated in the table inside the
fuel filler flap.
Further information on tire pressures can be
obtained at a qualified specialist workshop.
Tire and Loading Information placard
:Recommended tire pressures
232Tire pressure
Wheels and tires
Page 241 of 274

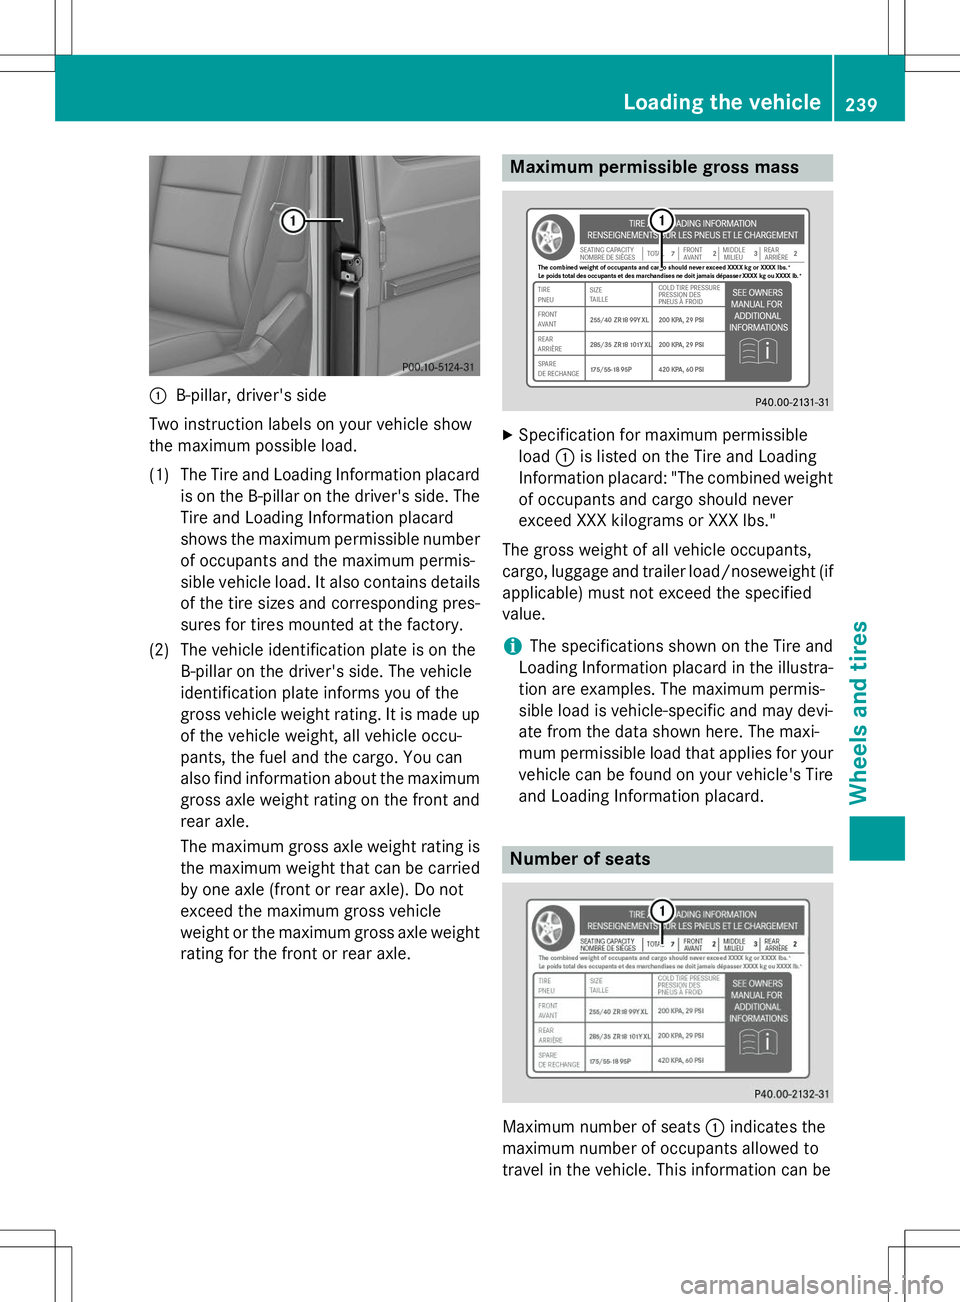
:B-pillar, driver's side
Two instruction labels on your vehicle show
the maximum possible load.
(1) The Tire and Loading Information placard is on the B-pilla ron the driver's side. The
Tire and Loading Information placard
shows the maximum permissible number
of occupants and the maximum permis-
sible vehicle load. It also contains details
of the tire sizes and corresponding pres-
sures for tires mounted at the factory.
(2) The vehicle identification plate is on the B-pillar on the driver's side. The vehicle
identification plate informs you of the
gross vehicle weight rating. It is made up
of the vehicle weight, all vehicle occu-
pants, the fuel and the cargo. You can
also find information about the maximum gross axle weight rating on the front and
rear axle.
The maximum gross axle weight rating is the maximum weight that can be carried
by one axle (front or rear axle). Do not
exceed the maximum gross vehicle
weight or the maximum gross axle weight
rating for the front or rear axle.
Maximum permissible gross mass
X Specification for maximum permissible
load :is listed on the Tire and Loading
Information placard: "The combined weight of occupants and cargo should never
exceed XXX kilograms or XXX lbs."
The gross weight of all vehicle occupants,
cargo, luggage and trailer load/noseweight (if
applicable) must not exceed the specified
value.
iThe specifications shown on the Tire and
Loading Information placard in the illustra- tion are examples. The maximum permis-
sible load is vehicle-specific and may devi-
ate from the data shown here. The maxi-
mum permissible load that applies for your
vehicle can be found on your vehicle's Tire
and Loading Information placard.
Number of seats
Maximum number of seats :indicates the
maximum number of occupants allowed to
travel in the vehicle. This information can be
Loading the vehicle239
Wheels and tires
Z
Page 242 of 274

found on the Tire and Loading Information
placard.
iThe specifications shown on the Tire and
Loading Information placard in the illustra-
tion are examples. The number of seats is
vehicle-specific and can differ from the
details shown. The number of seats in your vehicle can be found on the Tire and Load-
ing Information placard.
Determining the correct load limit
Step-by-step instructions
The following steps have been developed as
required of all manufacturers under Title 49,
Code of U.S. Federal Regulations, Part 575
pursuant to the "National Traffic and Motor
Vehicle Safety Act of 1966". X Step 1: Locate the statement "The com-
bined weight of occupants and cargo
should never exceed XXX kg or XXX lbs." on your vehicle’s Tire and Loading Information
placard.
X Step 2: Determine the combined weight of
the driver and passengers that will be riding
in your vehicle.
X Step 3: Subtract the combined weight of
the driver and passengers from XXX kilo-
grams or XXX lbs.
X Step 4: The resulting figure equals the
available amount of cargo and luggage load capacity. Example: if the "XXX" amount
equals 1400 lbs and there will be five
150 lbs passengers in your vehicle, the
amount of available cargo and luggage load
capacity is 650 lbs (1400 - 750 (5 x 150) =
650 lbs).
X Step 5: Determine the combined weight of
luggage and cargo being loaded on the
vehicle. That weight may not safely exceed
the available cargo and luggage load capa-
city calculated in step 4.
X Step 6 (if applicable): If your vehicle will
be towing a trailer, load from your trailer
will be transferred to your vehicle. This reduces the available cargo and luggage
load capacity of your vehicle (
Ypage 269).
240Loading the vehicle
Wheels and tires
Page 243 of 274

Example: steps 1 to 3
The following table shows examples on how to calculate total and cargo load capacities withvarying seating configurations and number and size of occupants. The following examples usea maximum load of 1,500 lbs (680 kg). This is for illustration purposes only. Make sure you
are using the actual load limit for your vehicle stated on your vehicle's Tire and Loading Infor- mation placard ( Ypage 238).
The greater the combined weight of the occupants, the lower the maximum luggage load.
Additional information when towing a trailer ( Ypage 269).
Step 1
Example 1Example 2Example 3
Combined maximum weight of
occupants and cargo (data from
the Tire and Loading Information placard)1500 lbs
(680 kg)1500 lbs
(680 kg)1500 lbs
(680 kg)
Step 2
Example 1Example 2Example 3
Number of people inthe vehicle (driver
and occupants)531
Distribution of the
occupantsFront: 2
Rear: 3Front: 1
Rear: 2Front: 1
Weight of the occu-
pantsOccupant 1: 150 lbs
(68 kg)
Occupant 2: 180 lbs
(82 kg)
Occupant 3: 160 lbs
(73 kg)
Occupant 4: 140 lbs
(63 kg)
Occupant 5: 120 lbs
(54 kg)Occupant 1: 200 lbs
(91 kg)
Occupant 2: 190 lbs
(86 kg)
Occupant 3: 150 lbs
(68 kg)Occupant 1:
150 lbs
(68 kg)
Gross weight of all
occupants750 lbs (340 kg)540 lbs (245 kg)150 lbs
(68 kg)
Loading the vehicle241
Wheels and tires
Z
Page 244 of 274

Step 3
Example 1Example 2Example 3
Permissible load
(maximum gross
vehicle weight rat-
ing from the Tire
and Loading Infor-
mation placard
minus the gross
weight of all occu-
pants)1500 lbs (680 kg)Ò
750 lbs (340 kg) =
750 lbs (340 kg)1500 lbs (680 kg) Ò
540 lbs (245 kg)
=960 lbs (435 kg)1500 lbs (680 kg) Ò
150 lbs (68 kg) =
1350 lbs (612 kg)
Vehicle identification plate
Even if you have calculated the total load
carefully, you should still make sure that the
gross vehicle weight rating and the gross axle weight rating are not exceeded. Details can
be found on the vehicle identification plate on the B-pillar on the driver's side of the vehicle( Y page 238).
Gross vehicle weight rating: the gross
weight of the vehicle, all passengers, load and
trailer load/noseweight (if applicable) must
not exceed the gross vehicle weight rating.
Gross Axle Weight Rating (GAWR): the
maximum permissible weight that can be car- ried by one axle (front or rear axle).
To ensure that your vehicle does not exceed
the maximum permissible values (gross vehi-
cle weight and maximum gross axle weight
rating), have your loaded vehicle (including
driver, occupants, load and full trailer load if
applicable) weighed on a suitable vehicle
weighbridge.
Trailer load/noseweight
The trailer load/noseweight affects the gross
weight of the vehicle. If a trailer is attached,
the trailer load/noseweight is included in the
load along with occupants and luggage. The
trailer load/noseweight is usually approx-
imately 10 % of the gross weight of the trailer and its load. Only use a trailer tow hitch that has been
approved for your vehicle by Mercedes-Benz.
Comply with the manufacturer's operating
instructions for operation, care and mainte-nance.
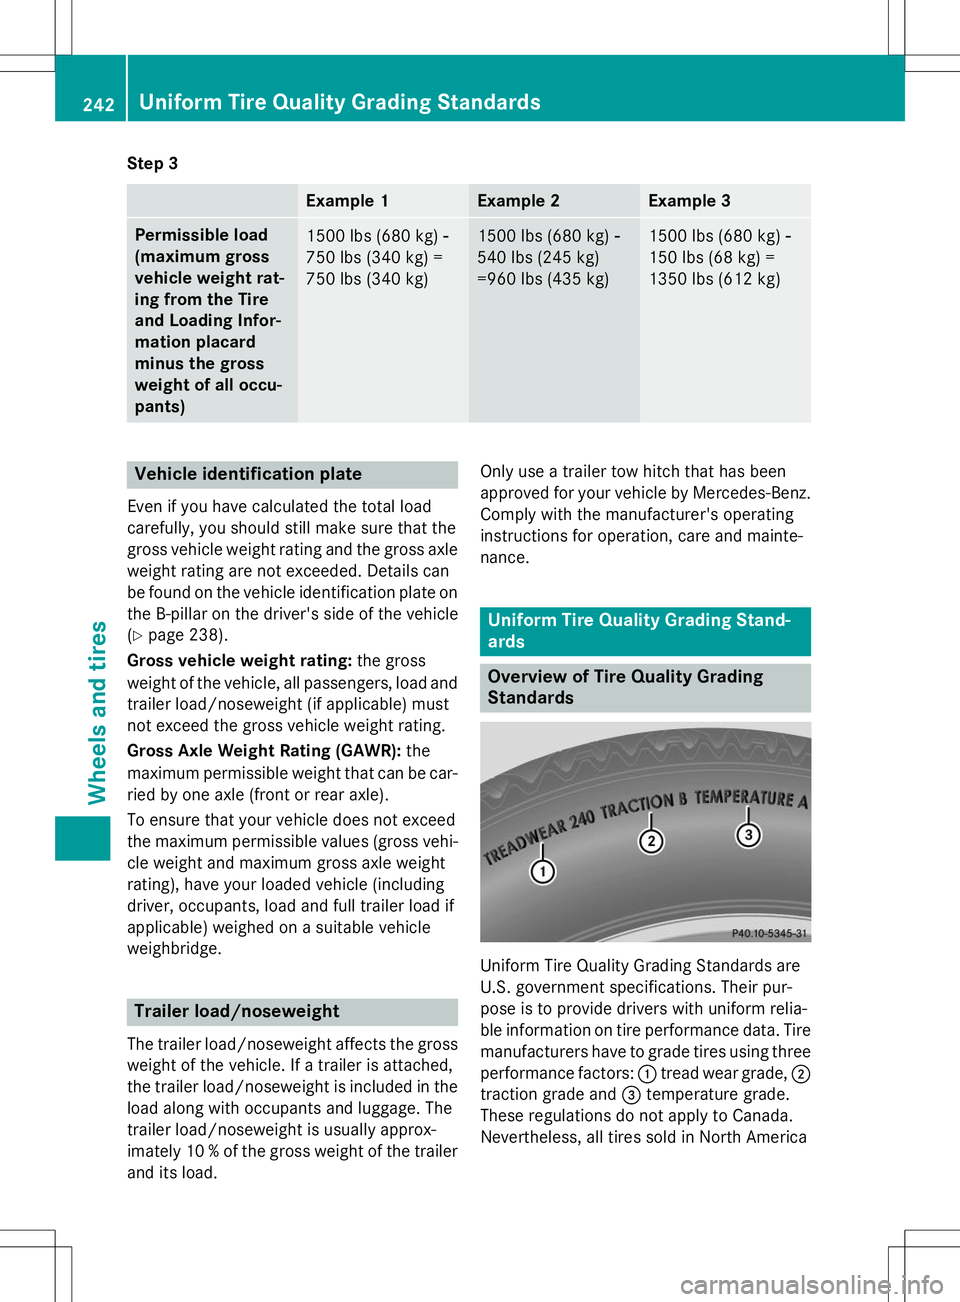
Uniform Tire Quality Grading Stand-
ards
Overview of Tire Quality Grading
Standards
Uniform Tire Quality Grading Standards are
U.S. government specifications. Their pur-
pose is to provide drivers with uniform relia-
ble information on tire performance data. Tire
manufacturers have to grade tires using three
performance factors: :tread wear grade, ;
traction grade and =temperature grade.
These regulations do not apply to Canada.
Nevertheless, all tires sold in North America
242Uniform Tire Quality Grading Standards
Wheels and tires