2015 MERCEDES-BENZ G-CLASS SUV seats
[x] Cancel search: seatsPage 86 of 274

iYou can find further information about
enlarging the cargo compartment (folding
the rear bench seat forwards) on( Y page 195).
Information in the Digital Operator's
Manual
In the Digital Operator's Manual you will find
information on the following topics:
R Adjusting the seats
R Adjusting the head restraints
R Removing/installing head restraints in therear
R Adjusting the multicontour seat
R Adjusting the 4-way lumbar support
R Switching the seat ventilation on/off
Adjusting the head restraints
Important safety notes
GWARNING
If head restraints are not installed and adjus-
ted correctly, they cannot provide protection
as intended. There is an increased risk of
injury in the head and neck area, e.g. in the
event of an accident or when braking.
Always drive with the head restraints instal-
led. Before driving off, make sure for every
vehicle occupant that the center of the head
restraint supports the back of the head at
about eye level.
Observe the following when adjusting the
head restraints: X Do not rotate the head restraints of the
front and rear seats.
Otherwise, you cannot adjust the height
and angle of the head restraints correctly.
X Adjust the head restraint so that it is as
close as possible to your head.
Adjusting the front seat head restraintheight
:Head restraint height
;Seat cushion angle
=Seat height
?Seat fore-and-aft adjustment
ABackrest angle
X Slide head restraint adjustment button :
up or down in the direction of the arrow.
Adjusting the luxury head restraints
X To adjust the side bolsters of the head
restraint: push or pull right and/or left-
hand side bolster :into the desired posi-
tion.
X To adjust the angle of the head
restraint: push or pull the head restraint in
the direction of arrow ;.
Resetting the front seat head restraints
It is necessary to reset the front seat head
restraints after the voltage supply has been
84Seats
Seats, steering wheel and mirrors
Page 87 of 274
interrupted, e.g. if the battery has been com-pletely discharged or disconnected.
X Make sure that the cup holder on the center
console is folded down ( Ypage 197).
X Move the seat as far forward as possible
and the head restraint in as far as possible.
Rear seat head restraints
Important safety notes
GWARNING
If head restraints are not installed and adjus-
ted correctly, they cannot provide protection
as intended. There is an increased risk of
injury in the head and neck area, e.g. in the
event of an accident or when braking.
Always drive with the head restraints instal-
led. Before driving off, make sure for every
vehicle occupant that the center of the head
restraint supports the back of the head at
about eye level.
Observe the following when adjusting the
head restraints: X Do not rotate the head restraints of the
front and rear seats.
Otherwise, you cannot adjust the height
and angle of the head restraints correctly.
X Adjust the head restraint so that it is as
close as possible to your head.
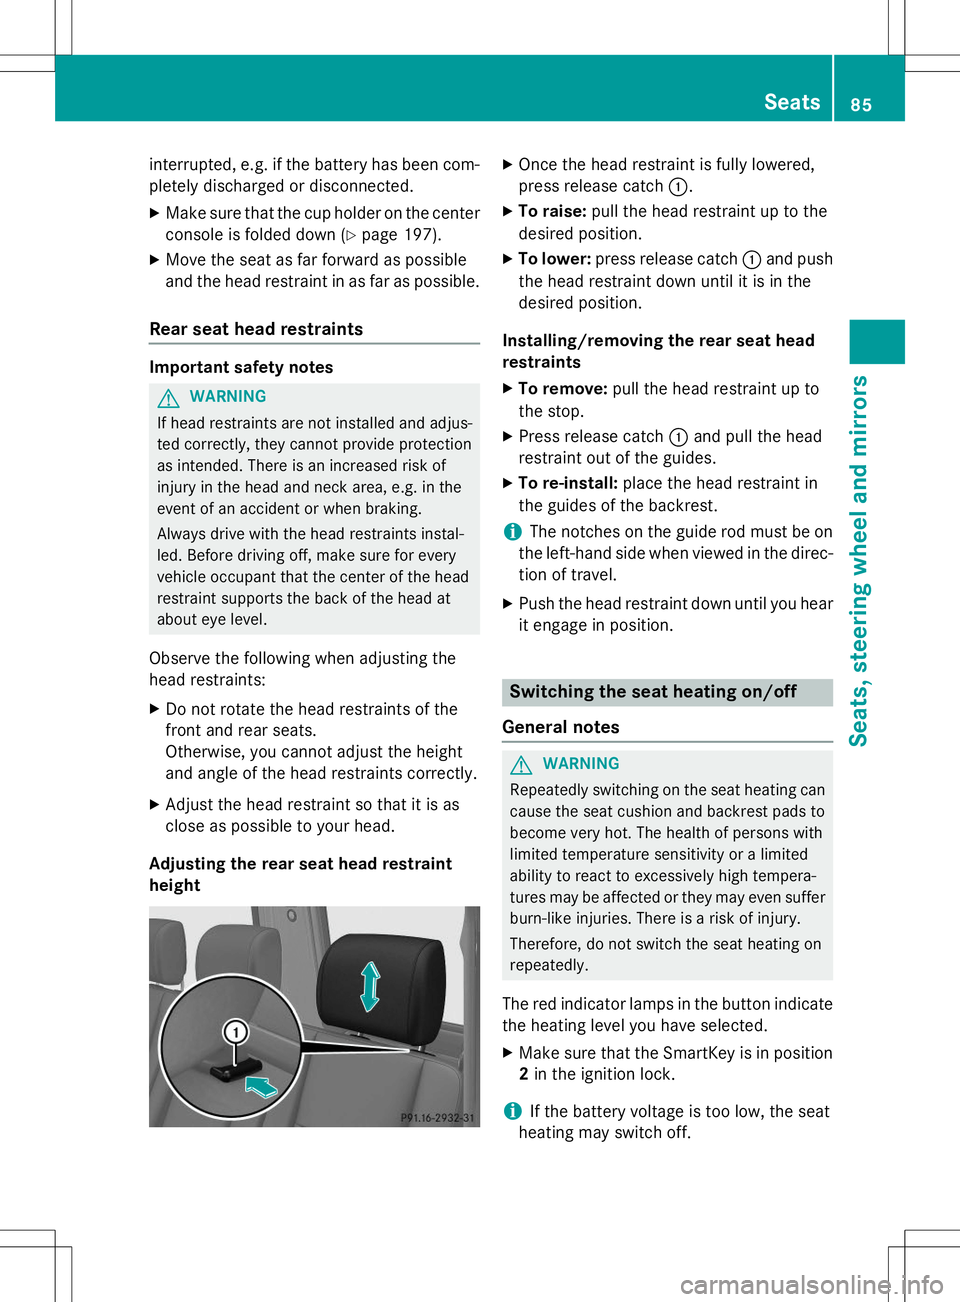
Adjusting the rear seat head restraintheight
X Once the head restraint is fully lowered,
press release catch :.
X To raise: pull the head restraint up to the
desired position.
X To lower: press release catch :and push
the head restraint down until it is in the
desired position.
Installing/removing the rear seat head
restraints
X To remove: pull the head restraint up to
the stop.
X Press release catch :and pull the head
restraint out of the guides.
X To re-install: place the head restraint in
the guides of the backrest.
iThe notches on the guide rod must be on
the left-hand side when viewed in the direc- tion of travel.
X Push the head restraint down until you hear
it engage in position.
Switching the seat heating on/off
General notes
GWARNING
Repeatedly switching on the seat heating can
cause the seat cushion and backrest pads to
become very hot. The health of persons with
limited temperature sensitivity or a limited
ability to react to excessively high tempera-
tures may be affected or they may even suffer burn-like injuries. There is a risk of injury.
Therefore, do not switch the seat heating on
repeatedly.
The red indicator lamps in the button indicate the heating level you have selected.
X Make sure that the SmartKey is in position
2 in the ignition lock.
iIf the battery voltage is too low, the seat
heating may switch off.
Seats85
Seats, steering wheel and mirrors
Z
Page 88 of 274
One or more of the indicator lamps in the
seat heating button are flashing.
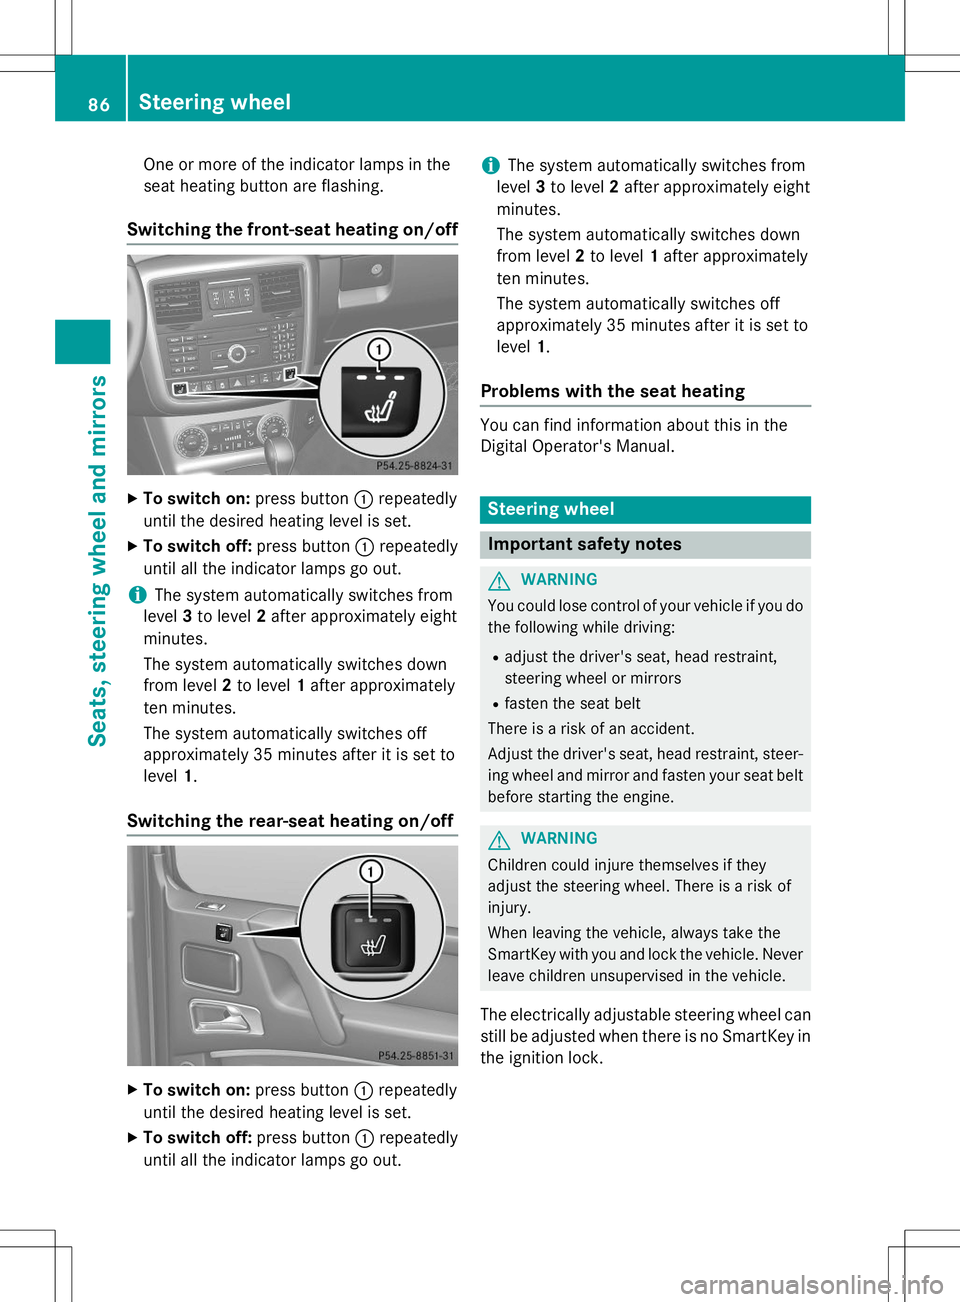
Switching the front-seat heating on/off
XTo switch on: press button:repeatedly
until the desired heating level is set.
X To switch off: press button:repeatedly
until all the indicator lamps go out.
iThe system automatically switches from
level 3to level 2after approximately eight
minutes.
The system automatically switches down
from level 2to level 1after approximately
ten minutes.
The system automatically switches off
approximately 35 minutes after it is set tolevel 1.
Switching the rear-seat heating on/off
X
To switch on: press button:repeatedly
until the desired heating level is set.
X To switch off: press button:repeatedly
until all the indicator lamps go out.
iThe system automatically switches from
level 3to level 2after approximately eight
minutes.
The system automatically switches down
from level 2to level 1after approximately
ten minutes.
The system automatically switches off
approximately 35 minutes after it is set tolevel 1.
Problems with the seat heating
You can find information about this in the
Digital Operator's Manual.
Steering wheel
Important safety notes
GWARNING
You could lose control of your vehicle if you do
the following while driving:
R adjust the driver's seat, head restraint,
steering wheel or mirrors
R fasten the seat belt
There is a risk of an accident.
Adjust the driver's seat, head restraint, steer-
ing wheel and mirror and fasten your seat belt before starting the engine.
GWARNING
Children could injure themselves if they
adjust the steering wheel. There is a risk ofinjury.
When leaving the vehicle, always take the
SmartKey with you and lock the vehicle. Neverleave children unsupervised in the vehicle.
The electrically adjustable steering wheel can
still be adjusted when there is no SmartKey in
the ignition lock.
86Steering wheel
Seats, steering wheel and mirrors
Page 89 of 274
Information in the Digital Operator's
Manual
In the Digital Operator's Manual you will find
information on the following topics: RAdjusting the steering wheel
R Steering wheel heating
R EASY-ENTRY/EXIT feature
Mirrors
In the Digital Operator's Manual you will find
information on the following topics:
R Rear-view mirror
R Exterior mirrors
R Automatic anti-glare mirrors
R Parking position for the exterior mirror on
the front-passenger side
Memory functions
In the Digital Operator's Manual you will find
information on the following topics:
R Storing settings
R Calling up a stored setting
Memory functions87
Seats , steering wheel and mirrors
Z
Page 195 of 274
Further information can be found in the
"Loading the vehicle" section (Ypage 238).
Observe the following notes when transport-
ing a load:
R Position heavy loads as far forwards as pos-
sible and as low down in the cargo com-
partment as possible.
iTransport loads when possible in the
cargo compartment. You should only use
the cargo compartment enlargement if the
load does not fit in the cargo compartment.
R Always place the load against the backrests
of the front seats or rear seats.
R Use the cargo tie-down rings and the parcel
nets to transport loads and luggage.
R Use cargo tie-down rings and fastening
materials appropriate for the weight and
size of the load.
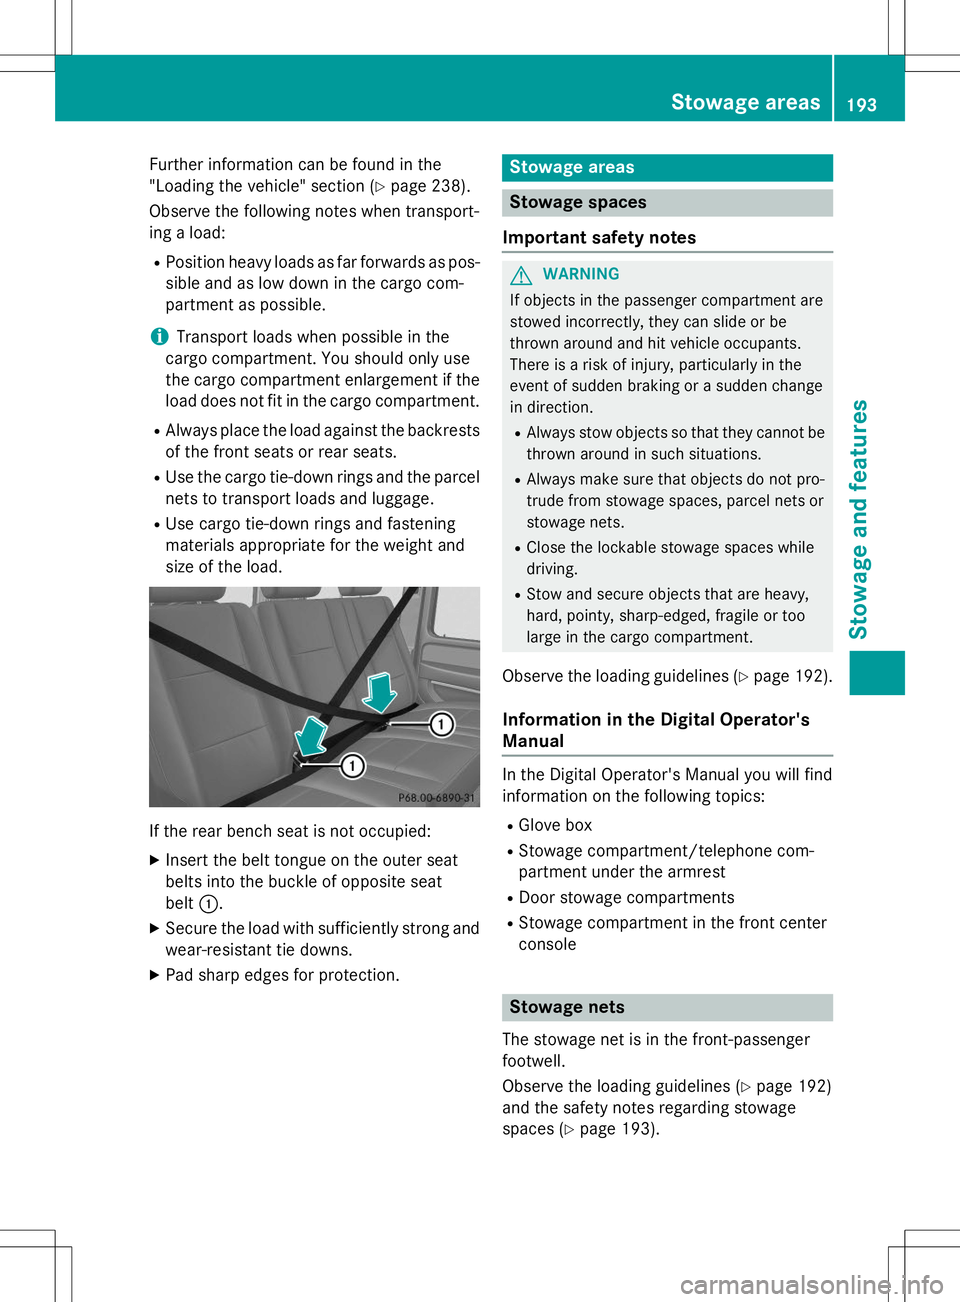
If the rear bench seat is not occupied: XInsert the belt tongue on the outer seat
belts into the buckle of opposite seat
belt :.
X Secure the load with sufficiently strong and
wear-resistant tie downs.
X Pad sharp edges for protection.
Stowage areas
Stowage spaces
Important safety notes
GWARNING
If objects in the passenger compartment are
stowed incorrectly, they can slide or be
thrown around and hit vehicle occupants.
There is a risk of injury, particularly in the
event of sudden braking or a sudden change
in direction. R Always stow objects so that they cannot be
thrown around in such situations.
R Always make sure that objects do not pro-
trude from stowage spaces, parcel nets or
stowage nets.
R Close the lockable stowage spaces while
driving.
R Stow and secure objects that are heavy,
hard, pointy, sharp-edged, fragile or too
large in the cargo compartment.
Observe the loading guidelines ( Ypage 192).
Information in the Digital Operator'sManual
In the Digital Operator's Manual you will find
information on the following topics: R
Glove box
R Stowage compartment/telephone com-
partment under the armrest
R Door stowage compartments
R Stowage compartment in the front center
console
Stowage nets
The stowage net is in the front-passenger
footwell.
Observe the loading guidelines ( Ypage 192)
and the safety notes regarding stowage
spaces ( Ypage 193).
Stowage areas193
Stowage and features
Z
Page 196 of 274
Cargo compartment enlargement
Important safety notes
GWARNING
If the rear bench seat/rear seat and seat
backrest are not engaged they could fold for- wards, e.g. when braking suddenly or in the
event of an accident. R The vehicle occupant would thereby be
pushed into the seat belt by the rear bench
seat/rear seat or by the seat backrest. The
seat belt can no longer offer the intended
level of protection and could even cause
injuries.
R Objects or loads in the trunk/cargo com-
partment cannot be restrained by the seat
backrest.
There is an increased risk of injury.
Before every trip, make sure that the seat
backrests and the rear bench seat/rear seat
are engaged.
GWARNING
Combustion engines emit poisonous exhaust
gases such as carbon monoxide. If the rear
door is open when the engine is running, par- ticularly if the vehicle is moving, exhaust
fumes could enter the passenger compart-
ment. There is a risk of poisoning.
Turn off the engine before opening the rear
door. Never drive with the rear door open.
!Ensure that you remove all containers
from the cup holder in the rear before fold- ing the seat backrest and the seat cushionof the rear bench seat forwards.
Observe the loading guidelines ( Ypage 192).
The rear bench seat is split symmetrically.
The left-hand and right-hand rear bench seats
can be folded forward to increase the capa-
city of the rear compartment. The following
changes are possible:
R fold the seat backrests forward
R fold the rear bench seat back fully
Folding the seat backrest forward
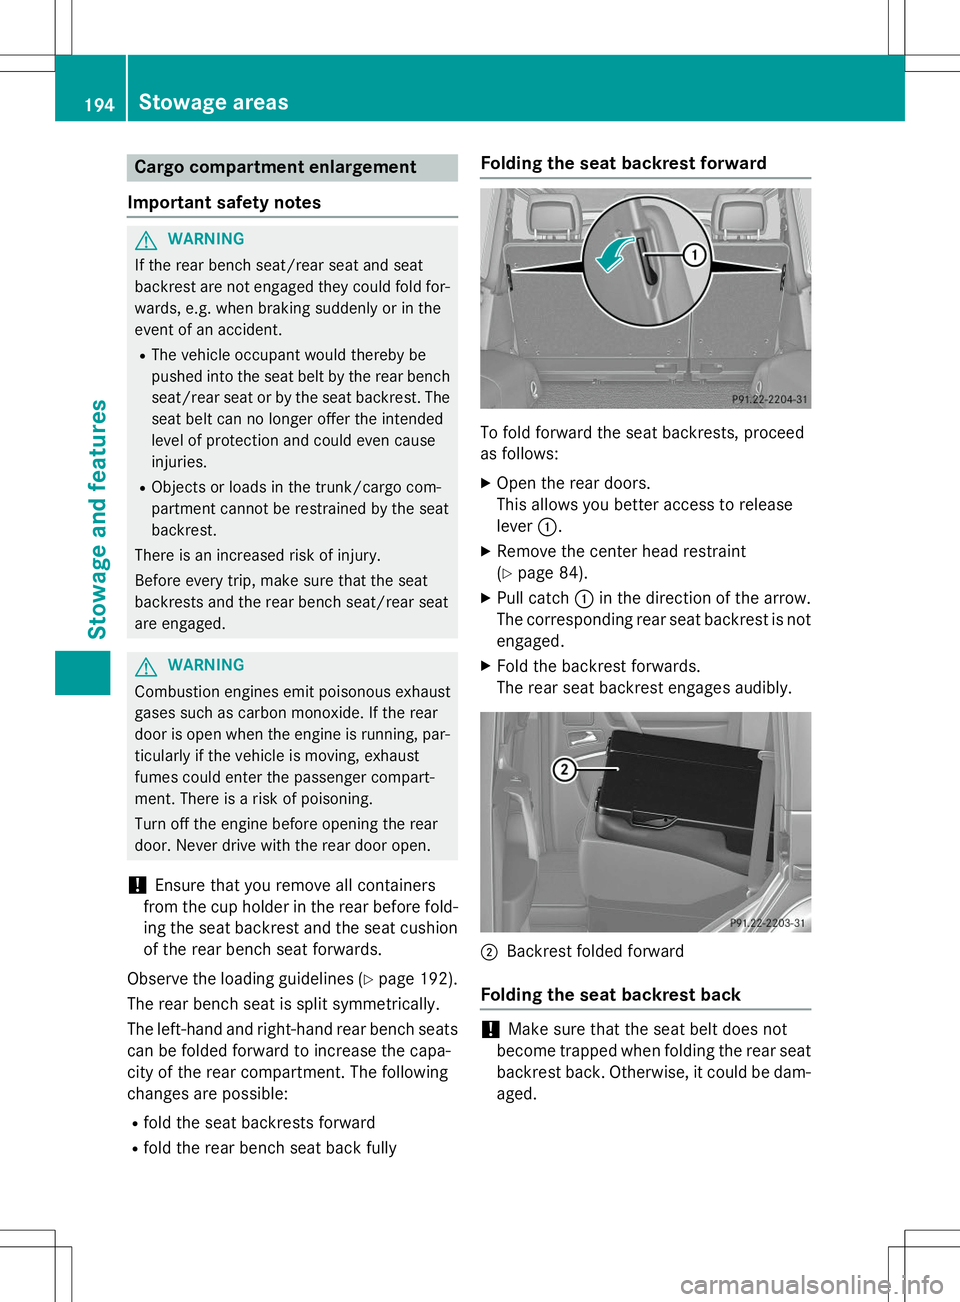
To fold forward the seat backrests, proceed
as follows:
X Open the rear doors.
This allows you better access to release
lever :.
X Remove the center head restraint(Y page 84).
X Pull catch :in the direction of the arrow.
The corresponding rear seat backrest is not
engaged.
X Fold the backrest forwards.
The rear seat backrest engages audibly.
;Backrest folded forward
Folding the seat backrest back
!Make sure that the seat belt does not
become trapped when folding the rear seat backrest back. Otherwise, it could be dam- aged.
194Stowage areas
Stowage and features
Page 219 of 274

GWARNING
Work carried out incorrectly on the battery
can lead, for example, to a short circuit and
thus damage the vehicle electronics. This canlead to function restrictions applying to
safety-relevant systems, e.g the lighting sys-
tem, the ABS (anti-lock braking system) or the
ESP ®
(Electronic Stability Program). The oper-
ating safety of your vehicle may be restricted.
You could lose control of the vehicle, for
example:
R when braking
R in the event of abrupt steering maneuvers
and/or when the vehicle's speed is not
adapted to the road conditions
There is a risk of an accident.
In the event of a short circuit or a similar inci-
dent, contact a qualified specialist workshop
immediately. Do not drive any further. You
should have all work involving the battery car- ried out at a qualified specialist workshop.
If ABS malfunctions, the wheels can lock dur-
ing braking. This limits the steerability of the
vehicle when braking and may increase the
braking distance.
If ESP ®
malfunctions, the vehicle will not be
stabilized if it starts to skid or a wheel starts to spin.
iFor further information about ABS and
ESP ®
, see ( Ypage 65) and ( Ypage 66).
GWARNING
During the charging process, a battery produ-
ces hydrogen gas. If a short circuit occurs or
sparks are created, the hydrogen gas can
ignite. There is a risk of an explosion.
R Make sure that the positive terminal of a
connected battery does not come into con-
tact with vehicle parts.
R Never place metal objects or tools on a bat-
tery.
R It is important that you observe the descri-
bed order of the battery terminals when
connecting and disconnecting a battery.
R When jump-starting, make sure that the
battery poles with identical polarity areconnected.
R It is particularly important to observe the
described order when connecting and dis-
connecting the jumper cables.
R Never connect or disconnect the battery
terminals while the engine is running.
GWARNING
Electrostatic build-up can lead to the creation
of sparks, which could ignite the highly explo-
sive gases of a battery. There is a risk of an
explosion.
Before handling the battery, touch the vehicle body to remove any existing electrostatic
build-up.
The highly flammable gas mixture forms when
charging the battery as well as when jump-starting.
Always make sure that neither you nor the
battery is electrostatically charged. A build-
up of electrostatic charge can be caused, for
example:
R by wearing clothing made from synthetic
fibers
R due to friction between clothing and seats
R if you push or pull the battery across the
carpet or other synthetic materials
R if you wipe the battery with a cloth
GWARNING
Battery acid is caustic. There is a risk of injury.
Avoid contact with skin, eyes or clothing. Do
not inhale any battery gases. Do not lean over
the battery. Keep children away from batter-
ies. Wash away battery acid immediately with
plenty of clean water and seek medical atten- tion.
!Have the battery checked regularly at a
qualified specialist workshop.
Observe the service intervals in the Main-
tenance Booklet or contact a qualified spe- cialist workshop for more information.
Battery (vehicle)217
Roadside Assistance
Z
Page 221 of 274

little energy, thus conserving battery power.
iIf the power supply has been interrupted,
e.g. due to a discharged battery, you will
have to: R set the clock. Information on setting the
clock can be found in the Digital Opera-
tor's Manual.
On vehicles with COMAND and a naviga-
tion system, the clock is set automati- cally.
R reset the head restraints on the front
seats. Information on resetting the head
restraints can be found in the Digital
Operator's Manual.
R reset the function for folding the exterior
mirrors in/out automatically, by folding
the mirrors out once ( Ypage 87).
Charging the battery
GWARNING
During charging and jump-starting, explosive
gases can escape from the battery. There is a
risk of an explosion.
Particularly avoid fire, open flames, creating
sparks and smoking. Ensure there is sufficient
ventilation while charging and jump-starting.
Do not lean over a battery.
GWARNING
Battery acid is caustic. There is a risk of injury.
Avoid contact with skin, eyes or clothing. Do
not inhale any battery gases. Do not lean over
the battery. Keep children away from batter-
ies. Wash away battery acid immediately with
plenty of clean water and seek medical atten- tion.
GWARNING
A discharged battery can freeze at tempera-
tures below freezing point. When jump-start-
ing the vehicle or charging the battery, gases can escape from the battery. There is a risk of
an explosion.
Allow the frozen battery to thaw out before
charging it or jump-starting.
!Only charge the battery using the jump-
starting connection point.
!Only use battery chargers with a maxi-
mum charging voltage of 14.8 V.
!Only charge the installed battery with a
battery charger which has been tested and
approved by Mercedes-Benz. These battery
chargers allow the battery to be charged
while still installed in the vehicle.
If, at low temperatures, the indicator lamps/
warning lamps in the instrument cluster do
not light up, it is highly likely that the dis-
charged battery has frozen. In this case you
may neither jump-start the vehicle nor charge the battery. The service life of a thawed-out
battery may be shorter. The starting charac-
teristics can be impaired, particularly at low
temperatures. Have the thawed-out battery
checked at a qualified specialist workshop.
A battery charger unit specially adapted for
Mercedes-Benz vehicles and tested and
approved by Mercedes-Benz is available as an
accessory. Contact an authorized Mercedes-
Benz Center for information and availability.
Charge the battery in accordance with the
operating instructions for the battery
charger.
The jump-starting connection point is in the
engine compartment ( Ypage 220).
X Read the operating instructions for the bat-
tery charger.
X Open the hood ( Ypage 205).
X Connect the battery charger to the positive
terminal and ground point in the same
order as when connecting the donor bat-
tery in the jump-starting procedure( Y page 220).
Battery (vehicle)219
Roadside Assistance
Z