2015 MERCEDES-BENZ E-CLASS SALOON maintenance
[x] Cancel search: maintenancePage 393 of 497

X
Clean sensors :of th edriving systems
wit hw ater, car shampoo and asoftc loth.
Cleaning th ereversing camera !
Do no
tclean th ecamera len sand th earea
aroun dthe reversing camera wit hahigh-
pressur ecleaner. X
Use clear wate rand asoftc loth to clean
camera lens :.
Cleaning th e360° camera !
Do no
tclean th ecamera len sand th earea
aroun dthe 360° camera wit hahigh-pres-
sure cleaner.360 X
Use clear wate rand asoftc loth to clean
camera lens :.
Cleaning th eexhaust tail pipes G
WARNING
The exhaust tai lpipe and tai lpipe trim can
become ver yhot.Ify ou come int ocontact
wit hthese part softhevehicle, you could burn
yourself. Ther eisariskofi njury.
Always be particularly careful aroun dthe
exhaust tai lpipe and th etailp ipe trim. Allow
these component stocooldown before touch-
ing them.
! Do no
tclean th eexhaust pipe wit hacid-
based cleanin gagents ,suc hass anitary
cleanser or wheel cleaner.
Impurities combined wit hthe effect sofroad
gri tand corrosiv eenvironmental factors may
caus eflas hrust to for monthesurface .You
can restore th eoriginal shin eoftheexhaust
pipe by cleanin gitregularly, especially in win-
te ra nd after washing.
X Clean th eexhaust pipe wit hacarep roduct
tested and approve dbyMercedes-Benz.
Cleaning th etraile rtow hitch H
Environmental note
Dispose of oily and greasy cloth sinanenvi-
ronmentally-responsible manner.
! Do no
tclean th eball couplin gwithah igh-
pressur ecleaner. Do no tuse solvents. 390
CareMaintenance and care
Page 394 of 497

!
Please note the care instructions in the
trailer coupling manufacturer's operating
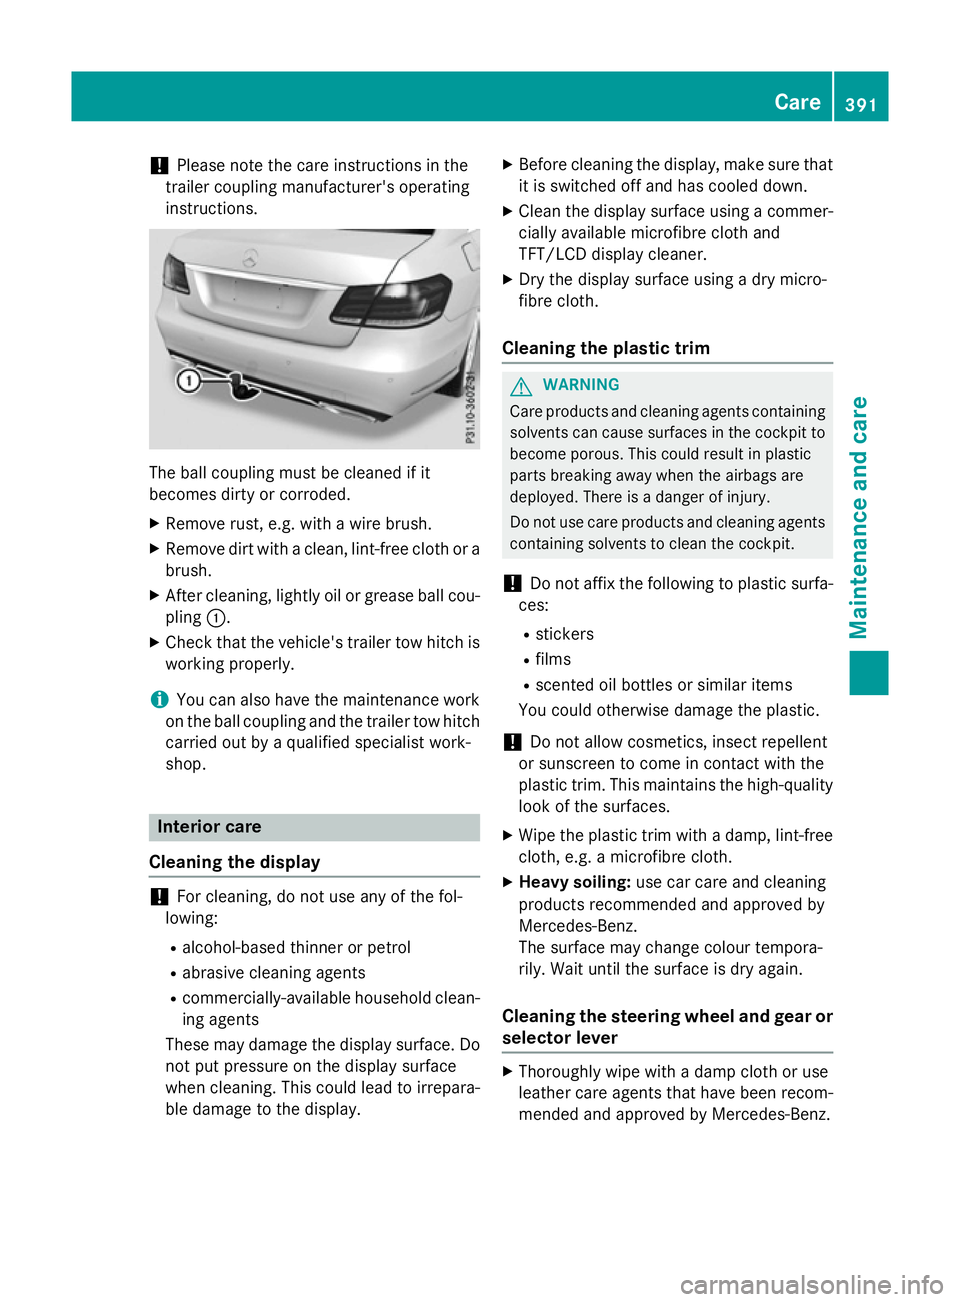
instructions. The ball coupling must be cleaned if it
becomes dirty or corroded.
X Remove rust, e.g. with awire brush.
X Remove dirt with aclean, lint-free cloth or a
brush.
X After cleaning, lightly oil or grease ball cou-
pling :.
X Check that the vehicle's trailer tow hitch is
working properly.
i You can also have the maintenance work
on the ball coupling and the trailer tow hitch
carried out by aqualified specialist work-
shop. Interior care
Cleaning the display !
For cleaning, do not use any of the fol-
lowing:
R alcohol-based thinner or petrol
R abrasive cleaning agents
R commercially-available householdc lean-
ing agents
These may damage the displays urface. Do
not put pressure on the displays urface
when cleaning. This could lead to irrepara-
ble damage to the display. X
Before cleaning the display, make sure that
it is switched off and has cooled down.
X Cleant he displays urface using acommer-
cially available microfibre cloth and
TFT/LCD displayc leaner.
X Dry the displays urface usingadry micro-
fibre cloth.
Cleaning the plastic trim G
WARNING
Care products and cleaning agents containing solvents can cause surfaces in the cockpit to
become porous. This could result in plastic
parts breaking awayw hen the airbags are
deployed. There is adanger of injury.
Do not use care products and cleaning agents containing solvents to clean the cockpit.
! Do not affix the following to plastic surfa-
ces:
R stickers
R films
R scented oil bottles or similari tems
You could otherwise damage the plastic.
! Do not allowc
osmetics, insect repellent
or sunscreen to come in contact with the
plastic trim. This maintains the high-quality look of the surfaces.
X Wipe the plastic trim with adamp, lint-free
cloth, e.g. amicrofibre cloth.
X Heavy soiling: use car care and cleaning
products recommended and approved by
Mercedes-Benz.
The surface may change colour tempora-
rily. Wait until the surface is dry again.
Cleaning the steering wheela nd gear or
selector lever X
Thoroughlyw ipe withadamp cloth or use
leather care agents that have been recom-
mended and approved by Mercedes-Benz. Care
391Maintenance and care Z
Page 395 of 497

Cleaning wooden trim and trim ele-
ments !
Do no
tuse solvent-based cleanin gagents
suc hast ar remover, wheel cleaners, pol-
ishe sorw axes. Ther eisotherwise ariskof
damaging th esurface.
X Wipe th ewoode ntrima nd trim elements
wit had amp, lint-free cloth ,e.g.am icrofi-
bre cloth.
X Heavy soiling: use car careand cleaning
product srecommended and approved by
Mercedes-Benz.
Cleaning th eseat covers General notes
! Do no
tuse microfibre cloth stoclean gen-
uine leather ,artificial leather or DINAMICA
covers. If used often ,the se can damag ethe
cover.
i Not
ethatregular car eisessential to
mak esure that th eappearanc eand com-
for toft hecover sare retaine dovertime.
Genuine leather seat covers
Leather is anatural product.
It has natural surface properties, e.g.: R unevenness in structure
R marks caused by growth and injury
R subtle colour differences
Thes eare characteristic sofleather and not
material faults.
! To retain th
enatural appearanc eofthe
leather ,observ ethe followin gcleaning
instructions:
R Clean genuine leather cover scarefully
wit had amp cloth and then wipe th ecov-
ers down wit hadry cloth.
R Mak esure that th eleather does not
become soaked. It may otherwise
become roug hand cracked.
R Only use leather car eagents that have
been tested and approved by Mercedes- Benz. You can obtain these from
aquali-
fied specialist workshop.
Seat cover sfromo ther materials
! Observ
ethe followin gwhen cleaning:
R clean artificial leather cover swithac loth
moistene dwithas olution containing 1%
detergen t(e.g. washing-up liquid).
R clean cloth cover switham icrofibre cloth
moistene dwithas olution containing 1%
detergen t(e.g. washing-up liquid). Rub
carefully, and always wipe entir eseat
sections to avoid leavin gvisible lines.
Leav ethe seat to dry afterwards. Clean-
ing results depen donthetype of dirt and
how lon githas been there.
R Clean DINAMICA cover swithad amp
cloth .Makes ure that you wipe entire
seat sections to avoid leavin gvisible
lines.
Cleaning th eseat belts G
WARNING
Seat belt smay be severely weakened if
bleached or coloured. This may lead to the
seat belts, for example ,tea rin gorf ailinginan
accident. Ther eisanincreased ris kofinjury,
possibly eve nfatal.
Never bleac horcolour seat belts.
! Do no
tclean th eseat belt susin gchemical
cleanin gagents .Donotdry th eseat belt sat
temperatures abov e80†or in direct sun-
light.
X Use clean, lukewarm wate rand soap solu-
tion.
Cleaning th eroof lining and carpets X
Roof lining: if it is verydirty, use asoft
brus hord ry shampoo.
X Carpets: use thecarpet and textile clean-
ing agents recommended and approved by
Mercedes-Benz. 392
CareMaintenance and care
Page 431 of 497

jack could tip ove
rwitht he vehicl eraised.
There is ariskofi njury.
Onl yposit iont he jack at the appropriate jack-
ing point of the vehicle. The base of the jack
must be positioned vertically, directl yunder
the jacking point of the vehicle.
Observe the following when raising the vehi-
cle:
R to rais ethe vehicle, onl yusethe vehicle-
specific jack tha thas been teste dand
approved by Mercedes-Benz. If the jack is
used incorrectly ,itcould tip ove rwhile the
vehicl eisraised.
R the jack is designe donlytor aiseand hold
the vehicl efor as hort time whil eawheel
is being changed. It is not suitabl efor per-
formin gmaintenance work under the vehi-
cle.
R avoi dchanging the whee lonuphilland
downhil lslope s.
R befor eraisi ng the vehicle, safeguard it from
rolling away by applying the parking brake
and positioning whee lchocks. Never
release the parking brake whil ethe vehicle
is raised.
R the jack must be place donafirm, flatand
non-sli psurface. On aloo se surface, a
large ,flatl oad- bearing underlay must be
used .Ona slippery surface, anon-slip
underlay must be used ,e.g.r ubbe rmats.
R do not us ewoode nblocks or similar
objects as ajack underlay .Otherwise, the
jack will not be able to achieve its load-
bearing capacity du etothe restricted
height.
R make sure tha tthe distance between the
undersid eofthe tyres and the ground does
not exceed 3cm.
R neve rplace your hands or fee tunder the
raised vehicle.
R do not li eunder the vehicle.
R do not start the engine when the vehicl eis
raised. R
do not open or close adoorort he boot lid/
tailgate when the vehicl eisraised.
R make sure tha tnopersons ar epresent in
the vehicl ewhent he vehicl eisraised.
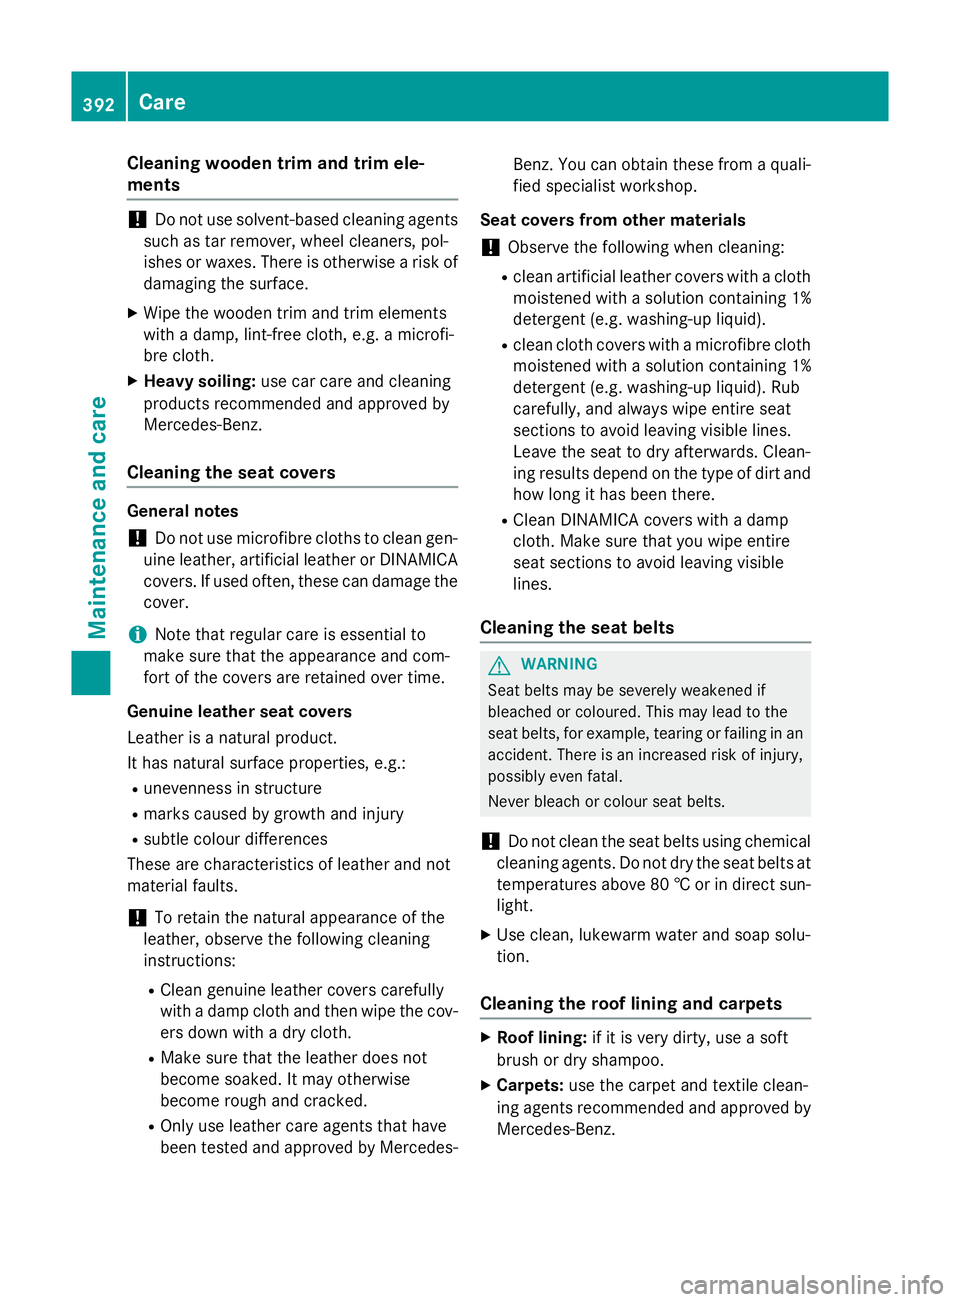
AM Gvehicle swithP erformanc eStudio
equipment: the wheelbolts ar ecovered by a
hu bc ap.B efore yo ucan unscrew the wheel
bolts ,you must remove the hu bcap. X
To remove: turnthe centre cove rofhub
cap :anti-clockwise and remove.
X To fit: beforefitting, ensur etha thub cap :
is in the open position. To do this, tur nthe
centre cove ranti-clockwise.
X Positio nhub cap :and tur nthe centre
cove rclockwise unti lhub cap :engages
physicall yand audibly.
X Make sure tha thub cap :is fitted
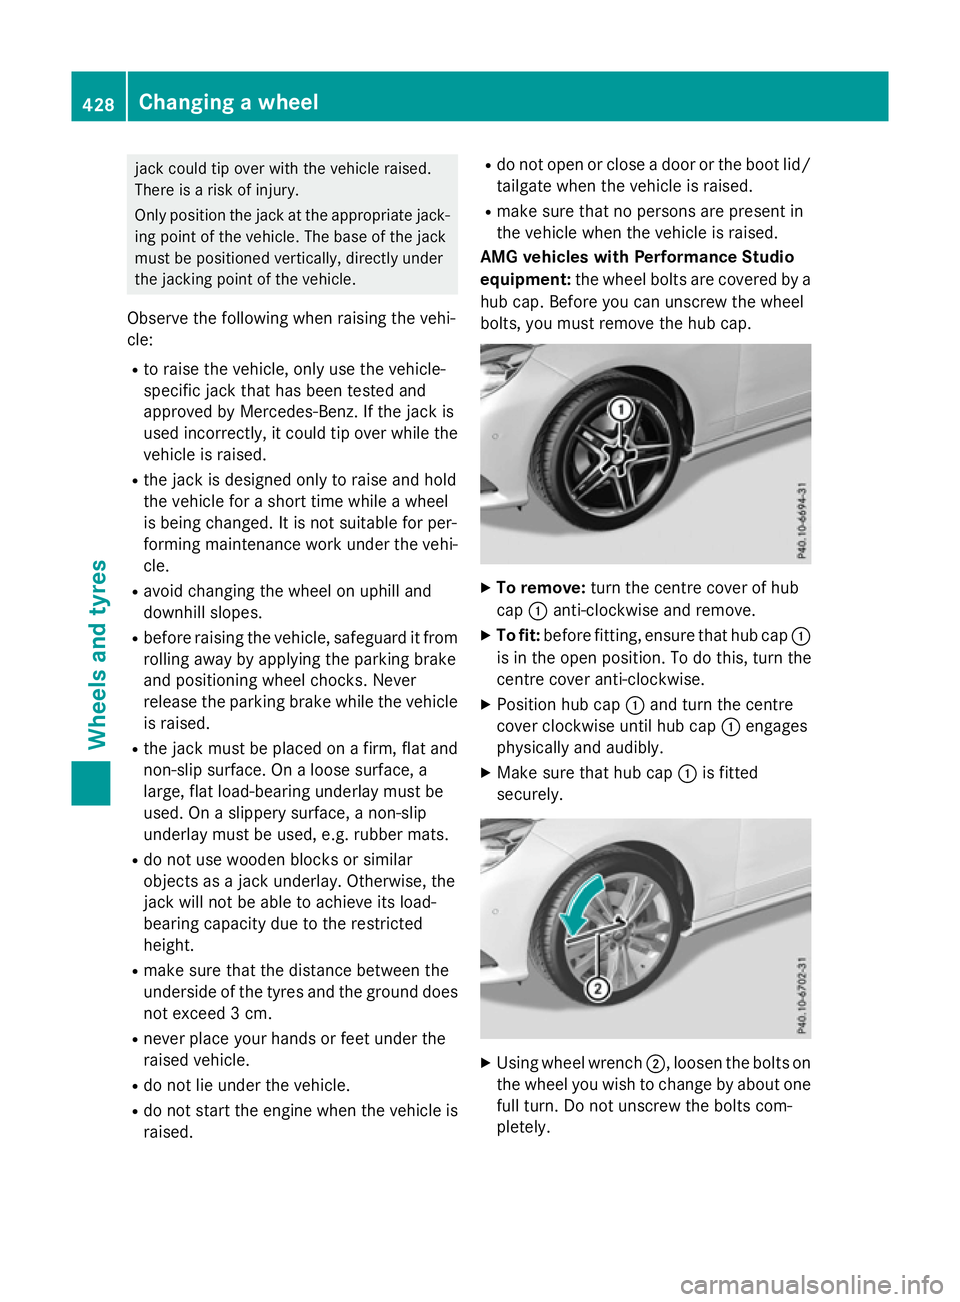
securely. X
Using whee lwrench ;,l oosent he bolts on
the whee lyou wish to change by abou tone
full turn. Do not unscrew the bolts com-
pletely. 428
Changin
gawheelWheels an dtyres