2015 MERCEDES-BENZ E-CLASS CABRIOLET change time
[x] Cancel search: change timePage 4 of 349
Welcome to the world of Mercedes-Benz
Before you first drive off, read this Owner's Man- ual carefully and familiarise yourself with your
vehicle. For your own safety and a longer vehicle
life, follow the instructions and warning notices in this manual. Disregarding them may lead to
damage to the vehicle or personal injury.
The equipment or model designation of your
vehicle may vary according to:
R model
R order
R country variant
R availability
The illustrations in this manual show a left-hand-
drive vehicle. On right-hand-drive vehicles, the
layout of components and controls differs
accordingly.
Mercedes-Benz is constantly updating its vehi-
cles to the state of the art.
Mercedes-Benz therefore reserves the right to
introduce changes in the following areas:
R design
R equipment
R technical features
The equipment in your vehicle may therefore
differ from that shown in the descriptions and
illustrations.
The following are integral components of the
vehicle:
R Digital Owner's Manual
R Printed Owner's Manual
R Service Booklet
R Equipment-dependent Supplements
Keep these documents in the vehicle at all
times. If you sell the vehicle, always pass all of
the documents on to the new owner.
Your Owner's Manuals: Digital - in the vehicle
The Digital Owner's Manual provides com-
prehensive and specifically adapted infor-
mation on the equipment in your vehicle
and your multimedia system. You will find
informative animations, individual lan-
guage selection options and an intuitive
search function. Printed manual - in the vehicle
In addition to the vehicle Owner's Manual,
the full multimedia system Supplement is also available from your Mercedes-Benz
Service Centre. Digital - on the Internet
The online version of the Owner's Manual
provides convenient access to compre-
hensive information on your vehicle and
your multimedia system. It also provides
helpful animations, interesting back-
ground information and various search
options.
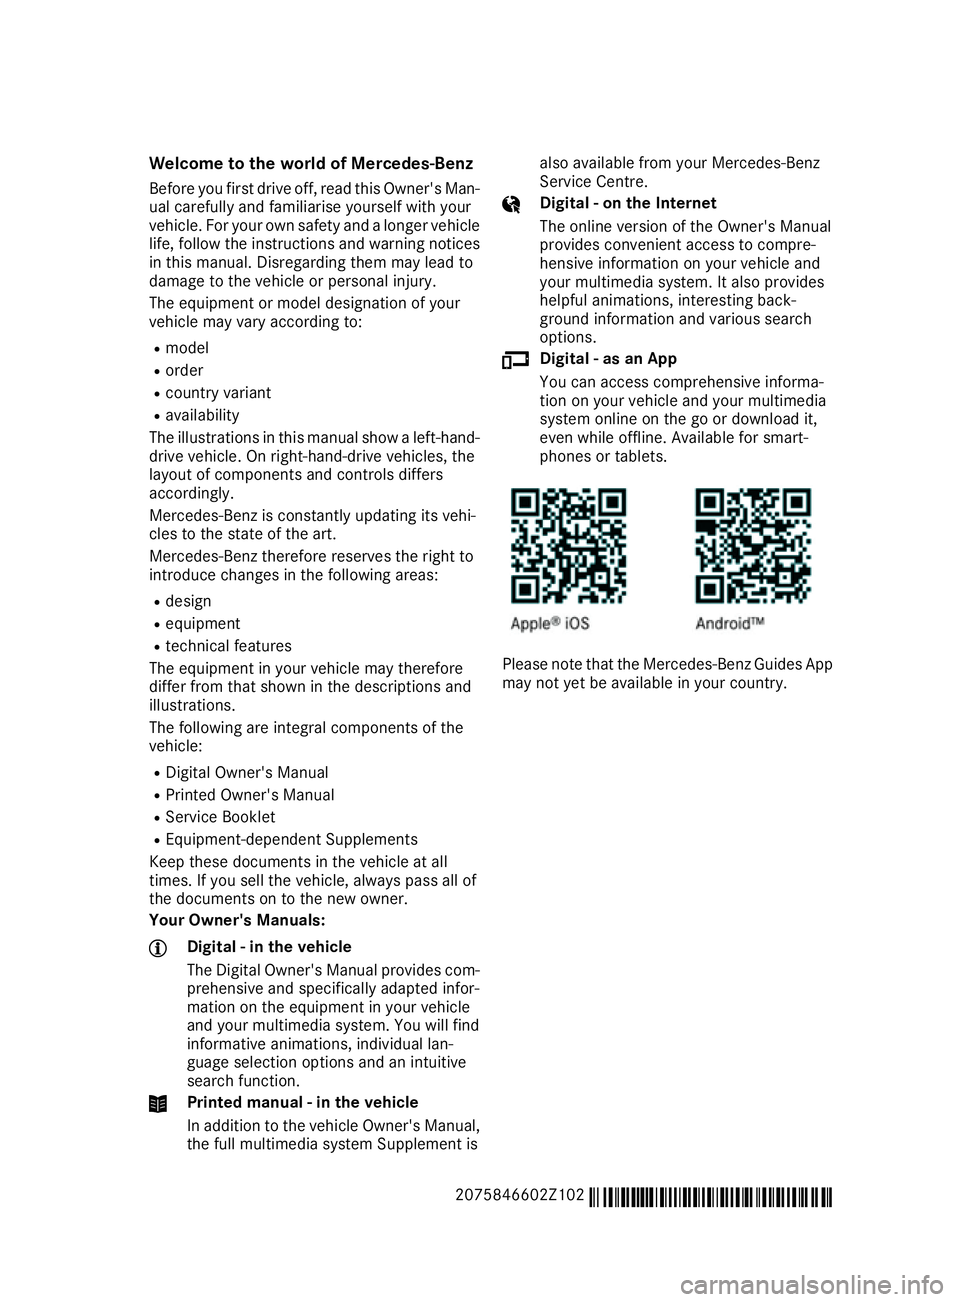
Digital - as an App
You can access comprehensive informa-
tion on your vehicle and your multimedia
system online on the go or download it,
even while offline. Available for smart-
phones or tablets.
Please note that the Mercedes-Benz Guides App
may not yet be available in your country.
2075846602Z102 É2075846602Z102?ËÍ
Page 27 of 349

Protection of the environment
General notes
H
Environmental note
Daimler's declared policy is one of compre-
hensive environmental protection.
Our objectives are to use the natural resour-
ces which form the basis of our existence on
this planet sparingly and in a manner which
takes the requirements of both nature and
humanity into consideration.
You too can help to protect the environment
by operating your vehicle in an environmen-
tally-responsible manner.
Fuel consumption and the rate of engine,
transmission, brake and tyre wear depend on
the following factors:
R operating conditions of your vehicle
R your personal driving style
You can influence both factors. Therefore,
please bear the following in mind:
Operating conditions:
R avoid short trips, as these increase fuel
consumption.
R observe the correct tyre pressure.
R do not carry any unnecessary weight in the
vehicle.
R remove the roof rack once you no longer
need it.
R a regularly serviced vehicle will contribute
to environmental protection. You should
therefore adhere to the service intervals.
R all maintenance work should be carried out
at a qualified specialist workshop.
Personal driving style:
R do not depress the accelerator pedal when
starting the engine.
R do not warm up the engine when the vehicle
is stationary.
R drive carefully and maintain a safe distance
from the vehicle in front.
R avoid frequent, sudden acceleration and
braking. R
change gear in good time and use each gear
only up to Ôof its maximum engine speed.
R switch off the engine in stationary traffic.
R monitor the vehicle's fuel consumption. Returning an end-of-life vehicle
EU countries only:
Mercedes-Benz will take back your old vehicle to
dispose of it in an environmentally-responsible
manner in accordance with the European Union (EU) End of Life Vehicles Directive.
There is a network of return points and disas-
sembly plants available. You can return your
vehicle to these plants free of charge. This
makes a valuable contribution to the recycling
process and the conservation of resources.
For further information on recycling old vehi-
cles, recovery and the terms of the policy, visit
the Mercedes-Benz homepage. Genuine Mercedes-Benz parts
H
Environmental note
Daimler AG also supplies reconditioned
assemblies and parts which are of the same
quality as new parts. For these, the same war-
ranty applies as for new parts.
! Airbags and seat belt tensioners, as well as
control units and sensors for these restraint
systems, may be installed in the following
areas of your vehicle:
R doors
R door pillars
R door sills
R seats
R dashboard
R instrument cluster
R centre console
Do not install accessories such as audio sys-
tems in these areas. Do not carry out repairs
or welding. You could impair the operating
efficiency of the restraint systems.
Have accessories retrofitted at a qualified
specialist workshop. 24
Genuine Mercedes-Benz partsIntroduction
Page 28 of 349
You could jeopardise the operating safety of
your vehicle if you use parts, tyres and wheels as
well as accessories relevant to safety which
have not been approved by Mercedes-Benz. This
could lead to malfunctions in safety-relevant
systems, e.g. the brake system. Only use genu- ine Mercedes-Benz parts or parts of equal qual-
ity. Only use tyres, wheels and accessories that
have been specifically approved for your vehi-
cle.
Mercedes-Benz tests genuine parts and conver-
sion parts and accessories that have been spe-
cifically approved for your vehicle for their reli-
ability, safety and suitability. Despite ongoing
market research, Mercedes-Benz is unable to
assess other parts. Mercedes-Benz therefore
accepts no responsibility for the use of such
parts in Mercedes-Benz vehicles, even if they
have been officially approved or independently
approved by a testing centre.
In Germany, certain parts are only officially
approved for installation or modification if they
comply with legal requirements. This also
applies to some other countries. All genuine
Mercedes-Benz parts meet the approval
requirements. The use of non-approved parts
may invalidate the vehicle's general operating
permit.
This is the case:
R if they cause a change of the vehicle type from
that for which the vehicle's general operating
permit was granted
R if other road users could be endangered
R if the emission or noise levels are adversely
affected
Always specify the vehicle identification number (VIN) (Y page 336) when ordering genuine
Mercedes-Benz parts. Owner's Manual
Vehicle equipment
i This Owner's Manual describes all models
and all standard and optional equipment
available for your vehicle at the time of pub-
lication of the Owner's Manual. Country-spe-
cific differences are possible. Note that your
vehicle may not be fitted with all features
described. This is also the case for systems
and functions relevant to safety. Therefore,
the equipment on your vehicle may differ from that in the descriptions and illustrations. The original purchase contract documentation
for your vehicle contains a list of all of the sys-
tems in your vehicle.
Should you have any questions concerning
equipment and operation, please consult a
Mercedes-Benz Service Centre.
The Owner's Manual and Service Booklet are
important documents and should kept in the
vehicle. Operating safety
Important safety notes
G
WARNING
If you do not have the prescribed service/
maintenance work or necessary repairs car-
ried out, this could result in malfunctions or
system failures. There is a risk of an accident. Always have the prescribed service/mainte-
nance work as well as necessary repairs car-
ried out at a qualified specialist workshop. G
WARNING
Flammable material such as leaves, grass or
twigs may ignite if they come into contact with hot parts of the exhaust system. There is a risk of fire.
When driving off road or on unpaved roads,
check the vehicle's underside regularly. In
particular, remove parts of plants or other
flammable materials which have become
trapped. In the case of damage, contact a
qualified specialist workshop. G
WARNING
Modifications to electronic components, their software as well as wiring could affect their
function and/or the operation of other net-
worked components. This could in particular
also be the case for systems relevant to
safety. They might not function properly any-
more and/or jeopardise the operational
safety of the vehicle. There is an increased
risk of an accident and injury.
Do not attempt to modify the wiring as well as
electronic components or their software. Operating safety
25Introduction
Z
Page 64 of 349
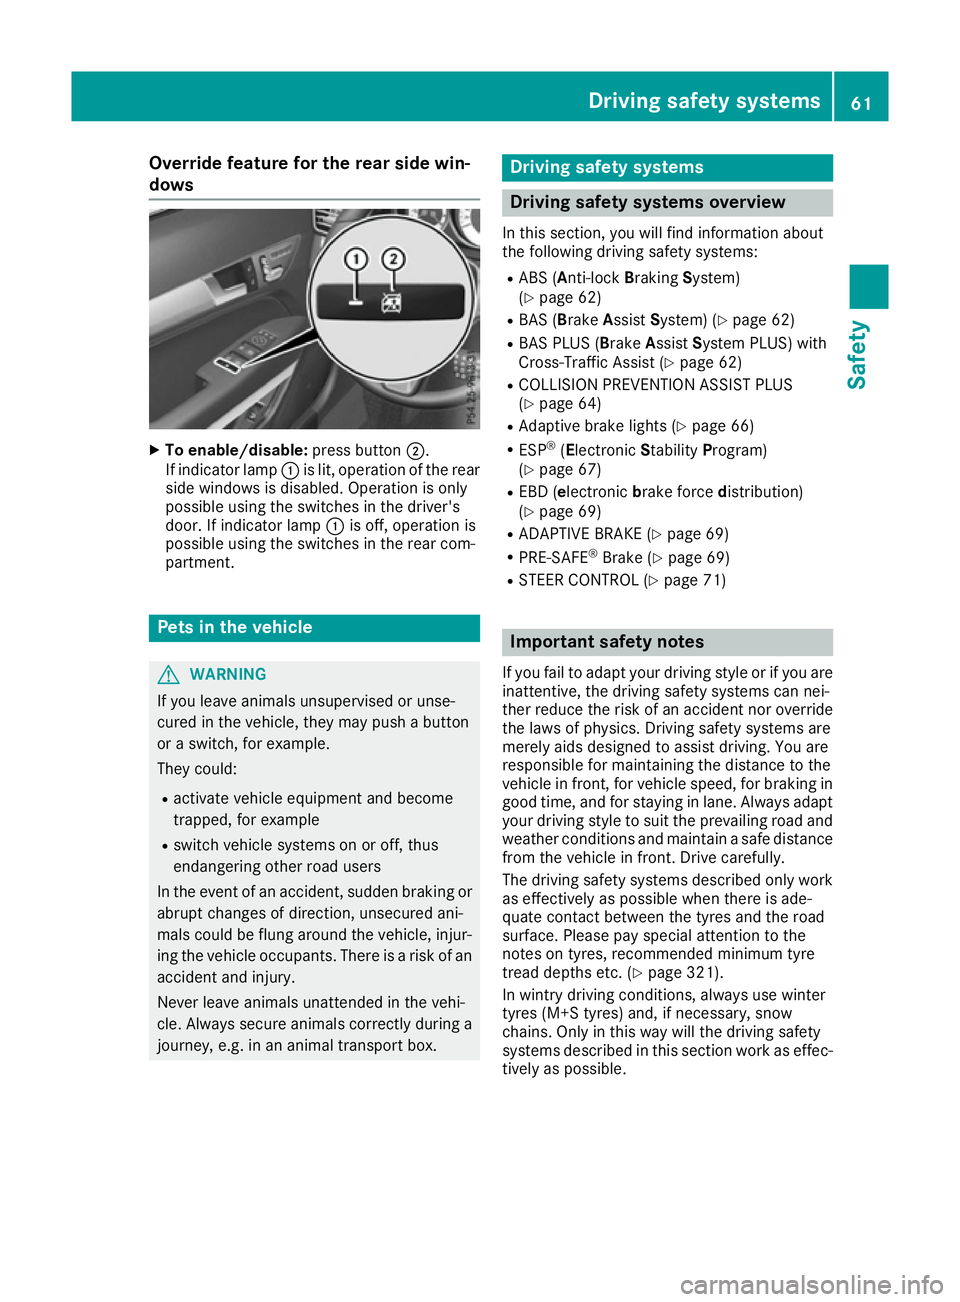
Override feature for the rear side win-
dows X
To enable/disable: press button;.
If indicator lamp :is lit, operation of the rear
side windows is disabled. Operation is only
possible using the switches in the driver's
door. If indicator lamp :is off, operation is
possible using the switches in the rear com-
partment. Pets in the vehicle
G
WARNING
If you leave animals unsupervised or unse-
cured in the vehicle, they may push a button
or a switch, for example.
They could:
R activate vehicle equipment and become
trapped, for example
R switch vehicle systems on or off, thus
endangering other road users
In the event of an accident, sudden braking or
abrupt changes of direction, unsecured ani-
mals could be flung around the vehicle, injur-
ing the vehicle occupants. There is a risk of an accident and injury.
Never leave animals unattended in the vehi-
cle. Always secure animals correctly during a
journey, e.g. in an animal transport box. Driving safety systems
Driving safety systems overview
In this section, you will find information about
the following driving safety systems:
R ABS (A nti-lock Braking System)
(Y page 62)
R BAS (Brake AssistSystem) (Y page 62)
R BAS PLUS (B rakeAssist System PLUS) with
Cross-Traffic Assist (Y page 62)
R COLLISION PREVENTION ASSIST PLUS
(Y page 64)
R Adaptive brake lights (Y page 66)
R ESP ®
(Electronic StabilityProgram)
(Y page 67)
R EBD (e lectronic brake force distribution)
(Y page 69)
R ADAPTIVE BRAKE (Y page 69)
R PRE-SAFE ®
Brake (Y page 69)
R STEER CONTROL (Y page 71) Important safety notes
If you fail to adapt your driving style or if you are
inattentive, the driving safety systems can nei-
ther reduce the risk of an accident nor override the laws of physics. Driving safety systems are
merely aids designed to assist driving. You are
responsible for maintaining the distance to the
vehicle in front, for vehicle speed, for braking in
good time, and for staying in lane. Always adapt
your driving style to suit the prevailing road and weather conditions and maintain a safe distance
from the vehicle in front. Drive carefully.
The driving safety systems described only work as effectively as possible when there is ade-
quate contact between the tyres and the road
surface. Please pay special attention to the
notes on tyres, recommended minimum tyre
tread depths etc. (Y page 321).
In wintry driving conditions, always use winter
tyres (M+S tyres) and, if necessary, snow
chains. Only in this way will the driving safety
systems described in this section work as effec-
tively as possible. Driving safety systems
61Safety Z
Page 79 of 349

X
To deactivate: press the&button on the
key twice in rapid succession.
The battery indicator light of the key
(Y page 77) flashes twice briefly and lights
up once. KEYLESS-GO is then deactivated.
X To activate: press any button on the key.
or X Insert the key into the ignition lock.
KEYLESS-GO and all of its associated features
are available again. Changing the settings of the locking
system
You can change the settings of the locking sys-
tem. This means that only the driver's door and
the fuel filler flap are unlocked when the vehicle is unlocked. This is useful if you frequently travelon your own.
X To change the setting: simultaneously press
the % and& buttons on the key for
approximately six seconds until the battery
check lamp flashes twice (Y page 77).
If the setting of the locking system is changed
within the signal range of the vehicle, pressing
the & or% button:
R locks or
R unlocks the vehicle
The key now functions as follows:
X To unlock: press the%button once.
X To unlock centrally: press the%button
twice.
X To lock centrally: press the&button.
The KEYLESS-GO function is changed as fol-
lows:
X To unlock the driver's door: touch the inner
surface of the door handle on the driver's
door.
X To unlock centrally: touch the inner surface
of the front-passenger door handle.
X To lock centrally: touch the outer sensor
surface on one of the door handles.
X To restore the factory settings: press and
hold down the %and& buttons simul-
taneously for approximately six seconds until
the battery check lamp flashes twice
(Y page 77). Emergency key element
General notes If the vehicle can no longer be locked or
unlocked with the key, use the emergency key
element.
If you use the emergency key element to unlock
and open the driver's door or the boot lid, the
anti-theft alarm system will be triggered. Switch
off the alarm (Y page 71).
If you unlock the vehicle using the emergency
key element, the fuel filler flap will not be
unlocked automatically.
X To unlock the fuel filler flap: insert the key
into the ignition lock.
Removing the emergency key element X
Push release catch :in the direction of the
arrow and, at the same time, remove emer-
gency key element ;from the key.
Further information about: R Unlocking the driver's door (Y page 82)
R Unlocking the boot (Y page 84)
R Locking the vehicle (Y page 82)
Inserting the emergency key element X
Push emergency key element ;fully into the
key until it engages and release catch :
returns to its basic position. 76
KeyOpening and closing
Page 128 of 349
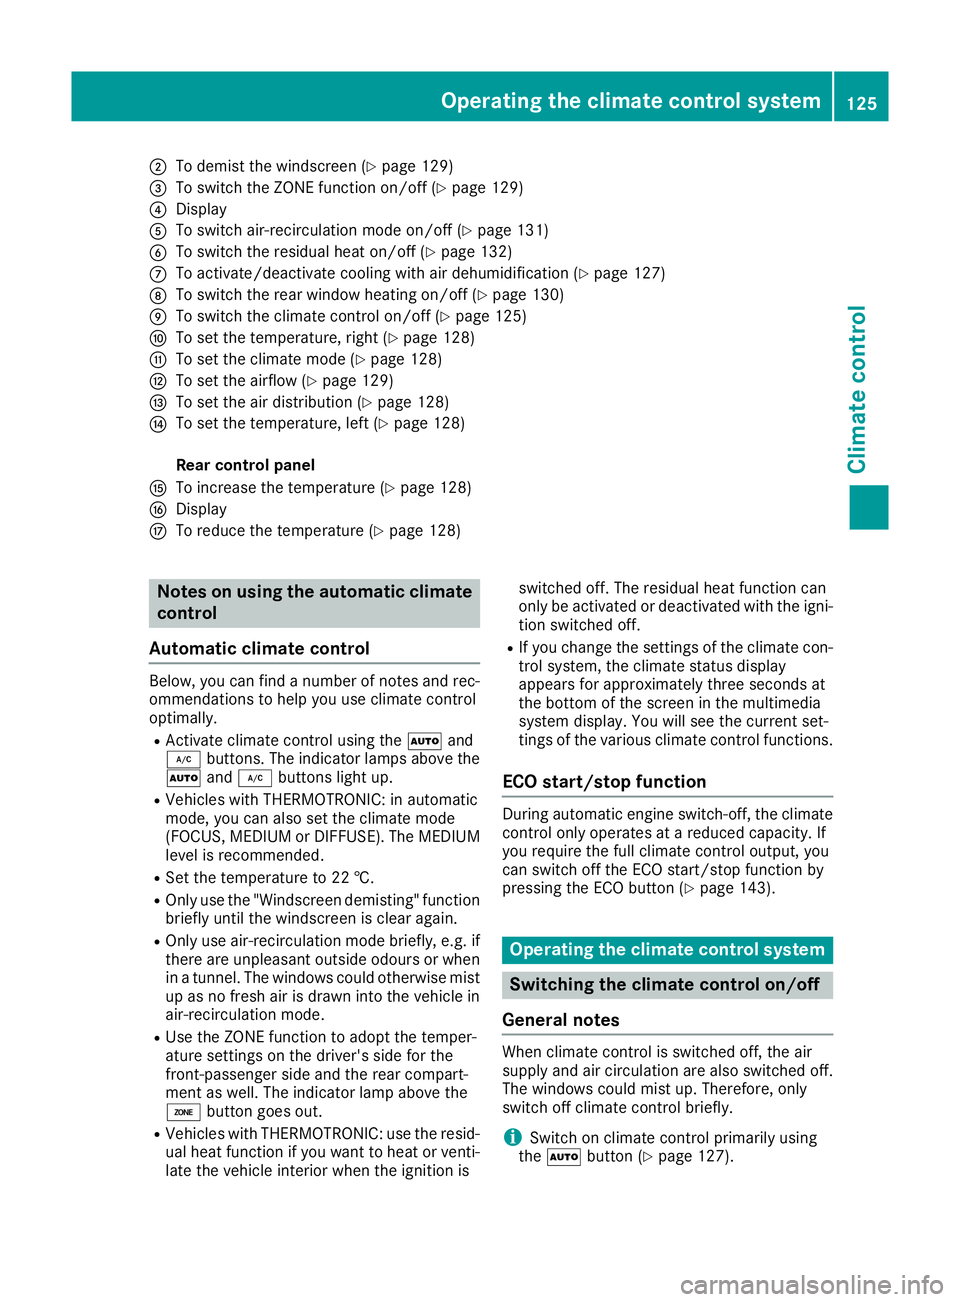
;
To demist the windscreen (Y page 129)
= To switch the ZONE function on/off (Y page 129)
? Display
A To switch air-recirculation mode on/off (Y page 131)
B To switch the residual heat on/off (Y page 132)
C To activate/deactivate cooling with air dehumidification (Y page 127)
D To switch the rear window heating on/off (Y page 130)
E To switch the climate control on/off (Y page 125)
F To set the temperature, right (Y page 128)
G To set the climate mode (Y page 128)
H To set the airflow (Y page 129)
I To set the air distribution (Y page 128)
J To set the temperature, left (Y page 128)
Rear control panel
K To increase the temperature (Y page 128)
L Display
M To reduce the temperature (Y page 128)Notes on using the automatic climate
control
Automatic climate control Below, you can find a number of notes and rec-
ommendations to help you use climate control
optimally.
R Activate climate control using the Ãand
¿ buttons. The indicator lamps above the
à and¿ buttons light up.
R Vehicles with THERMOTRONIC: in automatic
mode, you can also set the climate mode
(FOCUS, MEDIUM or DIFFUSE). The MEDIUM
level is recommended.
R Set the temperature to 22 †.
R Only use the "Windscreen demisting" function
briefly until the windscreen is clear again.
R Only use air-recirculation mode briefly, e.g. if
there are unpleasant outside odours or when
in a tunnel. The windows could otherwise mist
up as no fresh air is drawn into the vehicle in air-recirculation mode.
R Use the ZONE function to adopt the temper-
ature settings on the driver's side for the
front-passenger side and the rear compart-
ment as well. The indicator lamp above the
á button goes out.
R Vehicles with THERMOTRONIC: use the resid-
ual heat function if you want to heat or venti-
late the vehicle interior when the ignition is switched off. The residual heat function can
only be activated or deactivated with the igni-
tion switched off.
R If you change the settings of the climate con-
trol system, the climate status display
appears for approximately three seconds at
the bottom of the screen in the multimedia
system display. You will see the current set-
tings of the various climate control functions.
ECO start/stop function During automatic engine switch-off, the climate
control only operates at a reduced capacity. If
you require the full climate control output, you
can switch off the ECO start/stop function by
pressing the ECO button (Y page 143). Operating the climate control system
Switching the climate control on/off
General notes When climate control is switched off, the air
supply and air circulation are also switched off.
The windows could mist up. Therefore, only
switch off climate control briefly.
i Switch on climate control primarily using
the à button (Y page 127). Operating the climate control system
125Climate control
Page 136 of 349
i
Switch the auxiliary heating on regularly
once a month for about ten minutes.
The auxiliary heating heats the air in the vehicle
interior to the set temperature. This occurs with- out using the heat of the running engine. The
auxiliary heating is operated directly using the
vehicle's fuel. For this reason, the tank content
must be at least at reserve fuel level to ensure
that the auxiliary heating functions.
The auxiliary heating/ventilation automatically
adjusts to changes in temperature and weather conditions. For this reason, the auxiliary heating
could switch from ventilation mode to heating
mode or from heating mode to ventilation mode.
The auxiliary heating switches off automatically after 50 minutes. This time limit can be altered.
To do this, visit a qualified specialist workshop.
You cannot use the auxiliary ventilation to cool
the vehicle interior to a temperature lower than
the outside temperature.
Before switching on X
Turn the key to position 2in the ignition lock
(Y page 139).
X Set the desired temperature.
Auxiliary heating or auxiliary ventilation can also
be switched on if the manually set climate con-
trol is activated. Optimum comfort is attained by setting the system to automatic mode. Set the
temperature to 22 †.
The auxiliary heating or auxiliary ventilation can
be switched on/off using the button on the
centre console or the remote control.
The on-board computer can be used to specify
up to three departure times, one of which may
be preselected (Y page 226). Switching the auxiliary heating/venti-
lation on or off using the button on the
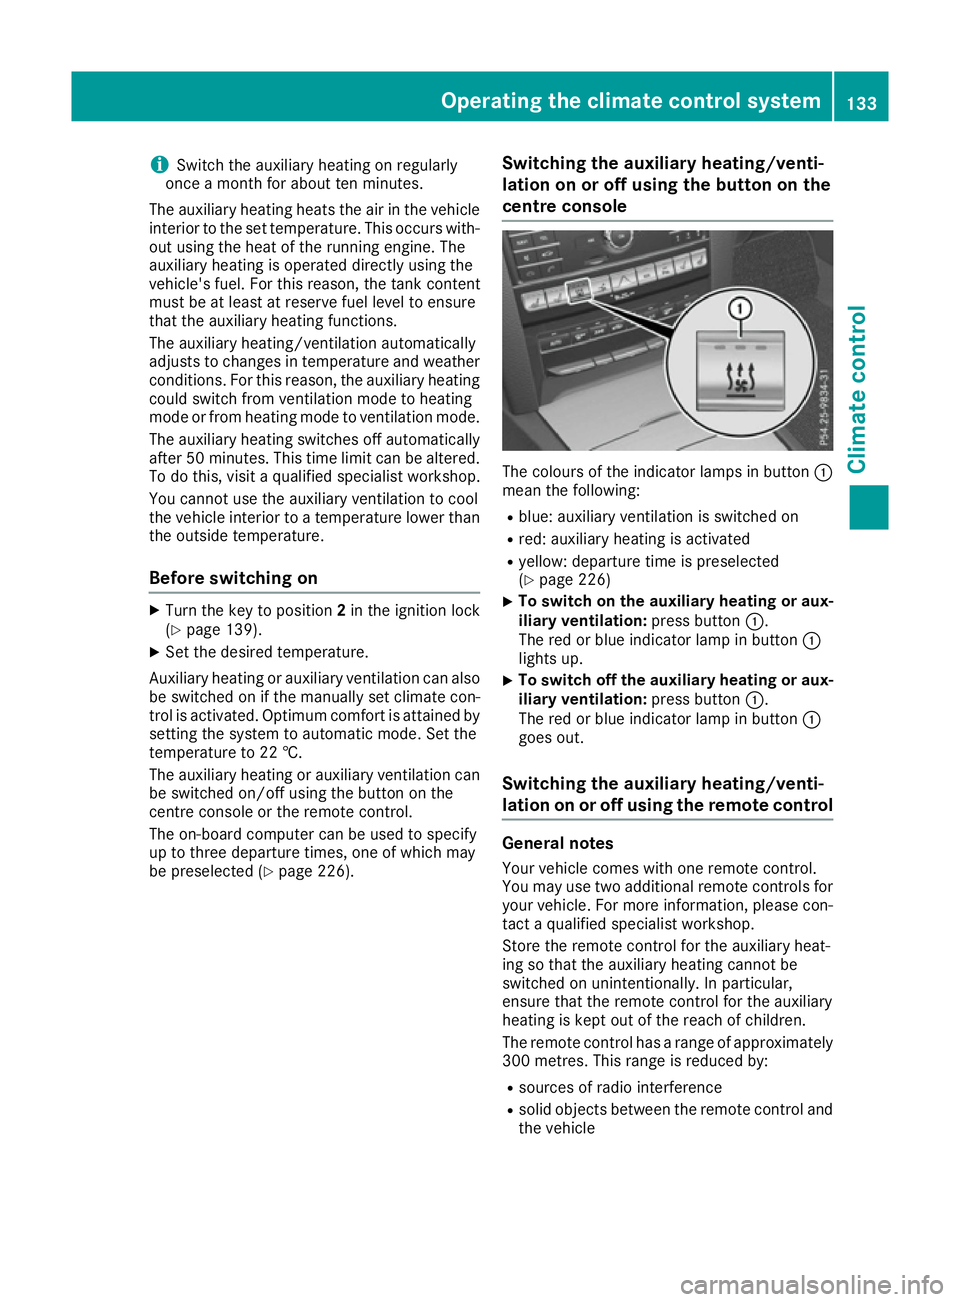
centre console The colours of the indicator lamps in button
:
mean the following:
R blue: auxiliary ventilation is switched on
R red: auxiliary heating is activated
R yellow: departure time is preselected
(Y page 226)
X To switch on the auxiliary heating or aux-
iliary ventilation:
press button:.
The red or blue indicator lamp in button :
lights up.
X To switch off the auxiliary heating or aux-
iliary ventilation: press button:.
The red or blue indicator lamp in button :
goes out.
Switching the auxiliary heating/venti-
lation on or off using the remote control General notes
Your vehicle comes with one remote control.
You may use two additional remote controls for your vehicle. For more information, please con-
tact a qualified specialist workshop.
Store the remote control for the auxiliary heat-
ing so that the auxiliary heating cannot be
switched on unintentionally. In particular,
ensure that the remote control for the auxiliary
heating is kept out of the reach of children.
The remote control has a range of approximately
300 metre s. Thisrange is reduced by:
R sources of radio interference
R solid objects between the remote control and
the vehicle Operating the climate control system
133Climate control Z
Page 138 of 349
time and at an unsuitable location. When setting
the departure time, also observe the important
safety notes (Y page 132).
X Briefly press the ubutton.
X Press the ,or. button repeatedly
until the time to be changed appears in the
display.
X Press the uand^ buttons simultane-
ously.
The Îsymbol in the remote control display
flashes.
X Press the ,or. button to set the
desired departure time.
i The longer you press the
,or. but-
ton, the faster the time changes.
X Press the uand^ button simultane-
ously.
The new departure time is stored.
Activating the set departure time
X Briefly press the ubutton.
X Press the ,or. button repeatedly
until the desired departure time appears in
the display.
X Press the ubutton.
The Ísymbol, the departure time and,
depending on the selected departure time,
the letter A, BorCappear in the display.
Deactivating the set departure time
X Briefly press the ubutton.
The status of the auxiliary heating is shown in the display.
X Press the .button.
The first departure time stored appears in the
display.
X Press the ^button.
OFF is shown in the remote control display.
Replacing the remote control battery Important safety notes
G
WARNING
Batteries contain toxic and corrosive substan- ces. If batteries are swallowed, it can result in
severe health problems. There is a risk of fatal injury. Keep batteries out of the reach of children. If
a battery is swallowed, seek medical attention
immediately. H
Environmental note Batteries contain pollutants.
It is illegal to dispose of them
with the household rubbish.
They must be collected sep-
arately and disposed of in anenvironmentally responsible
recycling system. Dispose of batteries in an
environmentally responsible
manner. Take discharged
batteries to a qualified spe-
cialist workshop or to a col-
lection point for used batter-
ies.
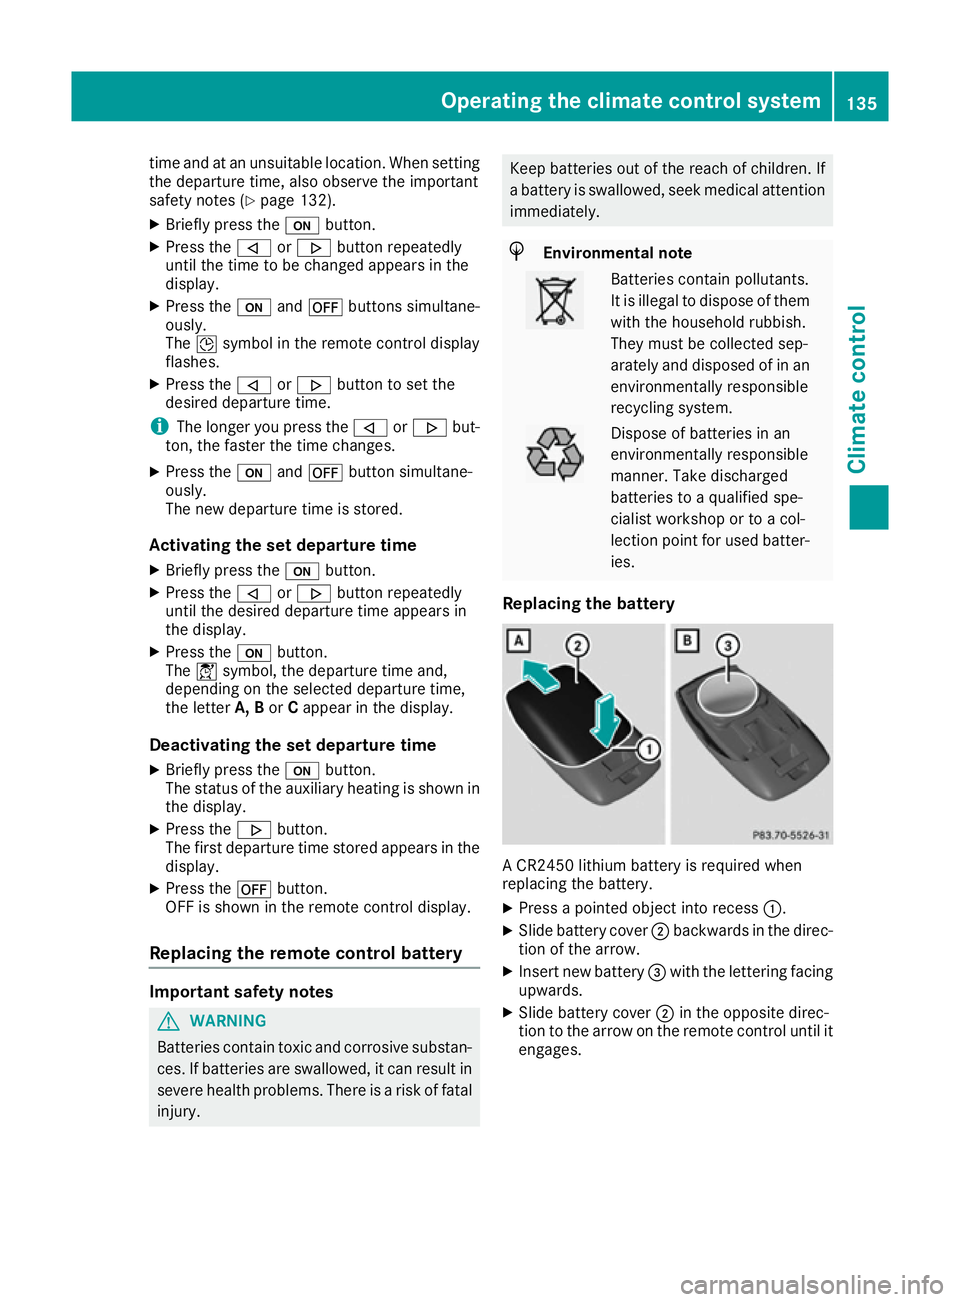
Replacing the battery A CR2450 lithium battery is required when
replacing the battery.
X Press a pointed object into recess :.
X Slide battery cover ;backwards in the direc-
tion of the arrow.
X Insert new battery =with the lettering facing
upwards.
X Slide battery cover ;in the opposite direc-
tion to the arrow on the remote control until it engages. Operating the climate control system
135Climate control Z