2015 MERCEDES-BENZ CLA SHOOTING BRAKE start stop button
[x] Cancel search: start stop buttonPage 258 of 421
Selecting an entry in the phone book
X
Press the =or; button on the steer-
ing wheel to select the Tel
Tel menu.
X Press the 9,:ora button to
switch to the phone book.
X Authorise access to the phone book on the
phone.
X Press the 9or: button to select the
desired name.
or X To begin rapid scrolling: press and hold
the 9 or: button for longer than
one second.
Rapid scrolling stops when you release the button or reach the end of the list.
X If only one telephone number is stored
for a name: press the6ora button
to start dialling.
or X If there is more than one number for a
particular name: press the6ora
button to display the numbers.
X Press the 9or: button to select the
number you want to dial.
X Press the 6ora button to start dial-
ling.
or
X If you do not want to make the call: press
the ~ or% button.
Redialling The on-board computer saves the last names
or numbers dialled in the redial memory.
X Press the =or; button on the steer-
ing wheel to select the Tel Telmenu.
X Press the 6button to switch to the
redial memory.
X Press the 9or: button to select the
desired name or number. X
Press the 6ora button to start dial-
ling.
or X If you do not want to make the call: press
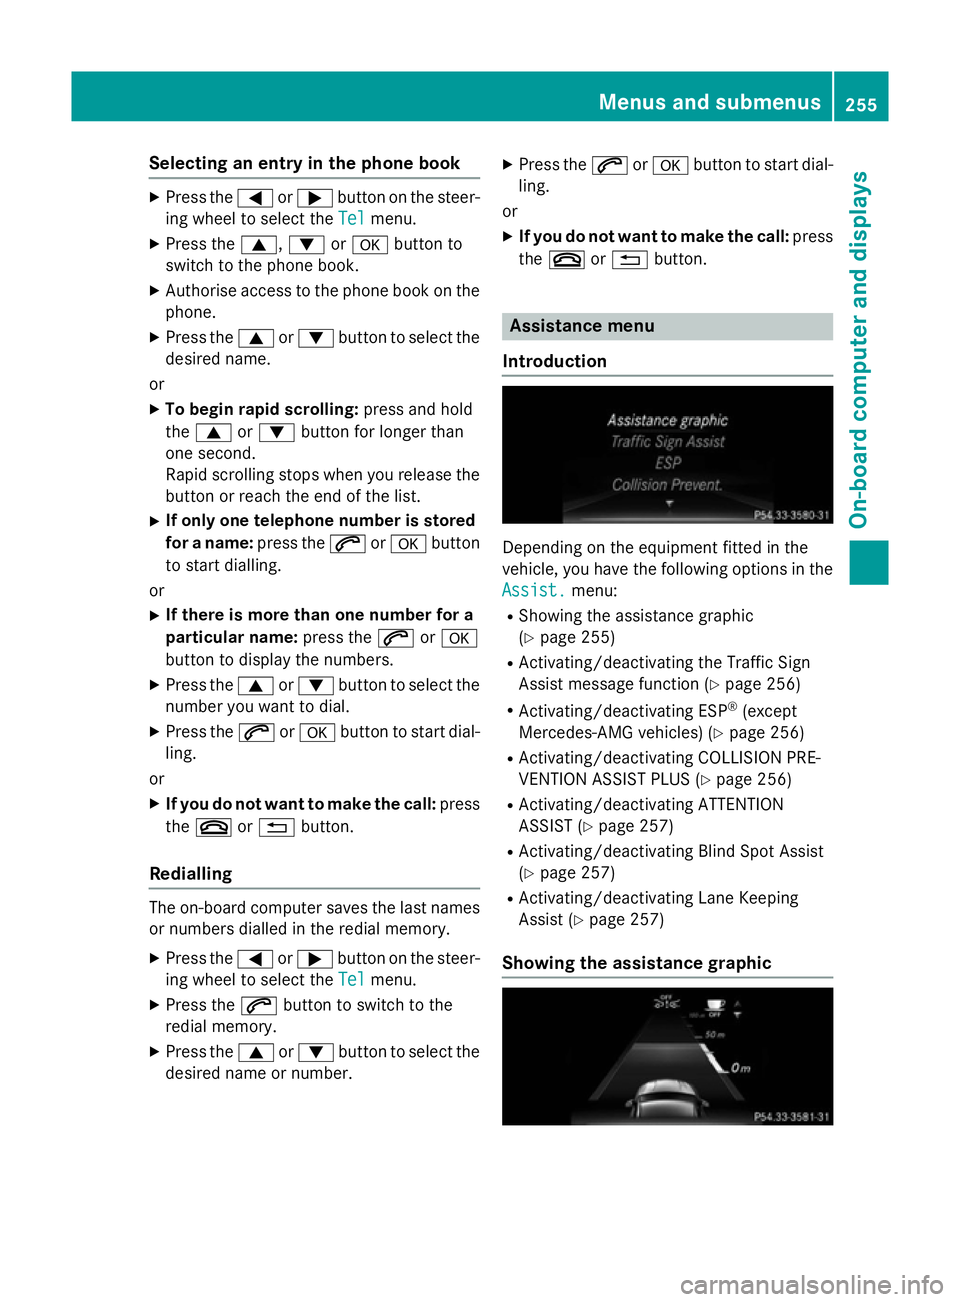
the ~ or% button. Assistance menu
Introduction Depending on the equipment fitted in the
vehicle, you have the following options in the
Assist. Assist. menu:
R Showing the assistance graphic
(Y page 255)
R Activating/deactivating the Traffic Sign
Assist message function (Y page 256)
R Activating/deactivating ESP ®
(except
Mercedes-AMG vehicles) (Y page 256)
R Activating/deactivating COLLISION PRE-
VENTION ASSIST PLUS (Y page 256)
R Activating/deactivating ATTENTION
ASSIST (Y page 257)
R Activating/deactivating Blind Spot Assist
(Y page 257)
R Activating/deactivating Lane Keeping
Assist (Y page 257)
Showing the assistance graphic Menus and submenus
255On-board computer and displays Z
Page 266 of 421
=
Transmission D
D/MM
? ESP ®
On
On/Off Off or SPORT handling mode
Sport
Sport
SETUP displays the following information and
functions:
R the digital speedometer
R the gear indicator
R the drive system setting
R the suspension mode
R the transmission position
R the ESP ®
(Electronic Stability Program) sta-
tus
X Press the =or; button on the steer-
ing wheel to select the AMG
AMGmenu.
X Press 9repeatedly until SETUP
appears.
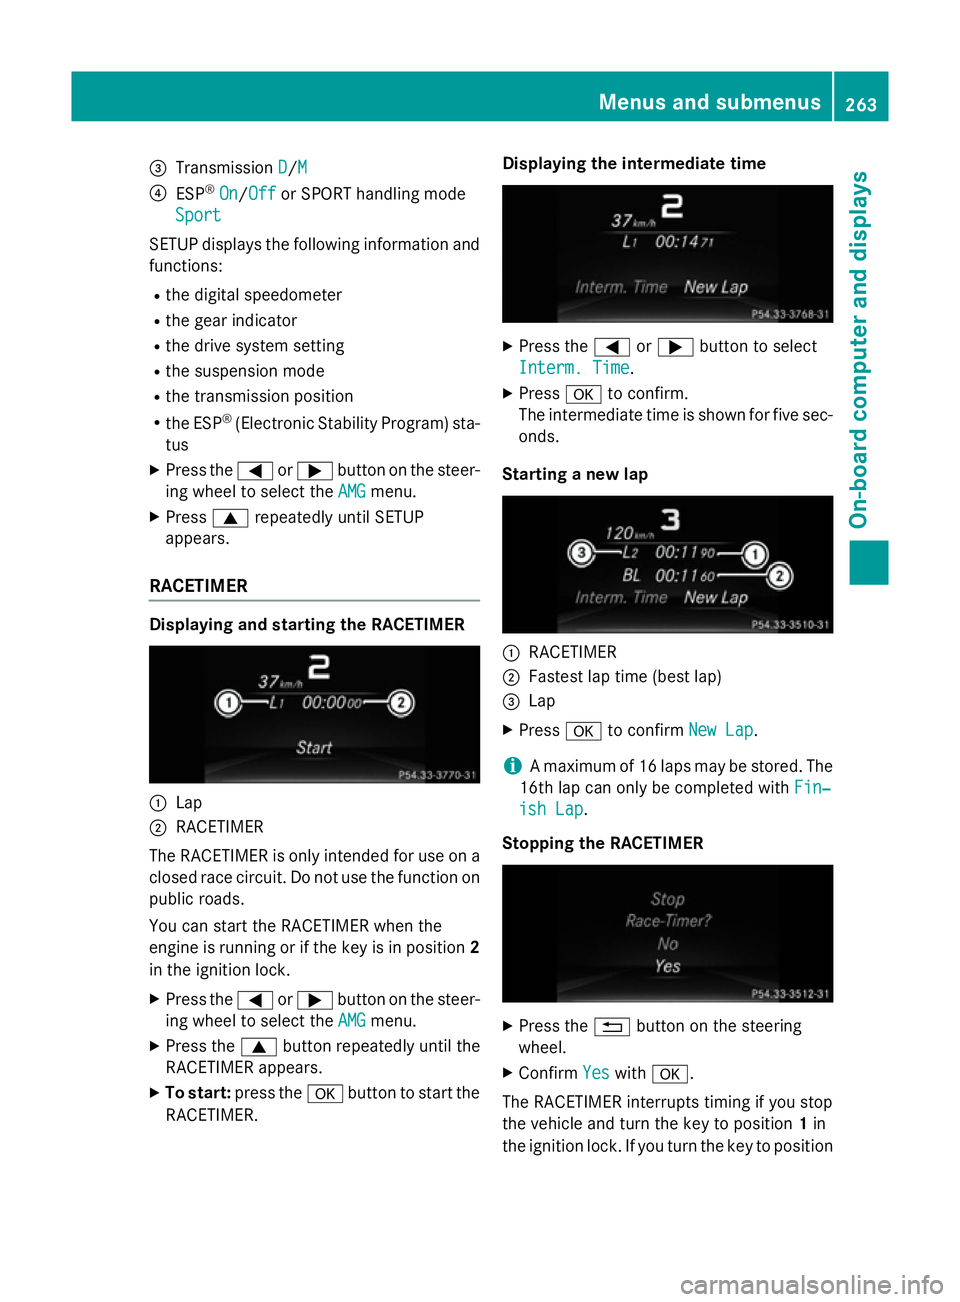
RACETIMER Displaying and starting the RACETIMER
:
Lap
; RACETIMER
The RACETIMER is only intended for use on a closed race circuit. Do not use the function on
public roads.
You can start the RACETIMER when the
engine is running or if the key is in position 2
in the ignition lock.
X Press the =or; button on the steer-
ing wheel to select the AMG
AMG menu.
X Press the 9button repeatedly until the
RACETIMER appears.
X To start: press the abutton to start the
RACETIMER. Displaying the intermediate time
X
Press the =or; button to select
Interm. Time Interm. Time.
X Press ato confirm.
The intermediate time is shown for five sec-
onds.
Starting a new lap :
RACETIMER
; Fastest lap time (best lap)
= Lap
X Press ato confirm New Lap
New Lap.
i A maximum of 16 laps may be stored. The
16th lap can only be completed with Fin‐
Fin‐
ish Lap
ish Lap.
Stopping the RACETIMER X
Press the %button on the steering
wheel.
X Confirm Yes
Yeswith a.
The RACETIMER interrupts timing if you stop
the vehicle and turn the key to position 1in
the ignition lock. If you turn the key to position Menus and submenus
263On-board computer and displays Z
Page 267 of 421
3
and then press ato confirm Start
Start, tim-
ing is continued.
Resetting the current lap
X Stop the RACETIMER.
X Press the =or; button to select
Reset Lap
Reset Lap .
X Press ato reset the lap time to "0".
Deleting all laps If you switch off the engine, the RACETIMER is
reset to "0" after 30 seconds. All laps are
deleted.
You cannot delete individual stored laps. If
you have stopped 16 laps, the current lap
does not have to be reset.
X Reset the current lap.
X Press ato confirm Reset Reset.
Reset Race Timer?
Reset Race Timer? appears in the multi-
function display.
X Press the :button to select Yes
Yesand
press the abutton to confirm.
All laps are deleted.
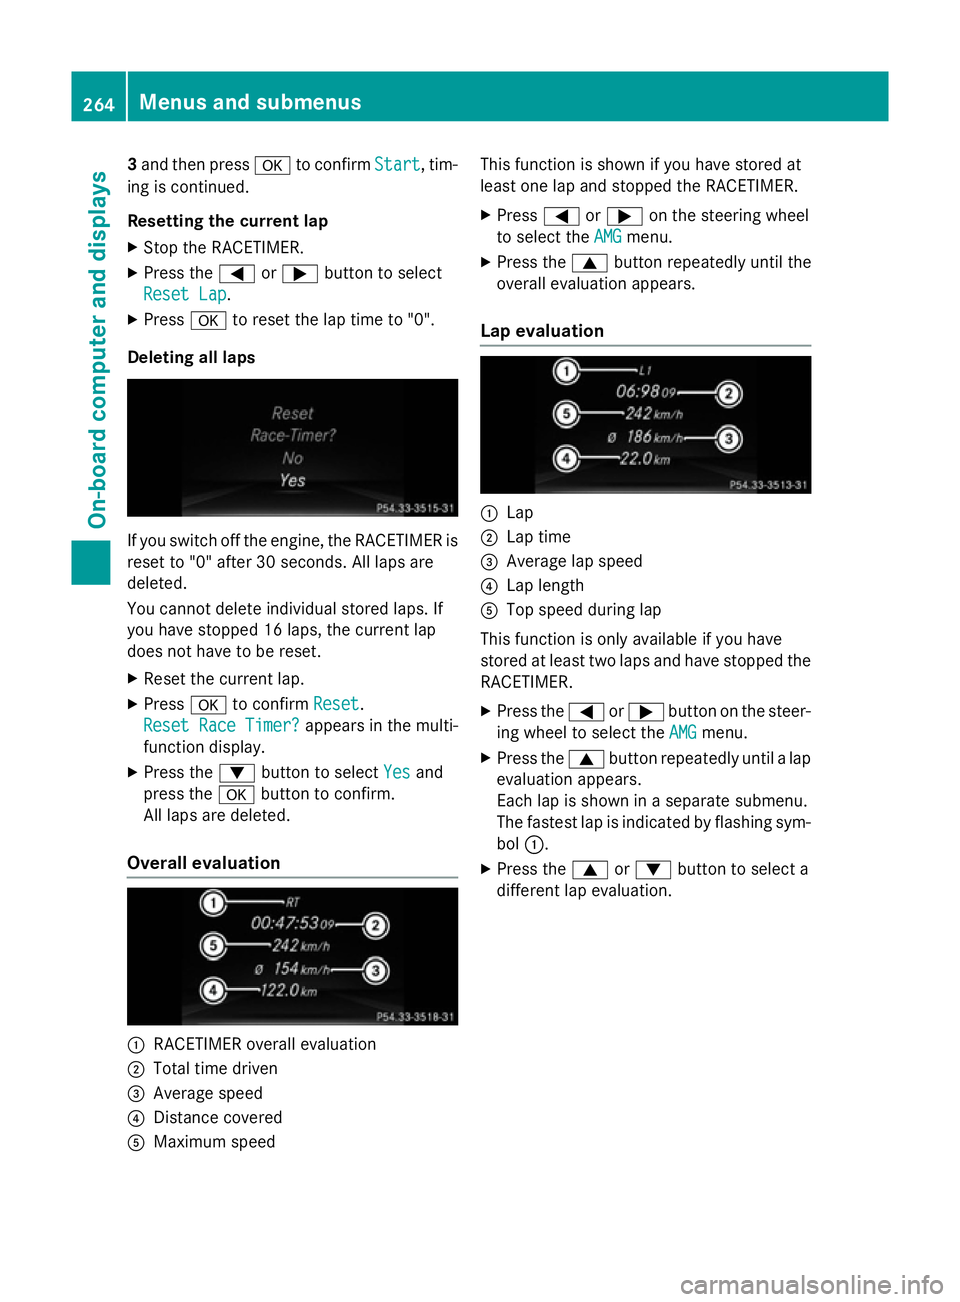
Overall evaluation :
RACETIMER overall evaluation
; Total time driven
= Average speed
? Distance covered
A Maximum speed This function is shown if you have stored at
least one lap and stopped the RACETIMER.
X Press =or; on the steering wheel
to select the AMG AMGmenu.
X Press the 9button repeatedly until the
overall evaluation appears.
Lap evaluation :
Lap
; Lap time
= Average lap speed
? Lap length
A Top speed during lap
This function is only available if you have
stored at least two laps and have stopped the
RACETIMER.
X Press the =or; button on the steer-
ing wheel to select the AMG
AMG menu.
X Press the 9button repeatedly until a lap
evaluation appears.
Each lap is shown in a separate submenu.
The fastest lap is indicated by flashing sym- bol :.
X Press the 9or: button to select a
different lap evaluation. 264
Menus and submenusOn-board computer and displays
Page 355 of 421
Flat tyre
Preparing the vehicle
Your vehicle may be equipped with: R MOExtended tyres (tyres with run-flat char-
acteristics) (Y page 352)
Vehicle preparation is not necessary on
vehicles with MOExtended tyres.
R a TIREFIT kit (Y page 351)
R an emergency spare wheel (certain coun-
tries only) (Y page 396)
Vehicles with MOExtended tyres are not
equipped with a TIREFIT kit at the factory. It is therefore recommended that you additionallyequip your vehicle with a TIREFIT kit if you fit tyres that do not feature run-flat characteris-
tics, e.g. winter tyres. A TIREFIT kit can be
obtained from a qualified specialist work-
shop.
Information on changing and fitting a wheel
(Y page 379).
X Stop the vehicle as far away as possible
from traffic on solid, non-slippery and level
ground.
X Switch on the hazard warning lamps.
X Secure the vehicle against rolling away
(Y page 192).
X If possible, bring the front wheels into the
straight-ahead position.
X Switch off the engine.
X Vehicles without KEYLESS-GO: remove
the key from the ignition lock.
X Vehicles with KEYLESS-GO start-func-
tion or KEYLESS-GO: open the driver's
door.
The on-board electronics now have status
0 . This is the same as the key having been
removed.
X Vehicles with KEYLESS-GO start-func-
tion or KEYLESS-GO: remove the Start/
Stop button from the ignition lock
(Y page 165).
X Make sure that the passengers are not
endangered as they do so. Make sure that no one is near the danger area while a
wheel is being changed. Anyone who is not
directly assisting in the wheel change
should, for example, stand behind the bar-
rier.
X Get out of the vehicle. Pay attention to traf-
fic conditions when doing so.
X Close the driver's door.
X Place the warning triangle at a suitable dis-
tance (Y page 350). Observe legal require-
ments. MOExtended tyres (tyres with run-flat
characteristics)
General notes With MOExtended tyres (tyres with run-flat
characteristics), you can continue to drive
your vehicle even if there is a total loss of
pressure in one or more tyres. The affected
tyre must not show any clearly visible dam-
age.
You can recognise MOExtended tyres by the
MOExtended marking which appears on the
tyre wall. You will find this marking next to the
tyre size designation, the load-bearing capa-
city and the speed index.
MOExtended tyres may only be used in con-
junction with an activated tyre pressure loss
warning system or tyre pressure monitor.
If a pressure loss warning message
appears in the multifunction display:
R observe the instructions in the display mes-
sages (Y page 292)
R check the tyre for damage
R if driving on, observe the following notes
The driving distance possible in run-flat mode is approximately 80 km when the vehicle is
partially laden and approximately 30 km
when the vehicle is fully laden. 352
Flat tyreBreakdown assistance
Page 366 of 421
!
Make sure that the electric parking brake
is released. If the electric parking brake is
faulty, visit a qualified specialist workshop.
! Only secure the tow cable or tow bar to
the towing eyes or, if available, to the trailer
tow hitch. You could otherwise damage the
vehicle.
! Observe the following points when towing
with a tow rope:
R Secure the tow rope on the same side on
both vehicles.
R Make sure that the tow rope is not longer
than legally permitted. Mark the tow rope
in the middle, e.g. with a white cloth
(30 x 30 cm). This will make other road
users aware that a vehicle is being
towed.
R Only secure the tow cable to the towing
eyes or, if available, to the trailer tow
hitch.
R Observe the brake lamps of the towing
vehicle while driving. Always maintain a
distance a distance so that the tow rope
does not sag.
R Do not use steel cables or chains to tow
your vehicle. You could otherwise dam-
age the vehicle.
! Do not use the towing eyes for recovery
purposes as this could damage the vehicle.
If in doubt, recover the vehicle with a crane.
! Pull away smoothly when towing away or
tow-starting a vehicle. If the tractive power
is too high, the vehicles could be damaged.
! You may tow the vehicle for a maximum of
50km. A towing speed of 50 km/h must not be exceeded.
For towing distances over 50 km, the front
axle or the entire vehicle must be raised
and transported.
! To tow vehicles with KEYLESS-GO, use
the key instead of the Start/Stop button.
The automatic transmission may otherwise switch to position Pwhen you open the driver's or front-passenger door which
could damage the transmission.
! Vehicles with automatic transmission
must not be tow-started. The transmission
may otherwise be damaged.
Observe the legal requirements for the rele-
vant countries when towing and tow-starting. It is better to have the vehicle transported
than to have it towed.
If the vehicle can no longer be driven because
of an accident or breakdown, you have the
following options:
R transporting the vehicle
As a rule, you should have the vehicle trans-
ported.
R towing the vehicle with a tow rope or tow
bar
Only tow the vehicle in exceptional cases.
The battery must be connected and charged.
Otherwise, you:
R cannot turn the key to position 2in the
ignition lock
R cannot release the electric parking brake
R cannot shift the transmission to position N
on vehicles with automatic transmis-
sion
The function of the electric parking brake and
the parking lock is dependent on the on-board voltage.
If the on-board voltage is low or if there is a
system malfunction:
R it may not be possible to apply the released
parking brake or
R it may not be possible to shift the trans-
mission to position P
Switch off non-essential consumers, e.g. the
radio.
Deactivate the automatic locking feature
before towing the vehicle (Y page 260). You
could otherwise be locked out when pushing
or towing the vehicle.
Deactivate tow-away protection before tow-
ing away the vehicle (Y page 82). Towing away and tow-starting
363Breakdown assistance Z
Page 383 of 421
Interchanging the front and rear wheels of
differing dimensions can render the general
operating permit invalid.
Observe the instructions and safety notes in
the "Changing a wheel" section (Y page 379).
The wear patterns on the front and rear tyres differ depending on the operating conditions.
Interchange the wheels before a clear wear
pattern has formed on the tyres. Front tyres
typically wear more on the shoulders and the
rear tyres in the centre.
On vehicles that have the same size front and rear wheels, you can interchange the wheels
every 5,000 to 10,000 km depending on the
degree of tyre wear. Ensure the direction of
rotation is maintained.
Clean the contact surfaces of the wheel and
the brake disc thoroughly every time a wheel
is interchanged. Check the tyre pressure and, if necessary, restart the tyre pressure loss
warning system or the tyre pressure monitor. Direction of rotation
Tyres with a specified direction of rotation
have additional benefits, e.g. if there is a risk
of aquaplaning. These advantages can only be gained if the tyres are fitted corresponding to the direction of rotation.
An arrow on the sidewall of the tyre indicates
its correct direction of rotation. Storing wheels
Store wheels in a cool, dry and preferably
dark place if they are not being used. Protect
the tyres against oil, grease, petrol and diesel. Fitting a wheel
Preparing the vehicle X
Stop the vehicle on solid, non-slippery and
level ground.
X Apply the electric parking brake manually. X
Move the front wheels to the straight-
ahead position.
X Vehicles with manual transmission:
depress the clutch pedal fully and engage
first or reverse gear.
X Vehicles with automatic transmission:
shift the automatic transmission to posi-
tion P.
X Switch off the engine.
X Vehicles without KEYLESS-GO: remove
the key from the ignition lock.
X Vehicles with KEYLESS-GO start-func-
tion or KEYLESS-GO: open the driver's
door.
The on-board electronics now have status
0. This is the same as the key having been removed.
X Vehicles with KEYLESS-GO start-func-
tion or KEYLESS-GO: remove the Start/
Stop button from the ignition lock
(Y page 165).
X If included in the vehicle equipment,
remove the tyre-change tool kit from the
vehicle.
X Safeguard the vehicle against rolling away
(Y page 192).
i Apart from some country-specific var-
iants, vehicles are not equipped with tyre-
changing tools. Some tools for changing a
wheel are specific to the vehicle. For more information on which tools are required to
perform a wheel change on your vehicle,
consult a qualified specialist workshop.
Necessary tyre-changing tools may
include, for example:
R Jack
R Wheel chock
R Wheel wrench 380
Changing a wheelWheels and tyres