2015 MERCEDES-BENZ CLA SHOOTING BRAKE door lock
[x] Cancel search: door lockPage 192 of 421

fuel. Otherwise, the fuel will enter the fuel
system. Even small amounts of the wrong
fuel can result in damage to the fuel system
and the engine. Notify a qualified specialist workshop and have the fuel tank and fuel
lines drained completely.
! Do not use petrol to refuel vehicles with a
diesel engine. Do not switch on the ignition if you accidentally refuel with the wrong
fuel. Otherwise, fuel can enter the fuel sys-tem. Even small amounts of the wrong fuel
could result in damage to the fuel system
and the engine. The repair costs are high.
Notify a qualified specialist workshop and
have the fuel tank and fuel lines drained
completely.
! Overfilling the fuel tank could damage the
fuel system.
! Take care not to spill any fuel on painted
surfaces. You could otherwise damage the
paintwork.
! Use a filter when adding fuel from a fuel
can. The fuel lines and/or the fuel injection system could otherwise be blocked by par-
ticles from the fuel can.
Do not get into the vehicle again during the
refuelling process. Otherwise, electrostatic
charge could build up again.
If you overfill the fuel tank, some fuel may
spray out when you remove the fuel pump
nozzle.
Further information on fuel and fuel quality
(Y page 402). Refuelling
General notes The fuel filler flap is unlocked/locked auto-
matically when you unlock/lock the vehicle
with the key.
The position of the fuel filler cap is displayed
æ in the instrument cluster. The arrow
next to the filling pump indicates the side of
the vehicle. Opening the fuel filler flap
:
To open the fuel filler flap
; Tyre pressure table
= To insert the fuel filler cap
? Instruction label on the fuel type to be
refuelled
X Vehicles without KEYLESS-GO: remove
the key from the ignition lock.
X Vehicles with KEYLESS-GO start-func-
tion or KEYLESS-GO: open the driver's
door.
The on-board electronics now have status
0. This is the same as the key having been removed.
X Press the fuel filler flap in the direction of
arrow :.
The fuel filler flap swings up.
X Turn the fuel filler cap anti-clockwise and
remove it.
X Insert the fuel filler cap into the holder on
the inside of fuel filler flap =.
X Completely insert the filler neck of the fuel
pump nozzle into the tank, hook in place
and refuel.
X Only fill the tank until the pump nozzle
switches off.
Vehicles with a diesel engine: the filler neck is
designed for refuelling at diesel filling pumps.
Do not add any more fuel after the pump
stops filling for the first time. Otherwise, fuel
may leak out. Refuelling
189Driving and parking Z
Page 195 of 421
Parking
Important safety notes
G
WARNING
Flammable material such as leaves, grass or
twigs may ignite if they come into contact with hot parts of the exhaust system or exhaust
gas flow. There is a risk of fire.
Park the vehicle so that no flammable mate-
rial can come into contact with hot vehicle
components. In particular, do not park on dry grassland or harvested grain fields. G
WARNING
If you leave children unattended in the vehi-
cle, they may be able to set the vehicle in
motion if, for example, they:
R release the parking brake
R shift the automatic transmission out of park
position Por shift manual transmission into
neutral
R start the engine
In addition, they may operate vehicle equip-
ment and become trapped. There is a risk of
an accident and injury.
When leaving the vehicle, always take the key with you and lock the vehicle. Never leave
children unattended in the vehicle.
! Always secure the vehicle correctly
against rolling away. Otherwise, the vehicle
or its drivetrain could be damaged.
To ensure that the vehicle is safeguarded
against rolling away unintentionally:
R the electric parking brake must be applied.
R on vehicles with manual transmission,
engage 1st gear or reverse gear.
R on vehicles with automatic transmission,
the transmission must be in position Pand
the transmission position display must
show Pin the multifunction display. R
the key must be removed from the ignition
lock.
R on uphill or downhill gradients, the front
wheels must be turned towards the kerb. Switching off the engine
Important safety notes G
WARNING
The automatic transmission switches to neu-
tral position Nwhen you switch off the engine.
The vehicle may roll away. There is a risk of an
accident.
After switching off the engine, always switch
to parking position P. Prevent the parked vehi-
cle from rolling away by applying the parking
brake.
Vehicles with manual transmission X
Shift to either 1st gear or reverse gear R.
X With the key: turn the key to position 0in
the ignition lock and remove it.
The immobiliser is activated.
X With the Start/Stop button: press the
Start/Stop button (Y page 165).
The engine stops and all the indicator
lamps in the instrument cluster go out.
When the driver's door is closed, this cor-
responds to key position 1. When the driv-
er's door is open, this corresponds to key
position 0: "key removed".
X Apply the electric parking brake.
Vehicles with automatic transmission X
Apply the electric parking brake.
X All vehicles (except Mercedes-AMG
vehicles): shift the transmission to posi-
tion P. 192
ParkingDriving and parking
Page 196 of 421

X
Mercedes-AMG vehicles: press but-
ton :.
X With the key: turn the key to position 0in
the ignition lock and remove it.
The immobiliser is activated.
X With the Start/Stop button: press the
Start/Stop button (Y page 165).
The engine stops and all the indicator
lamps in the instrument cluster go out.
When the driver's door is closed, this cor-
responds to key position 1. When the driv-
er's door is open, this corresponds to key
position 0: "key removed".
If you switch the engine off with the trans-
mission in position Ror D, the automatic
transmission shifts to Nautomatically.
With the key: if you then open the driver's
door or the front-passenger door or remove
the key from the ignition, the automatic trans- mission shifts to Pautomatically.
With the Start/Stop button: if you then
open the driver's door or the front-passenger
door, the automatic transmission shifts to P
automatically.
If you want the automatic transmission to
remain in neutral N, e.g. when having the
vehicle cleaned in an automatic car wash with a towing system:
With the key:
X Switch the ignition on.
X Depress the brake pedal and keep it
depressed.
X Shift to neutral N. X
Release the brake pedal.
X Release the electric parking brake.
X Switch off the ignition and leave the key in
the ignition lock.
With the Start/Stop button: X Remove the Start/Stop button from the
ignition lock.
X Insert the key into the ignition lock.
X Switch the ignition on.
X Depress the brake pedal and keep it
depressed.
X Shift to neutral N.
X Release the brake pedal.
X Release the electric parking brake.
X Switch off the ignition and leave the key in
the ignition lock. Electric parking brake
General notes G
WARNING
If you leave children unattended in the vehi-
cle, they may be able to set the vehicle in
motion if, for example, they:
R release the parking brake
R shift the automatic transmission out of park
position Por shift manual transmission into
neutral
R start the engine
In addition, they may operate vehicle equip-
ment and become trapped. There is a risk of
an accident and injury.
When leaving the vehicle, always take the key with you and lock the vehicle. Never leave
children unattended in the vehicle. Parking
193Driving and parking Z
Page 197 of 421
The function of the electric parking brake is
dependent on the on-board voltage. If the on-
board voltage is low or if there is a malfunc-
tion in the system, it may not be possible to
apply the released parking brake.
X If this is the case, only park the vehicle on
level ground and secure it to prevent it from
rolling away.
X Vehicles with automatic transmission:
shift the automatic transmission to posi-
tion P.
X Vehicles with manual transmission:
engage first gear.
It may not be possible to release an applied
parking brake if the on-board voltage is low or
if there is a malfunction in the system. Con-
tact a qualified specialist workshop.
The electric parking brake carries out a func-
tion check at regular intervals when the
engine is switched off. Noises that occur are
normal.
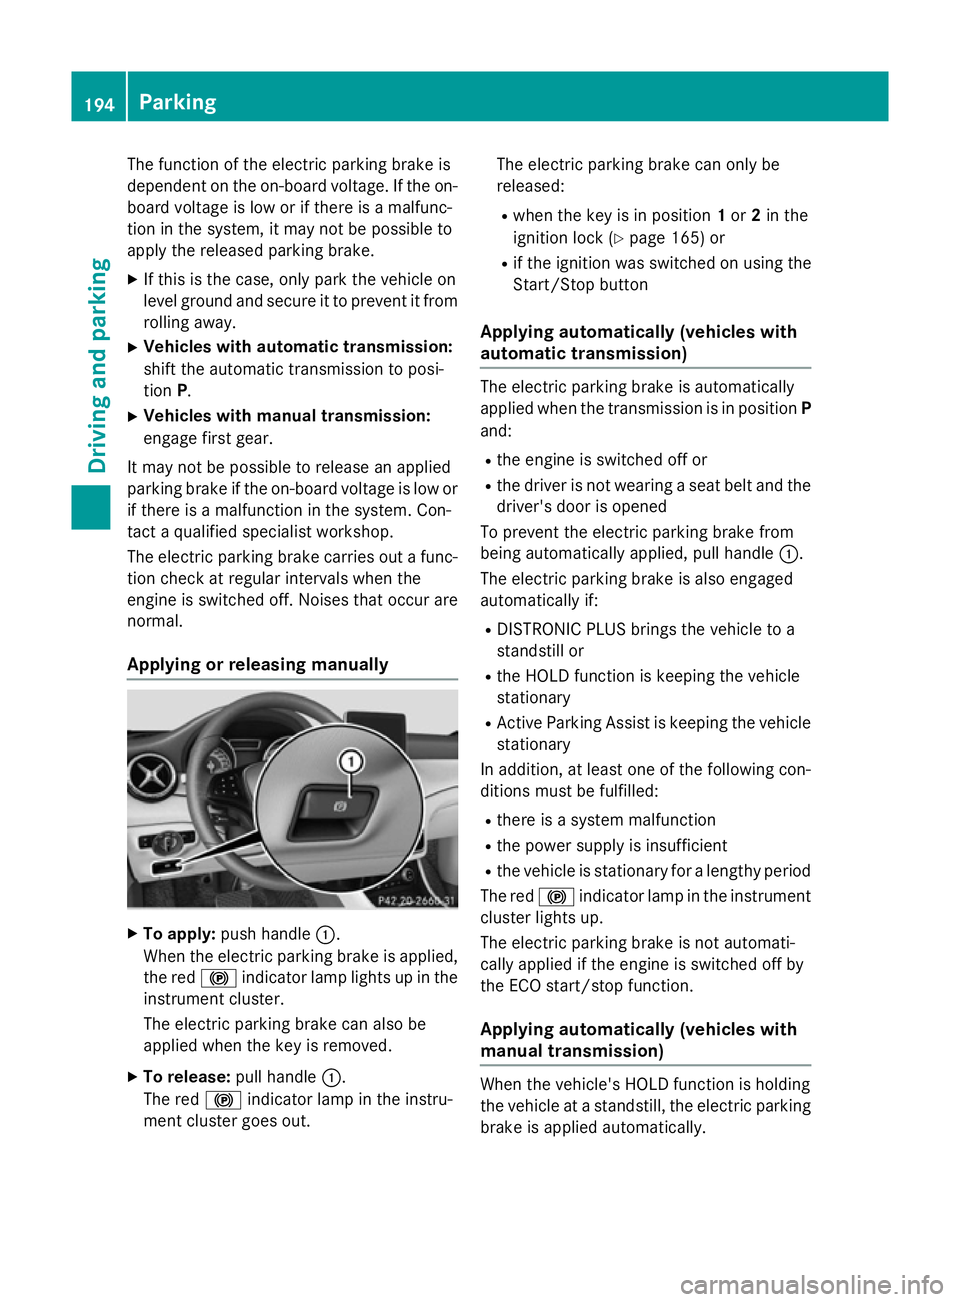
Applying or releasing manually X
To apply: push handle :.
When the electric parking brake is applied, the red !indicator lamp lights up in the
instrument cluster.
The electric parking brake can also be
applied when the key is removed.
X To release: pull handle:.
The red !indicator lamp in the instru-
ment cluster goes out. The electric parking brake can only be
released:
R when the key is in position 1or 2in the
ignition lock (Y page 165) or
R if the ignition was switched on using the
Start/Stop button
Applying automatically (vehicles with
automatic transmission) The electric parking brake is automatically
applied when the transmission is in position P
and:
R the engine is switched off or
R the driver is not wearing a seat belt and the
driver's door is opened
To prevent the electric parking brake from
being automatically applied, pull handle :.
The electric parking brake is also engaged
automatically if:
R DISTRONIC PLUS brings the vehicle to a
standstill or
R the HOLD function is keeping the vehicle
stationary
R Active Parking Assist is keeping the vehicle
stationary
In addition, at least one of the following con-
ditions must be fulfilled:
R there is a system malfunction
R the power supply is insufficient
R the vehicle is stationary for a lengthy period
The red !indicator lamp in the instrument
cluster lights up.
The electric parking brake is not automati-
cally applied if the engine is switched off by
the ECO start/stop function.
Applying automatically (vehicles with
manual transmission) When the vehicle's HOLD function is holding
the vehicle at a standstill, the electric parking
brake is applied automatically. 194
ParkingDriving and parking
Page 216 of 421
When the HOLD function is activated, the
transmission is shifted automatically to posi- tion Pif:
R the driver's seat belt is not fastened and the
driver's door is open
R the engine is switched off, unless it is auto-
matically switched off by the ECO start/
stop function
The electric parking brake secures the vehicle
automatically if the HOLD function is activa-
ted, the vehicle is stationary and:
R a system fault occurs
R the power supply is insufficient
Vehicles with manual transmission The electric parking brake secures the vehicle
automatically if the HOLD function is activa-
ted and:
R the driver's seat belt is not fastened and the
driver's door is open
R the engine is switched off, unless it is auto-
matically switched off by the ECO start/
stop function
R a system fault occurs
R the power supply is insufficient
The Brake immediately
Brake immediately message may also
appear in the multifunction display.
X Immediately depress the brake pedal firmly
until the warning message in the multifunc-
tion display goes out.
The HOLD function is deactivated.
A horn will sound at regular intervals if you
turn off the engine, take off your seat belt or
open the driver's door when the HOLD func-
tion is activated. The horn alerts you to the
fact that the HOLD function is still activated.
If you attempt to lock the vehicle, the tone
becomes louder. The vehicle cannot be
locked until you have deactivated the HOLD
function.
i Once you have switched off the engine,
you cannot restart it until you have deacti-
vated the HOLD function. Start-off assist (except Mercedes-
AMG vehicles)
Important safety notes G
WARNING
If you use start-off assist, individual wheels
may start to spin and the vehicle may skid. If
ESP ®
is deactivated, there is a greater danger
of skidding and having an accident. Make sure that no persons or obstacles are in the area
around the vehicle.
Start-off assist enables optimum acceleration
from a standstill. For this, a suitably high-grip road surface is required, along with the tyresand vehicle being in good condition.
Do not activate start-off assist on public
roads.
Observe the safety notes on driving safety
systems (Y page 72).
Be sure to read the safety notes and informa-
tion on ESP ®
(Y page 76).
Activating start-off assist X
Deactivate ESP ®
(Y page 256).
X Turn the steering wheel to the straight-
ahead position.
X Depress the brake pedal firmly with your
left foot and keep the brake pedal
depressed.
X Shift the transmission to position D.
X Use the DYNAMIC SELECT button to select
the Sdrive program (Y page 174).
X Quickly depress the accelerator pedal fully.
X Take your foot off the brake, but keep the
accelerator pedal depressed.
The vehicle pulls away at maximum accel-
eration.
i Activate ESP ®
as soon as the acceleration
process has ended. ESP ®
will otherwise not
be able to stabilise the vehicle if the vehicle
starts to skid or a wheel starts to spin. Driving systems
213Driving and parking Z
Page 263 of 421
ting switches permanent SPEEDTRONIC
off.
X Press the abutton to store the entry.
For further information on permanent SPEED-
TRONIC (Y page 204).
Activating/deactivating the automatic
locking feature
X Press the =or; button on the steer-
ing wheel to select the Settings
Settingsmenu.
X Press the :or9 button to select the
Vehicle
Vehicle submenu.
X Press ato confirm.
X Press the :or9 button to select the
Automatic door locks
Automatic door locks function.
If the Automatic door locks
Automatic door locks function is
switched on, the multifunction display
shows the doors in orange.
X Press the abutton to save the setting.
If you activate the Automatic door locks
Automatic door locks
function, the vehicle is centrally locked above
a speed of around 15 km/h.
For further information on the automatic lock- ing feature; see (Y page 95).
Activating/deactivating the acoustic
locking confirmation
If you switch on the Acoustic
Acoustic Lock Lockfunction,
an acoustic signal sounds when you lock the
vehicle.
X Press the =or; button on the steer-
ing wheel to select the Settings
Settings menu.
X Press the :or9 button to select the
Vehicle Vehicle submenu.
X Press ato confirm.
X Press the :or9 button to select the
Acoustic Lock
Acoustic Lock function.
If the Acoustic
Acoustic Lock
Lockfunction is activated,
the & symbol in the multifunction dis-
play lights up orange.
X Press the abutton to save the setting. Heating Auxiliary heating departure time
G
DANGER
If the exhaust pipe is blocked or sufficient
ventilation is not possible, toxic exhaust
fumes can enter the vehicle, especially car-
bon monoxide. This is the case, e.g. in
enclosed spaces, or if the vehicle is stuck in
snow. There is a risk of fatal injuries.
You should switch off the auxiliary heating in
enclosed spaces which do not have an extrac- tion system, e.g. a garage. If the vehicle is
stuck in snow and you must leave the auxiliary
heating running, keep the exhaust pipe and
the area around the vehicle clear of snow. To guarantee a sufficient supply of fresh air, open
a window on the side of the vehicle away from the wind. G
WARNING
When the auxiliary heating is switched on,
parts of the vehicle can become very hot.
Flammable materials such as leaves, grass or twigs may ignite if they come into contact
with:
R hot parts of the exhaust system
R the exhaust gas itself
There is a risk of fire.
When the auxiliary heating is switched on,
make sure that:
R no flammable materials come into contact
with hot vehicle components
R the exhaust gas can escape from the
exhaust pipe unhindered
R the exhaust gas does not come into contact
with flammable materials.
! Operating the auxiliary heating/ventila-
tion draws on the vehicle battery. After you
have heated or ventilated the vehicle a
maximum of two times, drive for a longer
distance.
Only vehicles with auxiliary heating have this
function. 260
Menus and submenusOn-board computer and displays
Page 264 of 421
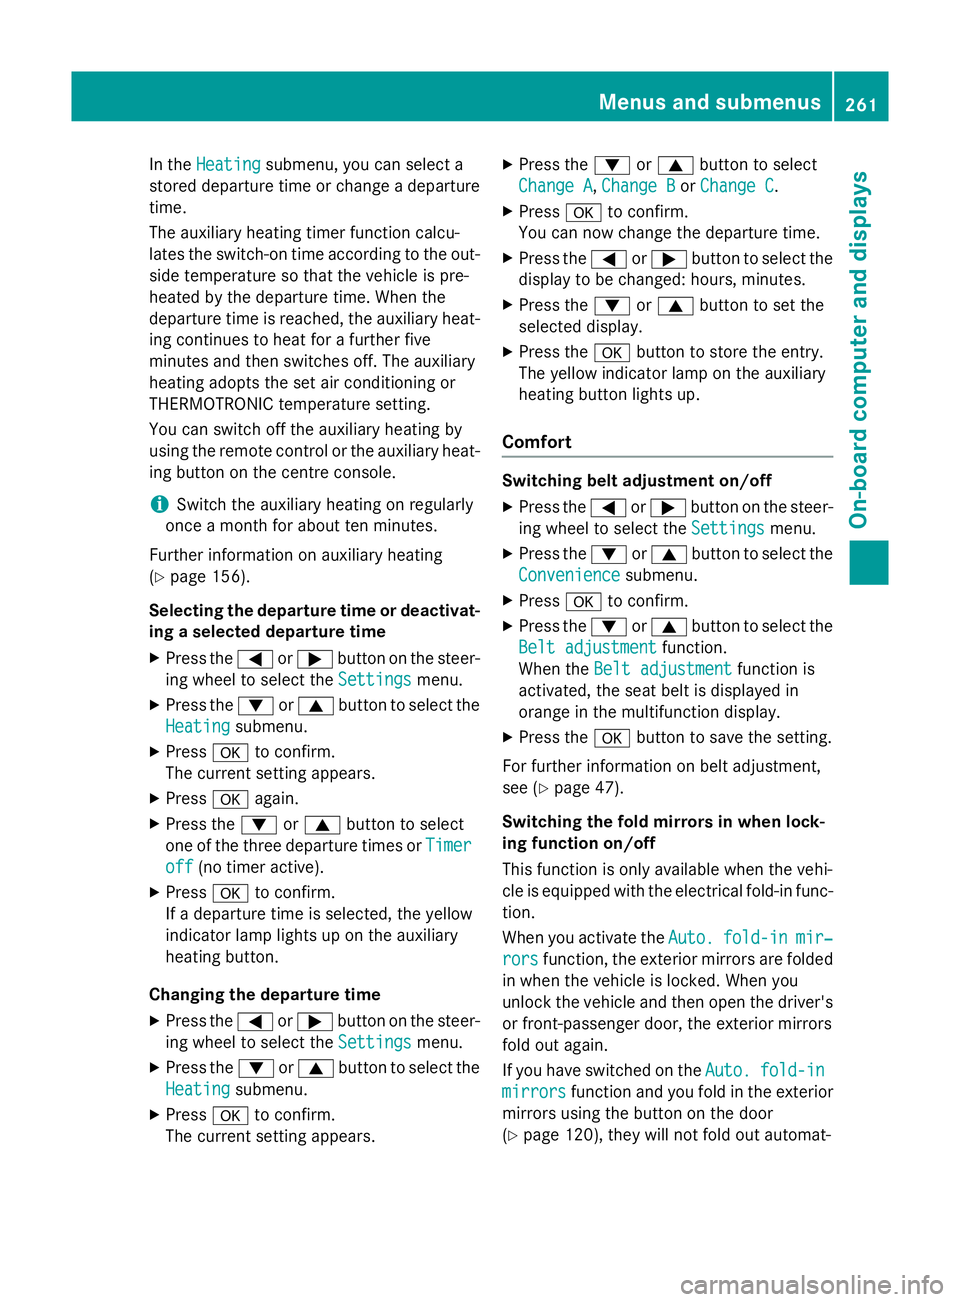
In the
Heating
Heating submenu, you can select a
stored departure time or change a departure
time.
The auxiliary heating timer function calcu-
lates the switch-on time according to the out-
side temperature so that the vehicle is pre-
heated by the departure time. When the
departure time is reached, the auxiliary heat- ing continues to heat for a further five
minutes and then switches off. The auxiliary
heating adopts the set air conditioning or
THERMOTRONIC temperature setting.
You can switch off the auxiliary heating by
using the remote control or the auxiliary heat- ing button on the centre console.
i Switch the auxiliary heating on regularly
once a month for about ten minutes.
Further information on auxiliary heating
(Y page 156).
Selecting the departure time or deactivat-
ing a selected departure time
X Press the =or; button on the steer-
ing wheel to select the Settings
Settings menu.
X Press the :or9 button to select the
Heating
Heating submenu.
X Press ato confirm.
The current setting appears.
X Press aagain.
X Press the :or9 button to select
one of the three departure times or Timer Timer
off
off (no timer active).
X Press ato confirm.
If a departure time is selected, the yellow
indicator lamp lights up on the auxiliary
heating button.
Changing the departure time
X Press the =or; button on the steer-
ing wheel to select the Settings Settingsmenu.
X Press the :or9 button to select the
Heating
Heating submenu.
X Press ato confirm.
The current setting appears. X
Press the :or9 button to select
Change A Change A, Change B Change BorChange C
Change C.
X Press ato confirm.
You can now change the departure time.
X Press the =or; button to select the
display to be changed: hours, minutes.
X Press the :or9 button to set the
selected display.
X Press the abutton to store the entry.
The yellow indicator lamp on the auxiliary
heating button lights up.
Comfort Switching belt adjustment on/off
X Press the =or; button on the steer-
ing wheel to select the Settings
Settings menu.
X Press the :or9 button to select the
Convenience
Convenience submenu.
X Press ato confirm.
X Press the :or9 button to select the
Belt adjustment Belt adjustment function.
When the Belt adjustment Belt adjustment function is
activated, the seat belt is displayed in
orange in the multifunction display.
X Press the abutton to save the setting.
For further information on belt adjustment,
see (Y page 47).
Switching the fold mirrors in when lock-
ing function on/off
This function is only available when the vehi-
cle is equipped with the electrical fold-in func-
tion.
When you activate the Auto.
Auto. fold-in fold-in mir‐
mir‐
rors
rors function, the exterior mirrors are folded
in when the vehicle is locked. When you
unlock the vehicle and then open the driver's or front-passenger door, the exterior mirrors
fold out again.
If you have switched on the Auto. Auto.fold-in
fold-in
mirrors
mirrors function and you fold in the exterior
mirrors using the button on the door
(Y page 120), they will not fold out automat- Menus and submenus
261On-board computer and displays Z
Page 301 of 421
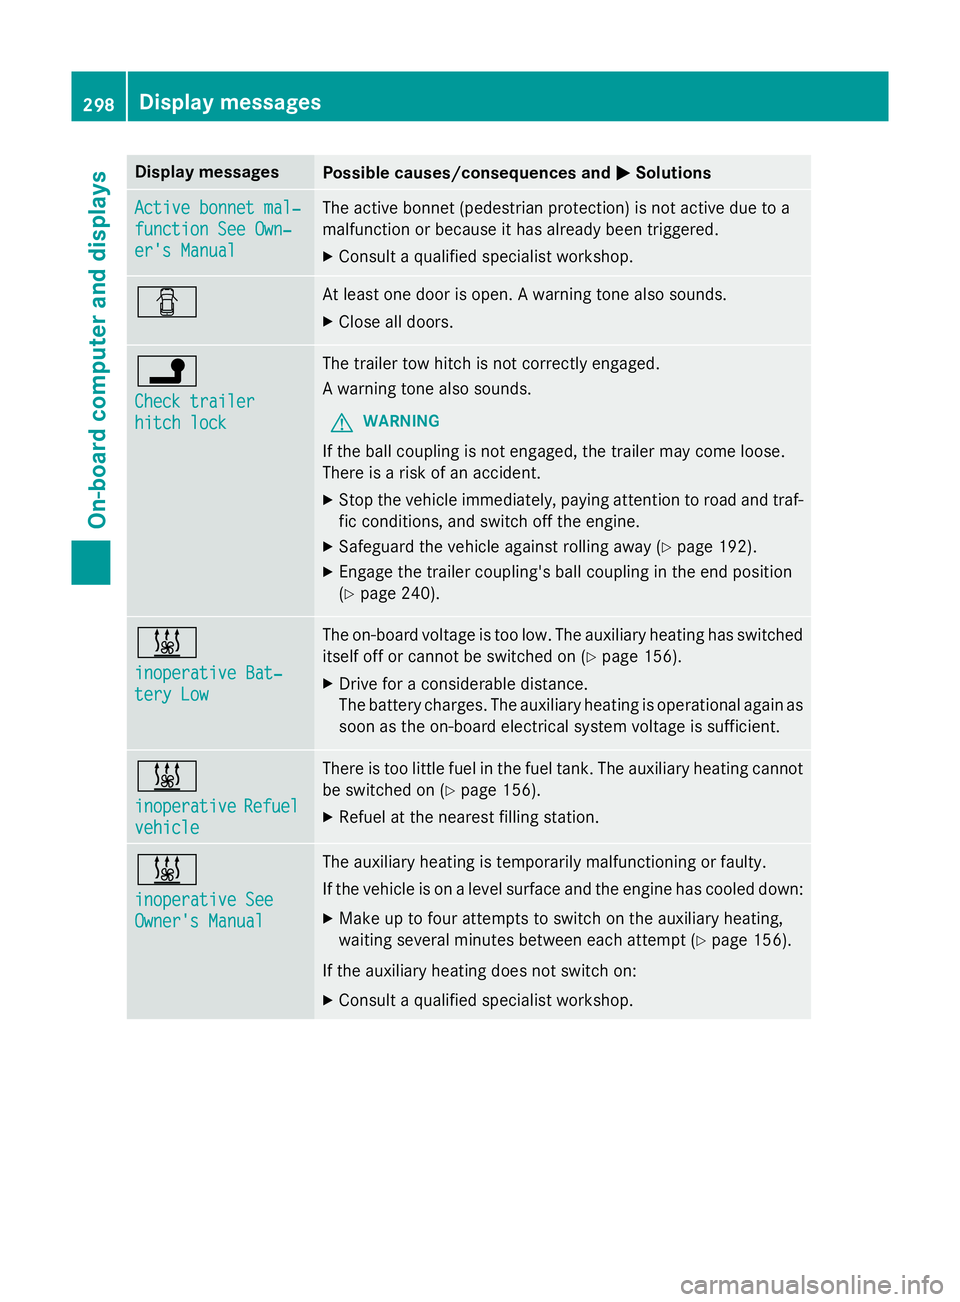
Display messages
Possible causes/consequences and
M
MSolutions Active bonnet mal‐
Active bonnet mal‐
function See Own‐ function See Own‐
er's Manual er's Manual The active bonnet (pedestrian protection) is not active due to a
malfunction or because it has already been triggered.
X Consult a qualified specialist workshop. C At least one door is open. A warning tone also sounds.
X Close all doors. j
Check trailer Check trailer
hitch lock hitch lock The trailer tow hitch is not correctly engaged.
A warning tone also sounds.
G WARNING
If the ball coupling is not engaged, the trailer may come loose.
There is a risk of an accident. X Stop the vehicle immediately, paying attention to road and traf-
fic conditions, and switch off the engine.
X Safeguard the vehicle against rolling away (Y page 192).
X Engage the trailer coupling's ball coupling in the end position
(Y page 240). &
inoperative Bat‐ inoperative Bat‐
tery Low tery Low The on-board voltage is too low. The auxiliary heating has switched
itself off or cannot be switched on (Y page 156).
X Drive for a considerable distance.
The battery charges. The auxiliary heating is operational again as
soon as the on-board electrical system voltage is sufficient. &
inoperative inoperative
Refuel
Refuel
vehicle
vehicle There is too little fuel in the fuel tank. The auxiliary heating cannot
be switched on (Y page 156).
X Refuel at the nearest filling station. &
inoperative See inoperative See
Owner's Manual Owner's Manual The auxiliary heating is temporarily malfunctioning or faulty.
If the vehicle is on a level surface and the engine has cooled down:
X Make up to four attempts to switch on the auxiliary heating,
waiting several minutes between each attempt (Y page 156).
If the auxiliary heating does not switch on:
X Consult a qualified specialist workshop. 298
Display
messagesOn-board computer and displays