2015 MERCEDES-BENZ C-Class tow
[x] Cancel search: towPage 188 of 214
Selecting playback options
If the Bluetooth ®
audio device supports the
corresponding function, the following options
are available:
R Normal Track Sequence
Normal Track Sequence: the tracks are
played in the normal order (e.g. track 1, 2,
3 etc.).
Audio data playback is determined by the
order in which the tracks are written to the
data medium. Alphabetical order is the
most common. Once all the tracks in a
folder have been played, the tracks in the
next folder are played.
R Random
Random Track TrackList
List: the current track list
is played in random order (e.g. 3, 8, 5 etc.).
R Random
Random Medium
Medium: all tracks on the data car-
rier are played in random order (e.g. track
3, 8, 5 etc.).
Playback options are optional functions
and are not, or only partially, supported by
Bluetooth ®
audio devices.
Selecting playback options
X To select Options
Options: turn and press the con-
troller.
X Select Playback Mode
Playback Mode.
A 003B dot indicates the current setting.
X Select the desired option.
If you select Random RandomTrack
Track List
List, you will
see a corresponding message in the dis-
play/selection window. Increasing the volume using COMAND
X To select Options Options: slide 005200C5and press
the controller.
X To select Volume
Volume: turn and press the con-
troller.
A menu appears. The 003Bdot indicates the
current setting.
X Select Standard
Standard orBoost Boost.
Information on sound settings
(Y page 200). Information on audio AUX mode
(Y
page 189). Operation with the Media Interface
Prerequisite
Media Interface is a universal interface for the
connection of mobile audio and video devi-
ces. Media Interface in COMAND has two
USB connections.
The USB connection sockets are located in
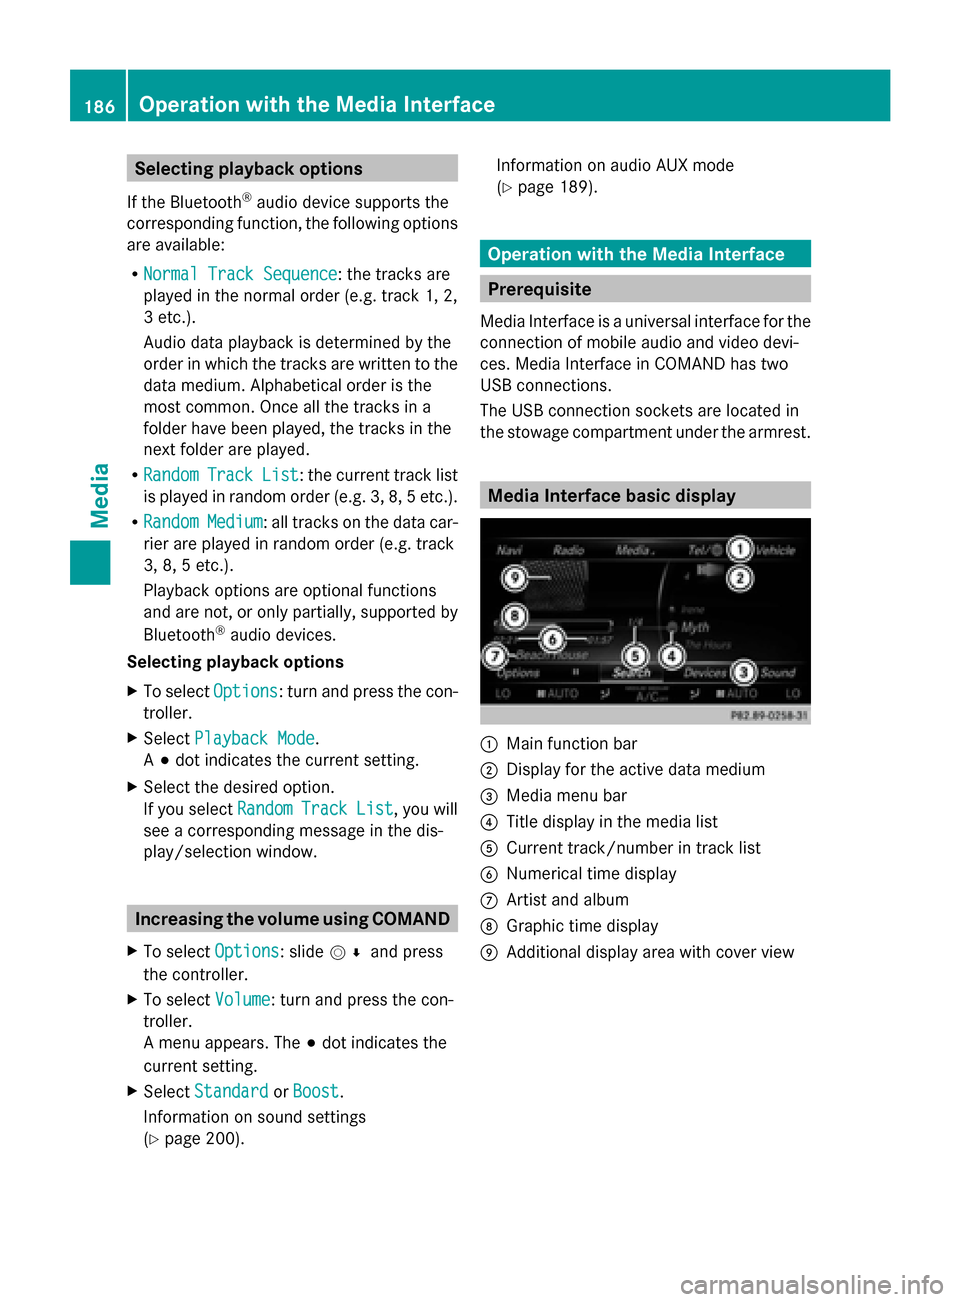
the stowage compartment under the armrest. Media Interface basic display
0043
Main function bar
0044 Display for the active data medium
0087 Media menu bar
0085 Title display in the media list
0083 Current track/number in track list
0084 Numerical time display
006B Artist and album
006C Graphic time display
006D Additional display area with cover view 186
Operation with the Media InterfaceMedia
Page 191 of 214
X
To switch on full-screen mode: press the
controller in the basic display.
X To show the video menu: slide 005200C5the
controller in full-screen mode.
The Media Interface menu bar appears.
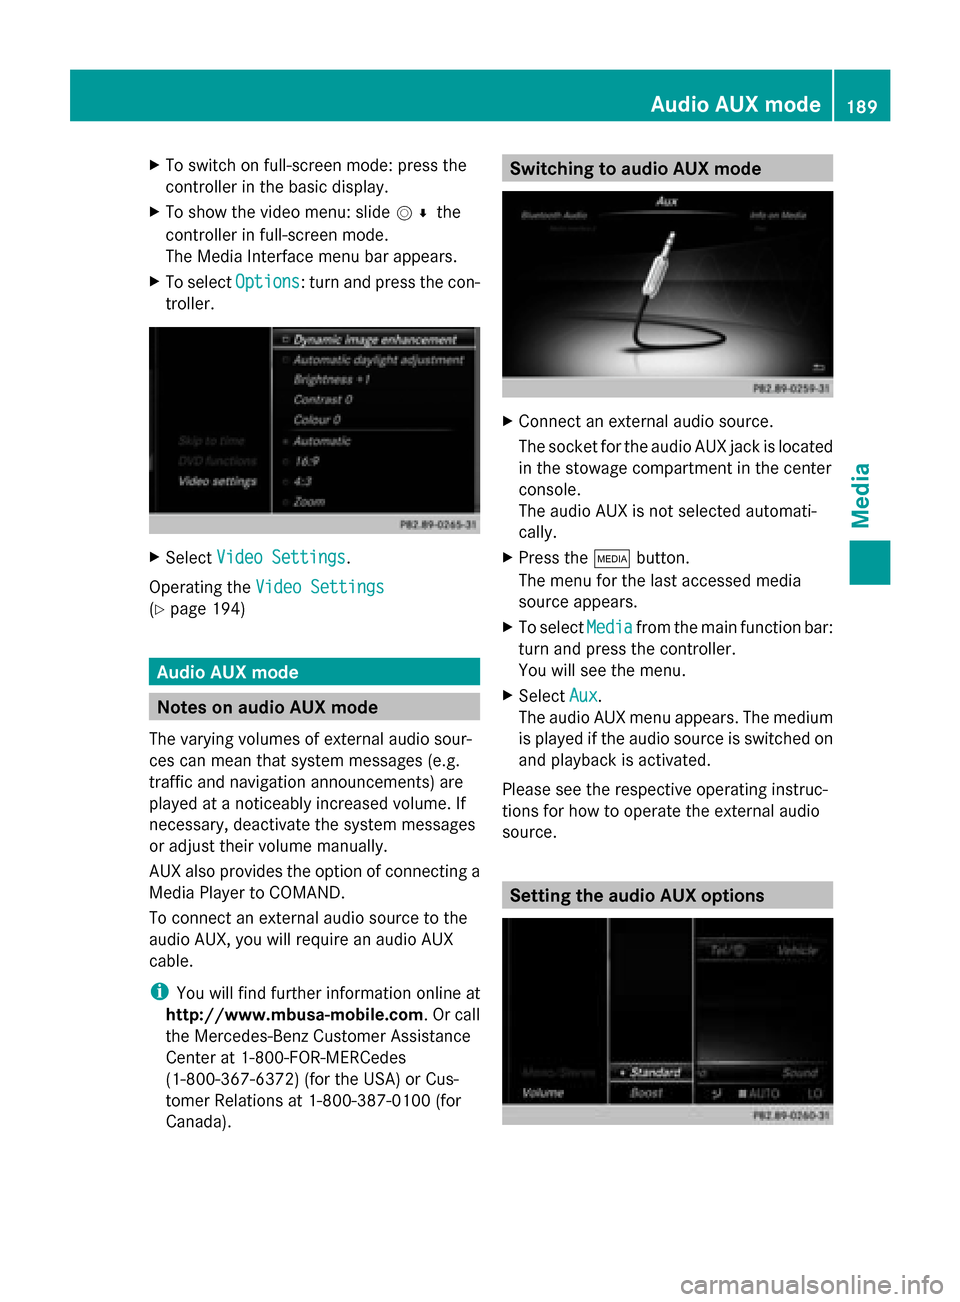
X To select Options
Options: turn and press the con-
troller. X
Select Video Settings
Video Settings.
Operating the Video Settings Video Settings
(Y page 194) Audio AUX mode
Notes on audio AUX mode
The varying volumes of external audio sour-
ces can mean that system messages (e.g.
traffic and navigation announcements) are
played at a noticeably increased volume. If
necessary, deactivate the system messages
or adjust their volume manually.
AUX also provides the option of connecting a
Media Player to COMAND.
To connect an external audio source to the
audio AUX, you will require an audio AUX
cable.
i You will find further information online at
http://www.mbusa-mobile.com. Or call
the Mercedes-Benz Customer Assistance
Center at 1-800-FOR-MERCedes
(1-800-367-6372) (for the USA) or Cus-
tomer Relations at 1-800-387-010 0(for
Canada). Switching to audio AUX mode
X
Connect an external audio source.
The socket for the audio AUX jack is located
in the stowage compartment in the center
console.
The audio AUX is not selected automati-
cally.
X Press the 00FDbutton.
The menu for the last accessed media
source appears.
X To select Media Mediafrom the main function bar:
turn and press the controller.
You will see the menu.
X Select Aux Aux.
The audio AUX menu appears. The medium
is played if the audio source is switched on
and playback is activated.
Please see the respective operating instruc-
tions for how to operate the external audio
source. Setting the audio AUX options Audio AUX mode
189Media Z
Page 192 of 214
X
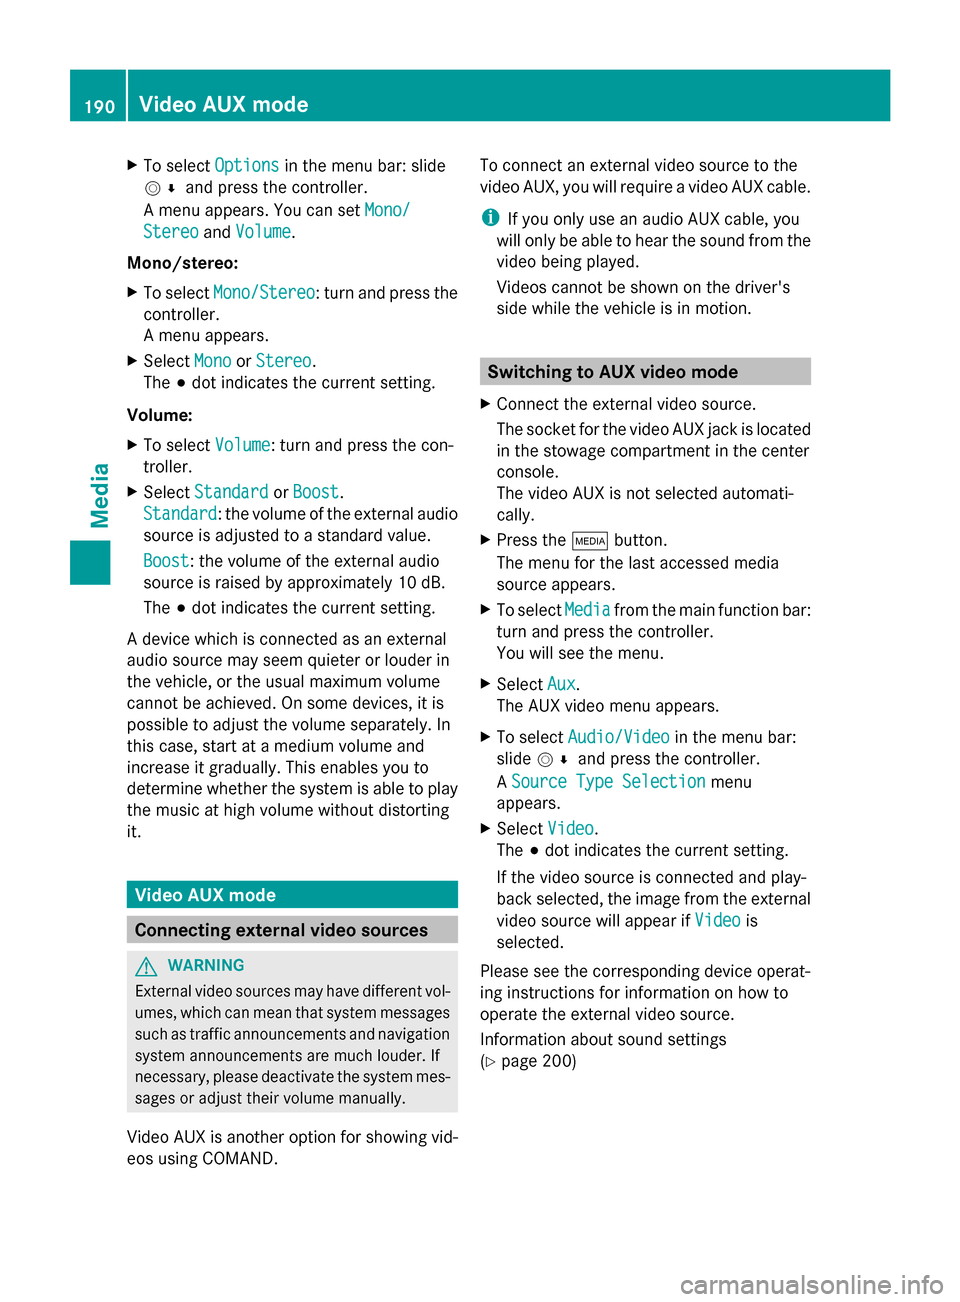
To select Options
Optionsin the menu bar: slide
005200C5 and press the controller.
A menu appears. You can set Mono/
Mono/
Stereo
Stereo andVolume
Volume.
Mono/stereo:
X To select Mono/Stereo
Mono/Stereo: turn and press the
controller.
A menu appears.
X Select Mono
Mono orStereo Stereo.
The 003Bdot indicates the current setting.
Volume:
X To select Volume
Volume: turn and press the con-
troller.
X Select Standard
Standard orBoost Boost.
Standard
Standard: the volume of the external audio
source is adjusted to a standard value.
Boost
Boost: the volume of the external audio
source is raised by approximately 10 dB.
The 003Bdot indicates the current setting.
A device which is connected as an external
audio source may seem quieter or louder in
the vehicle, or the usual maximum volume
cannot be achieved. On some devices, it is
possible to adjust the volume separately. In
this case, start at a medium volume and
increase it gradually. This enables you to
determine whether the system is able to play
the music at high volume without distorting
it. Video AUX mode
Connecting external video sources
G
WARNING
External video sources may have different vol-
umes, which can mean that system messages
such as traffic announcements and navigation
system announcements are much louder. If
necessary, please deactivate the system mes-
sages or adjust their volume manually.
Video AUX is another option for showing vid-
eos using COMAND. To connect an external video source to the
video AUX, you will require a video AUX cable.
i
If you only use an audio AUX cable, you
will only be able to hear the sound from the
video being played.
Videos cannot be shown on the driver's
side while the vehicle is in motion. Switching to AUX video mode
X Connect the external video source.
The socket for the video AUX jack is located
in the stowage compartment in the center
console.
The video AUX is not selected automati-
cally.
X Press the 00FDbutton.
The menu for the last accessed media
source appears.
X To select Media
Media from the main function bar:
turn and press the controller.
You will see the menu.
X Select Aux Aux.
The AUX video menu appears.
X To select Audio/Video Audio/Video in the menu bar:
slide 005200C5 and press the controller.
A Source Type Selection
Source Type Selection menu
appears.
X Select Video Video.
The 003Bdot indicates the current setting.
If the video source is connected and play-
back selected, the image from the external
video source will appear if Video Videois
selected.
Please see the corresponding device operat-
ing instructions for information on how to
operate the external video source.
Information about sound settings
(Y page 200) 190
Video AUX modeMedia
Page 208 of 214
You can select a location in the information
chart (option 1) or in the map (option 2). You
can store frequently selected locations in the
memory (Y page 207).
i COMAND receives the data for the
weather forecasts from the nearest
weather station to the selected location.
Option 1: selecting the area in the infor-
mation chart X
To select Position Position in the information
chart: turn and press the controller.
X To select the current vehicle position:
select Current Position
Current Position from the menu.
COMAND receives the weather data for the
current vehicle position from the nearest
weather station and displays it automati-
cally.
Requirement for "Selecting the vicinity of the
destination": a route is calculated to a desti-
nation (Y page 69). The menu item is other-
wise grayed out.
X To select the vicinity of the destina-
tion: select Near Destination
Near Destination from the
menu: turn the controller and press to con-
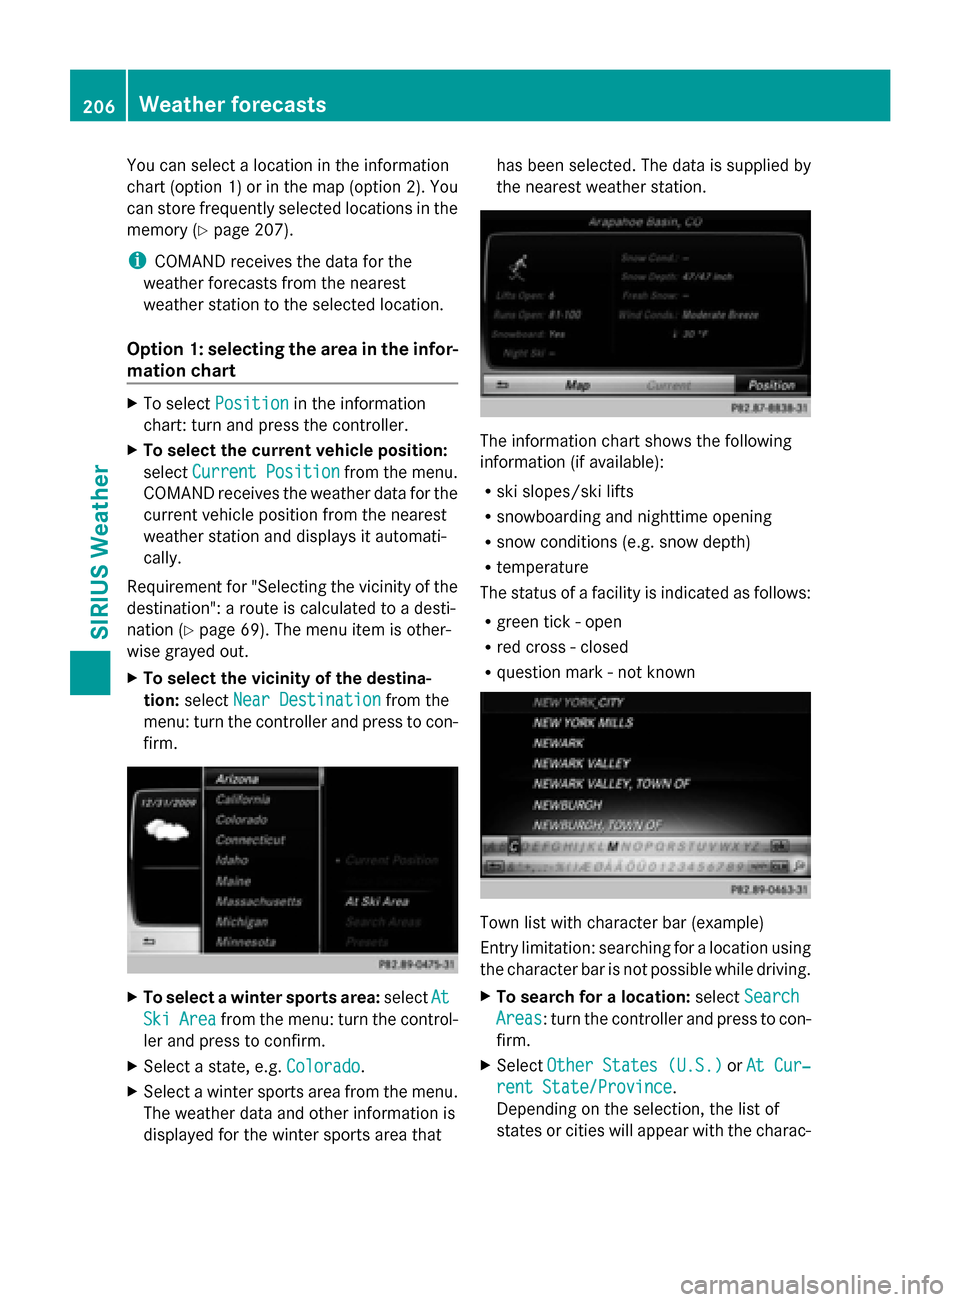
firm. X
To select a winter sports area: selectAt At
Ski
Ski Area
Area from the menu: turn the control-
ler and press to confirm.
X Select a state, e.g. Colorado
Colorado.
X Select a winter sports area from the menu.
The weather data and other information is
displayed for the winter sports area that has been selected. The data is supplied by
the nearest weather station.
The information chart shows the following
information (if available):
R ski slopes/ski lifts
R snowboarding and nighttime opening
R snow conditions (e.g. snow depth)
R temperature
The status of a facility is indicated as follows:
R green tick - open
R red cross - closed
R question mark - not known Town list with character bar (example)
Entry limitation: searching for a location using
the character bar is not possible while driving.
X
To search for a location: selectSearch Search
Areas
Areas: turn the controller and press to con-
firm.
X Select Other States (U.S.) Other States (U.S.) orAt Cur‐
At Cur‐
rent State/Province
rent State/Province.
Depending on the selection, the list of
states or cities will appear with the charac- 206
Weather forecastsSIRIUS Weather
Page 209 of 214
ter bar. You can limit the search using the
character bar.
X To select the state or town: enter the initial
letter by turning the controller and then
press to confirm.
X To switch to the list without the character
bar: slide 5or select ok ok.
X To delete an entry: select 0084from the
character bar and press the controller.
Pressing briefly deletes the last letter
entered.
Pressing and holding longer deletes the
entire entry.
X To select the state/province or town in the
list: turn the controller and press to con-
firm.
After selecting a state (or province), the list
of towns appears.
After choosing a town, the information
chart displays the weather forecast for the
selected location. The data is supplied by
the nearest weather station.
Option 2: selecting the area in the
weather map X
Call up the weather map (Y page 207).
X Move the weather map so that the cross-
hair is over the desired area (Y page 208).
X Press the controller.
The information chart shows the weather
forecast for the selected area. The data is
supplied by the nearest weather station. Memory functions
Storing the area in the weather memory You can save locations that are called up fre-
quently in ten preset positions (0, 1-9) in the
weather memory. X
In the weather memory: select the area
for the weather forecast (Y page 205).
The selected location appears at the top in
the status bar.
X To select Position
Position in the information
chart: turn and press the controller.
X Select Presets Presets.
X Select a preset using the controller.
X Press and hold the controller until you hear
a tone.
The area is entered on the selected preset.
Selecting an area from the weather
memory X
Directly from the weather memory:
select Position Position from the information
chart: turn and press the controller.
X Select Presets
Presets.
X Select the memory position which contains
the location you require.
The weather data for the selected area is
displayed. Weather map
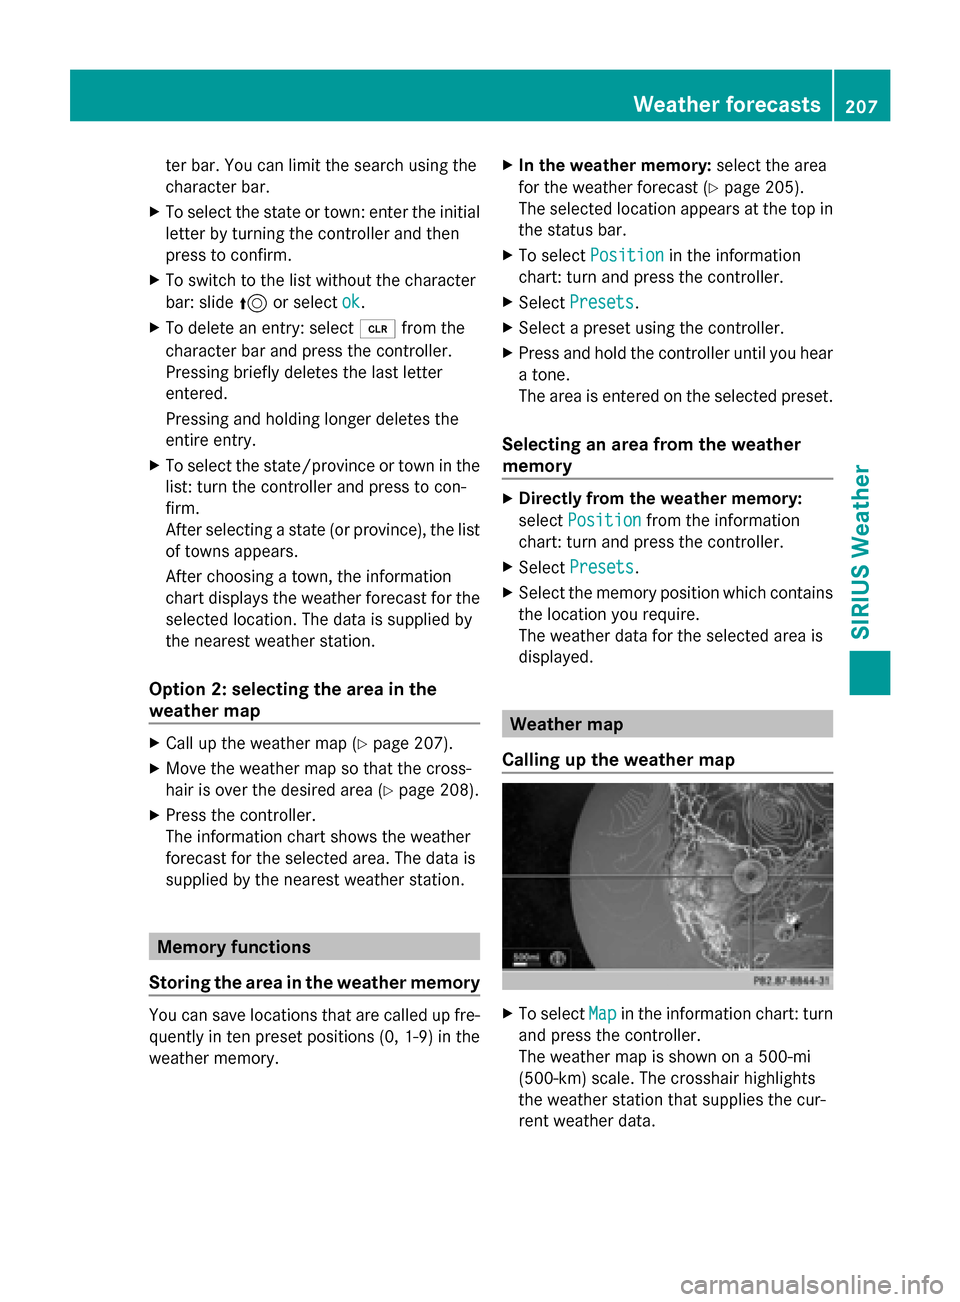
Calling up the weather map X
To select Map Mapin the information chart: turn
and press the controller.
The weather map is shown on a 500-mi
(500-km) scale. The crosshair highlights
the weather station that supplies the cur-
rent weather data. Weather forecasts
207SIRIUS Weather