2015 MERCEDES-BENZ B-CLASS SPORTS audio
[x] Cancel search: audioPage 73 of 346
The SmartKey centrally locks/unlocks:R the doors
R the tailgate
R the fuel filler flap
The turn signals flash once when unlocking
and three times when locking.
iWhen the locator lighting is activated in
Audio 20/COMAND, it also lights up when
it is dark after the vehicle is unlocked with
the remote control (see the separate oper- ating instructions).
iYou can also set an audible signal to con-
firm that the vehicle has been locked. The
audible signal can be activated and deacti- vated using the on-board computer( Y page 205).
KEYLESS-GO
General notes
Bear in mind that the engine can be started by
any of the vehicle occupants if there is a
SmartKey in the vehicle.
Locking/unlocking centrally
You can start, lock or unlock the vehicle using
KEYLESS-GO. To do this, you only need carry the SmartKey with you. You can combine the
functions of KEYLESS-GO with those of a con-
ventional SmartKey. Unlock the vehicle by
using KEYLESS-GO, for instance, and lock it
using the &button on the SmartKey.
The driver's door and the door at which the
handle is used, must both be closed. The
SmartKey must be outside the vehicle. When locking or unlocking with KEYLESS-GO, the
distance between the SmartKey and the cor-
responding door handle must not be greater
than 3 ft (1 m). A check which periodically establishes a radio
connection between the vehicle and the
SmartKey determines whether a valid Smart- Key is in the vehicle. This occurs, for example:
R when starting the engine
R whilst driving
R when the external door handles aretouched
R during convenience closing
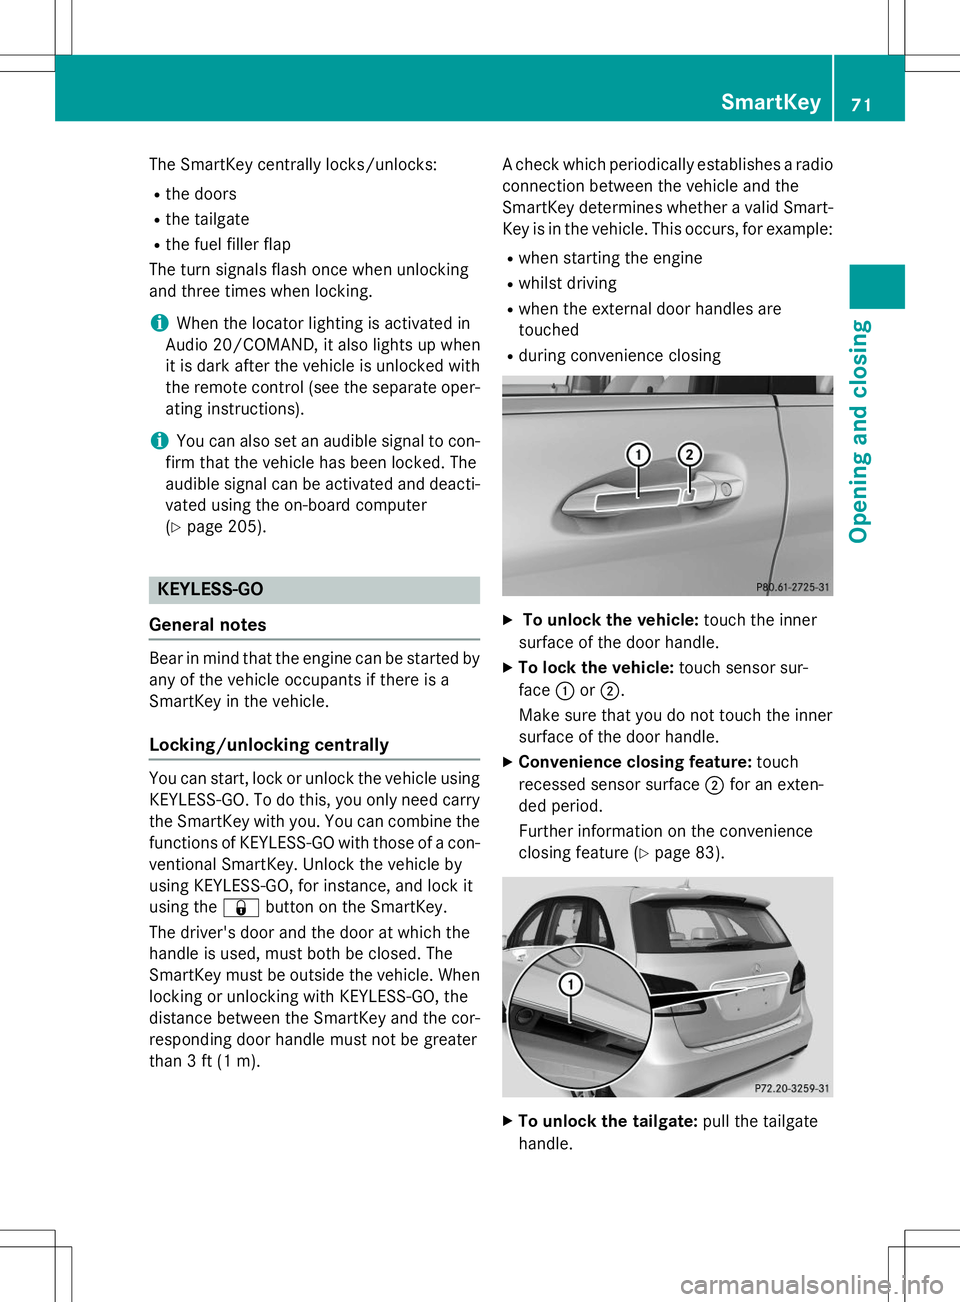
X To unlock the vehicle: touch the inner
surface of the door handle.
X To lock the vehicle: touch sensor sur-
face :or; .
Make sure that you do not touch the inner
surface of the door handle.
X Convenience closing feature: touch
recessed sensor surface ;for an exten-
ded period.
Further information on the convenience
closing feature ( Ypage 83).
X
To unlock the tailgate: pull the tailgate
handle.
SmartKey71
Opening and closing
Z
Page 111 of 346
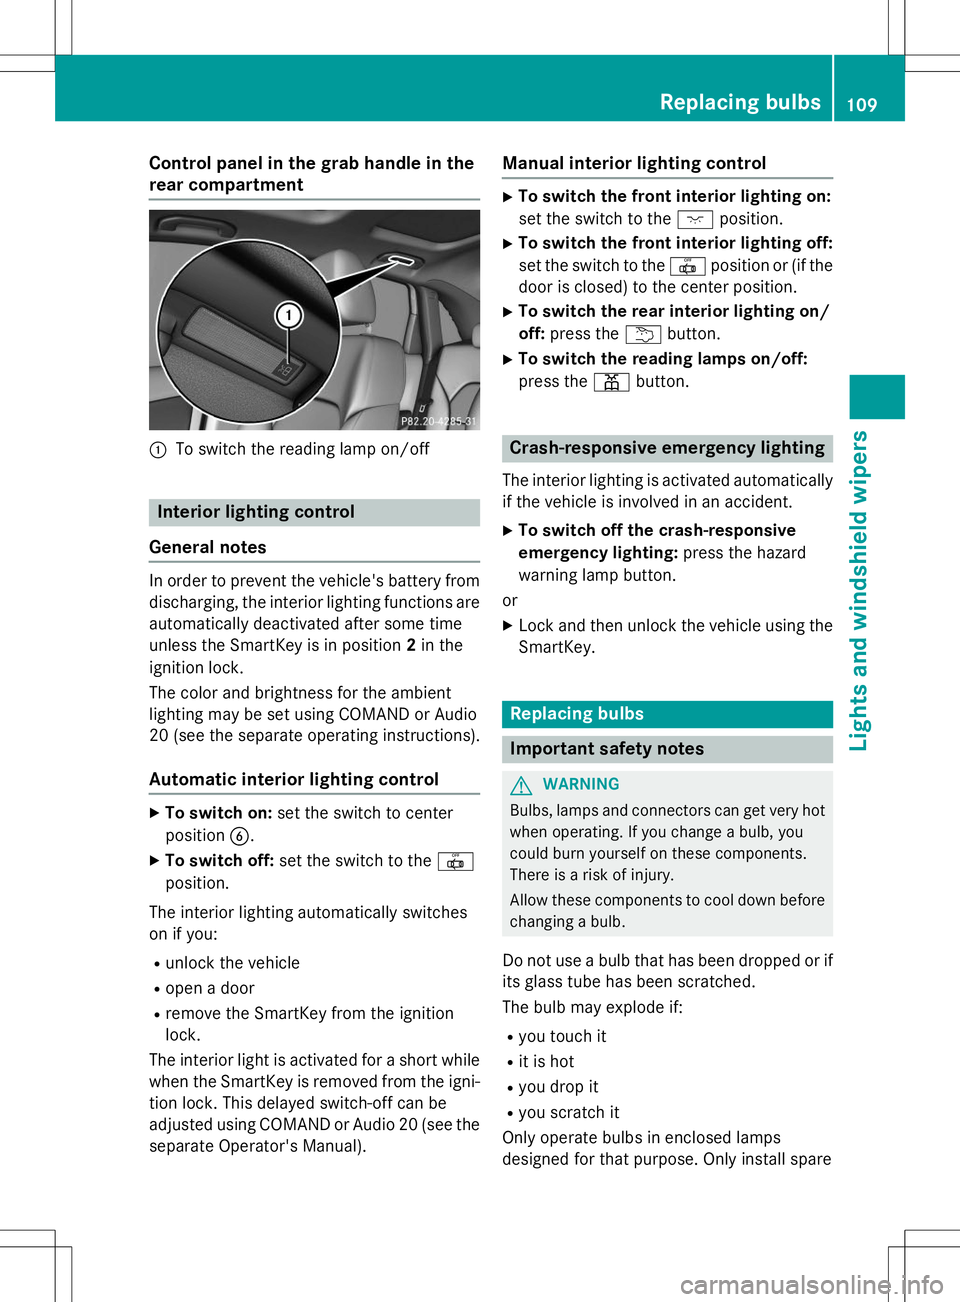
Control panel in the grab handle in the
rear compartment
:To switch the reading lamp on/off
Interior lighting control
General notes
In order to prevent the vehicle's battery from discharging, the interior lighting functions are
automatically deactivated after some time
unless the SmartKey is in position 2in the
ignition lock.
The color and brightness for the ambient
lighting may be set using COMAND or Audio
20 (see the separate operating instructions).
Automatic interior lighting control
X To switch on: set the switch to center
position B.
X To switch off: set the switch to the |
position.
The interior lighting automatically switches
on if you: R unlock the vehicle
R open a door
R remove the SmartKey from the ignition
lock.
The interior light is activated for a short while when the SmartKey is removed from the igni-
tion lock. This delayed switch-off can be
adjusted using COMAND or Audio 20 (see the separate Operator's Manual).
Manual interior lighting control
X To switch the front interior lighting on:
set the switch to the cposition.
X To switch the front interior lighting off:
set the switch to the |position or (if the
door is closed) to the center position.
X To switch the rear interior lighting on/
off: press the ubutton.
X To switch the reading lamps on/off:
press the pbutton.
Crash-responsive emergency lighting
The interior lighting is activated automatically
if the vehicle is involved in an accident.
X To switch off the crash-responsive
emergency lighting: press the hazard
warning lamp button.
or X Lock and then unlock the vehicle using the
SmartKey.
Replacing bulbs
Important safety notes
GWARNING
Bulbs, lamps and connectors can get very hotwhen operating. If you change a bulb, you
could burn yourself on these components.
There is a risk of injury.
Allow these components to cool down beforechanging a bulb.
Do not use a bulb that has been dropped or if
its glass tube has been scratched.
The bulb may explode if: R you touch it
R it is hot
R you drop it
R you scratch it
Only operate bulbs in enclosed lamps
designed for that purpose. Only install spare
Replacing bulbs109
Lights and windshield wipers
Z
Page 124 of 346
ROnly use air-recirculation mode briefly, e.g.
if there are unpleasant outside odors or
when in a tunnel. The windows could oth-
erwise fog up, since no fresh air is drawn
into the vehicle in air-recirculation mode.
R If you change the settings of the climate
control system, the climate status display
appears for approximately three seconds
at the bottom of the screen in the Audio/
COMAND display (see separate operating
instructions). You will see the current set-
tings of the various climate control func-tions.
ECO start/stop function
During automatic engine switch-off, the cli-
mate control system only operates at a
reduced capacity. If you require the full cli-
mate control output, you can switch off the
ECO start/stop function by pressing the ECO
button ( Ypage 140).
122Overview of climate control systems
Climate control
Page 126 of 346
RUse the residual heat function if you want to
heat or ventilate the vehicle interior when
the ignition is switched off. The residual
heat function can only be activated or deac- tivated with the ignition switched off.
R If you change the settings of the climate
control system, the climate status display
appears for approximately three seconds
at the bottom of the screen in the Audio/
COMAND display (see separate operating
instructions). You will see the current set-
tings of the various climate control func-tions.
ECO start/stop function
During automatic engine switch-off, the cli-
mate control system only operates at a
reduced capacity. If you require the full cli-
mate control output, you can switch off the
ECO start/stop function by pressing the ECO
button ( Ypage 140).
Operating the climate control sys- tems
Switching climate control on/off
General notes
When the climate control is switched off, the air supply and air circulation are also
switched off. The windows could fog up.
Therefore, switch off climate control onlybriefly
Air-conditioning system
X Turn the SmartKey to position 2in the igni-
tion lock ( Ypage 135).
X To switch on: turn controlAclockwise to
the desired position (except position 0)
( Y page 121).
X To switch off: turn controlAcounter-
clockwise to position 0(Y page 121).
Dual-zone automatic climate control
X
Turn the SmartKey to position 2in the igni-
tion lock ( Ypage 135).
X To activate: press theÃbutton.
The indicator lamp in the Ãbutton lights
up. Airflow and air distribution are set to
automatic mode.
or
X Press the ^button.
The indicator lamp in the ^button goes
out. The previously selected settings arerestored.
X To deactivate: press the^button.
The indicator lamp in the ^button lights
up.
iDual-zone automatic climate control:
switch on climate control primarily using the à button.
Activating/deactivating cooling with
air dehumidification
General notes
If you deactivate the "Cooling with air-dehu-
midification" function, the air inside the vehi- cle will not be cooled. The air inside the vehi-cle will also not be dehumidified. The win-
dows can fog up more quickly. Therefore, only
deactivate the "Cooling with air-dehumidifi-
cation" function briefly.
The "Cooling with air dehumidification" func-
tion is only available when the engine is run-
ning. The air inside the vehicle is cooled and
dehumidified according to the temperatureselected.
Condensation may drip from the underside of the vehicle when it is in cooling mode. This is
normal and not a sign that there is a malfunc- tion.
124Operating the climate control systems
Climate control
Page 182 of 346
Rear view camera
General notes
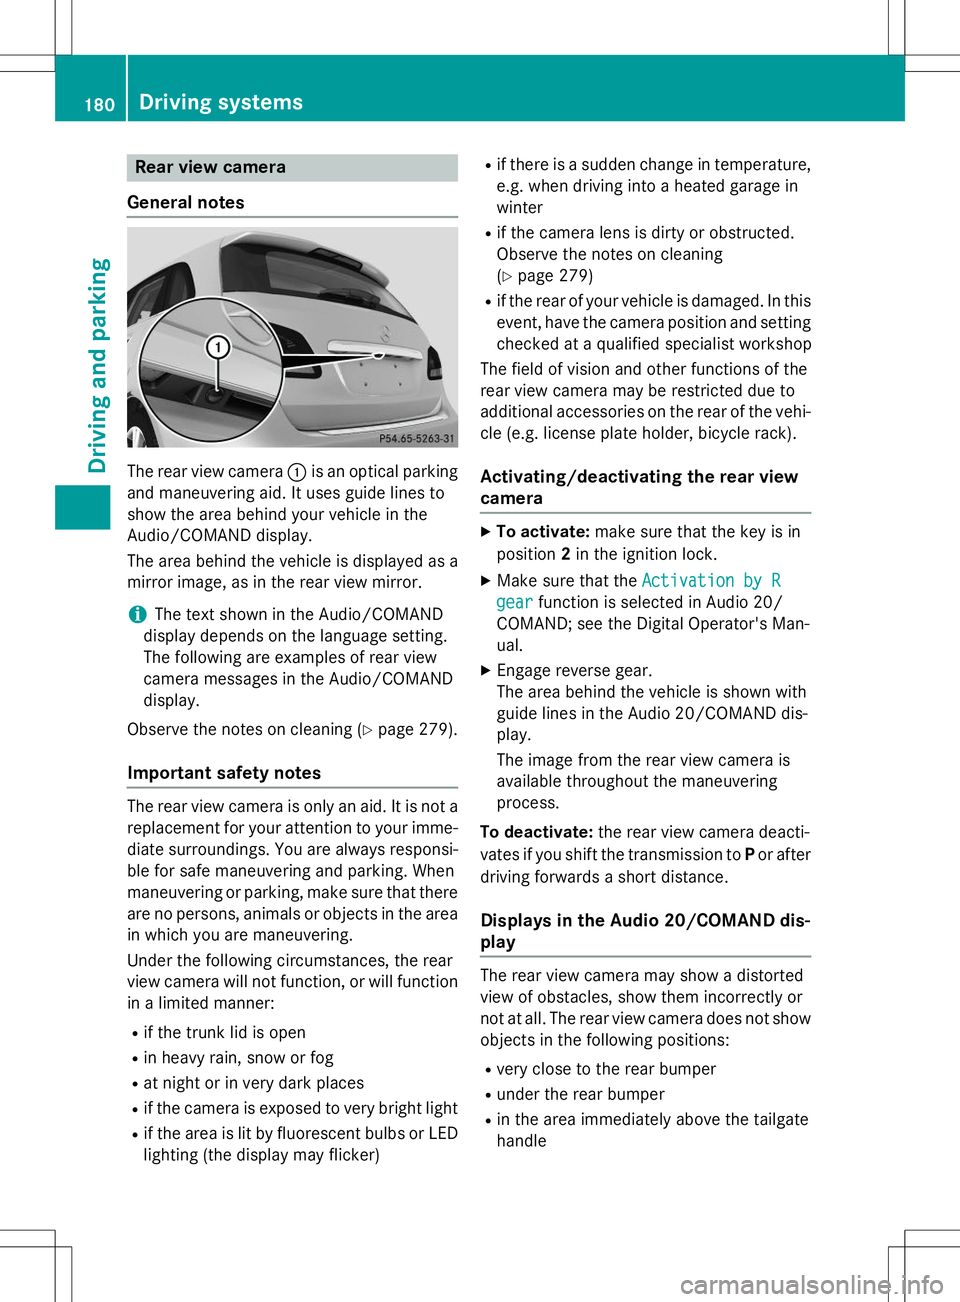
The rear view camera :is an optical parking
and maneuvering aid. It uses guide lines to
show the area behind your vehicle in the
Audio/COMAND display.
The area behind the vehicle is displayed as a
mirror image, as in the rear view mirror.
iThe text shown in the Audio/COMAND
display depends on the language setting.
The following are examples of rear view
camera messages in the Audio/COMAND
display.
Observe the notes on cleaning ( Ypage 279).
Important safety notes
The rear view camera is only an aid. It is not a
replacement for your attention to your imme-
diate surroundings. You are always responsi- ble for safe maneuvering and parking. When
maneuvering or parking, make sure that there
are no persons, animals or objects in the area in which you are maneuvering.
Under the following circumstances, the rear
view camera will not function, or will function
in a limited manner:
R if the trunk lid is open
R in heavy rain, snow or fog
R at night or in very dark places
R if the camera is exposed to very bright light
R if the area is lit by fluorescent bulbs or LED
lighting (the display may flicker) R
if there is a sudden change in temperature,
e.g. when driving into a heated garage in
winter
R if the camera lens is dirty or obstructed.
Observe the notes on cleaning(Y page 279)
R if the rear of your vehicle is damaged. In this
event, have the camera position and setting
checked at a qualified specialist workshop
The field of vision and other functions of the
rear view camera may be restricted due to
additional accessories on the rear of the vehi-
cle (e.g. license plate holder, bicycle rack).
Activating/deactivating the rear view
camera
X To activate: make sure that the key is in
position 2in the ignition lock.
X Make sure that the
Activation by R
gearfunction is selected in Audio 20/
COMAND; see the Digital Operator's Man-
ual.
X Engage reverse gear.
The area behind the vehicle is shown with
guide lines in the Audio 20/COMAND dis-
play.
The image from the rear view camera is
available throughout the maneuvering
process.
To deactivate: the rear view camera deacti-
vates if you shift the transmission to Por after
driving forwards a short distance.
Displays in the Audio 20/COMAND dis-play
The rear view camera may show a distorted
view of obstacles, show them incorrectly or
not at all. The rear view camera does not show
objects in the following positions:
R very close to the rear bumper
R under the rear bumper
R in the area immediately above the tailgate
handle
180Driving systems
Driving and parking
Page 183 of 346
!Objects not at ground level may appear to
be further away than they actually are, e.g.: R the bumper of a parked vehicle
R the drawbar of a trailer
R the ball coupling of a trailer tow hitch
R the rear section of an HGV
R a slanted post
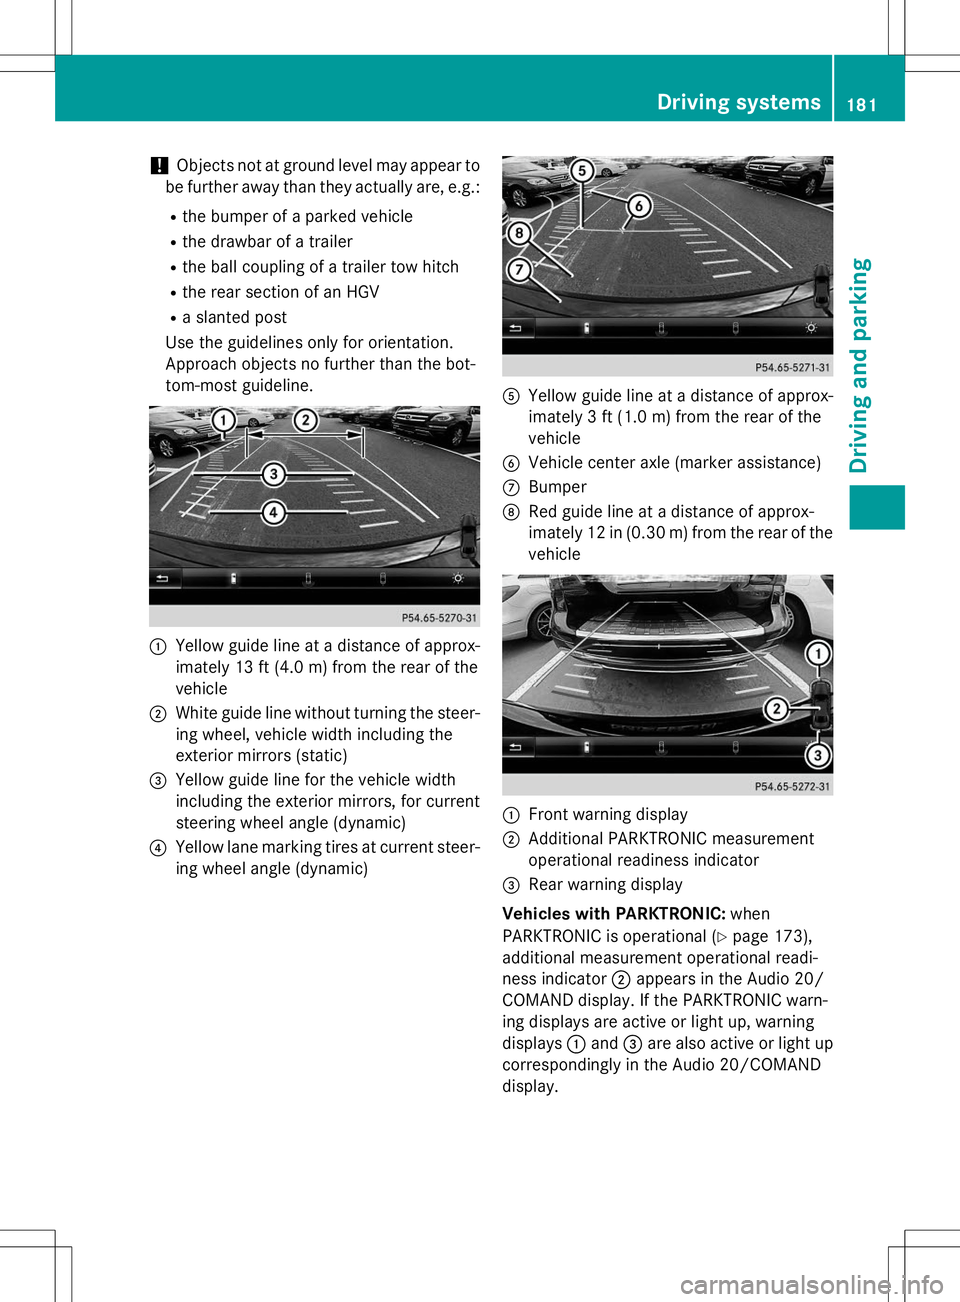
Use the guidelines only for orientation.
Approach objects no further than the bot-
tom-most guideline.
:Yellow guide line at a distance of approx-
imately 13 ft (4.0 m) from the rear of thevehicle
;White guide line without turning the steer-
ing wheel, vehicle width including the
exterior mirrors (static)
=Yellow guide line for the vehicle width
including the exterior mirrors, for current
steering wheel angle (dynamic)
?Yellow lane marking tires at current steer-
ing wheel angle (dynamic)
AYellow guide line at a distance of approx-
imately 3 ft (1.0 m) from the rear of thevehicle
BVehicle center axle (marker assistance)
CBumper
DRed guide line at a distance of approx-
imately 12 in (0.30 m) from the rear of the vehicle
:Front warning display
;Additional PARKTRONIC measurement
operational readiness indicator
=Rear warning display
Vehicles with PARKTRONIC: when
PARKTRONIC is operational ( Ypage 173),
additional measurement operational readi-
ness indicator ;appears in the Audio 20/
COMAND display. If the PARKTRONIC warn-
ing displays are active or light up, warning
displays :and =are also active or light up
correspondingly in the Audio 20/COMAND
display.
Driving systems181
Driving and parking
Z
Page 185 of 346
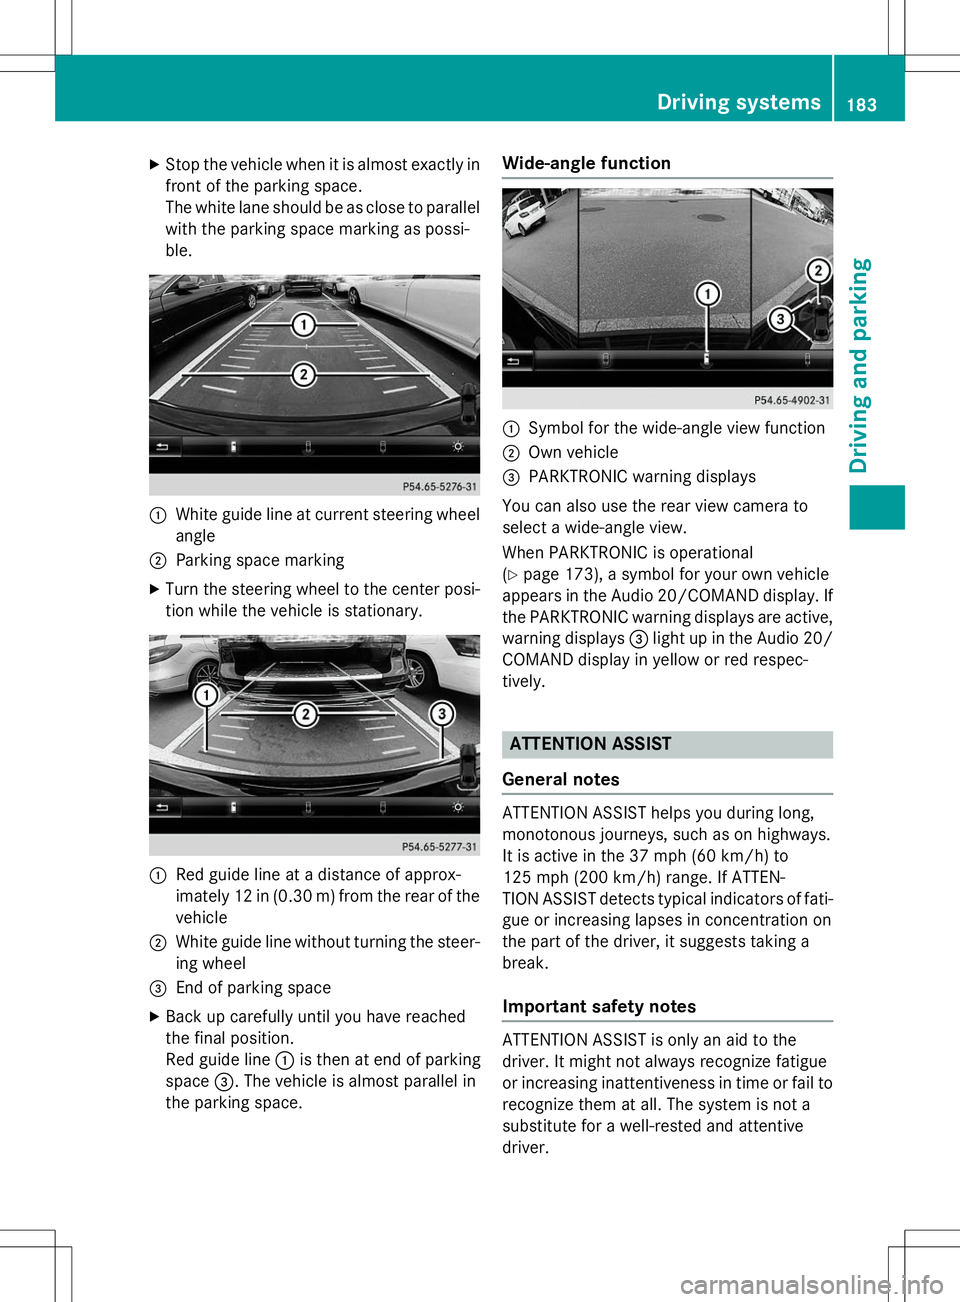
XStop the vehicle when it is almost exactly in
front of the parking space.
The white lane should be as close to parallel
with the parking space marking as possi-
ble.
:White guide line at current steering wheel
angle
;Parking space marking
X Turn the steering wheel to the center posi-
tion while the vehicle is stationary.
:Red guide line at a distance of approx-
imately 12 in (0.30 m) fromthe rear of the
vehicle
;White guide line without turning the steer- ing wheel
=End of parking space
X Back up carefully until you have reached
the final position.
Red guide line :is then at end of parking
space =. The vehicle is almost parallel in
the parking space.
Wide-angle function
:Symbol for the wide-angle view function
;Own vehicle
=PARKTRONIC warning displays
You can also use the rear view camera to
select a wide-angle view.
When PARKTRONIC is operational ( Y page 173), a symbol for your own vehicle
appears in the Audio 20/COMAND display. If
the PARKTRONIC warning displays are active, warning displays =light up in the Audio 20/
COMAND display in yellow or red respec-
tively.
ATTENTION ASSIST
General notes
ATTENTION ASSIST helps you during long,
monotonous journeys, such as on highways.
It is active in the 37 mph (60 km/h) to
125 mph (200 km/h) range. If ATTEN-
TION ASSIST detects typical indicators of fati-
gue or increasing lapses in concentration on
the part of the driver, it suggests taking a
break.
Important safety notes
ATTENTION ASSIST is only an aid to the
driver. It might not always recognize fatigue
or increasing inattentiveness in time or fail to
recognize them at all. The system is not a
substitute for a well-rested and attentive
driver.
Driving systems183
Driving an d parking
Z
Page 196 of 346
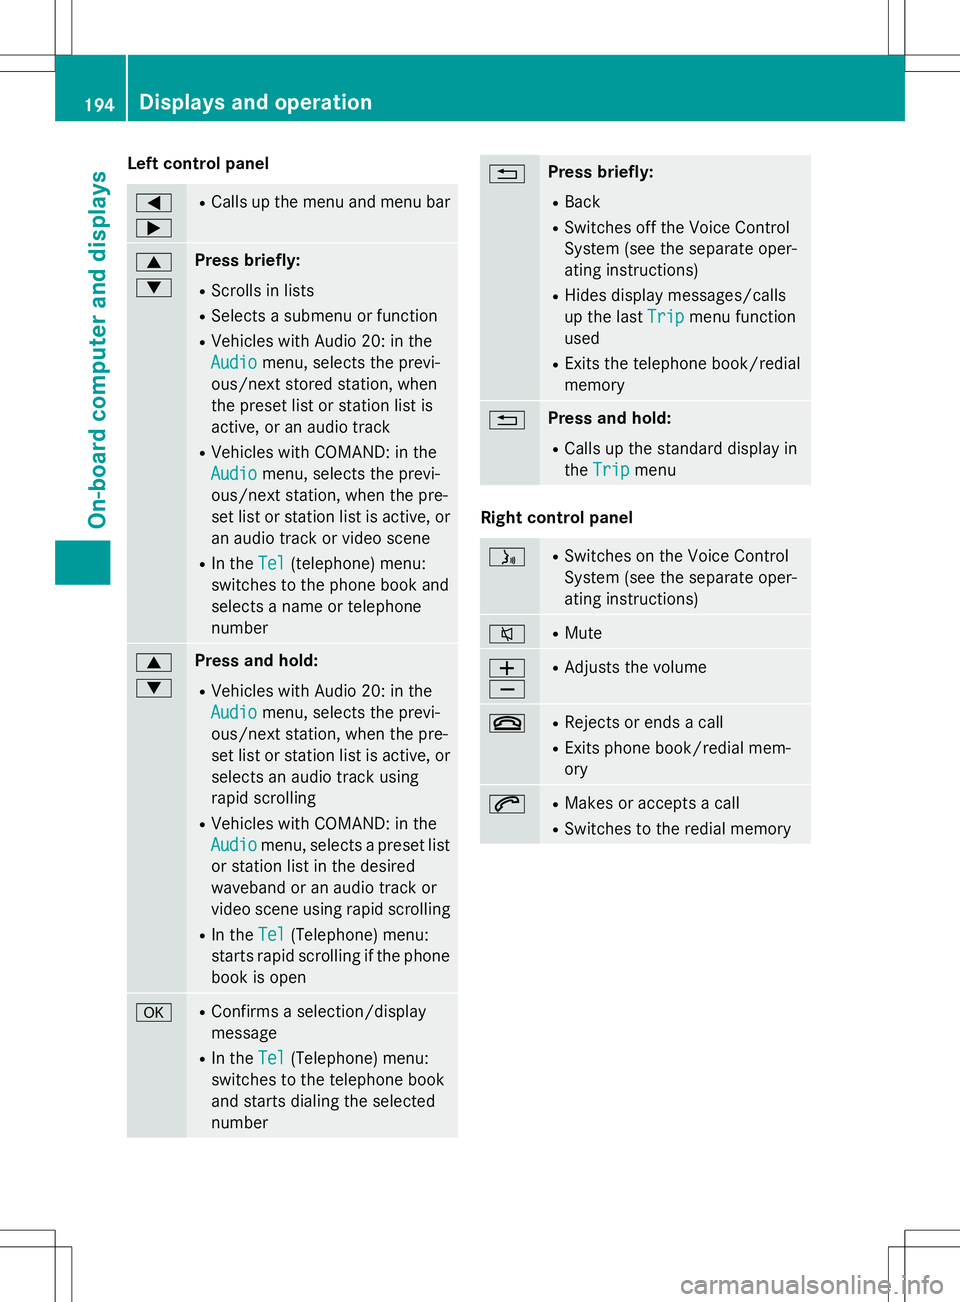
Left control panel
= ;RCalls up the menu and menu bar
9 :Press briefly:
R Scrolls in lists
R Selects a submenu or function
R Vehicles with Audio 20: in the
Audiomenu, selects the previ-
ous/next stored station, when
the preset list or station list is
active, or an audio track
R Vehicles with COMAND: in the
Audiomenu, selects the previ-
ous/next station, when the pre-
set list or station list is active, or
an audio track or video scene
R In the
Tel(telephone) menu:
switches to the phone book and
selects a name or telephone
number
9 :Press and hold:
R Vehicles with Audio 20: in the
Audiomenu, selects the previ-
ous/next station, when the pre-
set list or station list is active, or
selects an audio track using
rapid scrolling
R Vehicles with COMAND: in the
Audiomenu, selects a preset list
or station list in the desired
waveband or an audio track or
video scene using rapid scrolling
R In the
Tel(Telephone) menu:
starts rapid scrolling if the phone
book is open
aR Confirms a selection/display
message
R In the
Tel(Telephone) menu:
switches to the telephone book
and starts dialing the selected
number
%Press briefly:
R Back
R Switches off the Voice Control
System (see the separate oper-
ating instructions)
R Hides display messages/calls
up the last
Tripmenu function
used
R Exits the telephone book/redial
memory
%Press and hold:
R Calls up the standard display in
the
Tripmenu
Right control panel
óR
Switches on the Voice Control
System (see the separate oper-
ating instructions)
8RMute
W XR
Adjusts the volume
~RRejects or ends a call
R Exits phone book/redial mem- ory
6RMakes or accepts a call
R Switches to the redial memory
194Displays and operation
On-board computer and displays