2015 MERCEDES-BENZ B-Class ELECTRIC start stop button
[x] Cancel search: start stop buttonPage 158 of 338
The electric parking brake can only be
released:
R when the SmartKey is in position 1or 2in
the ignition lock (Y page 131) or
R if the ignition was switched on using the
Start/Stop button
Applying automatically When the vehicle's HOLD function is holding
the vehicle at a standstill, the electric parking brake is engaged automatically.
In addition, at least one of the following con-
ditions must be fulfilled:
R the drive system is switched off.
R the driver's door is open and the seat belt is
not fastened.
R there is a system malfunction.
R the power supply is insufficient.
R the vehicle is stationary for a lengthy
period.
The red F(USA only) or !(Canada
only) indicator lamp in the instrument cluster
lights up.
Releasing automatically Your vehicle's electric parking brake is auto-
matically released if all of the following con-
ditions are met:
R the vehicle has been started.
R the transmission is in position Dor R.
R the seat belt has been fastened.
R you depress the accelerator pedal.
If the transmission is in position R, the tailgate
must be closed.
If your seat belt is not fastened, the following conditions must be fulfilled to automatically
release the electric parking brake:
R the driver's door is closed.
R you have shifted out of transmission posi-
tion Por you have previously driven faster
than 2 mph (3 km/h). Ensure that you do not depress the acceler-
ator pedal unintentionally. Otherwise the
parking brake will be released and the vehicle
will start to move.
Emergency braking The vehicle can also be braked during an
emergency by using the electric parking
brake.
X While driving, push handle :of the electric
parking brake (Y page 155).
The vehicle is braked as long as you keep
handle :of the electric parking brake
pressed. The longer the electric parking
brake handle :is depressed, the greater
the braking force.
During braking:
R a warning tone sounds
R the Please Release Parking Brake Please Release Parking Brake
message appears
R the red F(USA only) or !(Canada
only) indicator lamp in the instrument clus-
ter flashes
When the vehicle has been braked to a stand-
still, the electric parking brake is applied. Parking the vehicle for a long period
If you leave the vehicle parked for longer than
four weeks, the battery may be damaged by
exhaustive discharging.
If you leave the vehicle parked for longer than six weeks, the vehicle may suffer damage as a
result of lack of use.
X Visit a qualified specialist workshop and
seek advice.
i You can obtain information about trickle
chargers from a qualified specialist work-
shop. 156
ParkingDriving and parking
Page 172 of 338
Active Parking Assist will only detect parking
spaces:
R that are parallel to the direction of travel
R that are at least 59 in (1.5 m) wide
R that are at least 51 in (1.3 m) longer than
your vehicle
When driving at speeds below 19 mph
(30 km/h), you will see parking symbol ;as
a status indicator in the instrument cluster.
When a parking space has been detected, an arrow towards the right or the left also
appears. By default, Active Parking Assist
only displays parking spaces on the front-
passenger side. Parking spaces on the driv-
er's side are displayed as soon as the turn
signal on the driver's side is activated. When
parking on the driver's side, this must remain activated until you confirm the use of Active
Parking Assist by pressing the abutton on
the multifunction steering wheel.
A parking space is displayed while you are
driving past it, and until you are approx-
imately 50 ft (15 m) away from it.
Parking G
WARNING
Active Parking Assist merely aids you by inter- vening actively in the steering. If you do not
brake there is a risk of an accident.
Always apply the brakes yourself when
maneuvering and parking.
X Stop the vehicle when the parking space
symbol shows the desired parking space in
the instrument cluster.
X Shift the transmission to position R.
The Start Park Assist? Start Park Assist? Yes: OK
Yes: OKNo:
No:
% message appears in the multifunction
display. X
To cancel the procedure: press the%
button on the multifunction steering wheel or pull away.
or
X To park using Active Parking Assist:
press the abutton on the multifunction
steering wheel.
The Park Assist Active Accelerate Park Assist Active Accelerate
and Brake and Brake Observe Surroundings
Observe Surroundings mes-
sage appears in the multifunction display.
X Let go of the multifunction steering wheel.
X Back up the vehicle, being ready to brake at
all times. When backing up, drive at a speed below approximately 6 mph (10 km/h).
Otherwise Active Parking Assist will be can-
celed.
Maneuvering may be required in tight park- ing spaces.
X Stop as soon as PARKTRONIC sounds the
continuous warning tone, if not before.
Maneuvering may be required in tight park- ing spaces.
The Park Assist Active Select D Park Assist Active Select D
Observe Observe Surroundings Surroundings message appears in
the multifunction display.
X Shift the transmission to position Dwhile
the vehicle is stationary.
Active Parking Assist immediately steers in
the other direction.
The Park Assist Active Accelerate Park Assist Active Accelerate
and Brake
and Brake Observe Surroundings
Observe Surroundings mes-
sage appears in the multifunction display.
i You will achieve the best results by wait-
ing for the steering procedure to complete before pulling away.
X Drive forwards and be ready to brake at all
times.
Maneuvering may be required in tight park-
ing spaces.
X Stop as soon as PARKTRONIC sounds the
continuous warning tone, if not before.
The Park Assist Active Select R Park Assist Active Select R
Observe
Observe Surroundings
Surroundings message appears in
the multifunction display. 170
Driving systemsDriving an
d parking
Page 173 of 338
As soon as the parking procedure is com-
plete, the Park
ParkAssist
Assist Switched
Switched Off
Offmes-
sage appears and a warning tone sounds. The vehicle is now parked.
Active Parking Assist no longer supports you
with steering interventions and brake appli-
cations. When Active Parking Assist is fin-
ished, you must steer and brake again your-
self. PARKTRONIC is still available.
Parking tips:
R The way your vehicle is positioned in the
parking space after parking is dependent
on various factors. These include the posi-
tion and shape of the vehicles parked in
front and behind it and the conditions of the location. It may be the case that Active
Parking Assist guides you too far into a
parking space, or not far enough into it. In
some cases, it may also lead you across or
onto the curb. If necessary, you should can- cel the parking procedure with Active Park-ing Assist.
R You can also select preselect transmission
position D. The vehicle redirects and does
not drive as far into the parking space.
Should the transmission change take place
too early, the parking procedure will be
canceled. A sensible parking position can
no longer be achieved from this position.
Exiting a parking space In order that Active Parking Assist can sup-
port you when you exit the parking space:
R you need to have parked using Active Park-
ing Assist.
R the border of the parking space must be
high enough at the front and the rear. A
curb is too small, for example.
R the border of the parking space must not be
too wide, as the position of the vehicle must
not exceed an angle of 45° to the starting
position as it is maneuvering into the park-
ing space.
R a maneuvering distance of at least 3.3 ft
(1.0 m) must be available. Active Parking Assist can only assist you with
exiting a parking space if you have parked thevehicle parallel to the direction of travel using
Active Parking Assist.
X Start the engine.
X Release the electric parking brake.
X Switch on the turn signal in the direction
you are pulling away.
X Shift the transmission to position Dor R.
The Start Park Assist? Yes: OK No: Start Park Assist? Yes: OK No:
message appears in the multifunction dis-
play %.
X To cancel the procedure: press the%
button on the multifunction steering wheel
or pull away.
or X To exit a parking space using Active
Parking Assist: press theabutton on
the multifunction steering wheel.
The Park Assist Active Accelerate Park Assist Active Accelerate
and
and Brake
Brake Observe
Observe Surroundings
Surroundings mes-
sage appears in the multifunction display.
X Let go of the multifunction steering wheel.
X Pull away, being ready to brake at all times.
Do not exceed a maximum speed of
approximately 6 mph (10 km/h) when exit-
ing a parking space. Otherwise Active Park- ing Assist will be canceled.
X Stop when PARKTRONIC sounds the con-
tinuous warning tone, if not before.
X Depending on the message or as required,
shift the transmission to position Dor R.
Active Parking Assist immediately steers in the other direction. The Park Assist Park Assist
Active Accelerate and Brake
Active Accelerate and Brake
Observe Observe Surroundings
Surroundings message appears
in the multifunction display.
i You will achieve the best results by wait-
ing for the steering procedure to complete before pulling away.
If you back up after activation, the steeringwheel is moved to the straight-ahead posi-
tion. Driving systems
171Driving and parking Z
Page 195 of 338
X
Press the 9or: button to select the
desired name.
or X To begin rapid scrolling: press and hold
the 9 or: button for longer than
one second.
Rapid scrolling stops when you release the button or reach the end of the list.
X If only one telephone number is stored
for a name: press the6ora button
to start dialing.
or X If there is more than one number for a
particular name: press the6ora
button to display the numbers.
X Press the 9or: button to select the
number you want to dial.
X Press the 6ora button to start dial-
ing.
or
X If you do not want to make the call: press
the ~ or% button.
Redialing The on-board computer saves the last names
or numbers dialed in the redial memory.
X Press the =or; button on the steer-
ing wheel to select the Tel Telmenu.
X Press the 6button to switch to the
redial memory.
X Press the 9or: button to select the
desired name or number.
X Press the 6ora button to start dial-
ing.
or X If you do not want to make the call: press
the ~ or% button. Assistance menu
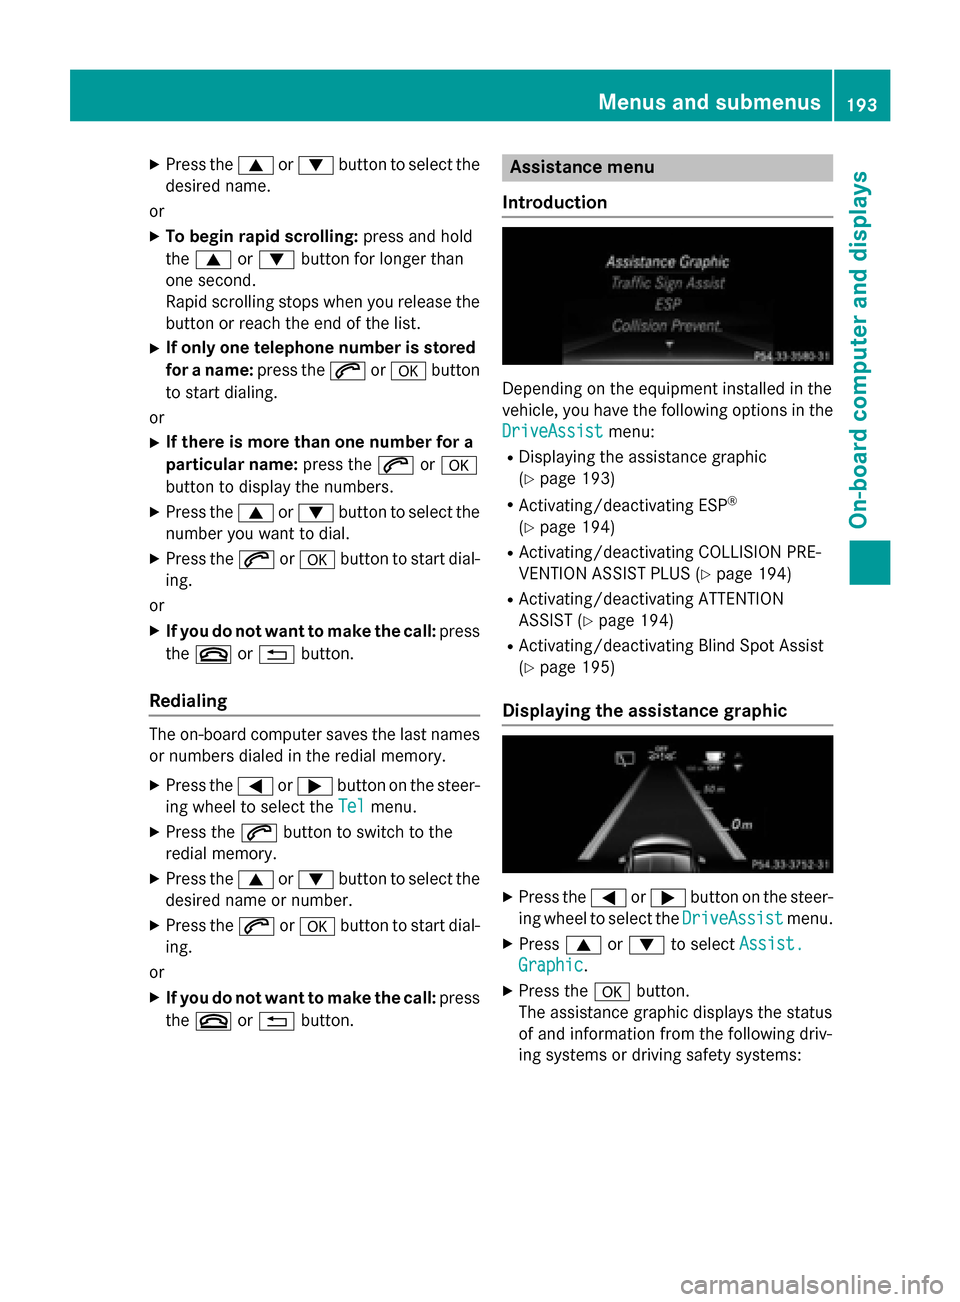
Introduction Depending on the equipment installed in the
vehicle, you have the following options in the
DriveAssist
DriveAssist menu:
R Displaying the assistance graphic
(Y page 193)
R Activating/deactivating ESP ®
(Y page 194)
R Activating/deactivating COLLISION PRE-
VENTION ASSIST PLUS (Y page 194)
R Activating/deactivating ATTENTION
ASSIST (Y page 194)
R Activating/deactivating Blind Spot Assist
(Y page 195)
Displaying the assistance graphic X
Press the =or; button on the steer-
ing wheel to select the DriveAssist DriveAssistmenu.
X Press 9or: to select Assist.
Assist.
Graphic
Graphic.
X Press the abutton.
The assistance graphic displays the status
of and information from the following driv-
ing systems or driving safety systems: Menus and submenus
193On-board computer and displays Z
Page 283 of 338
X
Stop the vehicle on solid, non-slippery and
level ground, as far away as possible from
traffic.
X Switch on the hazard warning lamps.
X Secure the vehicle against rolling away
(Y page 153).
X If possible, bring the front wheels into the
straight-ahead position.
X Switch off the drive system.
X Vehicles without KEYLESS-GO: remove
the SmartKey from the ignition lock.
X Vehicles with KEYLESS-GO start-func-
tion or KEYLESS-GO: open the driver's
door.
The on-board electronics now have status
0. This is the same as the SmartKey having
been removed.
X Vehicles with KEYLESS-GO start-func-
tion or KEYLESS-GO: remove the Start/
Stop button from the ignition lock
(Y page 131).
X All occupants must get out of the vehicle.
Make sure that they are not endangered as
they do so.
X Make sure that no one is near the danger
area while a wheel is being changed. Any-
one who is not directly assisting in the
wheel change should, for example, stand
behind the barrier.
X Get out of the vehicle. Pay attention to traf-
fic conditions when doing so.
X Close the driver's door.
i Vehicles equipped with MOExtended tires
are not equipped with a TIREFIT kit at the
factory. It is therefore recommended that
you additionally equip your vehicle with a
TIREFIT kit if you mount tires that do not
feature run-flat properties, e.g. winter tires. A TIREFIT kit can be obtained from a quali-
fied specialist workshop. MOExtended tires (tires with run-flat
properties)
General notes With MOExtended tires (tires with run flat
characteristics), you can continue to drive
your vehicle even if there is a total loss of
pressure in one or more tires. The affected
tire must not show any clearly visible damage.
You can recognize MOExtended tires by the
MOExtended marking which appears on the
sidewall of the tire. You will find this marking next to the tire size designation, the load-
bearing capacity and the speed index
(Y page 315).
MOExtended tires may only be used in con-
junction with an active tire pressure monitor.
If a pressure loss warning message
appears in the multifunction display:
R observe the instructions in the display mes-
sages (Y page 221).
R check the tire for damage.
R if driving on, observe the following notes.
The driving distance possible in run-flat mode is approximately 50 miles (80 km) when the
vehicle is partially laden and approximately
18 miles (30 km) when the vehicle is fully
laden.
In addition to the vehicle load, the driving dis-
tance possible depends upon:
R vehicle speed
R road condition
R outside temperature
The driving distance possible in run-flat mode may be reduced by extreme driving condi-
tions/maneuvers, or it can be increased
through a moderate style of driving.
The driving distance possible in run-flat modeis counted from the moment the tire pressure
loss warning appears in the multifunction dis-
play.
You must not exceed a maximum speed of
50 mph (80 km/h). Flat tire
281Roadside Assistance
Page 295 of 338
!
When towing, pull away slowly and
smoothly. If the tractive power is too high,
the vehicles could be damaged.
! The vehicle can be towed a maximum of
30 miles (50km). The towing speed of
30 mph (50km/h) must not be exceeded.
If the vehicle has to be towed more than
30 miles (50km), the front axle must be
raised or the entire vehicle raised and
transported.
! Do not tow with sling-type equipment.
This could damage the vehicle.
! To tow vehicles with KEYLESS-GO, use
the SmartKey instead of the Start/Stop
button. The transmission may otherwise
shift to position Pwhen you open the driv-
er's or front-passenger door, which could
damage the transmission.
Observe the legal requirements for the rele-
vant countries when towing away.
Make sure that no charging cable is plugged
in. The parking lock cannot be released if a
charging cable is plugged in.
It is better to have the vehicle transported
than to have it towed away.
If the vehicle can no longer be driven because
of an accident or breakdown, you have the
following options:
R transporting the vehicle
As a rule, you should have the vehicle trans-
ported.
R towing the vehicle with a tow rope or tow
bar
Only tow the vehicle in exceptional cases.
Observe the following notes.
The vehicle may not be towed and must
always be transported if:
R the multifunction display is not working
R one of more of the following warning lamps
is lit up:
- Drive system
- 12 V battery R
one or both of the following display mes-
sages have appeared:
- Stop Switch Engine Off
Stop Switch Engine Off
- Service Required Do Not Shift Service Required Do Not Shift
Gears Visit Dealer Gears Visit Dealer
R the brake pedal begins to pulsate as the
towing procedure commences.
R you have to tow the vehicle over a longer
distance than 30 miles (50 km)
When towing a vehicle, the transmission must be in position N.
The battery must be connected and charged.
Otherwise, you:
R cannot turn the SmartKey to position 2in
the ignition lock
R cannot release the electric parking brake
R cannot shift the transmission to position N
i The function of the electric parking brake
and the parking lock is dependent on the
on-board voltage.
If the on-board voltage is low or there is a
system malfunction, it is possible that:
R the electric parking brake may not be
applied in certain circumstances, or
R the transmission may not be shifted to P
i Switch off non-essential consumers, e.g.
the radio.
i Disarm the automatic locking feature
(Y page 198). You could otherwise be
locked out when pushing or towing the
vehicle. Towing
293Roadside Assistance Z
Page 296 of 338
Installing/removing the towing eye
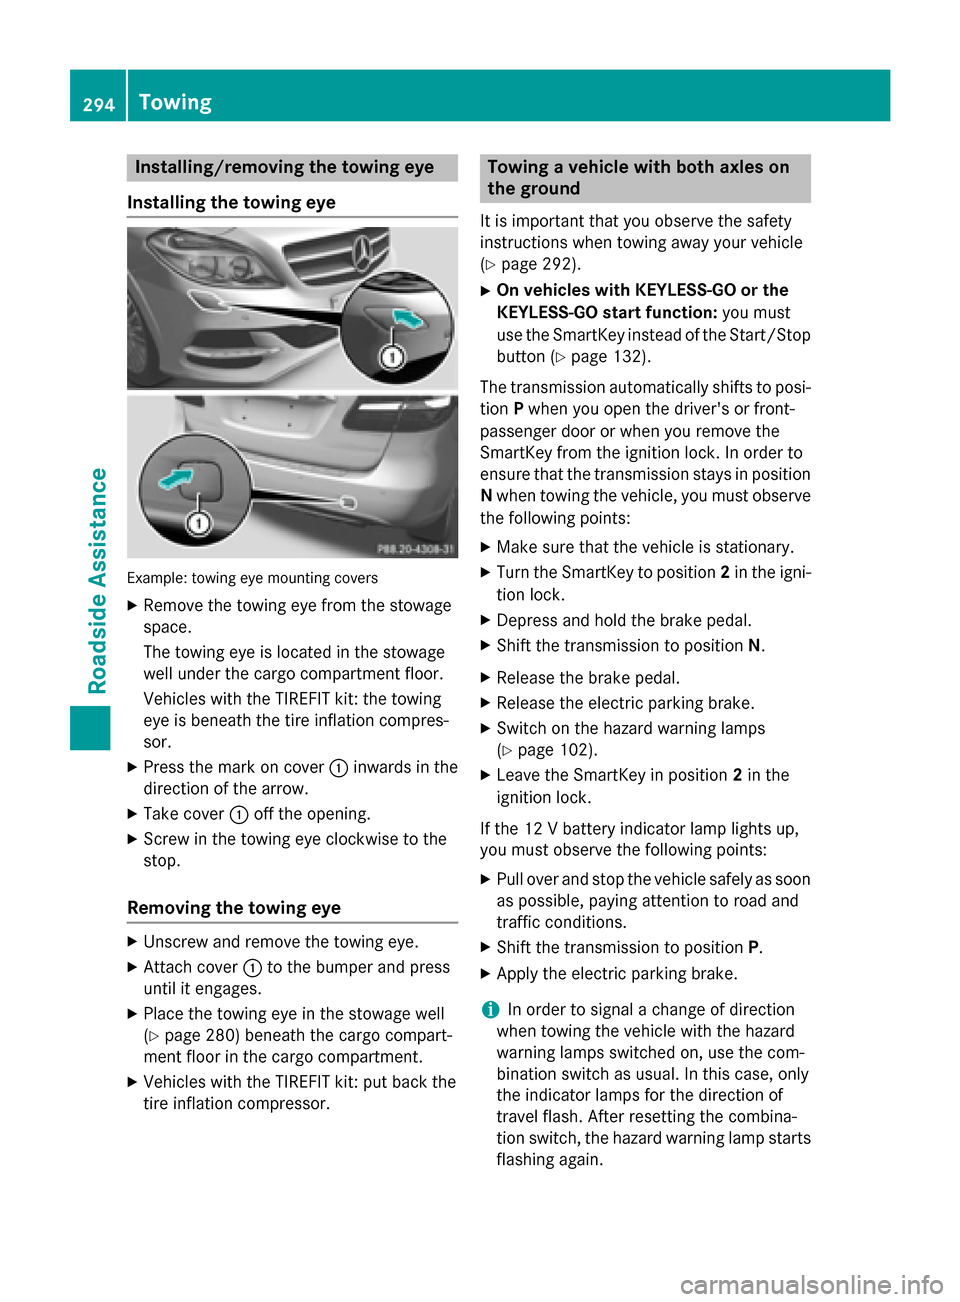
Installing the towing eye Example: towing eye mounting covers
X Remove the towing eye from the stowage
space.
The towing eye is located in the stowage
well under the cargo compartment floor.
Vehicles with the TIREFIT kit: the towing
eye is beneath the tire inflation compres-
sor.
X Press the mark on cover :inwards in the
direction of the arrow.
X Take cover :off the opening.
X Screw in the towing eye clockwise to the
stop.
Removing the towing eye X
Unscrew and remove the towing eye.
X Attach cover :to the bumper and press
until it engages.
X Place the towing eye in the stowage well
(Y page 280) beneath the cargo compart-
ment floor in the cargo compartment.
X Vehicles with the TIREFIT kit: put back the
tire inflation compressor. Towing a vehicle with both axles on
the ground
It is important that you observe the safety
instructions when towing away your vehicle
(Y page 292).
X On vehicles with KEYLESS-GO or the
KEYLESS-GO start function: you must
use the SmartKey instead of the Start/Stop
button (Y page 132).
The transmission automatically shifts to posi- tion Pwhen you open the driver's or front-
passenger door or when you remove the
SmartKey from the ignition lock. In order to
ensure that the transmission stays in position N when towing the vehicle, you must observe
the following points:
X Make sure that the vehicle is stationary.
X Turn the SmartKey to position 2in the igni-
tion lock.
X Depress and hold the brake pedal.
X Shift the transmission to position N.
X Release the brake pedal.
X Release the electric parking brake.
X Switch on the hazard warning lamps
(Y page 102).
X Leave the SmartKey in position 2in the
ignition lock.
If the 12 V battery indicator lamp lights up,
you must observe the following points:
X Pull over and stop the vehicle safely as soon
as possible, paying attention to road and
traffic conditions.
X Shift the transmission to position P.
X Apply the electric parking brake.
i In order to signal a change of direction
when towing the vehicle with the hazard
warning lamps switched on, use the com-
bination switch as usual. In this case, only
the indicator lamps for the direction of
travel flash. After resetting the combina-
tion switch, the hazard warning lamp starts
flashing again. 294
TowingRoadside Assistance
Page 297 of 338
Towing the vehicle with the front axle
raised
When towing your vehicle with the rear axle
raised, it is important that you observe the
safety instructions (Y page 292).
! The ignition must be switched off if the
vehicle is being towed with the front axle
raised. Otherwise, ESP ®
may intervene and
damage the brake system.
X On vehicles with KEYLESS-GO or the
KEYLESS-GO start function: you must
use the SmartKey instead of the Start/Stop button (Y page 132).
X Make sure that the vehicle is stationary.
X Turn the SmartKey to position 2in the igni-
tion lock.
X When the vehicle is stationary, depress the
brake pedal and keep it depressed.
X Shift the transmission to position P.
X Release the brake pedal.
X Release the electric parking brake.
X Switch off the automatic locking
(Y page 198).
X Switch on the hazard warning lamps
(Y page 102).
X Turn the SmartKey in the ignition lock to
position 0and leave the SmartKey in the
ignition lock. Towing the vehicle with the rear axle
raised
When towing your vehicle with the rear axle
raised, it is important that you observe the
safety instructions (Y page 292).
! The ignition must be switched off if you
are towing the vehicle with the rear axle
raised. Intervention by ESP ®
could other-
wise damage the brake system. The transmission automatically shifts to posi-
tion Pwhen you open the driver's or front-
passenger door or when you remove the
SmartKey from the ignition lock. In order to
ensure that the transmission stays in position N when towing the vehicle, you must observe
the following points:
X On vehicles with KEYLESS-GO or the
KEYLESS-GO start function: you must
use the SmartKey instead of the Start/Stop
button (Y page 132).
X Make sure that the vehicle is stationary.
X Turn the SmartKey to position 2in the igni-
tion lock.
X Depress and hold the brake pedal.
X Shift the transmission to position N.
X Release the brake pedal.
X Apply the electric parking brake.
X Switch off the automatic locking
(Y page 198).
X Bring the front wheels into the straight-
ahead position.
X Switch on the hazard warning lamps
(Y page 102).
X Turn the SmartKey in the ignition lock to
position 0and leave the SmartKey in the
ignition lock. Transporting the vehicle
! You may only secure the vehicle by the
wheels, not by parts of the vehicle such as
axle or steering components. Otherwise,
the vehicle could be damaged.
X Turn the SmartKey to position 2in the igni-
tion lock (Y page 131).
X Shift the transmission to position N.
As soon as the vehicle has been loaded:
X Prevent the vehicle from rolling away by
applying the electric parking brake.
X Shift the transmission to position P. Towing
295Roadside Assistance Z