2015 LINCOLN MKT trunk
[x] Cancel search: trunkPage 18 of 500
GENERAL INFORMATION
See the following sections for directions on how to properly use safety
restraints for children.
WARNING:Always make sure your child is secured properly in a
device that is appropriate for their height, age and weight. Child
safety restraints must be bought separately from your vehicle. Failure
to follow these instructions and guidelines may result in an increased
risk of serious injury or death to your child.
WARNING:All children are shaped differently. The
recommendations for safety restraints are based on probable
child height, age and weight thresholds from NHTSA and other safety
organizations, or are the minimum requirements of law. Ford
recommends checking with a NHTSA Certified Child Passenger Safety
Technician (CPST) and consulting your pediatrician to make sure your
child seat is appropriate for your child, and is compatible with and
properly installed in your vehicle. To locate a child seat fitting station
and CPST, contact the NHTSA toll free at 1-888-327-4236 or on the
internet at http://www.nhtsa.dot.gov. In Canada, check with your local
St. John Ambulance office for referral to a CPST or for further
information, contact your provincial ministry of transportation, or locate
your local St. John Ambulance office by searching for St. John
Ambulance on the internet, or Transport Canada at 1–800–333–0371
(http://www.tc.gc.ca). Failure to properly restrain children in safety
seats made especially for their height, age, and weight may result in an
increased risk of serious injury or death to your child.
WARNING:Do not leave children or animals unattended in the
vehicle. On hot days, the temperature in the trunk or vehicle
interior can rise very quickly. Exposure of people or animals to these
high temperatures for even a short time can cause death or serious
heat-related injuries, including brain damage. Small children are
particularly at risk.
Child Safety17
2015 MKT(mkt)
Owners Guide gf, 1st Printing, October 2014
USA(fus)
Page 127 of 500
Collision Warning
System MessagesAction / Description
Collision Warning
MalfunctionDisplayed when there is a system malfunction
with the collision warning system. The system
will be disabled. Contact your authorized
dealer as soon as possible.
Door Messages Action / Description
X Door Ajar Displayed when a door is not completely
closed.
Liftgate Ajar Displayed when the trunk is not completely
closed.
Driver Alert
MessagesAction / Description
Driver Alert Warning
Rest NowStop and rest as soon as it is safe to do so.
Driver Alert Warning
Rest suggestedTake a rest break soon.
Fuel Messages Action / Description
Check Fuel Fill Inlet Displayed when the fuel fill inlet may not be
properly closed.
Fuel Level LOW Displayed as an early reminder of a low fuel
condition.
126Information Displays
2015 MKT(mkt)
Owners Guide gf, 1st Printing, October 2014
USA(fus)
Page 212 of 500
WARNING:Use caution when using the rear video camera and
the trunk is ajar. If the trunk is ajar, the camera will be out of
position and the video image may be incorrect. All guidelines have been
removed when the trunk is ajar.
WARNING:Use caution when turning camera features on or off
while in R (Reverse). Make sure the vehicle is not moving.
The rear view camera system provides a video image of the area behind
the vehicle.
During operation, lines appear in the display which represent your
vehicle’s path and proximity to objects behind the vehicle.
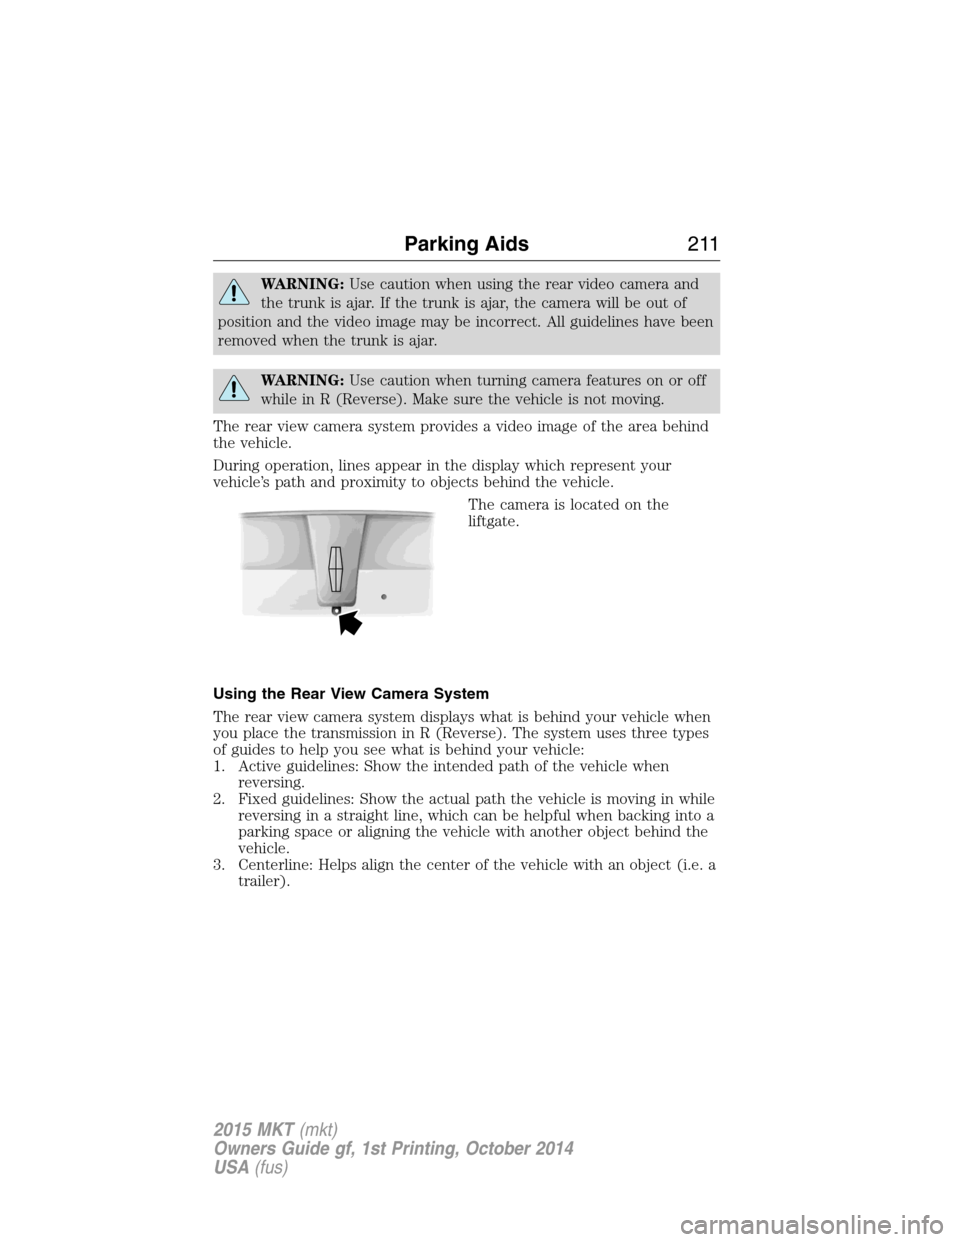
The camera is located on the
liftgate.
Using the Rear View Camera System
The rear view camera system displays what is behind your vehicle when
you place the transmission in R (Reverse). The system uses three types
of guides to help you see what is behind your vehicle:
1. Active guidelines: Show the intended path of the vehicle when
reversing.
2. Fixed guidelines: Show the actual path the vehicle is moving in while
reversing in a straight line, which can be helpful when backing into a
parking space or aligning the vehicle with another object behind the
vehicle.
3. Centerline: Helps align the center of the vehicle with an object (i.e. a
trailer).
Parking Aids211
2015 MKT(mkt)
Owners Guide gf, 1st Printing, October 2014
USA(fus)
Page 213 of 500
Note:If the transmission is in R (Reverse) and the trunk/liftgate is ajar,
no rear view camera features are displayed.
Note:If the image comes on while the transmission is not in R
(Reverse), have the system inspected by your authorized dealer.
Note:When towing, the camera only sees what is being towed behind
the vehicle. This might not provide adequate coverage as it usually
provides in normal operation and some objects might not be seen. In
some vehicles, the guidelines may disappear once the trailer tow
connector is engaged.
Note:The camera may not operate correctly under the following
conditions:
•Nighttime or dark areas if one or both reverse lamps are not
operating. Do not use the rear view camera display when lighting is
low until both reverse lamps are functional.
•The camera’s view is obstructed by mud, water or debris. Clean the
lens with a soft, lint-free cloth and non-abrasive cleaner.
•The rear of the vehicle is hit or damaged, causing the camera to
become misaligned. Check with your authorized dealer to have the
rear view camera system checked for proper coverage and operation.
Adjusting the Rear View Camera Settings (If Equipped)
To access any of the rear view camera system settings, make the
following selections in the touch screen when the transmission is not in
R (Reverse):
1. Menu
2. Vehicle
3. Rear View Camera
After changing a system setting, the touch screen shows a preview of the
feature(s) selected.
212Parking Aids
2015 MKT(mkt)
Owners Guide gf, 1st Printing, October 2014
USA(fus)
Page 325 of 500

•Do not use hydrofluoric acid-based or high caustic-based wheel
cleaners, steel wool, fuels or strong household detergent.
•If you intend on parking your vehicle for an extended period after
cleaning the wheels with a wheel cleaner, drive your vehicle for a few
minutes before doing so. This reduces the risk of increased corrosion
of the brake discs.
VEHICLE STORAGE
If you plan on storing your vehicle for an extended period of time
(30 days or more), read the following maintenance recommendations to
make sure your vehicle stays in good operating condition.
All motor vehicles and their components were engineered and tested for
reliable, regular driving. Long-term storage under various conditions may
lead to component degradation or failure unless specific precautions are
taken to preserve the components.
General
•Store all vehicles in a dry, ventilated place.
•Protect from sunlight, if possible.
•If vehicles are stored outside, they require regular maintenance to
protect against rust and damage.
Body
•Wash vehicle thoroughly to remove dirt, grease, oil, tar or mud from
exterior surfaces, rear-wheel housing and underside of front fenders.
•Periodically wash vehicles stored in exposed locations.
•Touch up raw or primed metal to prevent rust.
•Cover chrome and stainless steel parts with a thick coat of auto wax
to prevent discoloration. Re-wax as necessary when the vehicle is
washed.
•Lubricate hood latch, all door latches and trunk lid hinges with a light
grade oil.
•Cover interior trim to prevent fading.
•Keep all rubber parts free from oil and solvents.
324Vehicle Care
2015 MKT(mkt)
Owners Guide gf, 1st Printing, October 2014
USA(fus)
Page 354 of 500

WARNING:Always use the jack provided as original equipment
with your vehicle. If using a jack other than the one provided as
original equipment with your vehicle, make sure the jack capacity is
adequate for the vehicle weight, including any vehicle cargo or
modifications.
Note:Passengers should not remain in the vehicle when the vehicle is
being jacked.
1. Park on a level surface, set the parking brake and activate the hazard
flashers.
2. Place the transmission in park (P) and turn the engine off.
Non-limousine:If the third row seat is stowed in the floor, you will
need to unstow it to access the spare tire and jack.
3. Remove the carpeted floor panel
located in the rear of the vehicle. Then
remove the wing nut that secures the
spare tire by turning it counterclockwise.
4. Lift and remove the spare tire from
the trunk.
5. Remove the second wing nut that
secures the jack retention bracket by
turning it counterclockwise. Remove the
jack kit from the vehicle.
6. Remove the jack, L-shaped bolt, and
the wrench from the felt bag. Fold down
the wrench socket to use to loosen the
lug nuts and to operate the jack.
Wheels and Tires353
2015 MKT(mkt)
Owners Guide gf, 1st Printing, October 2014
USA(fus)
Page 355 of 500
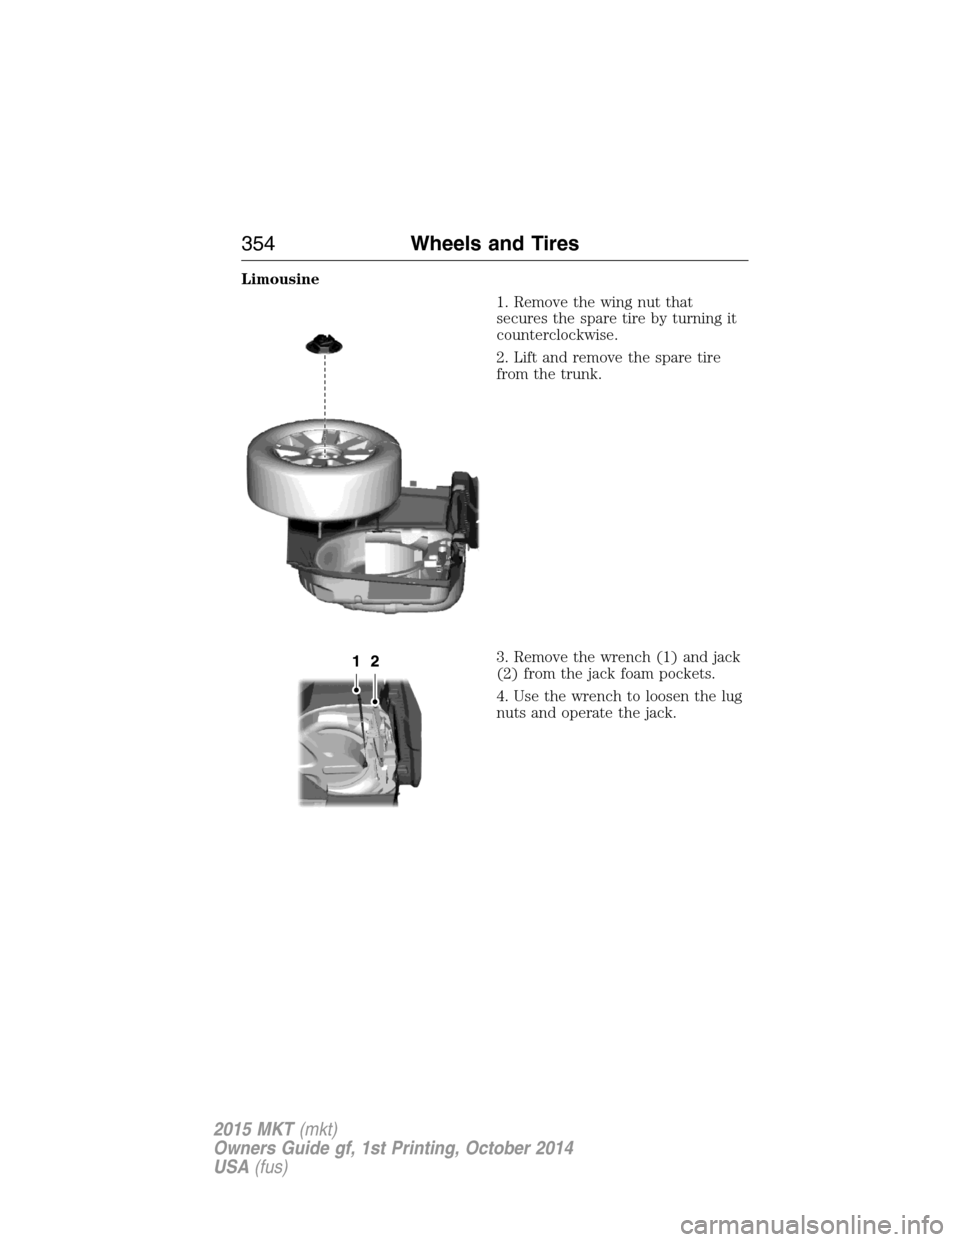
Limousine
1. Remove the wing nut that
secures the spare tire by turning it
counterclockwise.
2. Lift and remove the spare tire
from the trunk.
3. Remove the wrench (1) and jack
(2) from the jack foam pockets.
4. Use the wrench to loosen the lug
nuts and operate the jack.
354Wheels and Tires
2015 MKT(mkt)
Owners Guide gf, 1st Printing, October 2014
USA(fus)
Page 357 of 500
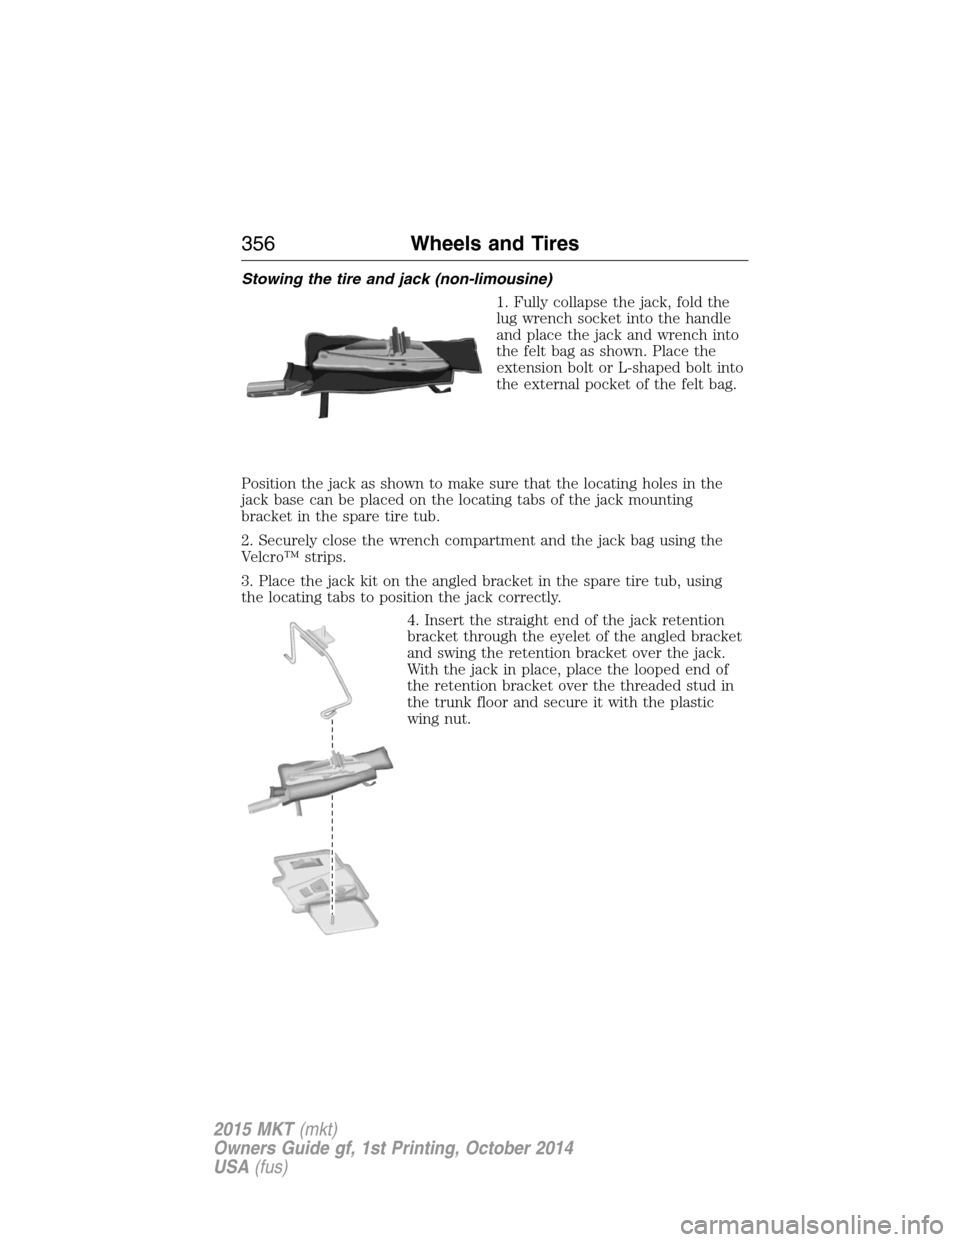
Stowing the tire and jack (non-limousine)
1. Fully collapse the jack, fold the
lug wrench socket into the handle
and place the jack and wrench into
the felt bag as shown. Place the
extension bolt or L-shaped bolt into
the external pocket of the felt bag.
Position the jack as shown to make sure that the locating holes in the
jack base can be placed on the locating tabs of the jack mounting
bracket in the spare tire tub.
2. Securely close the wrench compartment and the jack bag using the
Velcro™ strips.
3. Place the jack kit on the angled bracket in the spare tire tub, using
the locating tabs to position the jack correctly.
4. Insert the straight end of the jack retention
bracket through the eyelet of the angled bracket
and swing the retention bracket over the jack.
With the jack in place, place the looped end of
the retention bracket over the threaded stud in
the trunk floor and secure it with the plastic
wing nut.
356Wheels and Tires
2015 MKT(mkt)
Owners Guide gf, 1st Printing, October 2014
USA(fus)