Page 674 of 886
6744-3. Do-it-yourself maintenance
Engine oil
With the engine at operating temperat ure and turned off, check the oil
level on the dipstick.
■ Checking the engine oil
Park the vehicle on level grou nd. After warming up the engine
and turning it off, wait more th an 5 minutes for the oil to drain
back into the bottom of the engine.
Holding a rag under the end, pull
the dipstick out.
Wipe the dipstick clean.
Reinsert the dipstick fully.
Holding a rag under the end, pull the dipstick out and check the
oil level.
Low
Normal
Excessive
The shape of the dipstick may dif-
fer depending on the type of vehi-
cle or engine.
Wipe the dipstick and reinsert it fully.STEP 1
STEP 2
STEP 3
STEP 4
STEP 5
STEP 6
Page 675 of 886

6754-3. Do-it-yourself maintenance
4
Maintenance and care ■ Adding engine oil
If the oil level is below or near the
low level mark, add engine oil of
the same type as th at already in the
engine.
Make sure to check th e oil type and prepare the items needed before
adding oil.
Remove the oil filler cap by turning it counterclockwise.
Add engine oil slowly, checking the dipstick.
Install the oil filler cap by turning it clockwise.Engine oil
selection P. 8 0 9
Oil quantity
(Low Full) 1.6 qt. (1.5 L, 1.3 Imp. qt.)
Items Clean funnel
■
Engine oil consumption
A certain amount of engine oil will be consumed while driving. In the following situ-
ations, oil consumption may increase, and engine oil may need to be refilled in
between oil maintenance intervals.
●
When the engine is new, for example di rectly after purchasing the vehicle or
after replacing the engine
●
If low quality oil or oil of an inappropriate viscosity is used
●
When driving at high engi ne speeds or with a heavy load, when towing, or when
driving while accelerating or decelerating frequently
●
When leaving the engine id ling for a long time, or when driving frequently
through heavy traffic STEP 1
STEP 2
STEP 3
Page 676 of 886

6764-3. Do-it-yourself maintenance
CAUTION■
Used engine oil ●
Used engine oil contains potentially harmful contaminants which may cause skin
disorders such as inflammati on or skin cancer, so care should be taken to avoid
prolonged and repeated contact. To remove used engine oil from your skin, wash
thoroughly with soap and water.●
Dispose of used oil and filters only in a safe and acceptable manner. Do not dis-
pose of used oil and filters in househol d trash, in sewers or onto the ground.
Call your Lexus dealer, service station or auto parts store for information con-
cerning recycling or disposal.●
Do not leave used engine oil within the reach of children.
NOTICE■
To prevent serious engine damage
Check the oil level on a regular basis.■
When replacing the engine oil ●
Be careful not to spill engine oil on the vehicle components.●
Avoid overfilling, or the engine could be damaged.●
Check the oil level on the dipstick every time you refill the vehicle.●
Be sure the engine oil filler cap is properly tightened.
Page 731 of 886

7314-3. Do-it-yourself maintenance
4
Maintenance and care CAUTION■
Replacing light bulbs ●
Turn off the lights. Do not attempt to replace the bulb immediately after turning
off the lights.
The bulbs become very hot and may cause burns.●
Do not touch the glass portion of the li ght bulb with bare hands. When it is
unavoidable to hold the glass portion, use and hold with a clean dry cloth to avoid
getting moisture and oils on the bulb.
Also, if the bulb is scratched or dropped, it may blow out or crack.●
Fully install light bulbs and any parts used to secure them. Failure to do so may
result in heat damage, fire, or water en tering the headlight unit. This may damage
the headlights or cause condensation to build up on the lens. ●
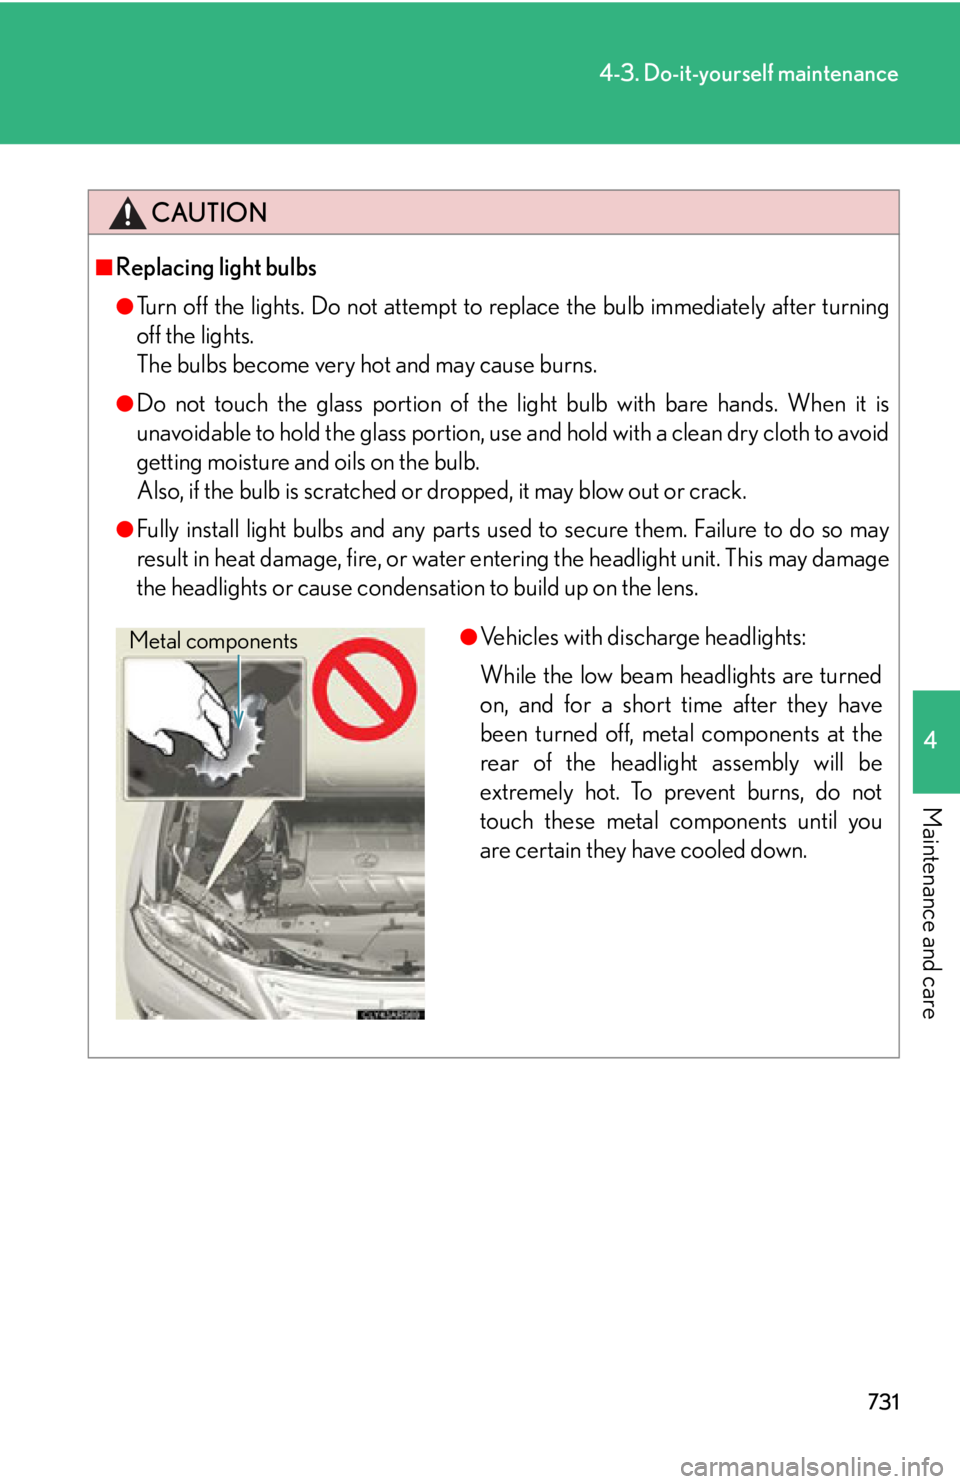
Vehicles with discharge headlights:
While the low beam headlights are turned
on, and for a short time after they have
been turned off, metal components at the
rear of the headlight assembly will be
extremely hot. To prevent burns, do not
touch these metal components until you
are certain they have cooled down.Metal components
Page 755 of 886
5
When trouble arises
7555-2. Steps to take in an emergency
Stop the vehicle immediately.
A buzzer sounds and a warning message is shown on th e multi-informa-
tion display. The following warning indicates the possibility of damage to
the vehicle that may lead to an accident. Immediately stop the vehicle in a
safe place and contact your Lexus dealer. Wa r n i n g m e s s a g e Details
(U.S.A.)
(Canada) Indicates abnormal engine oil pressure
The warning light may come on if the engine oil pres-
sure is too low.
(Flashes)
(AWD models) Indicates the AWD system has overheated
Page 786 of 886

7865-2. Steps to take in an emergency
CAUTION■
Replacing a flat tire ●
Observe the following precautions.
Failure to do so may result in serious injury:
• Do not touch the disc wheels or the ar ea around the brakes immediately after
the vehicle has been driven.
After the vehicle has been driven the disc wheels and the area around the
brakes will be extremely hot. Touching these areas with hands, feet or other
body parts while changing a tire, etc. may result in burns.
• Do not attach a heavily damaged wheel ornament, as it may fly off the wheel
while the vehicle is moving.●
Failure to follow these precautions could cause the wheel nuts to loosen and the
tire to fall off, resulting in death or serious injury.
• Never use oil or grease on the wheel bolts or wheel nuts.
Oil and grease may cause the wheel nuts to be excessively tightened, leading
to bolt or disc wheel damage. In addition, the oil or grease can cause the
wheel nuts to loosen and the wheel may fall off, causing a serious accident.
Remove any oil or grease from the wheel bolts or wheel nuts.
• Have the wheel nuts tightened with a to rque wrench to 76 ft•lbf (103 N•m,
10.5 kgf•m) as soon as possible after changing wheels.
• When installing a tire, only use whee l nuts that have been specifically
designed for that wheel.
• If there are any cracks or deformations in the bolt screws, nut threads or bolt
holes of the wheel, have the vehicle inspected by your Lexus dealer.■
Replacing a flat tire for ve hicles with power back door
In cases such as when replacing tires, make sure to turn off the power back door
main switch ( P. 58). Failure to do so may cause the back door to operate unin-
tentionally if the power back door switch is accidentally touched, resulting in hands
and fingers being caught and injured.
Page 807 of 886
Vehicle specifications
6
8056-1. Specifications
Maintenance data
(fuel, oil level, etc.) .............. 806
Fuel information ...................... 818
Tire information....................... 821
6-2. Customization
Customizable features ........ 834
6-3. Initialization
Items to initialize .................... 847
Page 808 of 886
8066-1. Specifications
Maintenance data (fue l, oil level, etc.)Dimensions and weight
* 1
: Unladen vehicles
* 2
: Vehicles without roof antenna and roof rails
* 3
: Vehicles with roof antenna but without roof rails
* 4
: Vehicles with roof rails
* 5
: Without towing package
* 6
: With towing packageOverall length 187.8 in. (4770 mm)
Overall width 74.2 in. (1885 mm)
Overall height
* 1
66.3 in. (1685 mm)
* 2
66.7 in. (1695 mm)
* 3
67.9 in. (1725 mm)
* 4
Wheelbase 107.9 in. (2740 mm)
Tr e a d Front 64.2 in. (1630 mm)
Rear 64.0 in. (1625 mm)
Vehicle capacity weight
(Occupants + luggage) 885 lb. (400 kg)
Trailer Weight Rating
(trailer weight + cargo weight) 2000 lb. (907 kg)
* 5
3500 lb. (1588 kg)
* 6