Page 44 of 407
331
Safety features of your vehicle
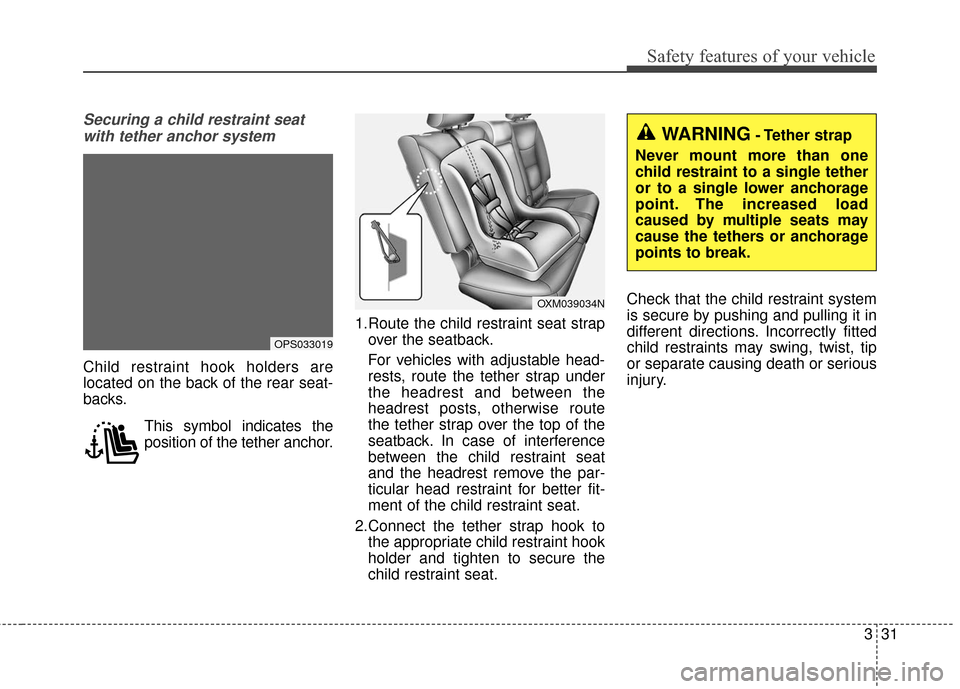
Securing a child restraint seatwith tether anchor system
Child restraint hook holders are
located on the back of the rear seat-
backs.
This symbol indicates the
position of the tether anchor. 1.Route the child restraint seat strap
over the seatback.
For vehicles with adjustable head-
rests, route the tether strap under
the headrest and between the
headrest posts, otherwise route
the tether strap over the top of the
seatback. In case of interference
between the child restraint seat
and the headrest remove the par-
ticular head restraint for better fit-
ment of the child restraint seat.
2.Connect the tether strap hook to the appropriate child restraint hook
holder and tighten to secure the
child restraint seat. Check that the child restraint system
is secure by pushing and pulling it in
different directions. Incorrectly fitted
child restraints may swing, twist, tip
or separate causing death or serious
injury.
OXM039034N
OPS033019
WARNING- Tether strap
Never mount more than one
child restraint to a single tether
or to a single lower anchorage
point. The increased load
caused by multiple seats may
cause the tethers or anchorage
points to break.
Page 45 of 407
Safety features of your vehicle
32
3
Securing a child restraint seat with
child seat lower anchor system
Some child seat manufacturers
make child restraint seats that are
labeled as LATCH or LATCH-com-
patible child restraint seats. LATCH
stands for "Lower Anchors and
Tethers for Children". These seats
include two rigid or webbing mount-
ed attachments that connect to two
LATCH anchors at specific seating
positions in your vehicle. This type of
child restraint seat eliminates the
need to use seat belts to attach the
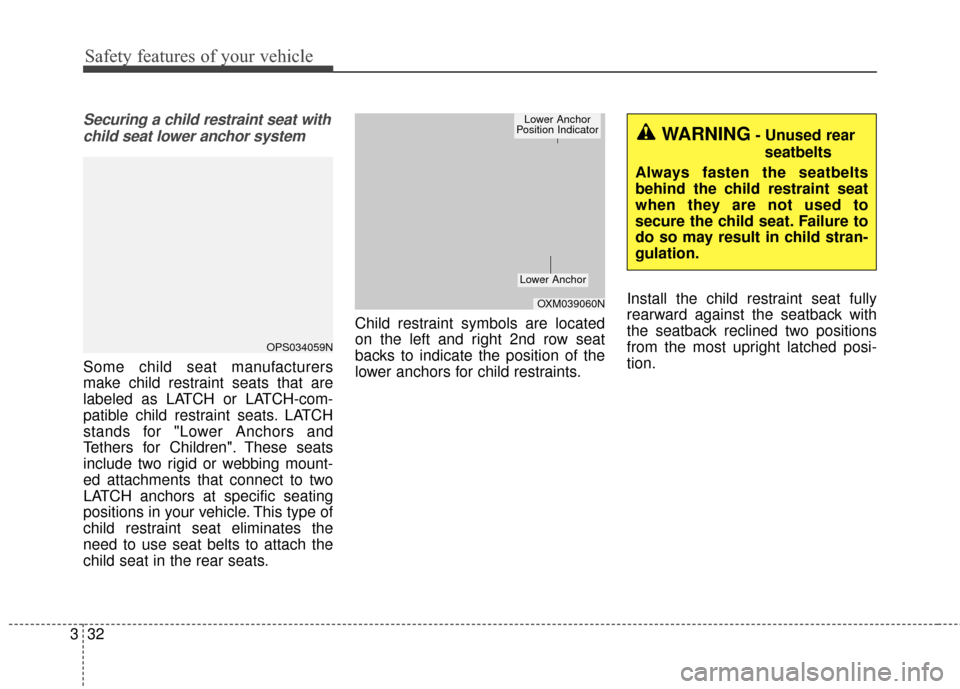
child seat in the rear seats. Child restraint symbols are located
on the left and right 2nd row seat
backs to indicate the position of the
lower anchors for child restraints.
Install the child restraint seat fully
rearward against the seatback with
the seatback reclined two positions
from the most upright latched posi-
tion.
OPS034059N
OXM039060N
Lower Anchor
Lower Anchor
Position Indicator
WARNING- Unused rear
seatbelts
Always fasten the seatbelts
behind the child restraint seat
when they are not used to
secure the child seat. Failure to
do so may result in child stran-
gulation.
Page 96 of 407
Features of your vehicle
26
4
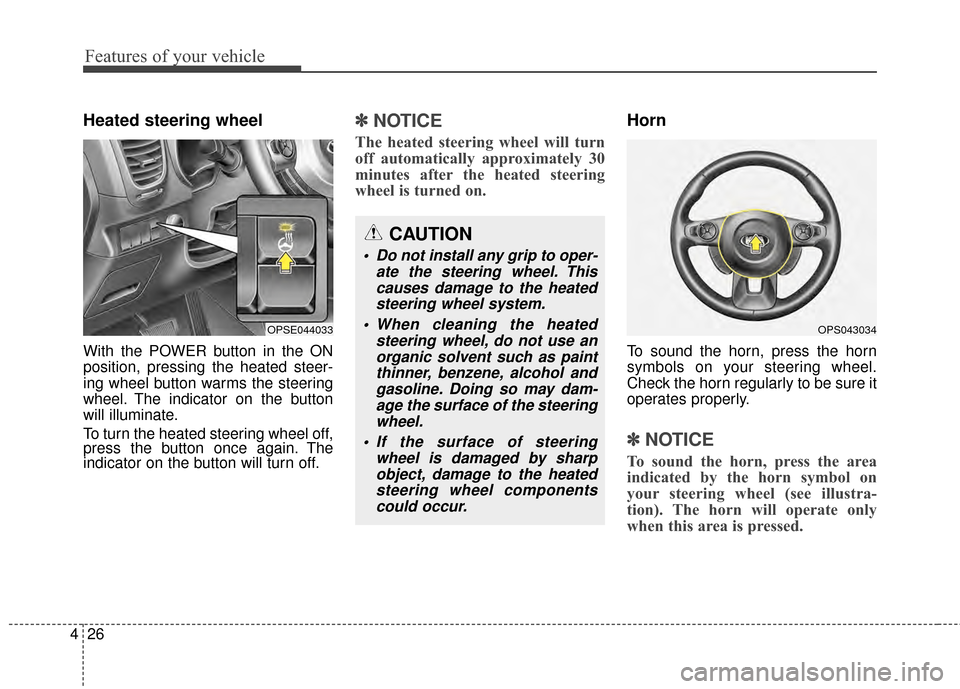
Heated steering wheel
With the POWER button in the ON
position, pressing the heated steer-
ing wheel button warms the steering
wheel. The indicator on the button
will illuminate.
To turn the heated steering wheel off,
press the button once again. The
indicator on the button will turn off.
✽ ✽
NOTICE
The heated steering wheel will turn
off automatically approximately 30
minutes after the heated steering
wheel is turned on.
Horn
To sound the horn, press the horn
symbols on your steering wheel.
Check the horn regularly to be sure it
operates properly.
✽ ✽NOTICE
To sound the horn, press the area
indicated by the horn symbol on
your steering wheel (see illustra-
tion). The horn will operate only
when this area is pressed.
OPSE044033OPS043034
CAUTION
Do not install any grip to oper-
ate the steering wheel. Thiscauses damage to the heatedsteering wheel system.
When cleaning the heated steering wheel, do not use anorganic solvent such as paintthinner, benzene, alcohol andgasoline. Doing so may dam-age the surface of the steeringwheel.
If the surface of steering wheel is damaged by sharpobject, damage to the heatedsteering wheel componentscould occur.
Page 110 of 407
Features of your vehicle
40
4
LCD Modes
LCD DISPLAY
Modes SymbolExplanation
EV informationThis mode displays EV system energy flow and ECO level.
For more details, refer to “EV information mode" in this chapter.
Trip Computer
This mode displays driving information like the tripmeter,
energy consumption, and so on.
For more details, refer to “Trip Computer” in this chapter.
A/VThis mode displays the state of the A/V system.
ServiceThis mode informs of service interval (mileage or days) and warning messages
related to TPMS and so on.
Master warning
User SettingsOn this mode, you can change settings of the doors, lamps, and so on.
❈ For controlling the LCD modes, refer to "LCD Display Control" in this chapter.
Page 302 of 407
739
Maintenance
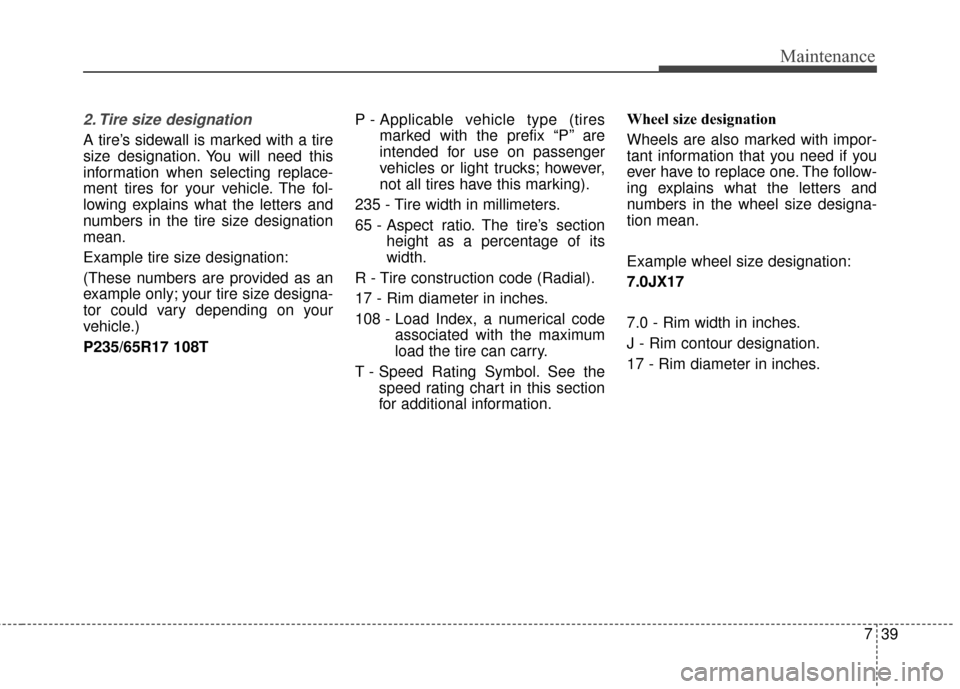
2. Tire size designation
A tire’s sidewall is marked with a tire
size designation. You will need this
information when selecting replace-
ment tires for your vehicle. The fol-
lowing explains what the letters and
numbers in the tire size designation
mean.
Example tire size designation:
(These numbers are provided as an
example only; your tire size designa-
tor could vary depending on your
vehicle.)
P235/65R17 108TP - Applicable vehicle type (tires
marked with the prefix “P’’ are
intended for use on passenger
vehicles or light trucks; however,
not all tires have this marking).
235 - Tire width in millimeters.
65 - Aspect ratio. The tire’s section height as a percentage of its
width.
R - Tire construction code (Radial).
17 - Rim diameter in inches.
108 - Load Index, a numerical code associated with the maximum
load the tire can carry.
T - Speed Rating Symbol. See the speed rating chart in this section
for additional information. Wheel size designation
Wheels are also marked with impor-
tant information that you need if you
ever have to replace one. The follow-
ing explains what the letters and
numbers in the wheel size designa-
tion mean.
Example wheel size designation:
7.0JX17
7.0 - Rim width in inches.
J - Rim contour designation.
17 - Rim diameter in inches.
Page 303 of 407
Maintenance
40
7
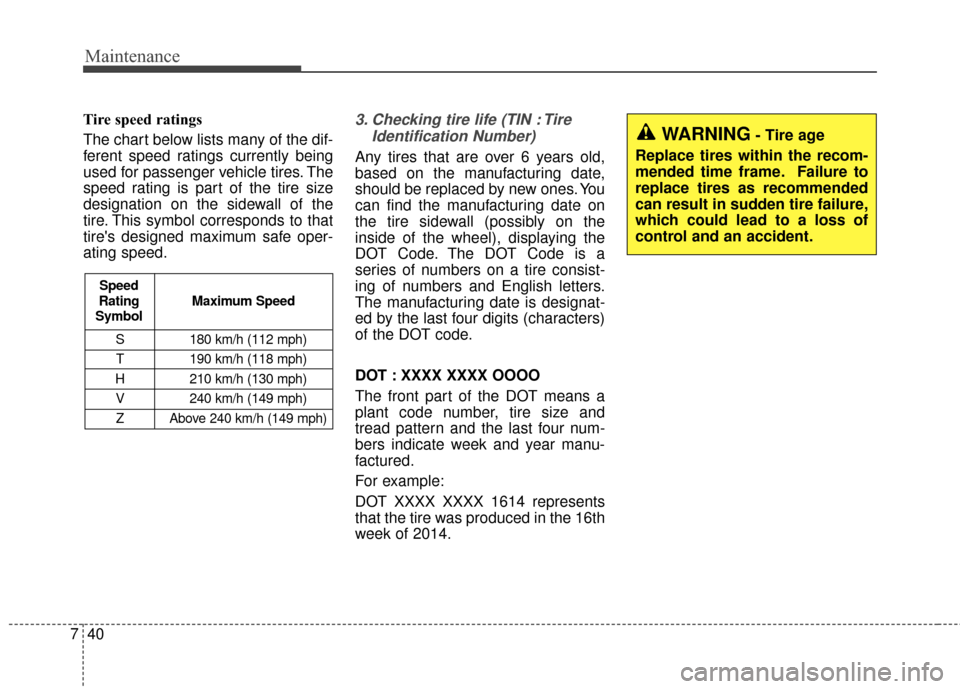
Tire speed ratings
The chart below lists many of the dif-
ferent speed ratings currently being
used for passenger vehicle tires. The
speed rating is part of the tire size
designation on the sidewall of the
tire. This symbol corresponds to that
tire's designed maximum safe oper-
ating speed.3. Checking tire life (TIN : Tire
Identification Number)
Any tires that are over 6 years old,
based on the manufacturing date,
should be replaced by new ones. You
can find the manufacturing date on
the tire sidewall (possibly on the
inside of the wheel), displaying the
DOT Code. The DOT Code is a
series of numbers on a tire consist-
ing of numbers and English letters.
The manufacturing date is designat-
ed by the last four digits (characters)
of the DOT code.
DOT : XXXX XXXX OOOO
The front part of the DOT means a
plant code number, tire size and
tread pattern and the last four num-
bers indicate week and year manu-
factured.
For example:
DOT XXXX XXXX 1614 represents
that the tire was produced in the 16th
week of 2014.
S 180 km/h (112 mph)
T 190 km/h (118 mph)
H 210 km/h (130 mph) V 240 km/h (149 mph)Z Above 240 km/h (149 mph)
Maximum Speed
Speed
Rating
Symbol
WARNING- Tire age
Replace tires within the recom-
mended time frame. Failure to
replace tires as recommended
can result in sudden tire failure,
which could lead to a loss of
control and an accident.
Page 342 of 407
85
Specifications & Consumer information
TIRES AND WHEELS
*1: Load Index
*2: Speed Symbol
ItemTire sizeWheel sizeLoad CapacitySpeed capacityInflation pressure kPa (psi)Wheel lug nut torque
kg•m (lb N
Normal loadMaximum load
LI *1KgSS *2Km/hFrontRear FrontRear
Full size tire205/60R166.5J×1692630H210230 (33)9~11
(65~79, 88~107)
CAUTION
When replacing tires, use the same size originally supplied with the vehicle.
Using tires of a different size can damage the related parts or make it work irregularly.
✽
✽ NOTICE
We recommend that when replacing tires, use the same originally supplied with the vehicles.
If not, that affects driving performance.