2015 KIA PICANTO Auto headlight
[x] Cancel search: Auto headlightPage 111 of 846
Features of your vehicle
38
4
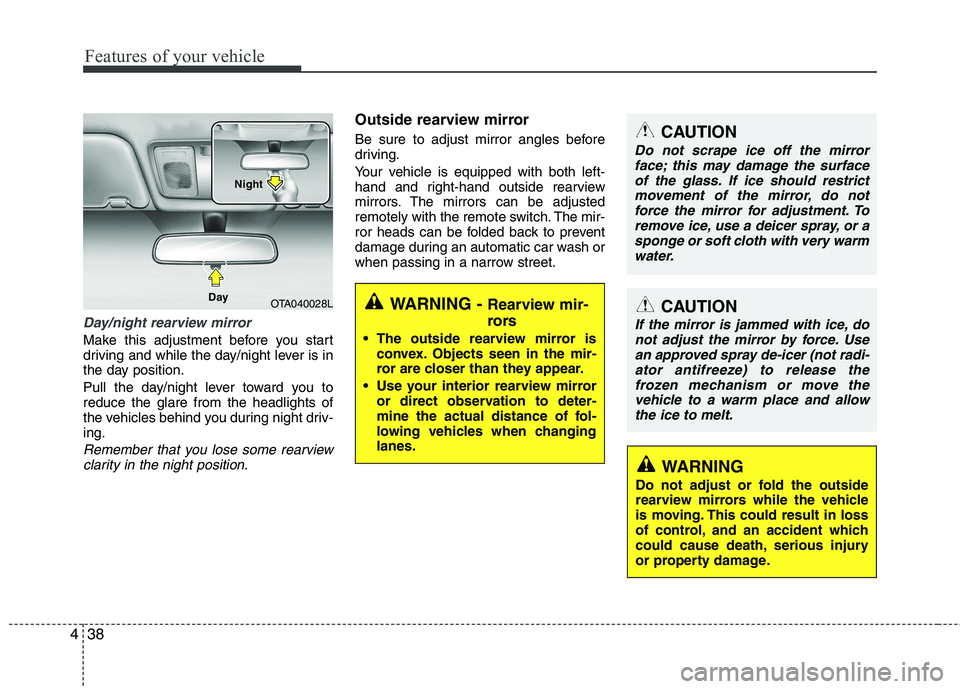
Day/night rearview mirror
Make this adjustment before you start
driving and while the day/night lever is in
the day position.
Pull the day/night lever toward you to reduce the glare from the headlights of
the vehicles behind you during night driv-ing.
Remember that you lose some rearview
clarity in the night position.
Outside rearview mirror
Be sure to adjust mirror angles before
driving.
Your vehicle is equipped with both left-
hand and right-hand outside rearview
mirrors. The mirrors can be adjusted
remotely with the remote switch. The mir-
ror heads can be folded back to prevent
damage during an automatic car wash or
when passing in a narrow street.
OTA040028L
Day NightWARNING -
Rearview mir-
rors
The outside rearview mirror is convex. Objects seen in the mir-
ror are closer than they appear.
Use your interior rearview mirror or direct observation to deter-
mine the actual distance of fol-
lowing vehicles when changinglanes.
CAUTION
Do not scrape ice off the mirror
face; this may damage the surface
of the glass. If ice should restrict movement of the mirror, do notforce the mirror for adjustment. To remove ice, use a deicer spray, or a
sponge or soft cloth with very warmwater.
CAUTION
If the mirror is jammed with ice, do not adjust the mirror by force. Usean approved spray de-icer (not radi- ator antifreeze) to release the
frozen mechanism or move thevehicle to a warm place and allow the ice to melt.
WARNING
Do not adjust or fold the outside
rearview mirrors while the vehicle
is moving. This could result in loss
of control, and an accident which
could cause death, serious injury
or property damage.
Page 142 of 846
469
Features of your vehicle
Battery saver function
The purpose of this feature is to pre-vent the battery from being dis-
charged. The system automatically
turns off the parking lights when the
driver removes the ignition key (smart
key: turns off the engine) and opens
the driver-side door.
With this feature, the parking lights will be turned off automatically if the driver
parks on the side of road at night.
If necessary, to keep the lights on
when the ignition key is removed,
(smart key: turns off the engine) per-
form the following:
1) Open the driver-side door.
2) Turn the parking lights OFF and ON again using the light switch on the
steering column. Headlight escort function (if equipped) The headlights (and/or taillights) will
remain on for approximately 20 minutes
after the ignition key is removed when
the engine is turned off. However, if the
driver’s door is opened and closed, the
headlights are turned off after 30 sec-
onds.
The headlights can be turned off by
pressing the lock button on the transmit-
ter (or smart key) twice or turning off the
light switch from the headlight or Autolight position.
Headlight welcome function (if equipped)
When the headlight switch is in the ON or
AUTO position and all doors (and tail-
gate) are closed and locked, if you press
the door unlock button on the transmitter
(or smart key), the headlights will come
on for about 15 seconds.
If the headlight switch is in the AUTO
position, the function can only operate atnight.
At this time, if you press the door unlock
button again or door lock button on the
transmitter (or smart key), the headlights
will turn off immediately.
Daytime running light (if equipped)
Daytime Running Lights (DRL) can make
it easier for others to see the front of your
vehicle during the day. DRL can be help-
ful in many different driving conditions,
and it is especially helpful after dawn and
before sunset.
The DRL system will make the head-
lights light turn OFF when:
1. The position or head light switch is ON.
2. Engine off or ACC.
LIGHTING
CAUTION
If the driver gets out of the vehicle
through other doors (except dri-
ver's door), the battery saver func- tion does not operate and the head-light escort function does not turnoff automatically. Therefore, It caus-
es the battery to be discharged. In this case, make sure to turn off thelamp before getting out of the vehi- cle.
Page 143 of 846
Features of your vehicle
70
4
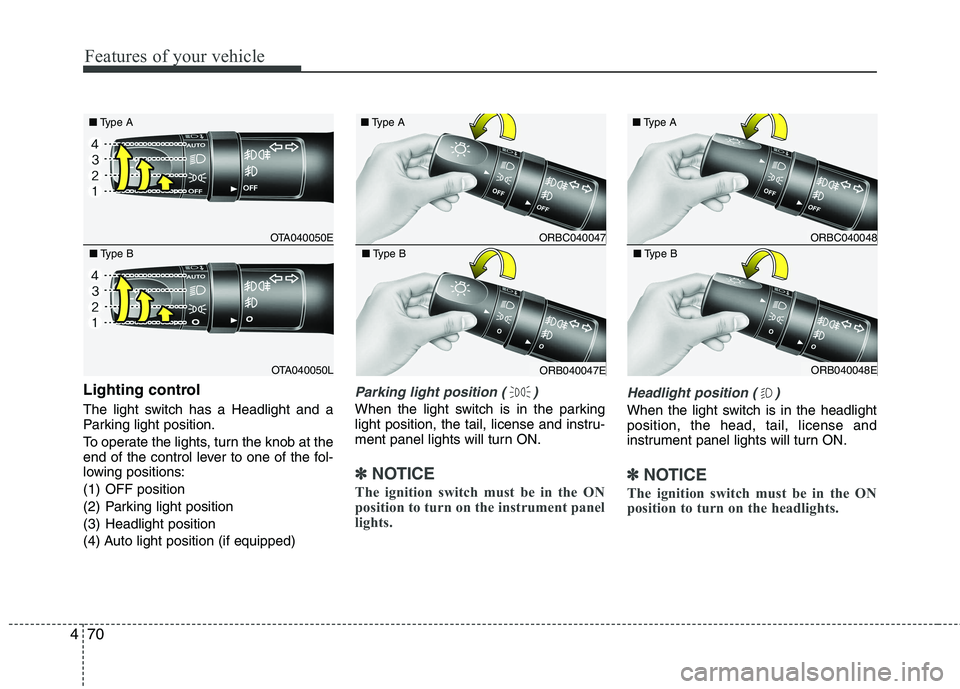
Lighting control
The light switch has a Headlight and a
Parking light position.
To operate the lights, turn the knob at the
end of the control lever to one of the fol-
lowing positions:
(1) OFF position
(2) Parking light position
(3) Headlight position
(4) Auto light position (if equipped)Parking light position ( )
When the light switch is in the parking
light position, the tail, license and instru-
ment panel lights will turn ON.
✽✽
NOTICE
The ignition switch must be in the ON
position to turn on the instrument panel
lights.
Headlight position ( )
When the light switch is in the headlight position, the head, tail, license and
instrument panel lights will turn ON.
✽✽ NOTICE
The ignition switch must be in the ON
position to turn on the headlights.
OTA040050E
■
Type A
OTA040050L
■
Type B
ORBC040047
■
Type A
ORB040047E
■
Type B
ORBC040048
■
Type A
ORB040048E
■
Type B
Page 144 of 846

471
Features of your vehicle
Auto light position (if equipped)
When the light switch is in the AUTO light position, the taillights and headlights will
turn ON or OFF automatically depending
on the amount of light outside the vehi-
cle.High beam operation
To turn on the high beam headlights, push
the lever away from you. Pull it back for
low beams. The high beam indicator will light when
the headlight high beams are switched on.
To prevent the battery from being dis-
charged, do not leave the lights on for a pro-
longed time while the engine is not running.
CAUTION
Never place anything over sensor
(1) located on the instrument
panel. This will ensure betterauto-light system control.
Don’t clean the sensor using a window cleaner. The cleaner may
leave a light film which could interfere with sensor operation.
If your vehicle has window tint or other types of metallic coating onthe front windshield, the Auto
light system may not work prop-erly.
OTA040051E
ORBC040049
■
Type A
ORB040049E
■
Type B
WARNING
Do not use high beam when there
are other vehicles. Using high beamcould obstruct the other driver'svision.
Page 147 of 846
Features of your vehicle
74
4
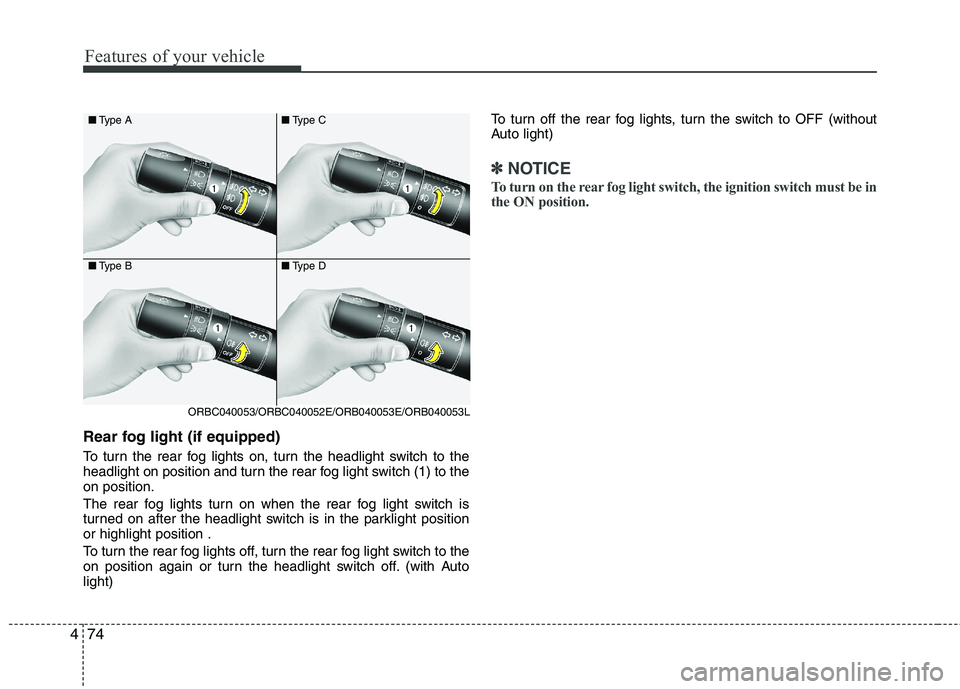
Rear fog light (if equipped)
To turn the rear fog lights on, turn the headlight switch to the
headlight on position and turn the rear fog light switch (1) to theon position.
The rear fog lights turn on when the rear fog light switch is
turned on after the headlight switch is in the parklight positionor highlight position .
To turn the rear fog lights off, turn the rear fog light switch to the
on position again or turn the headlight switch off. (with Autolight) To turn off the rear fog lights, turn the switch to OFF (without
Auto light)
✽✽
NOTICE
To turn on the rear fog light switch, the ignition switch must be in
the ON position.
■ Type A
■ Type B
ORBC040053/ORBC040052E/ORB040053E/ORB040053L ■
Type C
■ Type D
Page 285 of 846
Driving your vehicle
42
5
Adjust your mirrors to reduce the glare
from other driver's headlights.
Keep your headlights clean and prop- erly aimed on vehicles not equipped with the automatic headlight aiming
feature. Dirty or improperly aimed
headlights will make it much more diffi-cult to see at night.
Avoid staring directly at the headlights of oncoming vehicles. You could be
temporarily blinded, and it will take
several seconds for your eyes to read-
just to the darkness.
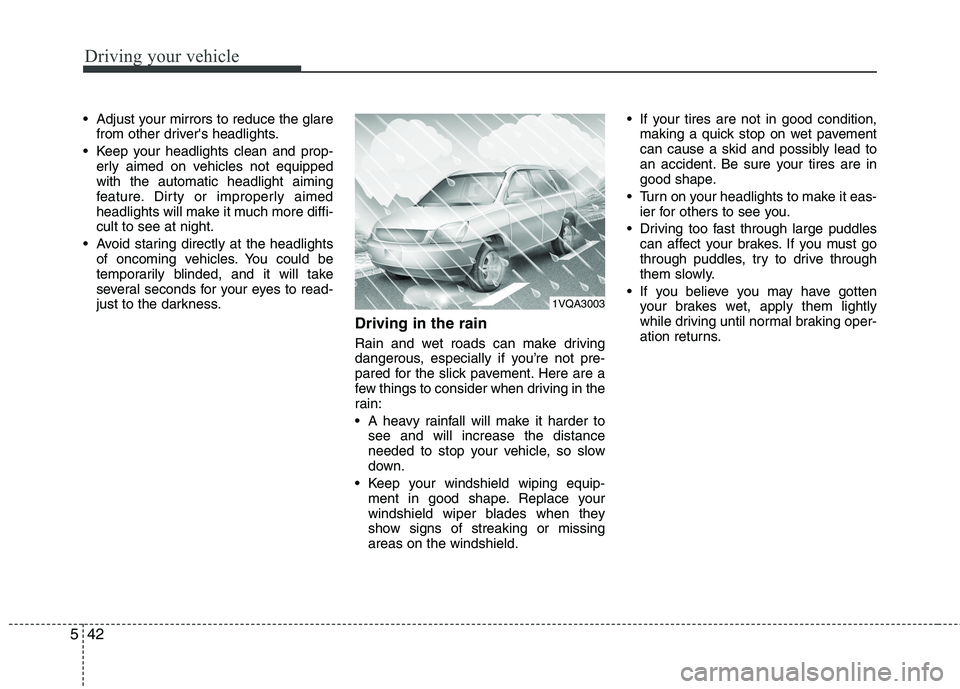
Driving in the rain
Rain and wet roads can make driving
dangerous, especially if you’re not pre-
pared for the slick pavement. Here are a
few things to consider when driving in the
rain:
A heavy rainfall will make it harder tosee and will increase the distance
needed to stop your vehicle, so slow
down.
Keep your windshield wiping equip- ment in good shape. Replace your
windshield wiper blades when they
show signs of streaking or missingareas on the windshield. If your tires are not in good condition,
making a quick stop on wet pavement
can cause a skid and possibly lead to
an accident. Be sure your tires are in
good shape.
Turn on your headlights to make it eas- ier for others to see you.
Driving too fast through large puddles can affect your brakes. If you must go
through puddles, try to drive through
them slowly.
If you believe you may have gotten your brakes wet, apply them lightly
while driving until normal braking oper-
ation returns.
1VQA3003
Page 337 of 846

75
Maintenance
While operating your vehicle:
Note any changes in the sound of theexhaust or any smell of exhaust fumes
in the vehicle.
Check for vibrations in the steering wheel. Notice any increased steering
effort or looseness in the steering wheel,
or change in its straight-ahead position.
Notice if your vehicle constantly turns slightly or “pulls” to one side when trav-
eling on smooth, level road.
When stopping, listen and check for unusual sounds, pulling to one side,
increased brake pedal travel or “hard-
to-push” brake pedal.
If any slipping or changes in the oper- ation of your transaxle occurs, check
the transaxle fluid level.
Check manual transaxle operation, including clutch operation.
Check automatic transaxle P (Park) function.
Check parking brake.
Check for fluid leaks under your vehicle (water dripping from the air condition-
ing system during or after use is nor-mal).
At least monthly:
Check coolant level in the enginecoolant reservoir.
Check the operation of all exterior lights, including the stoplights, turn sig-
nals and hazard warning flashers.
Check the inflation pressures of all tires including the spare.
At least twice a year
(i.e., every Spring and Fall):
Check radiator, heater and air condi- tioning hoses for leaks or damage.
Check windshield washer spray and wiper operation. Clean wiper blades with
clean cloth dampened with washer fluid.
Check headlight alignment.
Check muffler, exhaust pipes, shields and clamps.
Check the lap/shoulder belts for wear and function.
Check for worn tires and loose wheel lug nuts.
At least once a year:
Clean body and door drain holes.
Lubricate door hinges and checks, andhood hinges.
Lubricate door and hood locks and latches.
Lubricate door rubber weatherstrips.
Check the air conditioning system.
Inspect and lubricate automatic transaxle linkage and controls.
Clean battery and terminals.
Check the brake fluid level.
Page 395 of 846

763
Maintenance
Headlight/Position light (Bulb type)*
1. Open the hood.
2. Remove the headlight bulb cover byturning it counterclockwise.
3. Disconnect the headlight bulb socket- connector.
4. Remove the bulb from the headlight assembly.
5. Install a new headlight bulb.
6. Connect the headlight bulb socket- connector.
7. Install the headlight bulb cover by turn- ing it clockwise.
* : if equipped
✽✽ NOTICE
If the headlight aiming adjustment is nec-
essary after the headlight assembly is rein-
stalled, we recommend that you consult an
authorized Kia dealer.
❋❋ Traffic Change (For Europe)
The low beam light distribution is asym-
metric.
If you go abroad to a country with oppo-
site traffic direction, this asymmetric part
will dazzle oncoming car driver. To pre-
vent dazzle, ECE regulation demand
several technical solutions (ex. automatic
change system, adhesive sheet, down
aiming). This headlamps are designed
not to dazzle opposite drivers. So, you
need not change your headlamps in a
country with opposite traffic direction.
OTA070026
(Continued)
If a bulb becomes damaged or cracked, replace it immediately
and carefully dispose of it.
Wear eye protection when chang- ing a bulb. Allow the bulb to cool
down before handling it.