2015 KIA PICANTO tyres
[x] Cancel search: tyresPage 716 of 846
549
Driving your vehicle
Safety chains
You should always attach chains
between your vehicle and your trailer.
Cross the safety chains under the tongue
of the trailer so that the tongue will not
drop to the road if it becomes separatedfrom the hitch.
Instructions about safety chains may be
provided by the hitch manufacturer or by
the trailer manufacturer. Follow the man-
ufacturer’s recommendation for attaching
safety chains. Always leave just enough
slack so you can turn with your trailer.
And, never allow safety chains drag on
the ground.Trailer brakes
If your trailer is equipped with a braking
system, make sure it conforms to your
country’s regulations and that it is prop-
erly installed and operating correctly.
If your trailer weighs more than the max-
imum trailer weight without trailer brakes
loaded, then it needs its own brakes and
they must be adequate. Be sure to read
and follow the instructions for the trailer
brakes so you’ll be able to install, adjust
and maintain them properly.
Don’t tap into your vehicle's brake sys-
tem. Driving with a trailer
Towing a trailer requires a certain
amount of experience. Before setting out
for the open road, you must get to know
your trailer. Acquaint yourself with the
feel of handling and braking with the
added weight of the trailer. And always
keep in mind that the vehicle you are
driving is now a good deal longer and not
nearly so responsive as your vehicle is
by itself.
Before you start, check the trailer hitch
and platform, safety chains, electrical
connector(s), lights, tyres and mirror
adjustment. If the trailer has electric
brakes, start your vehicle and trailer mov-
ing and then apply the trailer brake con-
troller by hand to be sure the brakes are
working. This lets you check your electri-
cal connection at the same time.
During your trip, check occasionally to be
sure that the load is secure, and that the
lights and trailer brakes are still working.
WARNING
- Trailer brakes
Do not use a trailer with its own
brakes unless you are absolutely
certain that you have properly set
up the brake system. This is not a
task for amateurs. Use an experi-
enced, competent trailer shop for
this work.
Page 730 of 846
What to do in an emergency
8
6
(Continued)
Be sure to use the correct
front and rear jacking posi-
tions on the vehicle; never
use the bumpers or any other
part of the vehicle for jacking
support.
The vehicle can easily roll off the jack causing serious
injury or death.
Do not get under a vehicle that is supported by a jack.
Do not start or run the engine whilst the vehicle is on the
jack.
Do not allow anyone to remain in the vehicle whilst it is on
the jack.
Make sure any children pres- ent are in a secure place away
from the road and from the
vehicle to be raised with the
jack.
IF YOU HAVE A FLAT TYRE
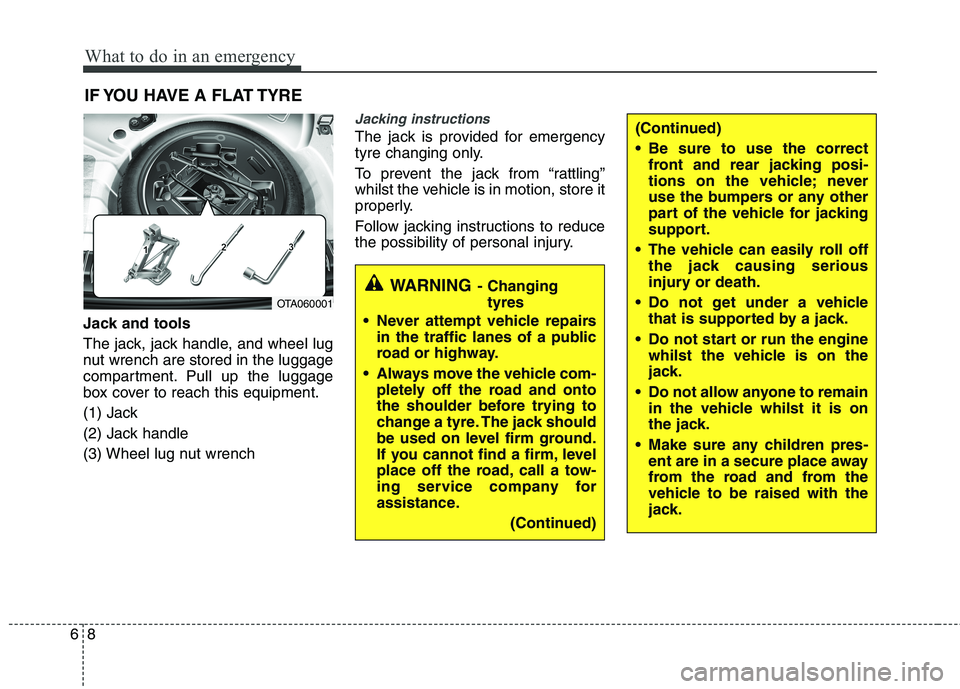
Jack and tools
The jack, jack handle, and wheel lug
nut wrench are stored in the luggage
compartment. Pull up the luggage
box cover to reach this equipment.
(1) Jack
(2) Jack handle
(3) Wheel lug nut wrench
Jacking instructions
The jack is provided for emergency
tyre changing only.
To prevent the jack from “rattling”
whilst the vehicle is in motion, store it
properly.
Follow jacking instructions to reduce
the possibility of personal injury.
WARNING - Changing
tyres
Never attempt vehicle repairs in the traffic lanes of a public
road or highway.
Always move the vehicle com- pletely off the road and onto
the shoulder before trying to
change a tyre. The jack should
be used on level firm ground.
If you cannot find a firm, level
place off the road, call a tow-
ing service company for
assistance.
(Continued)
OTA060001
Page 731 of 846
69
What to do in an emergency
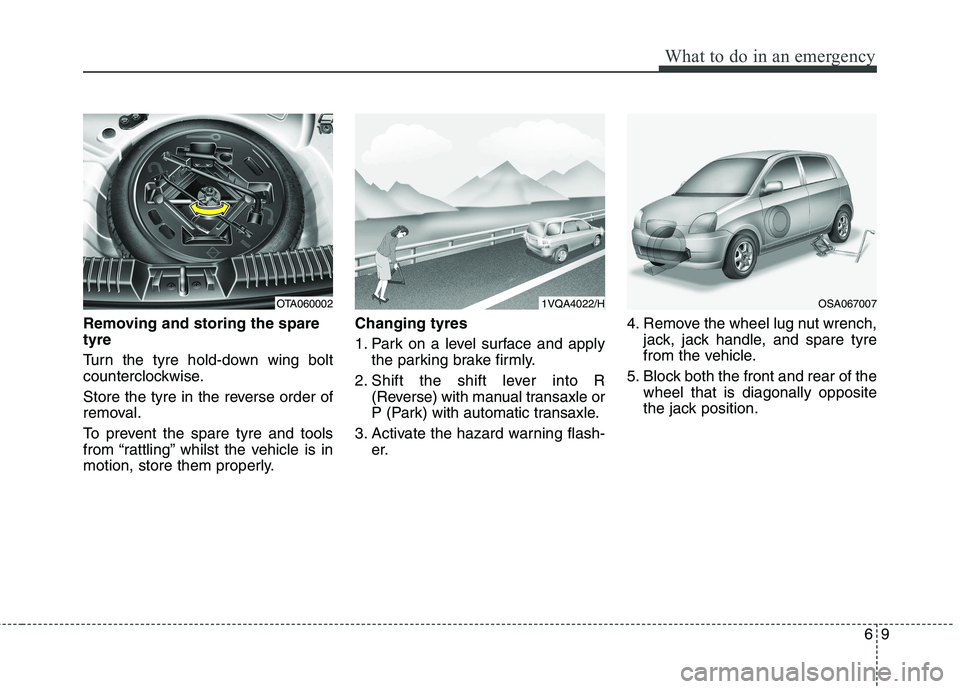
Removing and storing the spare tyre
Turn the tyre hold-down wing bolt
counterclockwise.
Store the tyre in the reverse order of
removal.
To prevent the spare tyre and tools
from “rattling” whilst the vehicle is in
motion, store them properly.Changing tyres
1. Park on a level surface and apply
the parking brake firmly.
2. Shift the shift lever into R (Reverse) with manual transaxle or
P (Park) with automatic transaxle.
3. Activate the hazard warning flash- er. 4. Remove the wheel lug nut wrench,
jack, jack handle, and spare tyre
from the vehicle.
5. Block both the front and rear of the wheel that is diagonally opposite
the jack position.
OTA0600021VQA4022/HOSA067007
Page 735 of 846
613
What to do in an emergency
To prevent the jack, jack handle,
wheel lug nut wrench and spare tyre
from rattling whilst the vehicle is in
motion, store them properly.
Important - use of compact sparetyre (if equipped)
Your vehicle is equipped with a com-
pact spare tyre. This compact spare
tyre takes up less space than a reg-
ular-size tyre. This tyre is smaller
than a conventional tyre and is
designed for temporary use only.
The compact spare should be inflat-
ed to 420 kPa (60 psi).
✽✽NOTICE
Check the inflation pressure after
installing the spare tyre. Adjust it to
the specified pressure, as necessary.
WARNING - Wheel studs
If the studs are damaged, they
may lose their ability to retain
the wheel. This could lead to theloss of the wheel and a collisionresulting in serious injuries.
WARNING - Inadequate
spare tyre pressure
Check the inflation pressures as
soon as possible after installing
the spare tyre. Adjust it to the
specified pressure, if necessary.
Refer to “Tyres and wheels” sec-tion 8.
CAUTION
You should drive carefully
when the compact spare is inuse. The compact spareshould be replaced by theproper conventional tyre and rim at the first opportunity.
The operation of this vehicle is not recommended withmore than one compact sparetyre in use at the same time.
WARNING
The compact spare tyre is for
emergency use only. Do not
operate your vehicle on this
compact spare at speeds over
80 km/h (50 mph). The originaltyre should be repaired or
replaced as soon as is possible
to avoid failure of the spare
possibly leading to personal
injury or death.
Page 736 of 846
What to do in an emergency
14
6
When using a compact spare tyre,
observe the following precautions:
Under no circumstances should
you exceed 80 km/h (50 mph); a higher speed could damage the
tyre.
Ensure that you drive slowly enough for the road conditions to
avoid all hazards. Any road hazard,
such as a pothole or debris, could
seriously damage the compact
spare.
Any continuous road use of this tyre could result in tyre failure, loss
of vehicle control, and possible
personal injury.
Do not exceed the vehicle’s maxi- mum load rating or the load-carry-
ing capacity shown on the sidewall
of the compact spare tyre.
Avoid driving over obstacles. The compact spare tyre diameter issmaller than the diameter of a con-
ventional tyre and reduces the
ground clearance approximately25 mm (1 inch), which could result
in damage to the vehicle. Do not take this vehicle through an
automatic car wash whilst the com-pact spare tyre is installed.
Do not use tyre chains on the com- pact spare tyre. Because of the
smaller size, a tyre chain will not fit
properly. This could damage the
vehicle and result in loss of thechain.
The compact spare tyre should not be installed on the front axle if the
vehicle must be driven in snow or
on ice.
Do not use the compact spare tyre on any other vehicle because thistyre has been designed especially
for your vehicle.
The compact spare tyre’s tread life is shorter than a regular tyre.
Inspect your compact spare tyre
regularly and replace worn com-
pact spare tyres with the same sizeand design, mounted on the samewheel. The compact spare tyre should not
be used on any other wheels, nor
should standard tyres, snow tyres,
wheel covers or trim rings be used
with the compact spare wheel. Ifsuch use is attempted, damage tothese items or other car compo-
nents may occur.
Do not use more than one tempo- rary spare tyre at a time.
Do not tow a trailer whilst the tem- porary spare tyre is installed.
Page 739 of 846
617
What to do in an emergency
IF YOU HAVE A FLAT TYRE (WITH TYREMOBILITYKIT, IF EQUIPPED)
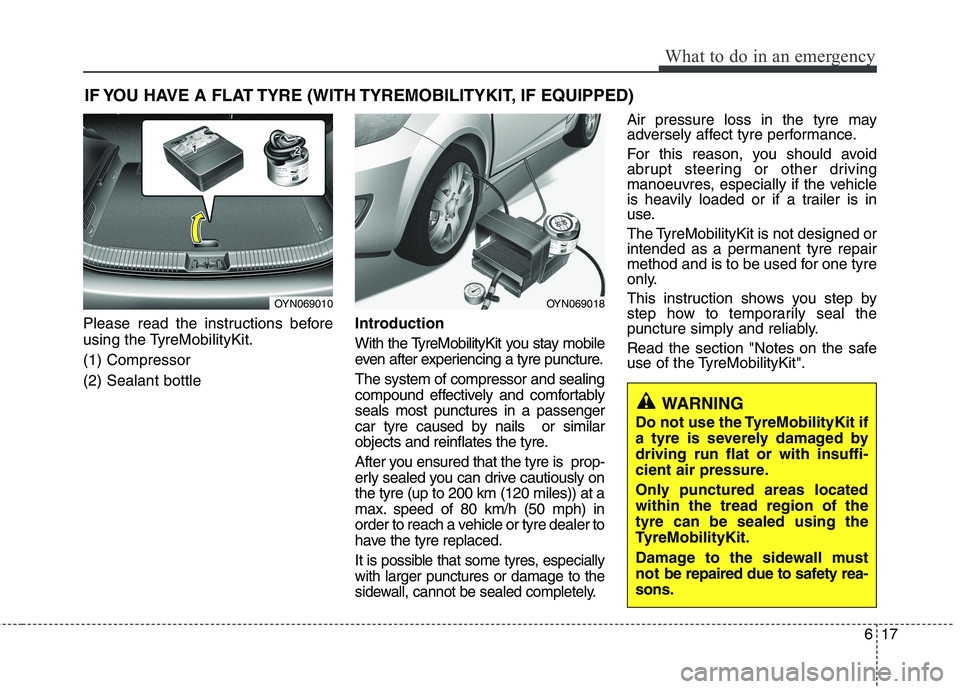
Please read the instructions before
using the TyreMobilityKit. (1) Compressor(2) Sealant bottle Introduction
With the TyreMobilityKit you stay mobile
even after experiencing a tyre puncture. The system of compressor and sealing
compound effectively and comfortablyseals most punctures in a passenger
car tyre caused by nails or similar
objects and reinflates the tyre.
After you ensured that the tyre is prop-
erly sealed you can drive cautiously onthe tyre (up to 200 km (120 miles)) at a
max. speed of 80 km/h (50 mph) in
order to reach a vehicle or tyre dealer to
have the tyre replaced.
It is possible that some tyres, especiallywith larger punctures or damage to the
sidewall, cannot be sealed completely.
Air pressure loss in the tyre may
adversely affect tyre performance.
For this reason, you should avoid
abrupt steering or other driving
manoeuvres, especially if the vehicle
is heavily loaded or if a trailer is in
use.
The TyreMobilityKit is not designed or
intended as a permanent tyre repair
method and is to be used for one tyre
only.
This instruction shows you step by
step how to temporarily seal the
puncture simply and reliably.
Read the section "Notes on the safe
use of the TyreMobilityKit".
OYN069010OYN069018
WARNING
Do not use the TyreMobilityKit if
a tyre is severely damaged bydriving run flat or with insuffi-
cient air pressure.
Only punctured areas located within the tread region of thetyre can be sealed using the
TyreMobilityKit.
Damage to the sidewall must
not be repaired due to safety rea-sons.
Page 743 of 846

621
What to do in an emergency
Notes on the safe use of the
TyreMobilityKit
Park your car at the side of theroad so that you can work with the
TyreMobilityKit away from moving
traffic. Place your warning triangle
in a prominent place to make pass-
ing vehicles aware of your location.
To be sure your vehicle won't move, even when you're on fairly
level ground, always set your park-
ing brake.
Only use the TyreMobilityKit for sealing/inflation passenger car
Tyres. Do not use on motorcycles,
bicycles or any other type of Tyres.
Do not remove any foreign objects- such as nails or screws -that have
penetrated the tyre.
Before using the TyreMobilityKit, read the precautionary advice
printed on the sealant bottle!
Provided the car is outdoors, leave the engine running. Otherwise
operating the compressor may
eventually drain the car battery. Never leave the TyreMobilityKit
unattended whilst it is being used.
Do not leave the compressor run- ning for more than 10 min. at a time
or it may overheat.
Do not use the TyreMobilityKit if the ambient temperature is below -30°C(-22°F).
Do not use the sealing compound after its expiration date which can
be found on the label of the bottle.
Keep away from children. Technical Data
System voltage: DC 12 V
Working voltage: DC 10 - 15 V
Amperage rating: max. 15 A
Suitable for use at temperatures:
-30 ~ +70°C (-22 ~ +158°F)
Max. working pressure: 6 bar (87 psi)
Size
Compressor: 170 x 150 x 60 mm (6.7 x 5.9 x 2.4 in.)
Sealant bottle: 85 x 77 ø mm (3.3 x 3.0 ø in.)
Compressor weight: 0.8 kg (1.8 lbs)
Sealant volume: 200 ml (12.2 cu. in.)
❈ Sealing compound and spare
parts can be obtained and
replaced at an authorised vehicle
or tyre dealer. Empty sealing com-
pound bottles may be disposed of
at home. Liquid residue from thesealing compound should be dis-
posed of by your vehicle or tyredealer or in accordance with local
waste disposal regulations.
Page 744 of 846

What to do in an emergency
22
6
TYRE PRESSURE MONITORING SYSTEM (TPMS) (IF EQUIPPED)
Low tyre pressure telltale / TPMS malfunction indicator
Each tyre, including the spare (if pro-
vided), should be checked monthlywhen cold and inflated to the inflation
pressure recommended by the vehicle
manufacturer on the vehicle placard or
tyre inflation pressure label. (If your
vehicle has tyres of a different size
than the size indicated on the vehicleplacard or tyre inflation pressure label,
you should determine the proper tyre
inflation pressure for those tyres.) As an added safety feature, your
vehicle has been equipped with a
tyre pressure monitoring system
(TPMS) that illuminates a low tyrepressure telltale when one or more
of your tyres is significantly under-
inflated. Accordingly, when the low
tyre pressure telltale illuminates, you
should stop and check your tyres as
soon as possible, and inflate them to
the proper pressure. Driving on a sig-nificantly under-inflated tyre causes
the tyre to overheat and can lead to
tyre failure. Under-inflation alsoreduces fuel efficiency and tyre tread
life, and may affect the vehicle’s han-
dling and stopping ability.
Please note that the TPMS is not a
substitute for proper tyre mainte-
nance, and it is the driver’s responsi-bility to maintain correct tyre pres-
sure, even if under-inflation has not
reached the level to trigger illumina-
tion of the TPMS low tyre pressure
telltale.
Your vehicle has also been equipped
with a TPMS malfunction indicator toindicate when the system is not oper-
ating properly. The TPMS malfunction
indicator is combined with the low
tyre pressure telltale. When the sys-tem detects a malfunction, the telltale
will flash for approximately one
minute and then remain continuously
illuminated. This sequence will con-
tinue upon subsequent vehicle start-
ups as long as the malfunction exists.When the malfunction indicator is illu-
minated, the system may not be able
to detect or signal low tyre pressure
as intended. TPMS malfunctions may
occur for a variety of reasons, includ-ing the installation of replacement or
alternate tyres or wheels on the vehi-
cle that prevent the TPMS from func-
tioning properly. Always check theTPMS malfunction telltale afterreplacing one or more tyres or
wheels on your vehicle to ensure that
the replacement or alternate tyres
and wheels allow the TPMS to con-
tinue to function properly.
OTA034055