2015 KIA PICANTO warning
[x] Cancel search: warningPage 298 of 846
555
Driving your vehicle
Weight of the trailer
What is the maximum safe weight of a
trailer? It should never weigh more than
the maximum trailer weight with trailer
brakes. But even that can be too heavy.
It depends on how you plan to use your
trailer. For example, speed, altitude, road
grades, outside temperature and how
often your vehicle is used to pull a trailer
are all important. The ideal trailer weight
can also depend on any special equip-
ment that you have on your vehicle.
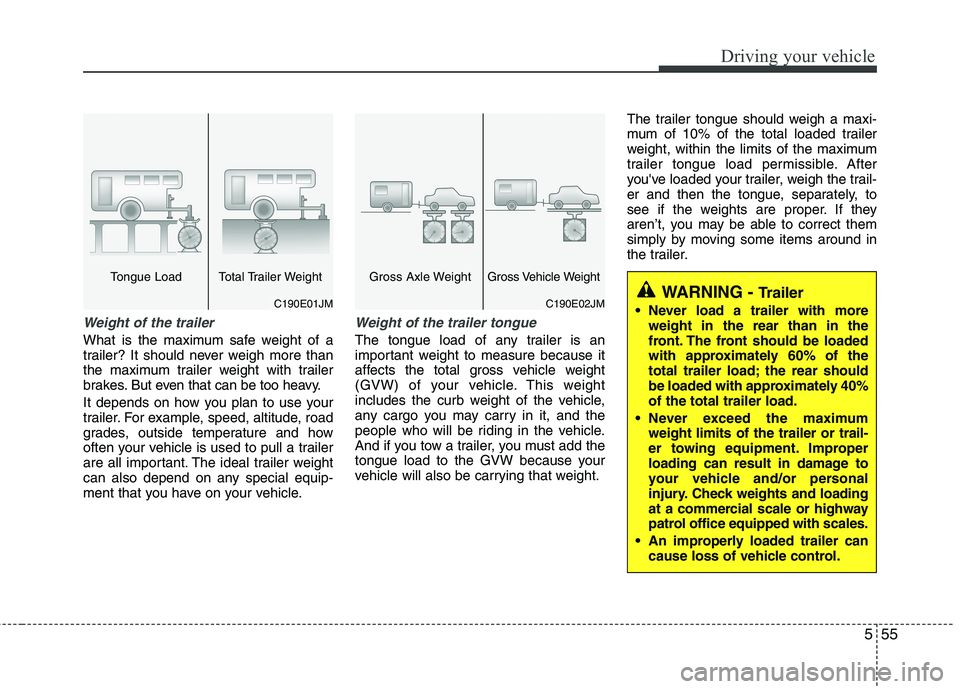
Weight of the trailer tongue
The tongue load of any trailer is an
important weight to measure because it
affects the total gross vehicle weight
(GVW) of your vehicle. This weight
includes the curb weight of the vehicle,
any cargo you may carry in it, and the
people who will be riding in the vehicle.
And if you tow a trailer, you must add the
tongue load to the GVW because your
vehicle will also be carrying that weight.The trailer tongue should weigh a maxi-
mum of 10% of the total loaded trailer
weight, within the limits of the maximum
trailer tongue load permissible. After
you've loaded your trailer, weigh the trail-
er and then the tongue, separately, to
see if the weights are proper. If they
aren’t, you may be able to correct them
simply by moving some items around in
the trailer.
C190E01JM
Tongue Load Total Trailer Weight
WARNING -
Trailer
Never load a trailer with more weight in the rear than in the
front. The front should be loaded
with approximately 60% of the
total trailer load; the rear should
be loaded with approximately 40%of the total trailer load.
Never exceed the maximum weight limits of the trailer or trail-
er towing equipment. Improper
loading can result in damage to
your vehicle and/or personal
injury. Check weights and loading
at a commercial scale or highway
patrol office equipped with scales.
An improperly loaded trailer can cause loss of vehicle control.C190E02JM
Gross Axle WeightGross Vehicle Weight
Page 299 of 846
Driving your vehicle
56
5
This section will guide you in the proper
loading of your vehicle, to keep your
loaded vehicle weight within its design
rating capability. Properly loading your
vehicle will provide maximum return of
the vehicle design performance. Before
loading your vehicle, familiarize yourself
with the following terms for determining
your vehicle's weight ratings, from the
vehicle's specifications and the certifica-tion label: Base curb weight
This is the weight of the vehicle including a full tank of fuel and all standard equip-
ment. It does not include passengers,
cargo, or optional equipment.
Vehicle curb weight
This is the weight of your new vehicle
when you picked it up from your dealer
plus any aftermarket equipment. Cargo weight
This figure includes all weight added to
the Base Curb Weight, including cargoand optional equipment.
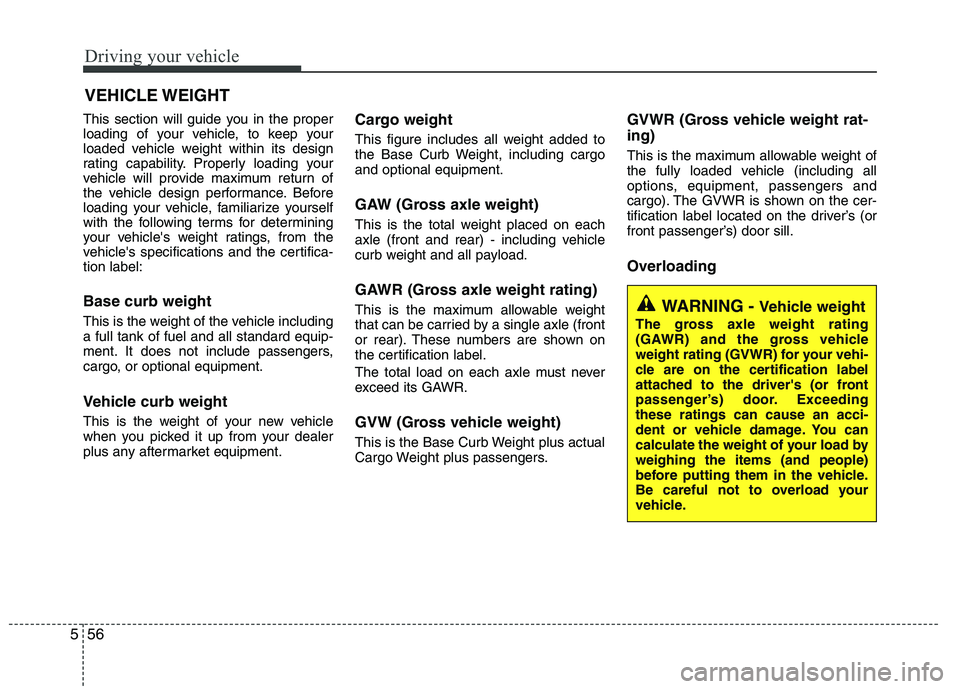
GAW (Gross axle weight)
This is the total weight placed on each
axle (front and rear) - including vehicle
curb weight and all payload.
GAWR (Gross axle weight rating)
This is the maximum allowable weight
that can be carried by a single axle (front
or rear). These numbers are shown on
the certification label.
The total load on each axle must never
exceed its GAWR.
GVW (Gross vehicle weight)
This is the Base Curb Weight plus actual
Cargo Weight plus passengers.GVWR (Gross vehicle weight rat- ing)
This is the maximum allowable weight of
the fully loaded vehicle (including all
options, equipment, passengers and
cargo). The GVWR is shown on the cer-
tification label located on the driver’s (or
front passenger’s) door sill. Overloading
VEHICLE WEIGHT
WARNING -
Vehicle weight
The gross axle weight rating
(GAWR) and the gross vehicle
weight rating (GVWR) for your vehi-
cle are on the certification label
attached to the driver's (or front
passenger’s) door. Exceedingthese ratings can cause an acci-
dent or vehicle damage. You can
calculate the weight of your load byweighing the items (and people)
before putting them in the vehicle.
Be careful not to overload your
vehicle.
Page 300 of 846
6
Road warning / 6-2
In case of an emergency while driving / 6-3
If the engine will not start / 6-4
Emergency starting / 6-5
If the engine overheats / 6-7
If you have a flat tire / 6-8
If you have a flat tire (with TireMobilityKit) / 6-18
Tire Pressure Monitoring System (TPMS) / 6-24
Towing / 6-29
Emergency commodity / 6-33
What to do in an emergency
Page 301 of 846
What to do in an emergency
2
6
ROAD WARNING
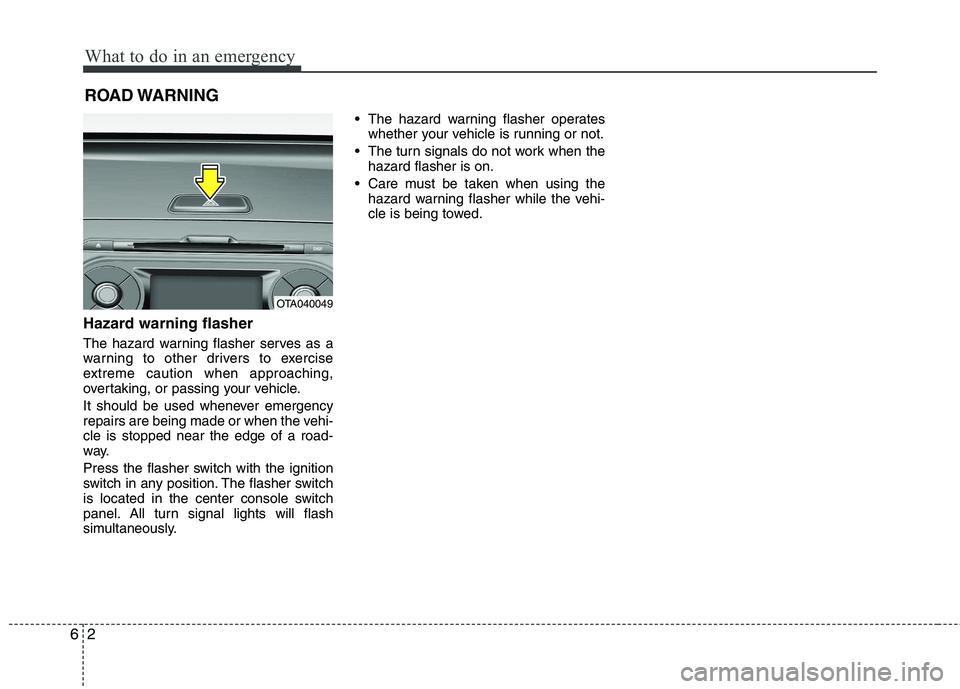
Hazard warning flasher
The hazard warning flasher serves as a
warning to other drivers to exercise
extreme caution when approaching,
overtaking, or passing your vehicle.
It should be used whenever emergency
repairs are being made or when the vehi-cle is stopped near the edge of a road-
way.
Press the flasher switch with the ignition
switch in any position. The flasher switch
is located in the center console switch
panel. All turn signal lights will flash
simultaneously. • The hazard warning flasher operates
whether your vehicle is running or not.
The turn signals do not work when the hazard flasher is on.
Care must be taken when using the hazard warning flasher while the vehi-
cle is being towed.
OTA040049
Page 303 of 846

What to do in an emergency
4
6
IF THE ENGINE WILL NOT START
If engine doesn't turn over or
turns over slowly
1. If your vehicle has an automatic transaxle, be sure the shift lever is in N
(Neutral) or P (Park) and the emer-
gency brake is set.
2. Check the battery connections to be sure they are clean and tight.
3. Turn on the interior light. If the light dims or goes out when you operate the
starter, the battery is discharged.
4. Check the starter connections to be sure they are securely tightened.
5. Do not push or pull the vehicle to start it. See instructions for "Jump starting". If engine turns over normally but
does not start
1. Check fuel level.
2. With the ignition switch in the LOCK
/OFF position, check all connectors at
the ignition coils and spark plugs.
Reconnect any that may be discon-
nected or loose.
3. If the engine still does not start, we rec- ommend that you call an authorized
Kia dealer.
WARNING
If the engine will not start, do not
push or pull the car to start it. Thiscould result in a collision or cause
other damage.
Page 304 of 846
65
What to do in an emergency
EMERGENCY STARTING
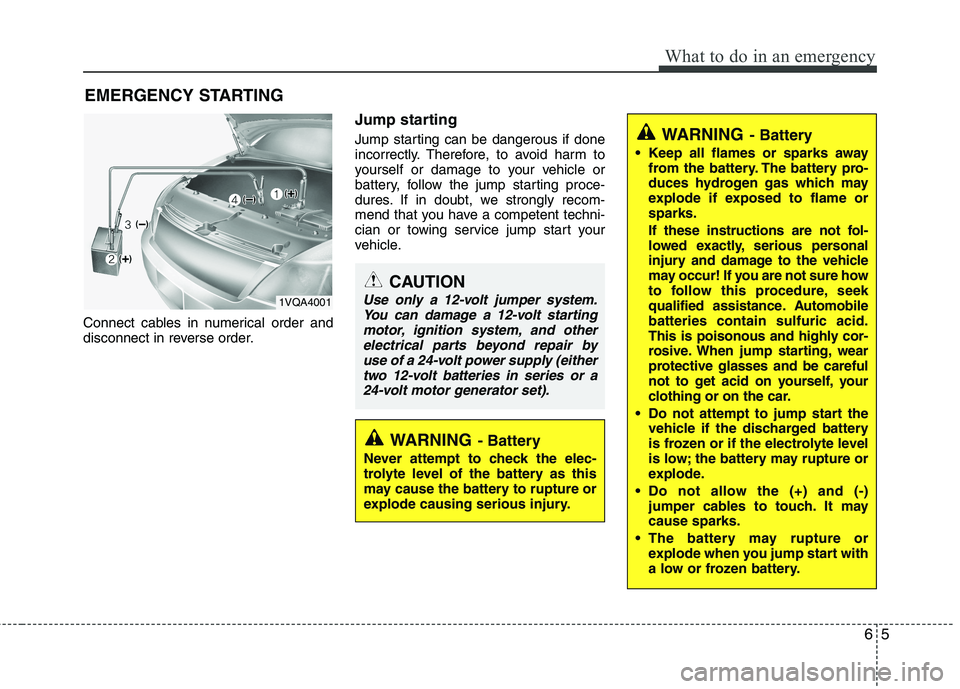
Connect cables in numerical order and
disconnect in reverse order. Jump starting
Jump starting can be dangerous if done
incorrectly. Therefore, to avoid harm to
yourself or damage to your vehicle or
battery, follow the jump starting proce-
dures. If in doubt, we strongly recom-
mend that you have a competent techni-
cian or towing service jump start your
vehicle.
CAUTION
Use only a 12-volt jumper system.
You can damage a 12-volt startingmotor, ignition system, and other
electrical parts beyond repair byuse of a 24-volt power supply (eithertwo 12-volt batteries in series or a24-volt motor generator set).
WARNING - Battery
• Keep all flames or sparks away from the battery. The battery pro-
duces hydrogen gas which may
explode if exposed to flame orsparks.
If these instructions are not fol-
lowed exactly, serious personal
injury and damage to the vehicle
may occur! If you are not sure how
to follow this procedure, seek
qualified assistance. Automobilebatteries contain sulfuric acid.
This is poisonous and highly cor-
rosive. When jump starting, wear
protective glasses and be careful
not to get acid on yourself, your
clothing or on the car.
Do not attempt to jump start the vehicle if the discharged battery
is frozen or if the electrolyte level
is low; the battery may rupture or
explode.
Do not allow the (+) and (-) jumper cables to touch. It maycause sparks.
The battery may rupture or explode when you jump start with
a low or frozen battery.
WARNING - Battery
Never attempt to check the elec-
trolyte level of the battery as this
may cause the battery to rupture or
explode causing serious injury.
1VQA4001
Page 305 of 846

What to do in an emergency
6
6
Jump starting procedure
1. Make sure the booster battery is 12-
volt and that its negative terminal is
grounded. 2. If the booster battery is in another vehi-
cle, do not allow the vehicles to touch.
3. Turn off all unnecessary electrical loads.
4. Connect the jumper cables in the exact sequence shown in the illustra-
tion. First connect one end of a jumper
cable to the positive terminal of the
jump start connector (1), then connect
the other end to the positive terminal
on the booster battery (2). Proceed to connect one end of the
other jumper cable to the negative ter-
minal of the booster battery (3), then
the other end to the negative terminal
of the jump start connector (4). Do not
connect it to or near any part that
moves when the engine is cranked.
Do not allow the jumper cables to con-
tact anything except the correct bat-
tery terminals or the correct ground.
Do not lean over the battery when
making connections. 5. Start the engine of the vehicle with the
booster battery and let it run at 2,000
rpm, then start the engine of the vehi-
cle with the discharged battery.
If the cause of your battery discharging is
not apparent, we recommend that the system be checked by an authorized Kia
dealer.
Push-starting
Your manual transaxle-equipped vehicle
should not be push-started because itmight damage the emission control sys-tem.
Vehicles equipped with automatic
transaxle cannot be push-started.
Follow the directions in this section for
jump-starting.
CAUTION - Battery cables
Do not connect the jumper cable
from the negative terminal of thebooster battery to the negative ter- minal of the discharged battery.This can cause the discharged bat-
tery to overheat and crack, releas- ing battery acid.
WARNING
Never tow a vehicle to start it
because the sudden surge forward
when the engine starts could cause
a collision with the tow vehicle.
CAUTION -AGM battery (if equipped)
Absorbent Glass Matt (AGM) bat-
teries are maintenance-free andshould only be serviced by anauthorized Kia dealer. For charg-
ing your AGM battery, use onlyfully automatic battery chargersthat are specially developed forAGM batteries.
When replacing the AGM battery, use only the Kia genuine batteryfor the ISG system.
Do not open or remove the cap on top of the battery. This may causeleaks of internal electrolyte that
could result in severe injury.
If the AGM battery is reconnected or replaced, ISG function will notoperate immediately.
If you want to use the ISG func-tion, the battery sensor needs tobe calibrated for approximately 4 hours with the ignition off.
Page 306 of 846

67
What to do in an emergency
IF THE ENGINE OVERHEATS
If your temperature gauge indicates over-
heating, you experience a loss of power,
or hear loud pinging or knocking, the
engine is probably too hot. If this hap-
pens, you should:
1. Pull off the road and stop as soon as it is safe to do so.
2. Place the shift lever in P (Park) and set the parking brake. If the air condition-
ing is on, turn it off.
3. If engine coolant is running out under the car or steam is coming out from the
hood, stop the engine. Do not open the
hood until the coolant has stopped run-
ning or the steaming has stopped. If
there is no visible loss of engine
coolant and no steam, leave the engine
running and check to be sure the
engine cooling fan is operating. If the
fan is not running, turn the engine off. 4. Check to see if the water pump drive
belt is missing. If it is not missing,
check to see that it is tight. If the drive
belt seems to be satisfactory, check for
coolant leaking from the radiator,
hoses or under the car. (If the air con-
ditioning had been in use, it is normal
for cold water to be draining from it
when you stop).
5. If the water pump drive belt is broken or engine coolant is leaking out, stop the
engine immediately and we recommend
that you call an authorized Kia dealer. 6. If you cannot find the cause of the
overheating, wait until the engine tem-
perature has returned to normal. Then,if coolant has been lost, carefully add
coolant to the reservoir to bring the
fluid level in the reservoir up to the
halfway mark.
7. Proceed with caution, keeping alert for further signs of overheating. If overheat-
ing happens again, we recommend that
you call an authorized Kia dealer.
WARNING
While the engine is running, keep
hair, hands and clothing away from
moving parts such as the fan and
drive belts to prevent injury.
WARNING
Do not remove the radiator cap
when the engine is hot. This can
allow coolant to be blown out of the
opening and cause serious burns.
CAUTION
Serious loss of coolant indicates there is a leak in the cooling sys-
tem and we recommend that the system be checked by an author-ized Kia dealer.
When the engine overheats from low engine coolant, suddenly
adding engine coolant may causecracks in the engine. To prevent damage, add engine coolantslowly in small quantities.