Page 160 of 420
487
Features of your vehicle
System operation
Ventilation
1. Set the mode to the position.
2. Set the air intake control to the outside
(fresh) air position.
3. Set the temperature control to the
desired position.
4. Set the fan speed control to the
desired speed.
Heating
1. Set the mode to the position.
2. Set the air intake control to the outside
(fresh) air position.
3. Set the temperature control to the
desired position.
4. Set the fan speed control to the
desired speed.
5. If dehumidified heating is desired, turn
the air conditioning system (if
equipped) on.
If the windscreen fogs up, set the mode
to the
orposition.Operation Tips
To keep dust or unpleasant fumes from
entering the vehicle through the venti-
lation system, temporarily set the air
intake control to the recirculated air
position. Be sure to return the control
to the fresh air position when the irrita-
tion has passed to keep fresh air in the
vehicle. This will help keep the driver
alert and comfortable.
Air for the heating/cooling system is
drawn in through the grilles just ahead
of the windscreen. Care should be
taken that these are not blocked by
leaves, snow, ice or other obstructions.
To prevent interior fog on the wind-
screen, set the air intake control to the
fresh air position and fan speed to the
desired position, turn on the air condi-
tioning system, and adjust the temper-
ature control to desired temperature.
Air conditioning
Kia Air Conditioning Systems are filled
with environmentally friendly R-134a
refrigerant.
1. Start the engine. Press the air condi-
tioning button.
2. Set the mode to the position.
3. Set the air intake control to the outside
air or recirculated air position.
4. Adjust the fan speed control and tem-
perature control to maintain maximum
comfort.
When maximum cooling is desired, set
the temperature control to the extreme
left position, then set the fan speed
control to the highest speed.
Page 173 of 420
Features of your vehicle
100 4
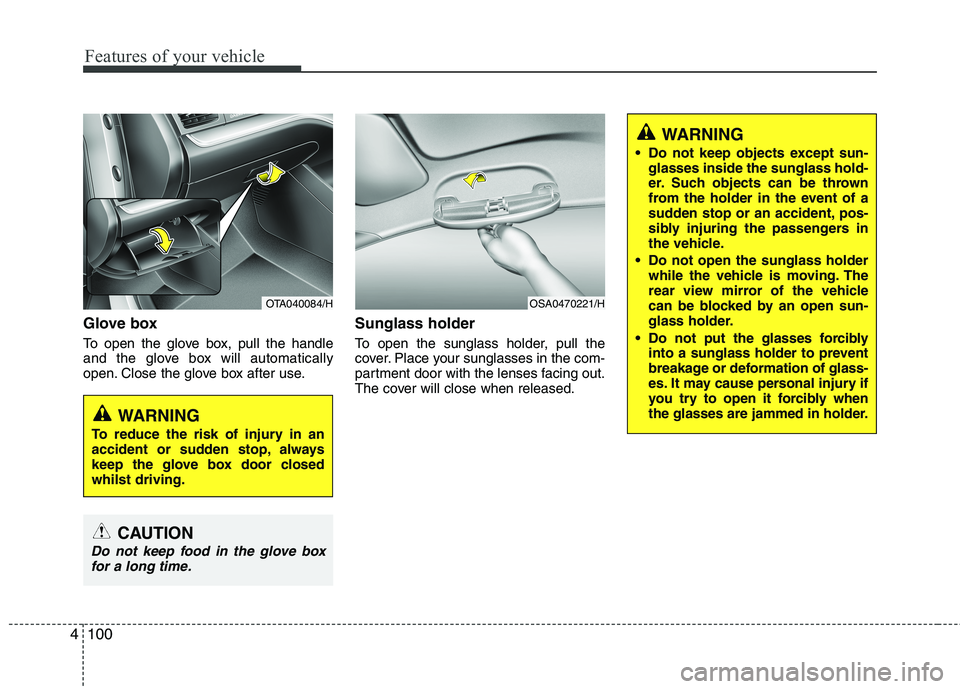
Glove box
To open the glove box, pull the handle
and the glove box will automatically
open. Close the glove box after use.
Sunglass holder
To open the sunglass holder, pull the
cover. Place your sunglasses in the com-
partment door with the lenses facing out.
The cover will close when released.
OTA040084/H
WARNING
To reduce the risk of injury in an
accident or sudden stop, always
keep the glove box door closed
whilst driving.
OSA0470221/H
CAUTION
Do not keep food in the glove box
for a long time.
WARNING
Do not keep objects except sun-
glasses inside the sunglass hold-
er. Such objects can be thrown
from the holder in the event of a
sudden stop or an accident, pos-
sibly injuring the passengers in
the vehicle.
Do not open the sunglass holder
while the vehicle is moving. The
rear view mirror of the vehicle
can be blocked by an open sun-
glass holder.
Do not put the glasses forcibly
into a sunglass holder to prevent
breakage or deformation of glass-
es. It may cause personal injury if
you try to open it forcibly when
the glasses are jammed in holder.
Page 177 of 420
Features of your vehicle
104 4
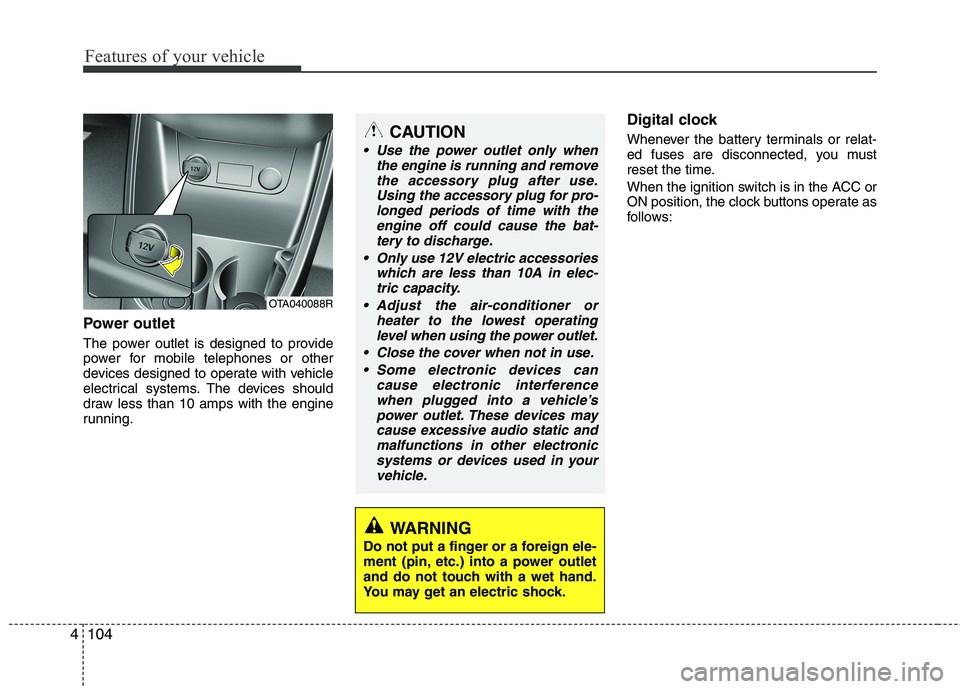
Power outlet
The power outlet is designed to provide
power for mobile telephones or other
devices designed to operate with vehicle
electrical systems. The devices should
draw less than 10 amps with the engine
running.
Digital clock
Whenever the battery terminals or relat-
ed fuses are disconnected, you must
reset the time.
When the ignition switch is in the ACC or
ON position, the clock buttons operate as
follows:CAUTION
Use the power outlet only when
the engine is running and remove
the accessory plug after use.
Using the accessory plug for pro-
longed periods of time with the
engine off could cause the bat-
tery to discharge.
Only use 12V electric accessories
which are less than 10A in elec-
tric capacity.
Adjust the air-conditioner or
heater to the lowest operating
level when using the power outlet.
Close the cover when not in use.
Some electronic devices can
cause electronic interference
when plugged into a vehicle’s
power outlet. These devices may
cause excessive audio static and
malfunctions in other electronic
systems or devices used in your
vehicle.
WARNING
Do not put a finger or a foreign ele-
ment (pin, etc.) into a power outlet
and do not touch with a wet hand.
You may get an electric shock.
OTA040088R
Page 178 of 420
4105
Features of your vehicle
Setup the clock (Type A, Type B)
With audio off
1. Press the [SETUP] or [Clock] button
until the clock of the display blinks.
2. Set the clock by turning the knob(1)
and press it.With audio on
1. Press the [SETUP] or [Clock] button
until the clock adjust mode displayed.
2. Set the clock by turning the knob(1)
and press it.
Setup the clock (Type C)
Hour:
Turn the knob to the left (H), will advance
the time displayed by one hour.
Minute:
Turn the knob to the right (M), will
advance the time displayed by one
minute.
WARNING
Do not adjust the clock whilst driv-
ing. You may lose your steering
control and cause an accident that
results in severe personal injury or
death.
OTA040203R
■Type C
OTA040095
OTA040089
■Type A
■Type B
Page 180 of 420
4107
Features of your vehicle
✽ ✽
NOTICE
If you install an aftermarket HID head
lamp, your vehicle’s audio and electron-
ic device may malfunction.
Antenna
Roof antenna
Your car uses a roof antenna to receive
both AM and FM broadcast signals. This
antenna is a removable type. To remove
the antenna, turn it counterclockwise. To
install the antenna, turn it clockwise.
AUDIO SYSTEM
OTA040097
CAUTION
• Before entering a place with a low
height clearance or a car wash,
remove surely the antenna by
rotating it counter-clockwise. If
not, the antenna may be dam-
aged.
When reinstalling your antenna, it
is important that it is fully tight-
ened and adjusted to the upright
position to ensure proper recep-
tion. But it could be removed
when parking the vehicle or when
loading cargo on the roof rack.
When cargo is loaded on the roof
rack, do not place the cargo near
the antenna pole to ensure proper
reception.
Page 184 of 420
4111
Features of your vehicle
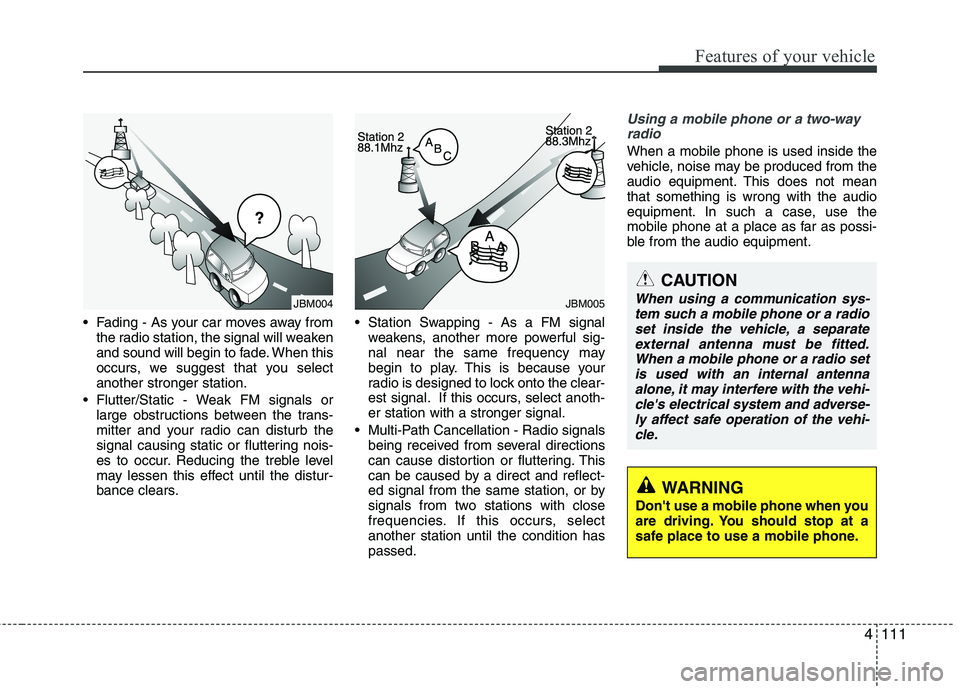
Fading - As your car moves away from
the radio station, the signal will weaken
and sound will begin to fade. When this
occurs, we suggest that you select
another stronger station.
Flutter/Static - Weak FM signals or
large obstructions between the trans-
mitter and your radio can disturb the
signal causing static or fluttering nois-
es to occur. Reducing the treble level
may lessen this effect until the distur-
bance clears. Station Swapping - As a FM signal
weakens, another more powerful sig-
nal near the same frequency may
begin to play. This is because your
radio is designed to lock onto the clear-
est signal. If this occurs, select anoth-
er station with a stronger signal.
Multi-Path Cancellation - Radio signals
being received from several directions
can cause distortion or fluttering. This
can be caused by a direct and reflect-
ed signal from the same station, or by
signals from two stations with close
frequencies. If this occurs, select
another station until the condition has
passed.
Using a mobile phone or a two-way
radio
When a mobile phone is used inside the
vehicle, noise may be produced from the
audio equipment. This does not mean
that something is wrong with the audio
equipment. In such a case, use the
mobile phone at a place as far as possi-
ble from the audio equipment.
JBM005JBM004
CAUTION
When using a communication sys-
tem such a mobile phone or a radio
set inside the vehicle, a separate
external antenna must be fitted.
When a mobile phone or a radio set
is used with an internal antenna
alone, it may interfere with the vehi-
cle's electrical system and adverse-
ly affect safe operation of the vehi-
cle.
WARNING
Don't use a mobile phone when you
are driving. You should stop at a
safe place to use a mobile phone.
Page 187 of 420
Features of your vehicle
114 4
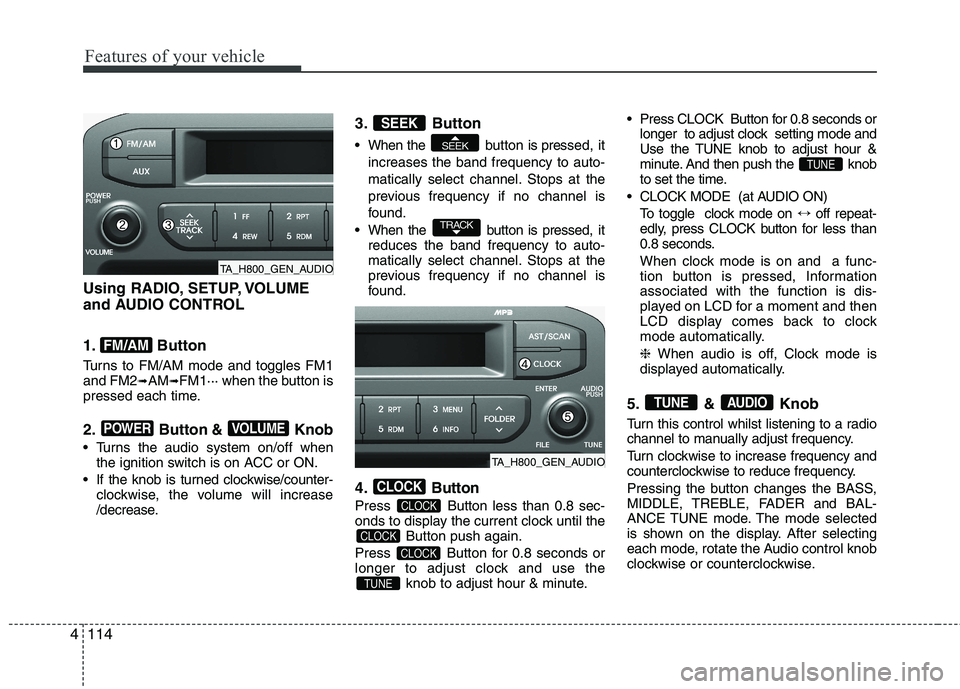
Using RADIO, SETUP, VOLUME
and AUDIO CONTROL
1. Button
Turns to FM/AM mode and toggles FM1
and FM2➟AM➟FM1··· when the button is
pressed each time.
2. Button & Knob
Turns the audio system on/off when
the ignition switch is on ACC or ON.
If the knob is turned clockwise/counter-
clockwise, the volume will increase
/decrease.
3. Button
When the button is pressed, it
increases the band frequency to auto-
matically select channel. Stops at the
previous frequency if no channel is
found.
When the button is pressed, it
reduces the band frequency to auto-
matically select channel. Stops at the
previous frequency if no channel is
found.
4. Button
Press Button less than 0.8 sec-
onds to display the current clock until the
Button push again.
Press Button for 0.8 seconds or
longer to adjust clock and use the
knob to adjust hour & minute. Press CLOCK Button for 0.8 seconds or
longer to adjust clock setting mode and
Use the TUNE knob to adjust hour &
minute. And then push the knob
to set the time.
CLOCK MODE (at AUDIO ON)
To toggle clock mode on ↔off repeat-
edly, press CLOCK button for less than
0.8 seconds.
When clock mode is on and a func-
tion button is pressed, Information
associated with the function is dis-
played on LCD for a moment and then
LCD display comes back to clock
mode automatically.
❈ When audio is off, Clock mode is
displayed automatically.
5. & Knob
Turn this control whilst listening to a radio
channel to manually adjust frequency.
Turn clockwise to increase frequency and
counterclockwise to reduce frequency.
Pressing the button changes the BASS,
MIDDLE, TREBLE, FADER and BAL-
ANCE TUNE mode. The mode selected
is shown on the display. After selecting
each mode, rotate the Audio control knob
clockwise or counterclockwise.
AUDIOTUNE
TUNE
TUNE
CLOCK
CLOCK
CLOCK
CLOCK
TRACK
SEEK
SEEK
VOLUMEPOWER
FM/AM
TA_H800_GEN_AUDIO
TA_H800_GEN_AUDIO
Page 188 of 420
4115
Features of your vehicle
To increase the BASS, rotate the knob
clockwise, whilst to decrease the BASS,
rotate the knob counterclockwise.
To increase the MIDDLE, rotate the knob
clockwise, whilst to decrease the MID-
DLE, rotate the knob counterclockwise.
To increase the TREBLE, rotate the knob
clockwise, whilst to decrease the TRE-
BLE, rotate the knob counterclockwise.
Turn the control knob clockwise to
emphasize rear speaker sound(front
speaker sound will be attenuated).
When the control knob is turned counter-
clockwise, front speaker sound will be
emphasized(rear speaker sound will be
attenuated).
Rotate the knob clockwise to emphasize
right speaker sound(left speaker sound
will be attenuated).
When the control knob is turned counter
clockwise, left speaker sound will be
emphasized(right speaker sound will be
attenuated).
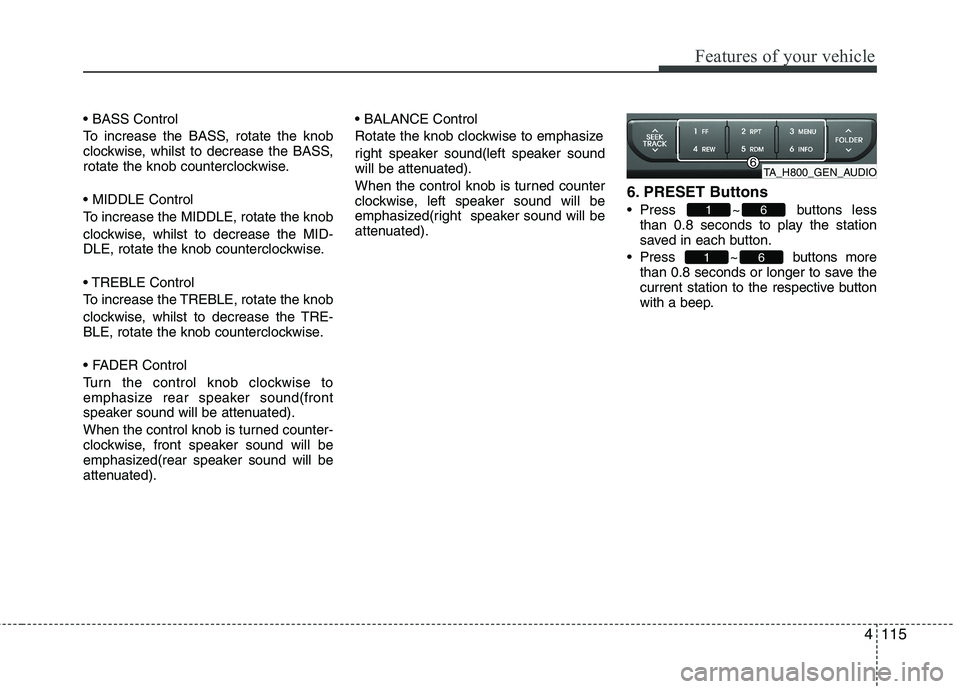
6. PRESET Buttons
Press ~ buttons less
than 0.8 seconds to play the station
saved in each button.
Press ~ buttons more
than 0.8 seconds or longer to save the
current station to the respective button
with a beep.
61
61
TA_H800_GEN_AUDIO