2015 KIA MORNING ESP
[x] Cancel search: ESPPage 46 of 420
Safety features of your vehicle
34 3
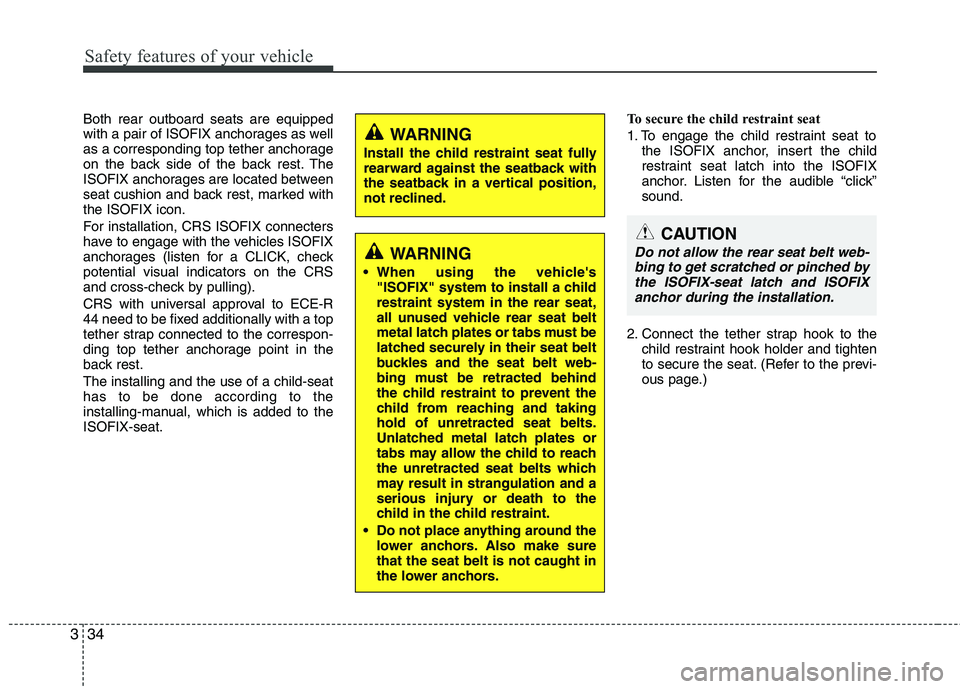
Both rear outboard seats are equipped
with a pair of ISOFIX anchorages as well
as a corresponding top tether anchorage
on the back side of the back rest. The
ISOFIX anchorages are located between
seat cushion and back rest, marked with
the ISOFIX icon.
For installation, CRS ISOFIX connecters
have to engage with the vehicles ISOFIX
anchorages (listen for a CLICK, check
potential visual indicators on the CRS
and cross-check by pulling).
CRS with universal approval to ECE-R
44 need to be fixed additionally with a top
tether strap connected to the correspon-
ding top tether anchorage point in the
back rest.
The installing and the use of a child-seat
has to be done according to the
installing-manual, which is added to the
ISOFIX-seat.To secure the child restraint seat
1. To engage the child restraint seat to
the ISOFIX anchor, insert the child
restraint seat latch into the ISOFIX
anchor. Listen for the audible “click”
sound.
2. Connect the tether strap hook to the
child restraint hook holder and tighten
to secure the seat. (Refer to the previ-
ous page.)
WARNING
When using the vehicle's
"ISOFIX" system to install a child
restraint system in the rear seat,
all unused vehicle rear seat belt
metal latch plates or tabs must be
latched securely in their seat belt
buckles and the seat belt web-
bing must be retracted behind
the child restraint to prevent the
child from reaching and taking
hold of unretracted seat belts.
Unlatched metal latch plates or
tabs may allow the child to reach
the unretracted seat belts which
may result in strangulation and a
serious injury or death to the
child in the child restraint.
Do not place anything around the
lower anchors. Also make sure
that the seat belt is not caught in
the lower anchors.
CAUTION
Do not allow the rear seat belt web-
bing to get scratched or pinched by
the ISOFIX-seat latch and ISOFIX
anchor during the installation.
WARNING
Install the child restraint seat fully
rearward against the seatback with
the seatback in a vertical position,
not reclined.
Page 52 of 420

Safety features of your vehicle
40 3
How does the air bag system
operate
Air bags are activated (able to inflate if
necessary) only when the ignition
switch is turned to the ON or START
position.
Air bags inflate instantly in the event of
a serious frontal or side collision (if
equipped with side air bag or curtain
air bag) in order to help protect the
occupants from serious physical injury.
There is no single speed at which the
air bags will inflate.
Generally, air bags are designed to
inflate based upon the severity of a col-
lision and its direction. These two fac-
tors determine whether the sensors
produce an electronic deployment/
inflation signal.
Air bag deployment depends on a
number of factors including vehicle
speed, angles of impact and the densi-
ty and stiffness of the vehicles or
objects which your vehicle hits in the
collision. The determining factors are
not limited to those mentioned above.
The front air bags will completely
inflate and deflate in an instant.
It is virtually impossible for you to see
the air bags inflate during an accident.It is much more likely that you will sim-
ply see the deflated air bags hanging
out of their storage compartments after
the collision.
In order to help provide protection in a
severe collision, the air bags must
inflate rapidly. The speed of air bag
inflation is a consequence of the
extremely short time in which a collision
occurs and the need to inflate the air
bag between the occupant and the
vehicle structures before the occupant
impacts those structures. This speed of
inflation reduces the risk of serious or
life-threatening injuries in a severe col-
lision and is thus a necessary part of air
bag design.
However, air bag inflation can also
cause injuries which can include facial
abrasions, bruises and broken bones
because the inflation speed also caus-
es the air bags to expand with a great
deal of force.
There are even circumstances
under which contact with the steer-
ing wheel air bag can cause fatal
injuries, especially if the occupant
is positioned excessively close to
the steering wheel.
WARNING
To avoid severe personal injury
or death caused by deploying air
bags in a collision, the driver
should sit as far back from the
steering wheel air bag as possi-
ble (at least 250 mm (10 inches)
away). The front passengers
should always move their seats
as far back as possible and sit
back in their seat.
Air bags inflate instantly in the
event of collision, and passen-
gers may be injured by the air bag
expansion force if they are not in
a proper position.
Air bag inflation may cause
injuries including facial or bodily
abrasions, injuries from broken
glasses or burns.
Page 62 of 420
Safety features of your vehicle
50 3
CAUTION
If the passenger’s front air bag
ON/OFF switch is not working
properly, the air bag warning light
()on the instrument panel will
illuminate.
And, the passenger's front air bag
OFF indicator
() will not illumi-
nate (The passenger's front air
bag ON indicator comes on and
goes off after approximately 60
seconds), the SRS Control
Module reactivate the passen-
ger’s front air bag and the pas-
senger’s front air bag will inflate
in frontal impact crashes even if
the passenger’s front air bag
ON/OFF switch is set to the OFF
position.
If this occurs, have an authorised
Kia dealer inspect the passen-
ger’s front air bag ON/OFF switch,
the pre-tensioner seat belt sys-
tem and the SRS air bag system
as soon as possible.
(Continued)
(Continued)
If the SRS air bag warning light
blinks or does not illuminate
when the ignition switch is turned
to the ON position, or if it illumi-
nates whilst the vehicle is being
driven, have an authorised Kia
dealer inspect the passenger’s
front air bag ON/OFF switch, pre-
tensioner seat belt and the SRS
air bag system as soon as possi-
ble.WARNING
The driver is responsible for the
proper position of the passen-
ger’s front air bag ON/OFF switch.
Deactivate the passenger's front
air bag only when the ignition
switch is switched off, or the mal-
function may occur in the SRS
Control Module.
And there may be a danger that
the driver's and/or front passen-
ger’s and/or side and curtain air
bag may fail to trigger, or not trig-
ger correctly during a collision.
Never install a rearward facing
child seat on the front passen-
ger's seat unless the passenger's
front air bag has been deactivat-
ed. The infant or child could be
severely injured or killed by an air
bag deployment in case of an
accident.
(Continued)
Page 80 of 420
47
Features of your vehicle
Transmitter precautions
✽ ✽
NOTICE
The transmitter will not work if any of
following occur:
• The ignition key is in ignition switch.
• You exceed the operating distance
limit (about 10 m [30 feet]).
• The battery in the transmitter is
weak.
• Other vehicles or objects may be
blocking the signal.
• The weather is extremely cold.
• The transmitter is close to a radio
transmitter such as a radio station or
an airport which can interfere with
normal operation of the transmitter.
When the transmitter does not work
correctly, open and close the door with
the ignition key. If you have a problem
with the transmitter, contact an autho-
rised Kia dealer.
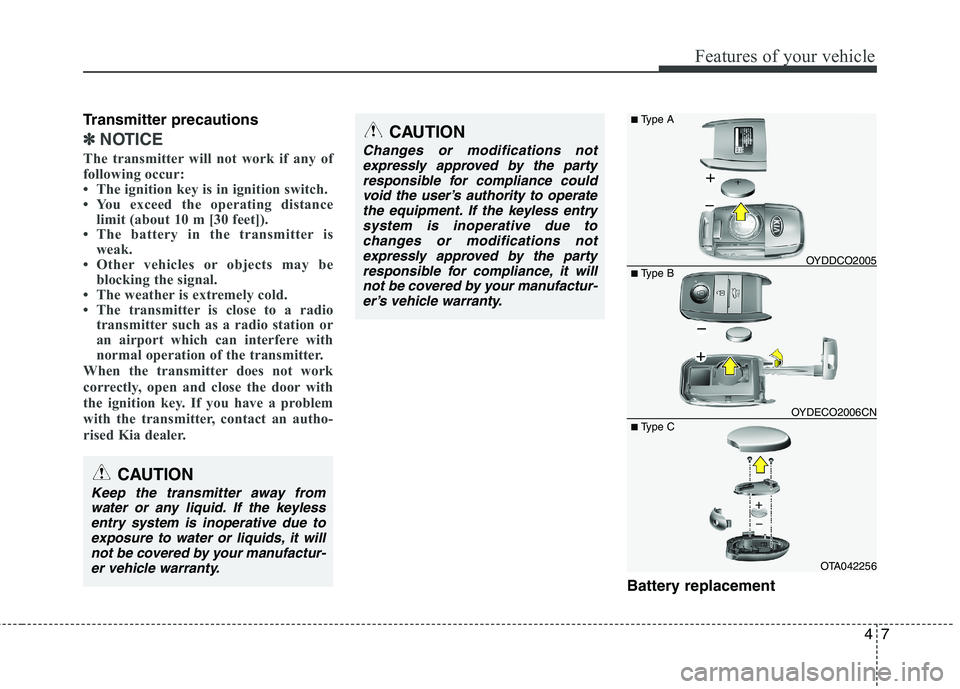
Battery replacement
CAUTION
Changes or modifications not
expressly approved by the party
responsible for compliance could
void the user’s authority to operate
the equipment. If the keyless entry
system is inoperative due to
changes or modifications not
expressly approved by the party
responsible for compliance, it will
not be covered by your manufactur-
er’s vehicle warranty.
OYDECO2006CN
■Type A
■ Type B
OTA042256
■ Type C
CAUTION
Keep the transmitter away from
water or any liquid. If the keyless
entry system is inoperative due to
exposure to water or liquids, it will
not be covered by your manufactur-
er vehicle warranty.
OYDDCO2005
Page 84 of 420
411
Features of your vehicle
(Continued)
• If the transmitter (or smart key) is in
close proximity to your cell phone or
smart phone, the signal from the
transmitter (or smart key) could be
blocked by normal operation of your
cell phone or smart phone. This is
especially important when the phone
is active such as making call, receiving
calls, text messaging, and/or send-
ing/receiving emails. Avoid placing
the transmitter (or smart key) and
your cell phone or smart phone in the
same pants or jacket pocket and
maintain adequate distance between
the two devices.
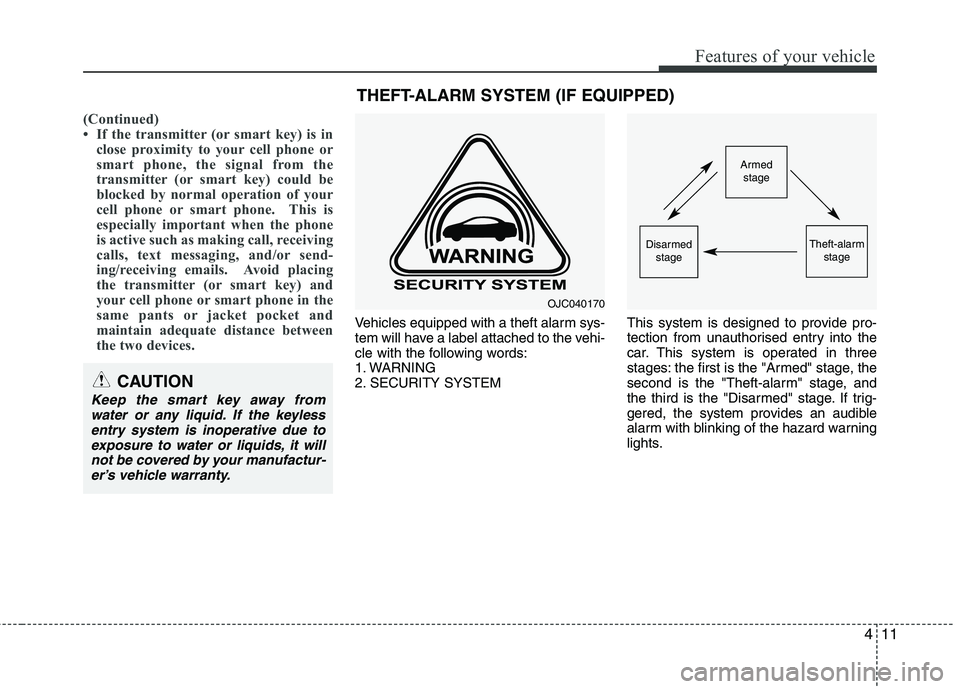
Vehicles equipped with a theft alarm sys-
tem will have a label attached to the vehi-
cle with the following words:
1. WARNING
2. SECURITY SYSTEMThis system is designed to provide pro-
tection from unauthorised entry into the
car. This system is operated in three
stages: the first is the "Armed" stage, the
second is the "Theft-alarm" stage, and
the third is the "Disarmed" stage. If trig-
gered, the system provides an audible
alarm with blinking of the hazard warning
lights.
Armed
stage
Theft-alarm
stageDisarmed
stage
CAUTION
Keep the smart key away from
water or any liquid. If the keyless
entry system is inoperative due to
exposure to water or liquids, it will
not be covered by your manufactur-
er’s vehicle warranty.
OJC040170
THEFT-ALARM SYSTEM (IF EQUIPPED)
Page 101 of 420

Features of your vehicle
28 4
(Continued)
Do not get back into a vehicle
once you have begun refuelling
since you can generate static
electricity by touching, rubbing
or sliding against any item or fab-
ric (polyester, satin, nylon, etc.)
capable of producing static elec-
tricity. Static electricity discharge
can ignite fuel vapors resulting in
rapid burning. If you must re-
enter the vehicle, you should
once again eliminate potentially
dangerous static electricity dis-
charge by touching a metal part
of the vehicle, away from the fuel
filler neck, nozzle or other petrol
source.
When using an approved
portable fuel container, be sure to
place the container on the
ground prior to refuelling. Static
electricity discharge from the
container can ignite fuel vapors
causing a fire. Once refuelling
has begun, contact with the vehi-
cle should be maintained until
the filling is complete.
(Continued)WARNING - Refuelling
dangers
Automotive fuels are flammable
materials. When refuelling, please
note the following guidelines care-
fully. Failure to follow these guide-
lines may result in severe personal
injury, severe burns or death by fire
or explosion.
Read and follow all warnings at
the gas station facility.
Before refuelling note the loca-
tion of the Emergency Petrol
Shut-Off, if available, at the gas
station facility.
Before touching the fuel nozzle,
you should eliminate potentially
dangerous static electricity dis-
charge by touching another metal
part of the vehicle, a safe dis-
tance away from the fuel filler
neck, nozzle, or other gas source.
(Continued)
(Continued)
Use only approved portable plas-
tic fuel containers designed to
carry and store petrol.
Do not use mobile phones whilst
refuelling. Electric current and/or
electronic interference from
mobile phones can potentially
ignite fuel vapors causing a fire.
When refuelling, always shut the
engine off. Sparks produced by
electrical components related to
the engine can ignite fuel vapors
causing a fire. Once refuelling is
complete, check to make sure the
filler cap and filler door are
securely closed, before starting
the engine.
DO NOT use matches or a lighter
and DO NOT SMOKE or leave a lit
cigarette in your vehicle whilst at
a gas station especially during
refuelling. Automotive fuel is
highly flammable and can, when
ignited, result in fire.
(Continued)
Page 111 of 420
Features of your vehicle
38 4
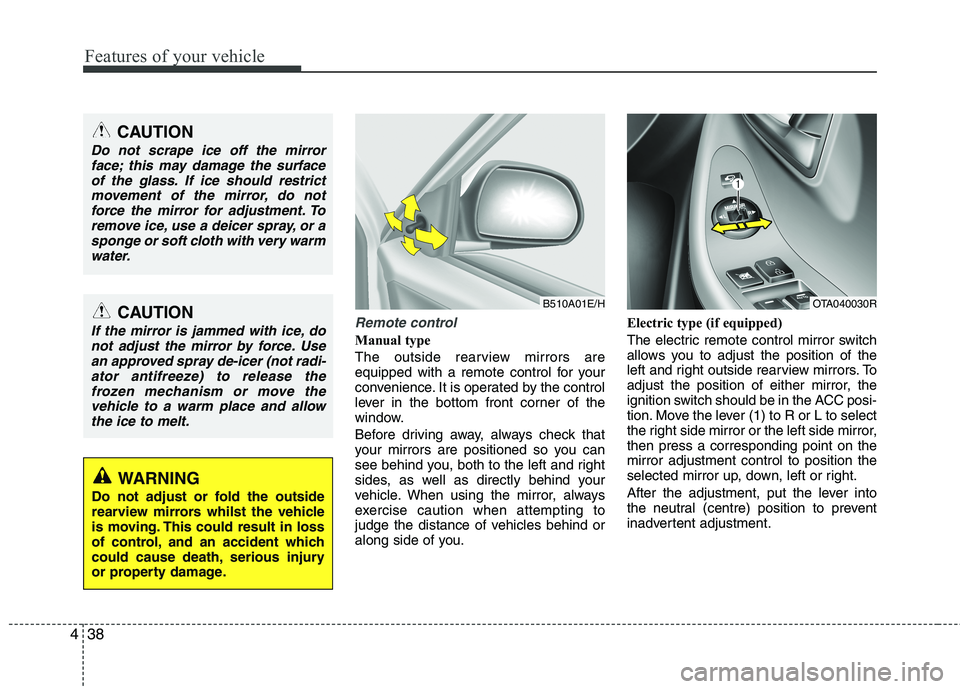
Remote control
Manual type
The outside rearview mirrors are
equipped with a remote control for your
convenience. It is operated by the control
lever in the bottom front corner of the
window.
Before driving away, always check that
your mirrors are positioned so you can
see behind you, both to the left and right
sides, as well as directly behind your
vehicle. When using the mirror, always
exercise caution when attempting to
judge the distance of vehicles behind or
along side of you.Electric type (if equipped)
The electric remote control mirror switch
allows you to adjust the position of the
left and right outside rearview mirrors. To
adjust the position of either mirror, the
ignition switch should be in the ACC posi-
tion. Move the lever (1) to R or L to select
the right side mirror or the left side mirror,
then press a corresponding point on the
mirror adjustment control to position the
selected mirror up, down, left or right.
After the adjustment, put the lever into
the neutral (centre) position to prevent
inadvertent adjustment.
CAUTION
Do not scrape ice off the mirror
face; this may damage the surface
of the glass. If ice should restrict
movement of the mirror, do not
force the mirror for adjustment. To
remove ice, use a deicer spray, or a
sponge or soft cloth with very warm
water.
CAUTION
If the mirror is jammed with ice, do
not adjust the mirror by force. Use
an approved spray de-icer (not radi-
ator antifreeze) to release the
frozen mechanism or move the
vehicle to a warm place and allow
the ice to melt.
WARNING
Do not adjust or fold the outside
rearview mirrors whilst the vehicle
is moving. This could result in loss
of control, and an accident which
could cause death, serious injury
or property damage.
B510A01E/HOTA040030R
Page 136 of 420
463
Features of your vehicle
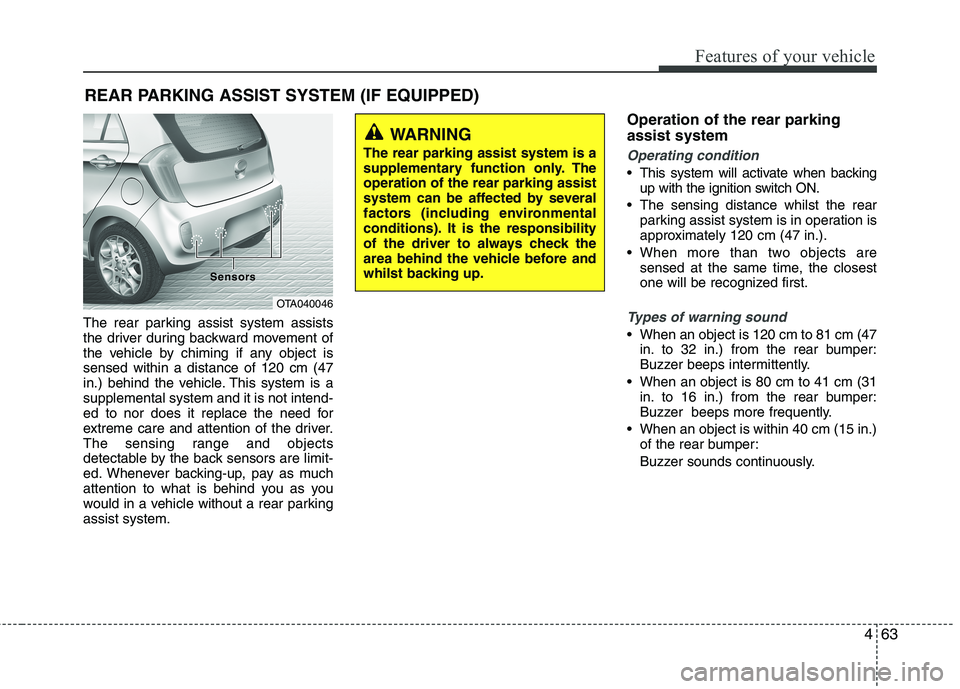
The rear parking assist system assists
the driver during backward movement of
the vehicle by chiming if any object is
sensed within a distance of 120 cm (47
in.) behind the vehicle. This system is a
supplemental system and it is not intend-
ed to nor does it replace the need for
extreme care and attention of the driver.
The sensing range and objects
detectable by the back sensors are limit-
ed. Whenever backing-up, pay as much
attention to what is behind you as you
would in a vehicle without a rear parking
assist system.
Operation of the rear parking
assist system
Operating condition
This system will activate when backing
up with the ignition switch ON.
The sensing distance whilst the rear
parking assist system is in operation is
approximately 120 cm (47 in.).
When more than two objects are
sensed at the same time, the closest
one will be recognized first.
Types of warning sound
When an object is 120 cm to 81 cm (47
in. to 32 in.) from the rear bumper:
Buzzer beeps intermittently.
When an object is 80 cm to 41 cm (31
in. to 16 in.) from the rear bumper:
Buzzer beeps more frequently.
When an object is within 40 cm (15 in.)
of the rear bumper:
Buzzer sounds continuously.
REAR PARKING ASSIST SYSTEM (IF EQUIPPED)
OTA040046 Sensor Sensor
s s
WARNING
The rear parking assist system is a
supplementary function only. The
operation of the rear parking assist
system can be affected by several
factors (including environmental
conditions). It is the responsibility
of the driver to always check the
area behind the vehicle before and
whilst backing up.