2015 KIA MORNING light
[x] Cancel search: lightPage 355 of 420
Maintenance
28 7
✽
✽
NOTICE
The “COLD” range is for reference only
and should NOT be used to determine
the transaxle fluid level.
✽ ✽
NOTICE
New automatic transaxle fluid should be
red. The red dye is added so the assem-
bly plant can identify it as automatic
transaxle fluid and distinguish it from
engine oil or antifreeze. The red dye,
which is not an indicator of fluid quali-
ty, is not permanent. As the vehicle is
driven, the automatic transaxle fluid
will begin to look darker. The colour
may eventually appear light brown.
Therefore, have an authorised Kia deal-
er change the automatic transaxle fluid
according to the Scheduled
Maintenance at the beginning of this
section.
Use only the specified automatic
transaxle fluid. (Refer to "Recommended
lubricants or capacities" in section 8.)
Changing the automatic transaxle
fluid
Have the automatic transaxle fluid
changed by an authorised Kia dealer
according to the Maintenance Schedule
at the beginning of this section.
WARNING - Transaxle fluid
The transaxle fluid level should be
checked when the engine is at nor-
mal operating temperature. This
means that the engine, radiator,
radiator hose and exhaust system
etc., are very hot. Exercise great
care not to burn yourself during
this procedure.
CAUTION
Low fluid level causes transaxle
shift slippage. Overfilling can
cause foaming, loss of fluid and
transaxle malfunction.
The use of a non-specified fluid
could cause transaxle malfunc-
tion and failure.
WARNING- Parking brake
To avoid sudden movement of the
vehicle, apply the parking brake
and depress the brake pedal before
moving the shift lever.
Page 363 of 420
Maintenance
36 7
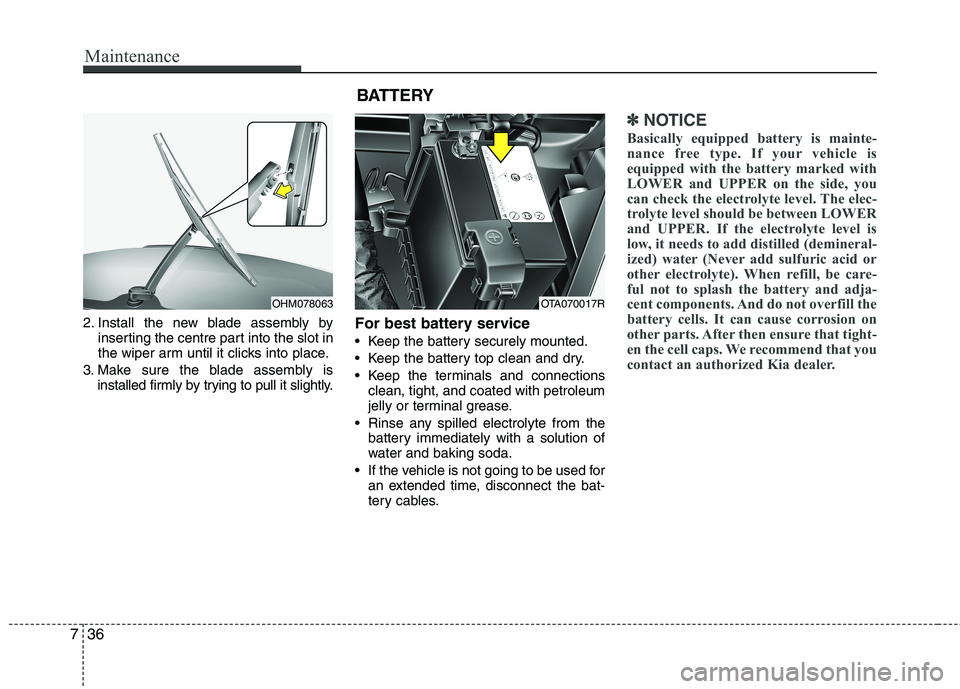
2. Install the new blade assembly by
inserting the centre part into the slot in
the wiper arm until it clicks into place.
3. Make sure the blade assembly is
installed firmly by trying to pull it slightly.For best battery service
Keep the battery securely mounted.
Keep the battery top clean and dry.
Keep the terminals and connections
clean, tight, and coated with petroleum
jelly or terminal grease.
Rinse any spilled electrolyte from the
battery immediately with a solution of
water and baking soda.
If the vehicle is not going to be used for
an extended time, disconnect the bat-
tery cables.
✽ ✽
NOTICE
Basically equipped battery is mainte-
nance free type. If your vehicle is
equipped with the battery marked with
LOWER and UPPER on the side, you
can check the electrolyte level. The elec-
trolyte level should be between LOWER
and UPPER. If the electrolyte level is
low, it needs to add distilled (demineral-
ized) water (Never add sulfuric acid or
other electrolyte). When refill, be care-
ful not to splash the battery and adja-
cent components. And do not overfill the
battery cells. It can cause corrosion on
other parts. After then ensure that tight-
en the cell caps. We recommend that you
contact an authorized Kia dealer.
OHM078063
BATTERY
OTA070017R
Page 364 of 420
737
Maintenance
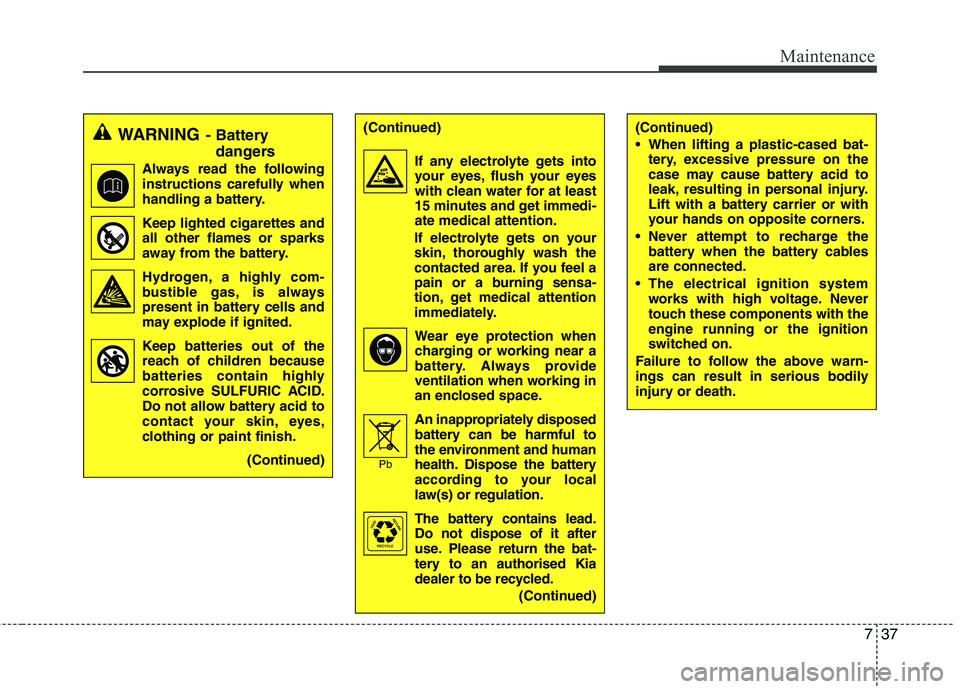
WARNING- Battery
dangers
Always read the following
instructions carefully when
handling a battery.
Keep lighted cigarettes and
all other flames or sparks
away from the battery.
Hydrogen, a highly com-
bustible gas, is always
present in battery cells and
may explode if ignited.
Keep batteries out of the
reach of children because
batteries contain highly
corrosive SULFURIC ACID.
Do not allow battery acid to
contact your skin, eyes,
clothing or paint finish.
(Continued)
(Continued)
If any electrolyte gets into
your eyes, flush your eyes
with clean water for at least
15 minutes and get immedi-
ate medical attention.
If electrolyte gets on your
skin, thoroughly wash the
contacted area. If you feel a
pain or a burning sensa-
tion, get medical attention
immediately.
Wear eye protection when
charging or working near a
battery. Always provide
ventilation when working in
an enclosed space.
An inappropriately disposed
battery can be harmful to
the environment and human
health. Dispose the battery
according to your local
law(s) or regulation.
The battery contains lead.
Do not dispose of it after
use. Please return the bat-
tery to an authorised Kia
dealer to be recycled.
(Continued)
Pb
(Continued)
When lifting a plastic-cased bat-
tery, excessive pressure on the
case may cause battery acid to
leak, resulting in personal injury.
Lift with a battery carrier or with
your hands on opposite corners.
Never attempt to recharge the
battery when the battery cables
are connected.
The electrical ignition system
works with high voltage. Never
touch these components with the
engine running or the ignition
switched on.
Failure to follow the above warn-
ings can result in serious bodily
injury or death.
Page 365 of 420
Maintenance
38 7
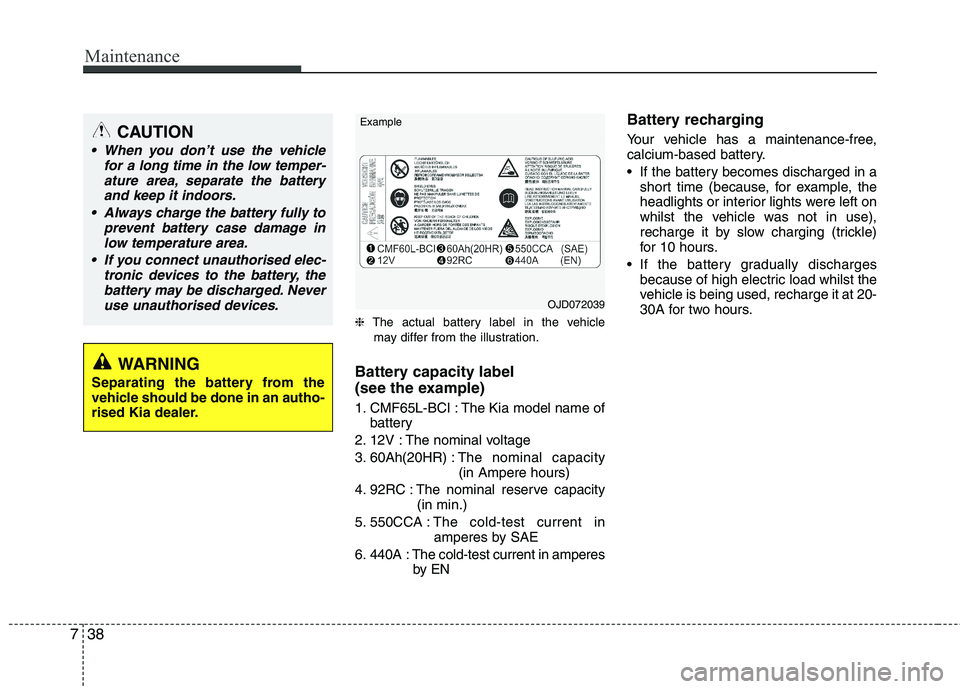
❈The actual battery label in the vehicle
may differ from the illustration.
Battery capacity label
(see the example)
1. CMF65L-BCI : The Kia model name of
battery
2. 12V : The nominal voltage
3. 60Ah(20HR) :The nominal capacity
(in Ampere hours)
4. 92RC : The nominal reserve capacity
(in min.)
5. 550CCA :The cold-test current in
amperes by SAE
6. 440A : The cold-test current in amperes
by EN
Battery recharging
Your vehicle has a maintenance-free,
calcium-based battery.
If the battery becomes discharged in a
short time (because, for example, the
headlights or interior lights were left on
whilst the vehicle was not in use),
recharge it by slow charging (trickle)
for 10 hours.
If the battery gradually discharges
because of high electric load whilst the
vehicle is being used, recharge it at 20-
30A for two hours.CAUTION
When you don’t use the vehicle
for a long time in the low temper-
ature area, separate the battery
and keep it indoors.
Always charge the battery fully to
prevent battery case damage in
low temperature area.
If you connect unauthorised elec-
tronic devices to the battery, the
battery may be discharged. Never
use unauthorised devices.
WARNING
Separating the battery from the
vehicle should be done in an autho-
rised Kia dealer.
OJD072039 Example
Page 372 of 420
745
Maintenance
Compact spare tyre replacement
(if equipped)
A compact spare tyre has a shorter
tread life than a regular size tyre.
Replace it when you can see the
tread wear indicator bars on the tyre.
The replacement compact spare tyre
should be the same size and design
tyre as the one provided with your
new vehicle and should be mounted
on the same compact spare tyre
wheel. The compact spare tyre is not
designed to be mounted on a regular
size wheel, and the compact spare
tyre wheel is not designed for mount-
ing a regular size tyre.Wheel replacement
When replacing the metal wheels for
any reason, make sure the new
wheels are equivalent to the original
factory units in diameter, rim width
and offset.Tyre traction
Tyre traction can be reduced if you
drive on worn tyres, tyres that are
improperly inflated or on slippery
road surfaces. tyres should be
replaced when tread wear indicators
appear. Slow down whenever there
is rain, snow or ice on the road to
reduce the possibility of losing con-
trol of the vehicle.
Tyre maintenance
In addition to proper inflation, correct
wheel alignment helps to decrease
tyre wear. If you find a tyre is worn
unevenly, have your dealer check the
wheel alignment.
When you have new tyres installed,
make sure they are balanced. This
will increase vehicle ride comfort and
tyre life. Additionally, a tyre should
always be rebalanced if it is removed
from the wheel.
WARNING
A wheel that is not the correct
size may adversely affect wheel
and bearing life, braking and
stopping abilities, handling char-
acteristics, ground clearance,
body-to-tyre clearance, snow
chain clearance, speedometer
and odometer calibration, head-
light aim and bumper height.
Page 376 of 420
749
Maintenance
Temperature - A, B & C
The temperature grades are A (the
highest), B, and C, representing the
tyre’s resistance to the generation of
heat and its ability to dissipate heat
when tested under controlled condi-
tions on a specified indoor laboratory
test wheel.
Sustained high temperature can
cause the material of the tyre to
degenerate and reduce tyre life, and
excessive temperature can lead to
sudden tyre failure. Grades B and A
represent higher levels of perform-
ance on the laboratory test wheel
than the minimum required by law.
Low aspect ratio tyre
(if equipped)
low aspect ratio tyres, whose aspect
ratio is lower than 50, are provided
for sporty looks.
Because the low aspect ratio tyres
are optimized for handling and brak-
ing, it may be more uncomfortable to
ride in and there is more noise com-
pare with normal tyres.
WARNING - Tyre
temperature
The temperature grade for this
tyre is established for a tyre that
is properly inflated and not over-
loaded. Excessive speed, under-
inflation, or excessive loading,
either separately or in combina-
tion, can cause heat build-up and
possible sudden tyre failure. This
can cause loss of vehicle control
and serious injury or death.
CAUTION
Because the sidewall of the low
aspect ratio tyre is shorter than
the normal, the wheel and tyre
of the low aspect ratio tyre is
easier to be damaged. So, follow
the instructions below.
- When driving on a rough road
or off road, drive cautiously
because tyres and wheels may
be damaged. And after driving,
inspect tyres and wheels.
- When passing over a pothole,
speed bump, manhole, or curb
stone, drive slowly so that the
tyres and wheels are not dam-
aged.
(Continued)
CAUTION
It is not easy to recognize the
tyre damage with your own
eyes. But if there is the slight-
est hint of tyre damage, even
though you cannot see the
tyre damage with your own
eyes, have the tyre checked or
replaced because the tyre
damage may cause air leakage
from the tyre.
If the tyre is damaged by driv-
ing on a rough road, off road,
pothole, manhole, or curb
stone, it will not be covered by
the warranty.
You can find out the tyre infor-
mation on the tyre sidewall.
(Continued)
- If the tyre is impacted, we rec-
ommend that you inspect the
tyre condition or contact an
authorised Kia dealer.
- To prevent damage to the tyre,
inspect the tyre condition and
pressure every 3,000km.
Page 377 of 420
Maintenance
50 7
FUSES
A vehicle’s electrical system is protected
from electrical overload damage by
fuses.
This vehicle has 2 fuse panels, one locat-
ed in the driver’s side panel bolster,
another is in the engine compartment.
If any of your vehicle’s lights, acces-
sories, or controls do not work, check the
appropriate circuit fuse. If a fuse has
blown, the element inside the fuse will be
melted.
If the electrical system does not work,
first check the driver’s side fuse panel.
Always replace a blown fuse with one of
the same rating.
Before replacing a blown fuse, discon-
nect the negative battery cable.
If the replacement fuse blows, this indi-
cates an electrical problem. Avoid using
the system involved and immediately
consult an authorised Kia dealer.
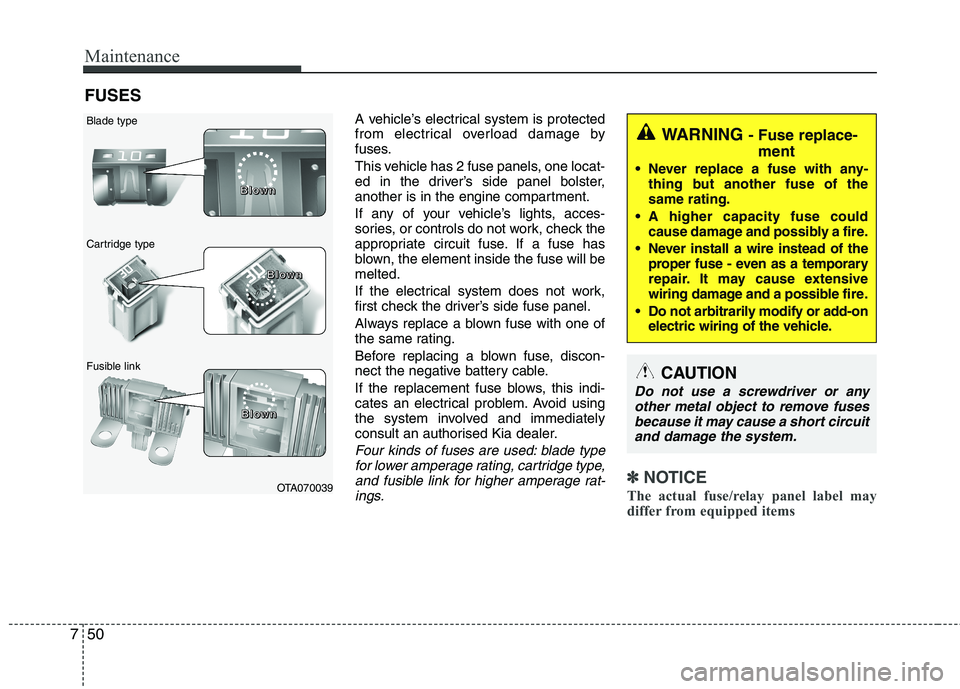
Four kinds of fuses are used: blade type
for lower amperage rating, cartridge type,
and fusible link for higher amperage rat-
ings.
✽ ✽
NOTICE
The actual fuse/relay panel label may
differ from equipped items
WARNING - Fuse replace-
ment
Never replace a fuse with any-
thing but another fuse of the
same rating.
A higher capacity fuse could
cause damage and possibly a fire.
Never install a wire instead of the
proper fuse - even as a temporary
repair. It may cause extensive
wiring damage and a possible fire.
Do not arbitrarily modify or add-on
electric wiring of the vehicle.
CAUTION
Do not use a screwdriver or any
other metal object to remove fuses
because it may cause a short circuit
and damage the system.
OTA070039 Blade type
Cartridge type
Fusible linkB B B B
l l l l
o o o o
w w w w
n n n n
B B B B
l l l l
o o o o
w w w w
n n n n
B B B B
l l l l
o o o o
w w w w
n n n n
Page 379 of 420
Maintenance
52 7
If you do not have a spare, use a fuse of
the same rating from a circuit you may
not need for operating the vehicle, such
as the cigarette lighter fuse.
If the headlights or other electrical com-
ponents do not work and the fuses are
OK, check the fuse panel in the engine
compartment. If a fuse is blown, it must
be replaced.
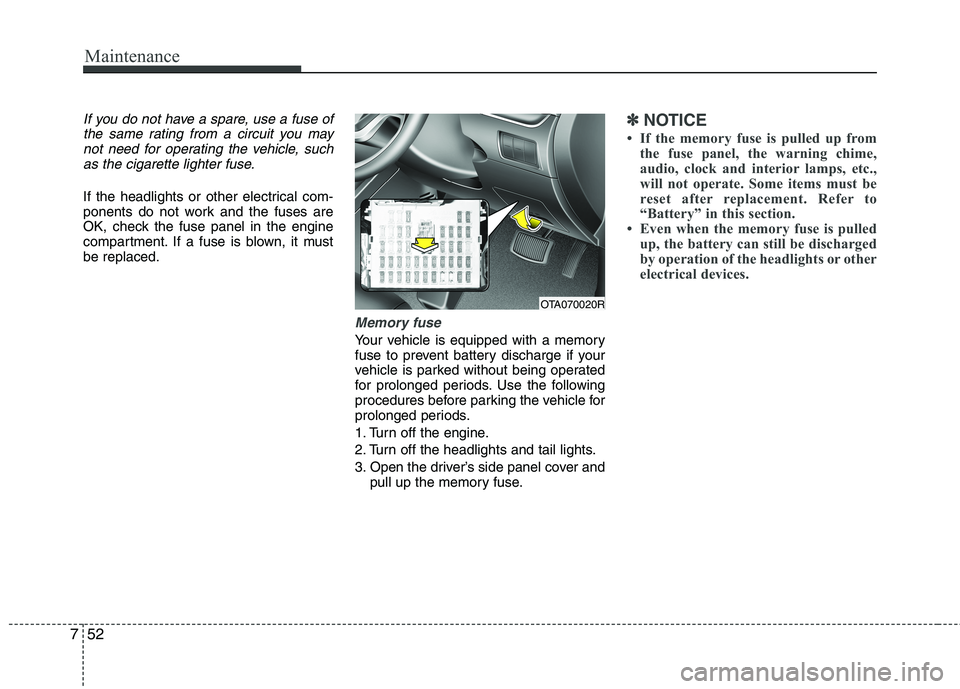
Memory fuse
Your vehicle is equipped with a memory
fuse to prevent battery discharge if your
vehicle is parked without being operated
for prolonged periods. Use the following
procedures before parking the vehicle for
prolonged periods.
1. Turn off the engine.
2. Turn off the headlights and tail lights.
3. Open the driver’s side panel cover and
pull up the memory fuse.
✽ ✽
NOTICE
• If the memory fuse is pulled up from
the fuse panel, the warning chime,
audio, clock and interior lamps, etc.,
will not operate. Some items must be
reset after replacement. Refer to
“Battery” in this section.
• Even when the memory fuse is pulled
up, the battery can still be discharged
by operation of the headlights or other
electrical devices.
OTA070020R