Page 64 of 132

STEERING WHEEL AUDIO CONTROLS
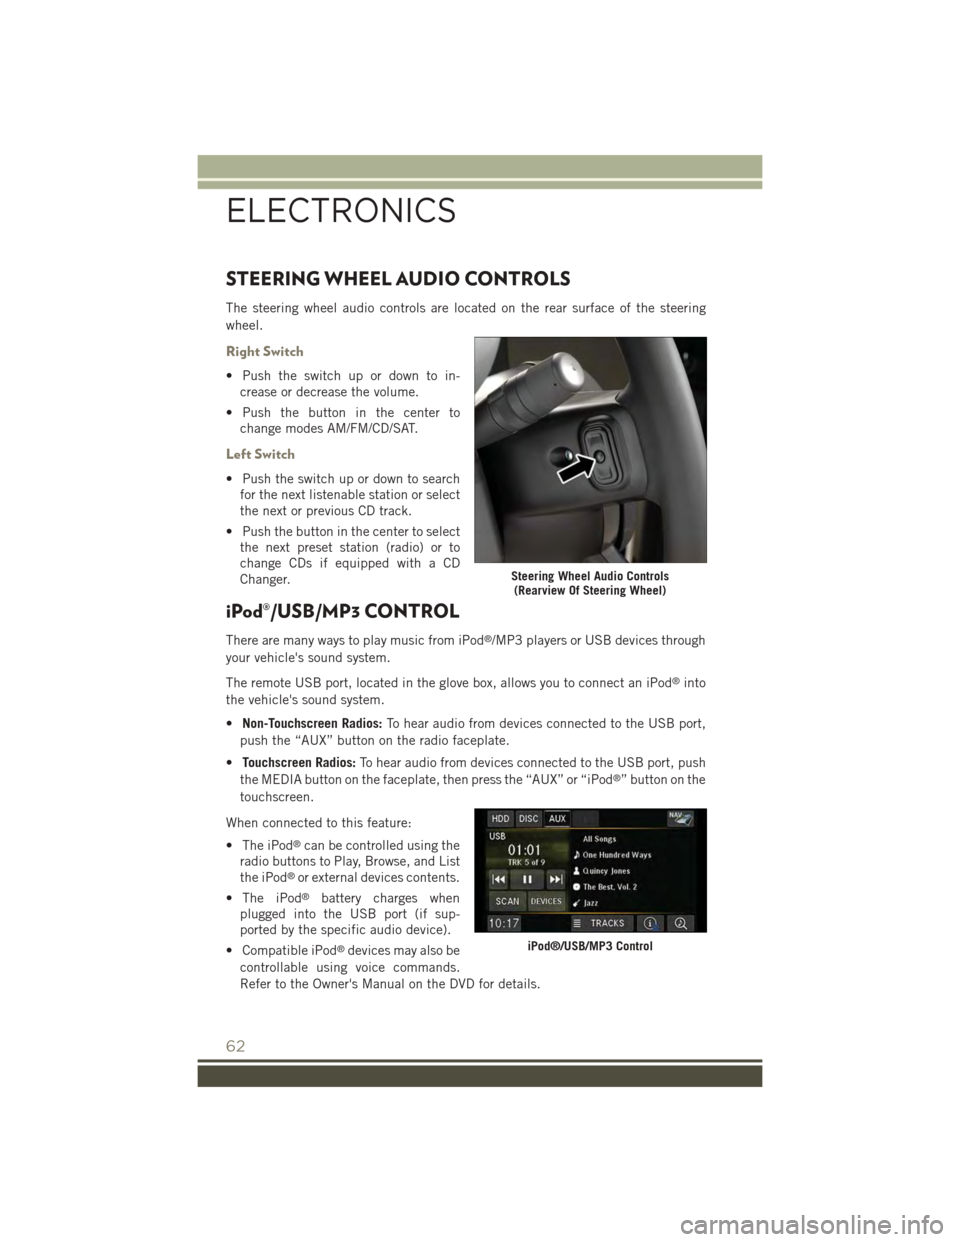
The steering wheel audio controls are located on the rear surface of the steering
wheel.
Right Switch
• Push the switch up or down to in-
crease or decrease the volume.
• Push the button in the center to
change modes AM/FM/CD/SAT.
Left Switch
• Push the switch up or down to search
for the next listenable station or select
the next or previous CD track.
• Push the button in the center to select
the next preset station (radio) or to
change CDs if equipped with a CD
Changer.
iPod®/USB/MP3 CONTROL
There are many ways to play music from iPod®/MP3 players or USB devices through
your vehicle's sound system.
The remote USB port, located in the glove box, allows you to connect an iPod®into
the vehicle's sound system.
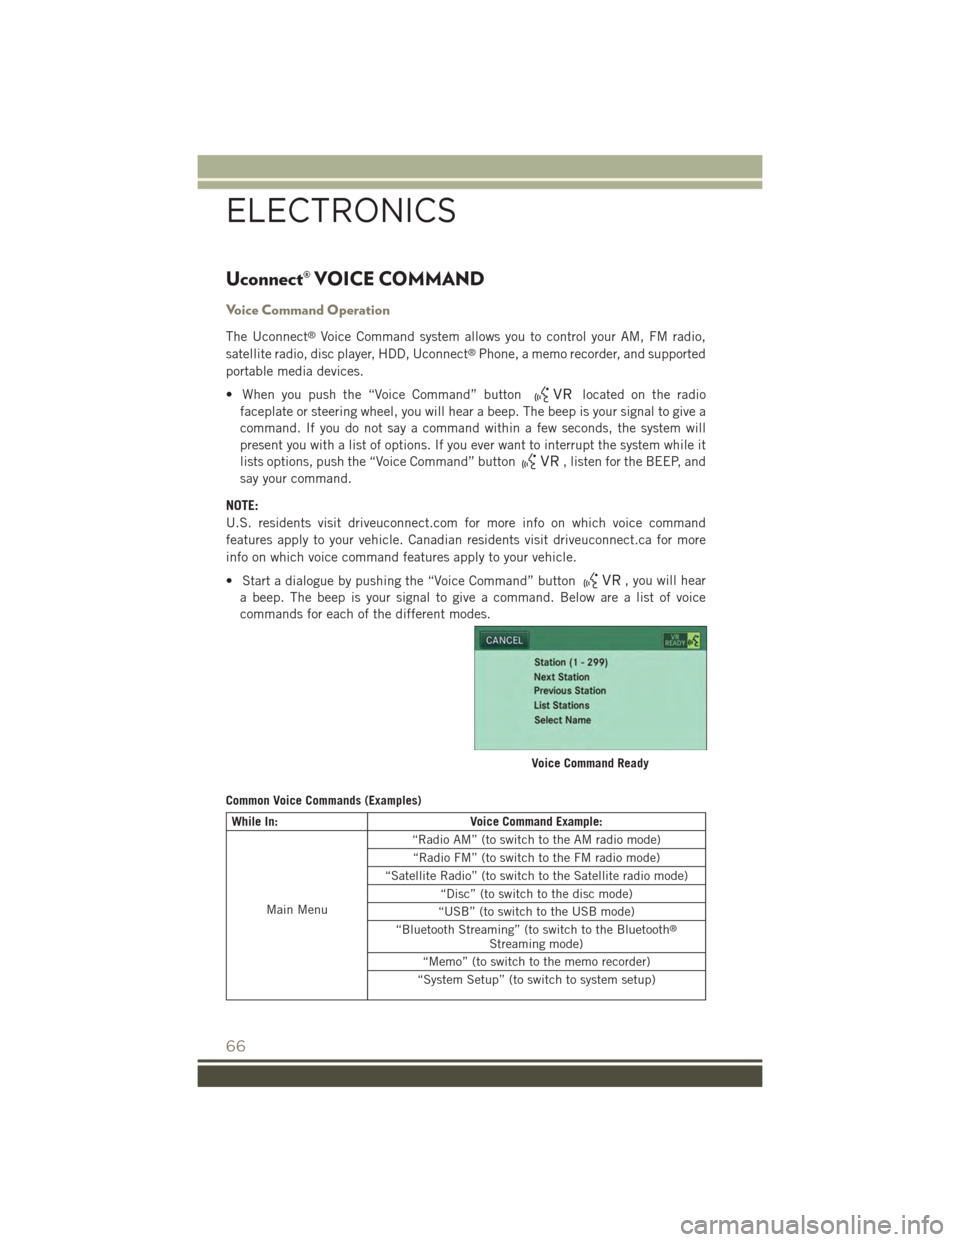
•Non-Touchscreen Radios:To hear audio from devices connected to the USB port,
push the “AUX” button on the radio faceplate.
•Touchscreen Radios:To hear audio from devices connected to the USB port, push
the MEDIA button on the faceplate, then press the “AUX” or “iPod®” button on the
touchscreen.
When connected to this feature:
• The iPod®can be controlled using the
radio buttons to Play, Browse, and List
the iPod®or external devices contents.
• The iPod®battery charges when
plugged into the USB port (if sup-
ported by the specific audio device).
• Compatible iPod®devices may also be
controllable using voice commands.
Refer to the Owner's Manual on the DVD for details.
Steering Wheel Audio Controls(Rearview Of Steering Wheel)
iPod®/USB/MP3 Control
ELECTRONICS
62
Page 68 of 132

Uconnect® VOICE COMMAND
Voice Command Operation
The Uconnect®Voice Command system allows you to control your AM, FM radio,
satellite radio, disc player, HDD, Uconnect®Phone, a memo recorder, and supported
portable media devices.
• When you push the “Voice Command” buttonlocated on the radio
faceplate or steering wheel, you will hear a beep. The beep is your signal to give a
command. If you do not say a command within a few seconds, the system will
present you with a list of options. If you ever want to interrupt the system while it
lists options, push the “Voice Command” button, listen for the BEEP, and
say your command.
NOTE:
U.S. residents visit driveuconnect.com for more info on which voice command
features apply to your vehicle. Canadian residents visit driveuconnect.ca for more
info on which voice command features apply to your vehicle.
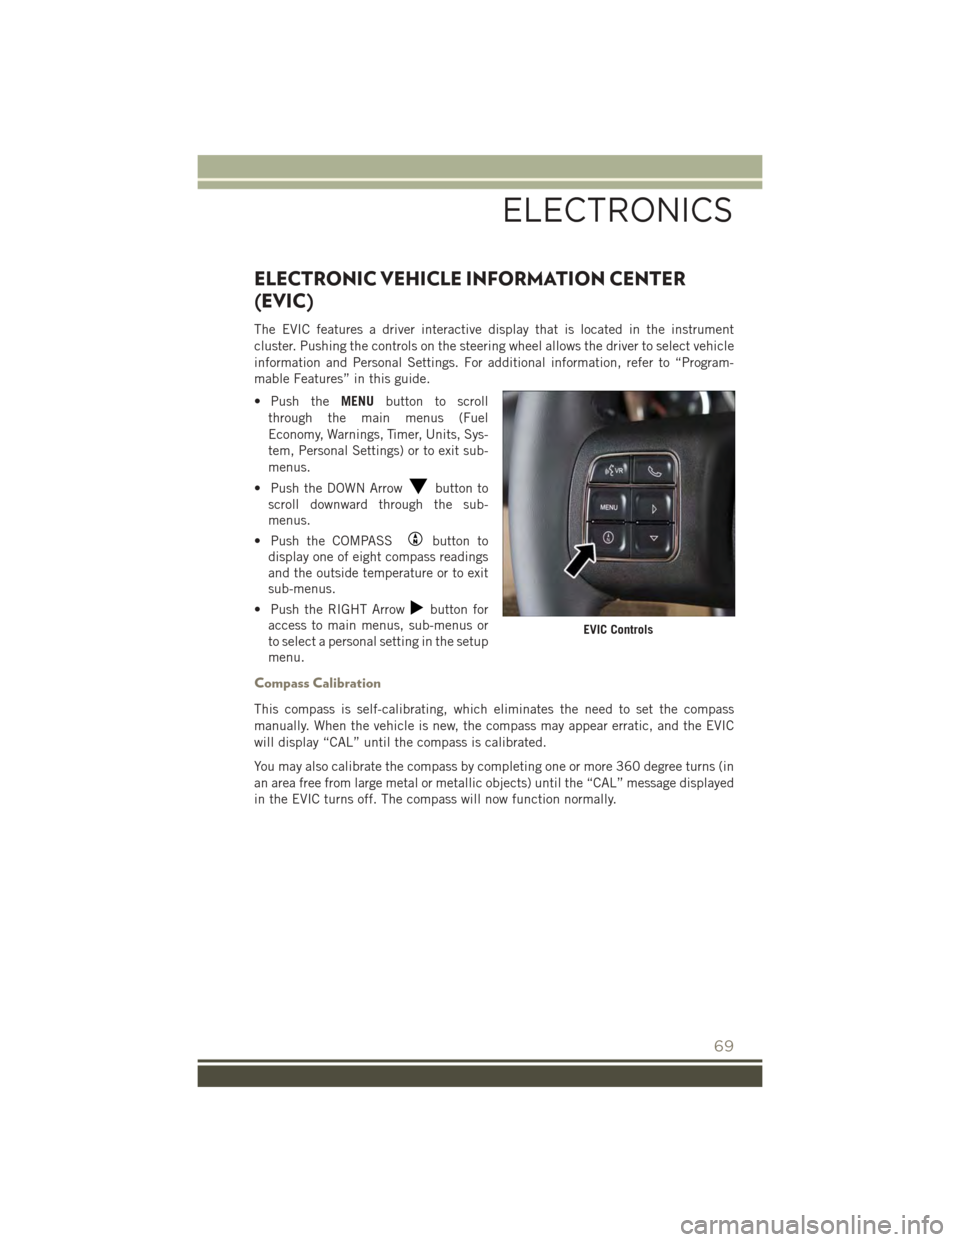
• Start a dialogue by pushing the “Voice Command” button, you will hear
a beep. The beep is your signal to give a command. Below are a list of voice
commands for each of the different modes.
Common Voice Commands (Examples)
While In:Voice Command Example:
Main Menu
“Radio AM” (to switch to the AM radio mode)
“Radio FM” (to switch to the FM radio mode)
“Satellite Radio” (to switch to the Satellite radio mode)
“Disc” (to switch to the disc mode)
“USB” (to switch to the USB mode)
“Bluetooth Streaming” (to switch to the Bluetooth®
Streaming mode)
“Memo” (to switch to the memo recorder)
“System Setup” (to switch to system setup)
Voice Command Ready
ELECTRONICS
66
Page 71 of 132

ELECTRONIC VEHICLE INFORMATION CENTER
(EVIC)
The EVIC features a driver interactive display that is located in the instrument
cluster. Pushing the controls on the steering wheel allows the driver to select vehicle
information and Personal Settings. For additional information, refer to “Program-
mable Features” in this guide.
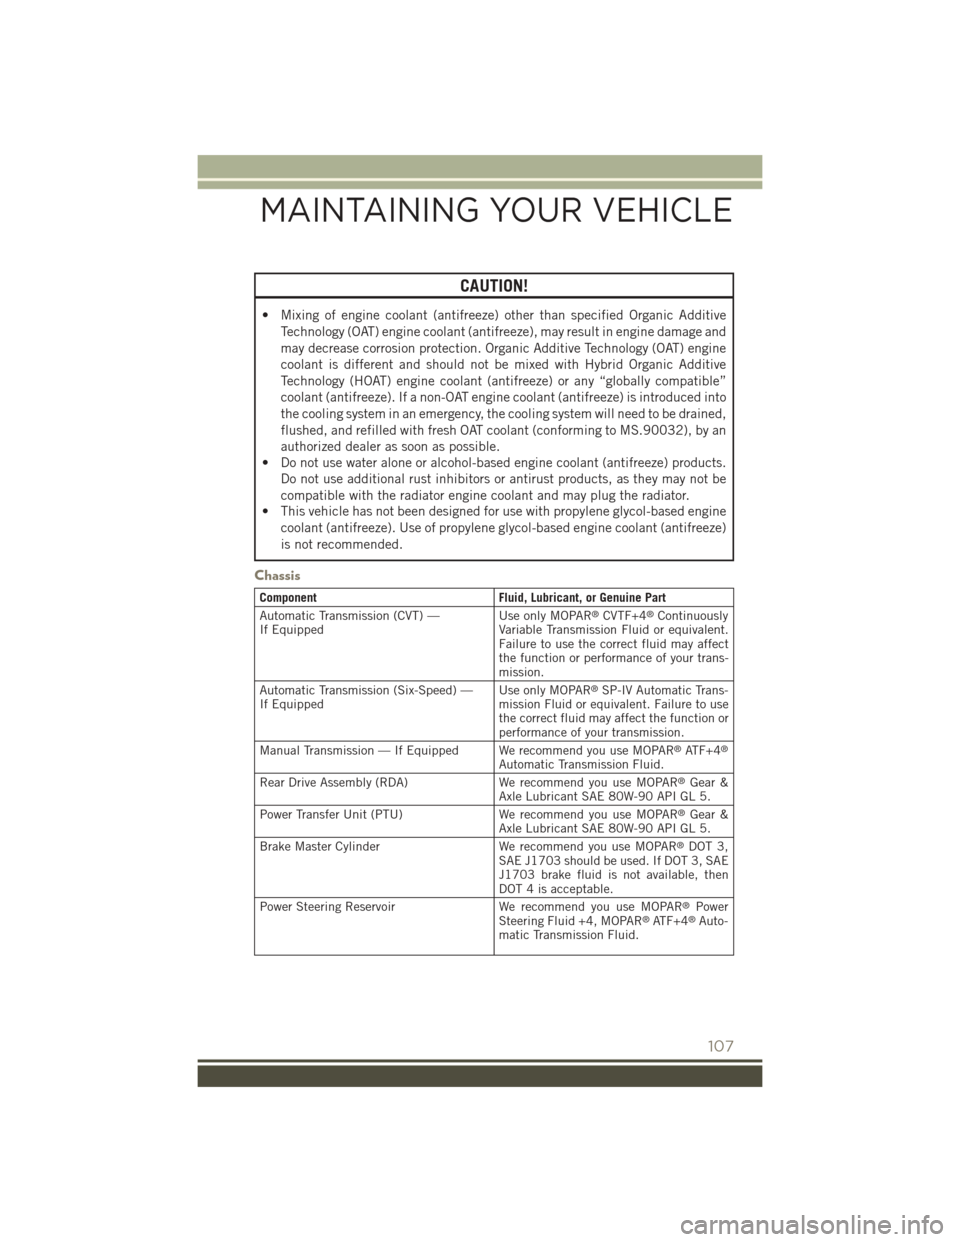
• Push theMENUbutton to scroll
through the main menus (Fuel
Economy, Warnings, Timer, Units, Sys-
tem, Personal Settings) or to exit sub-
menus.
• Push the DOWN Arrowbutton to
scroll downward through the sub-
menus.
• Push the COMPASSbutton to
display one of eight compass readings
and the outside temperature or to exit
sub-menus.
• Push the RIGHT Arrowbutton for
access to main menus, sub-menus or
to select a personal setting in the setup
menu.
Compass Calibration
This compass is self-calibrating, which eliminates the need to set the compass
manually. When the vehicle is new, the compass may appear erratic, and the EVIC
will display “CAL” until the compass is calibrated.
You may also calibrate the compass by completing one or more 360 degree turns (in
an area free from large metal or metallic objects) until the “CAL” message displayed
in the EVIC turns off. The compass will now function normally.
EVIC Controls
ELECTRONICS
69
Page 101 of 132

TOWING A DISABLED VEHICLE
To w i n gConditionWheels OFFthe GroundManualTransmission
6-SpeedAutomatic(FWD Only)
6-SpeedAutomatic4WD
CVTAutomaticTransmission
Flat Tow NONE
• Transmis-sion in
NEUTRAL• Key inACC orON/RUNposition
If transmis-sion is oper-able:• Transmis-sion in
NEUTRAL•25mph(40 km/h)
maxspeed• 15 miles(24 km)maxdis-
tance
If transmis-sion is oper-able:• Transmis-sion in
NEUTRAL•25mph(40 km/h)
maxspeed• 15 miles(24 km)maxdis-
tance
NOTALLOWED
Wheel Liftor DollyTow
RearNOT ALLOWEDNOT ALLOWEDNOTALLOWED
FrontFWD ModelsONLYOK NOT ALLOWEDFWD ModelsONLY
FlatbedALL BEST METHOD BEST METHOD BEST METHODBESTMETHOD
FREEING A STUCK VEHICLE
If your vehicle becomes stuck in mud, sand or snow, it can often be moved by a
rocking motion. Turn your steering wheel right and left to clear the area around the
front wheels. Then move the shift lever back and forth between REVERSE and
DRIVE. Using minimal accelerator pedal pressure to maintain the rocking motion,
without spinning the wheels, is most effective.
NOTE:
To improve the vehicle's traction when starting off in deep snow, sand or gravel, it
may be desirable to switch the Electronic Stability Control (ESC) to “Partial Off”
mode by momentarily pressing the ESC Offswitch. For further information on
ESC, refer to the Owner's Manual on the DVD.
WHAT TO DO IN EMERGENCIES
99
Page 105 of 132
6. Engine Oil Fill
7. Engine Coolant Pressure Cap
8. Engine Oil Dipstick
9. Engine Coolant Reservoir
10. Power Steering Fluid Reservoir
MAINTAINING YOUR VEHICLE
103
Page 107 of 132
6. Engine Oil Fill
7. Engine Coolant Pressure Cap
8. Engine Oil Dipstick
9. Engine Coolant Reservoir
10. Power Steering Fluid Reservoir
MAINTAINING YOUR VEHICLE
105
Page 109 of 132

CAUTION!
• Mixing of engine coolant (antifreeze) other than specified Organic Additive
Technology (OAT) engine coolant (antifreeze), may result in engine damage and
may decrease corrosion protection. Organic Additive Technology (OAT) engine
coolant is different and should not be mixed with Hybrid Organic Additive
Technology (HOAT) engine coolant (antifreeze) or any “globally compatible”
coolant (antifreeze). If a non-OAT engine coolant (antifreeze) is introduced into
the cooling system in an emergency, the cooling system will need to be drained,
flushed, and refilled with fresh OAT coolant (conforming to MS.90032), by an
authorized dealer as soon as possible.
• Do not use water alone or alcohol-based engine coolant (antifreeze) products.
Do not use additional rust inhibitors or antirust products, as they may not be
compatible with the radiator engine coolant and may plug the radiator.
• This vehicle has not been designed for use with propylene glycol-based engine
coolant (antifreeze). Use of propylene glycol-based engine coolant (antifreeze)
is not recommended.
Chassis
ComponentFluid, Lubricant, or Genuine Part
Automatic Transmission (CVT) —If EquippedUse only MOPAR®CVTF+4®ContinuouslyVariable Transmission Fluid or equivalent.Failure to use the correct fluid may affectthe function or performance of your trans-mission.
Automatic Transmission (Six-Speed) —If EquippedUse only MOPAR®SP-IV Automatic Trans-mission Fluid or equivalent. Failure to usethe correct fluid may affect the function orperformance of your transmission.
Manual Transmission — If Equipped We recommend you use MOPAR®AT F + 4®
Automatic Transmission Fluid.
Rear Drive Assembly (RDA)We recommend you use MOPAR®Gear &Axle Lubricant SAE 80W-90 API GL 5.
Power Transfer Unit (PTU)We recommend you use MOPAR®Gear &Axle Lubricant SAE 80W-90 API GL 5.
Brake Master CylinderWe recommend you use MOPAR®DOT 3,SAE J1703 should be used. If DOT 3, SAEJ1703 brake fluid is not available, thenDOT 4 is acceptable.
Power Steering Reservoir We recommend you use MOPAR®PowerSteering Fluid +4, MOPAR®AT F + 4®Auto-matic Transmission Fluid.
MAINTAINING YOUR VEHICLE
107
Page 111 of 132

Once A Month Or Before A Long Trip:
• Check engine oil level
• Check windshield washer fluid level
• Check the tire inflation pressures and look for unusual wear or damage
• Check the fluid levels of the coolant reservoir, brake master cylinder, power
steering and fill as needed
• Check function of all interior and exterior lights
Required Maintenance Intervals.
Refer to the maintenance schedules on the following page for the required mainte-
nance intervals.
At Every Oil Change Interval As Indicated By Oil Change Indicator System:
•Change oil and filter.
• Rotate the tires.Rotate at the first sign of irregular wear, even if it occurs before the oil
indicator system turns on.
•Inspect battery and clean and tighten terminals as required.
•Inspect brake pads, shoes, rotors, drums, hoses and park brake.
•Inspect engine cooling system protection and hoses.
•Inspect exhaust system.
•Inspect engine air cleaner if using in dusty or off-road conditions.
MAINTAINING YOUR VEHICLE
109